
Subscribe to Our Youtube Channel
Summary of Contents for Medi Capture MVR Lite
- Page 1 MVR Lite High Definition Medical Video Recorder User Guide Applies to Firmware 191018 and higher. MVR Lite-UG01-EN-200324-OB...
- Page 2 MVR Lite User Guide - English Precautions for Use Symbols in the manual Symbols on the product Warning Before attempting to set up the product, carefully read through the Indicates a potentially hazardous situation User Guide. or improper use that could result in serious personal injuries or death.
- Page 3 The MVR Lite is a Class I active medical device (Medical Devices Directive 93/42/EEC). It is important to observe your obligations as the operator of this medical device to ensure its safe operation with no risk of danger to patients, users or third parties.
- Page 4 Ne pas utiliser les images à des fins d’évaluation ou de diagnostic. La compression réduit l’information de l’image qui n’est en conséquence pas appropriée aux diagnostic. Le MVR Lite Recorder est un produit actif de classe I (Directive Medical Devices 93/42/EEC). L’exploitant doit utiliser cet équipement conformément aux recommandations du manuel utilisateur afin d’assurer un fonctionnement sans risque ni danger pour le patient, l’utilisateur ou tout autre partie.
-
Page 5: Table Of Contents
Footswitches and Camera Triggers ......22 Creating Patient Data ............13 Settings (for Administrators) ..........23 Workflow after MVR Lite was switched on: ....13 Structure of Settings: ..........23 Using Patient Button to End Recording Study ....13 Locking / Protecting Advanced Settings ......24 Manual Patient Data Input .......... -
Page 6: Important Safety Instructions
MVR Lite User Guide - English Important Safety Instructions 1. Read all of these instructions. 2. Keep these instructions. 3. Heed all warnings in these instructions. 4. Follow all of these instructions. 5. Do not misuse this apparatus. 6. Clean only with dry cloth. -
Page 7: Data Protection
Intended Use: The MVR Lite is intended to be networked to a variety of surgical imaging systems. The MVR Lite has the capability to view, archive, review, and process images collected from these surgical imaging systems so that they can be reviewed in their originally recorded state. -
Page 8: To Get Started
7. When you finish the study, it is safe to remove the USB flash drive from the MVR Lite. Insert the stick into the USB connector of a computer. Drop and drag your recordings from the stick to your computer for viewing, archiving, etc. -
Page 9: Front Panel
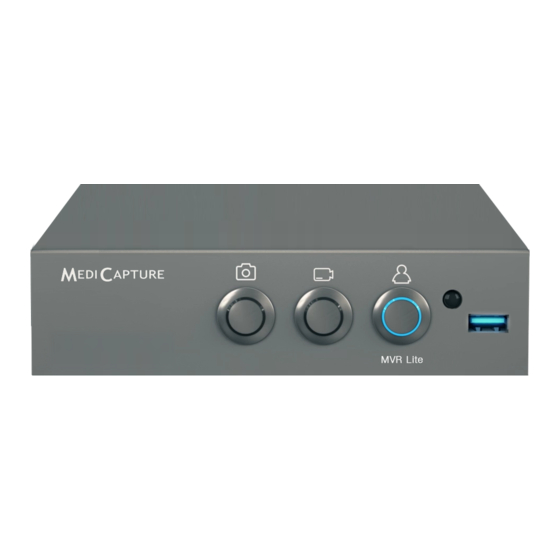
MVR Lite User Guide - English Front Panel Front Panel Record Video button New Patient button USB Drive Connector Records video clips of Press before each patient study. Opens Capture Photo button what is displayed on a new folder / new study to store the Connect a USB drive here. -
Page 10: Monitor User Interface
A USB keyboard with integrated trackpad can serve as an alternative to a touchscreen monitor. The integrated trackpad works like a mouse with double-click function. Please note the short cut key functions to operate the user interface of MVR Lite: F1 = Take picture... -
Page 11: Remote Control
Remote control with a Remote Device (tablet) by using the MVR Remote App Android remote devices (tablets) can be used for external control of MVR Lite, either via USB connection as an external touchscreen monitor (= USB tethering) or wirelessly as a handhold portable device. -
Page 12: Connecting The Mvr Lite
Connecting the MVR Lite The MVR Lite connects to one or two video sources (for example, an endoscopic camera, surgical camera, ultrasound, etc.). 1. If you are adding the MVR Lite to imaging equipment that you are already using, begin by locating the video output of the primary video source. -
Page 13: Creating Patient Data
The workflow for patient data input depends on the settings for Patient Info. ➤ Settings ➤ System ➤ Patient Info MVR Lite starts with a defined home screen after switching-on or after a study was finished. Workflow after MVR Lite was switched on:... -
Page 14: Manual Patient Data Input
Search Recent Patient on Storage Instead of typing patient data manually, you can also list all recent patients which are located on your MVR Lite storage media (those which are enabled and connected). Tap on the “search” icon in the screen “ENTER PATIENT DATA” to retrieve the list. -
Page 15: Recording Videos
These tags are helpful to identify the different sections of the video. Pause Pause Part 1 Part 2 Part 3 Vide o S tart Video Stop Video Start Video Stop More information about tags in chapter: Reviewing Videos on MVR Lite. <15> MVR Lite-UG01-EN-200324-OB... -
Page 16: Changing Input Signals In Live View = Multi Input
Recording to a USB Flash Drive Recording to the supplied MediCapture USB flash drive is the easiest way to start using your MVR Lite. When you finish recording, you can remove the flash drive and easily carry it with you. -
Page 17: Recording To A Usb Hard Drive
Transferring Images from a USB Drive to Your Computer If you record your videos to a USB flash drive or USB hard drive, unplug it from the MVR Lite at the end of your imaging studies. Insert the drive into a USB connector on your computer. -
Page 18: Recording To Network Storage
Please ask your IT-Administrator to setup the settings for network storage. 1. Create a physical LAN connection to your Network server by using the USB-LAN adapter for the rear of MVR Lite. Plug the adapter into a USB port. -
Page 19: Deleting Data
MVR Lite User Guide - English Select one storage: USB or Network* Tap on study for selection To select a study, a video or a still image, simply tap on the preview icon. Tap on video for playback Tap on image for editing *Note: Only available when Network is activated by activation key. -
Page 20: Reviewing Videos On Mvr Lite
MVR Lite User Guide - English Reviewing Videos on MVR Lite A selected video starts to play automatically. To pause the video, tap on the Pause icon. You can now use the timeline slider to change position in the video or tab forward and backward frame by frame. -
Page 21: Creating And Printing Reports
Viewing Videos on Your Computer The MVR Lite records high definition video in H.264 or HEVC (=H.265) format, sometimes referred to as MPEG-4 or MP4. These widely used formats are ideally suited to medical applications because they deliver the highest quality video in a compact file size. -
Page 22: Information Page / System Settings
Turning off or a mains power failure during active video recording will also cause corrupted video files. MVR Lite features an Automatic Video Repair Function. As soon as you plug-in a USB drive with a damaged video file, MVR Lite detects the file and fixes it for playback. -
Page 23: Settings (For Administrators)
MVR Lite User Guide - English Settings (for Administrators) You can find all MVR Lite setup features in Settings. Please note: Advanced Settings as well as optional networking should only be changed by technical personnel or IT administrators. SETTINGS are only available in English language. -
Page 24: Locking / Protecting Advanced Settings
User Accounts for Security Protection ➤ Settings ➤ Advanced ➤ User Accounts For advanced device protection and data security of recorded studies, MVR Lite can be locked with User accounts. Enable user accounts and add users User Name Password for User Account <24>... - Page 25 “Master Password” exists. In case you do not remember your user account information, MVR Lite requires a complete setup to factory default settings, which means many of your achieved information will get lost. User log in with User Name and Password.
-
Page 26: Special Video Input Settings
MVR Lite User Guide - English Special Video Input Settings ➤ Settings ➤ Video/Audio ➤ Video Input Picture-in-Picture Recording (PIP) When using Multi-Input you can set MVR Lite to Picture-in-Picture. Input 2 will be displayed as a window in Input 1. • Exactly this view gets recorded as one picture or one video into the patient study folder. -
Page 27: Upgrades / Activation Keys
When networking is enabled, studies can be stored directly to an additional shared folder on your network server (see section Archive). Networking needs to be enabled to connect MVR Lite to a LAN router. This enables the option to control MVR Lite with the MVR Remote App on a portable device (example: Android tablet via Wi-Fi). -
Page 28: Appendix A: Mvr Lite Specifications
MVR Lite User Guide - English Appendix A: MVR Lite Specifications Function Records video and still images in high definition from medical video sources to a USB storage, or Network storage. Case Stainless Steel metal case, copper metal base Buttons... -
Page 29: Appendix A: Mvr Lite Specifications, Continued
Fuse T1AH, 250V Kit Contents MVR Lite recorder, USB flash drive, HDMI cable, HDMI to DVI adapter, Split Remote Cable Adapter, Power Cable, IR Remote Control, Rubber Feet (4), User Guide (English) Compliance and EN 60601-1:2006 + A1:2013 + A12:2104, EN 60601-1-2:2015,... -
Page 30: Appendix B: Medicapture Limited Warranty
(1) year. Should warranty service be required, the warranty period will be extended by the number of days required to restore normal operation and return the product(s). MediCapture MVR Lite medical image recording device Warranty Conditions If, during the year that immediately follows the purchase date, a product covered by this warranty is found to have a defect in material or workmanship, MediCapture (or a service facility authorized by MediCapture) will restore the product to its original operating condition without charge for parts or labor.
Need help?
Do you have a question about the MVR Lite and is the answer not in the manual?
Questions and answers