Advertisement
Quick Links
Advertisement

Summary of Contents for Kathrein FMK 100w
- Page 1 FMK 100w 2220000009 FMK 100b 2220000015 Window/Door Contact FMK 100a 2220000016 User Manual...
- Page 2 If you have any further questions, please contact your local retailer or KATHREIN Digital Systems GmbH directly. Your window/door contact FMK 100 was developed and built with state-of-the-art technology and complies with European and German standards.
- Page 3 TO MINIMISE THE RISK OF ELECTRIC SHOCK, YOU MUST NOT EXPOSE THIS PRODUCT TO WET AND MOIST CONDITIONS AT ANY TIME. All KATHREIN Digital Systems GmbH products are lead-free and meet the requirements stated under the European Directive on the Restriction of Hazardous Substances (RoHS).
- Page 4 The warranty claim will expire in such cases! The window/door contacts FMK 100w, FMK 100b and FMK 100a are equipped with a high-quality housing. However, please observe the following safety instructions: • Operate the window/door contact only with the provided batteries.
- Page 5 If you notice any kind of defect, remove the batteries from the window/door contacts FMK 100w, FMK 100b and FMK 100a and contact your retailer or KATHREIN Digital Systems GmbH directly. Any further usage of the system may lead to fire or electric...
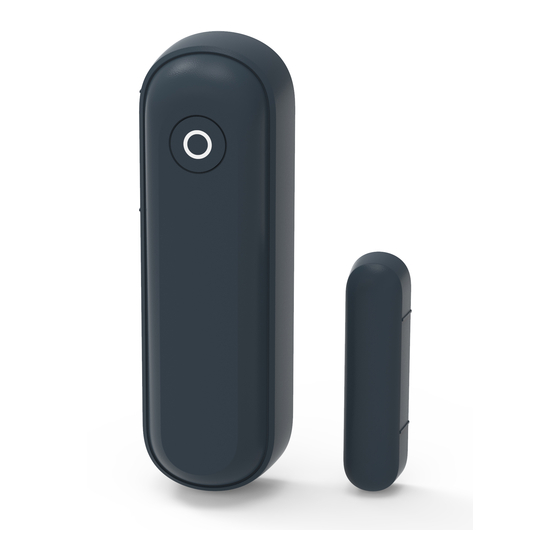
- Page 6 Window/Door Contact FMK 100 Product description: The KATHREIN Digital Systems GmbH window/ door contact is an integral part of your alarm system and is used to secure your windows and doors. The contact consists of two parts (sensor + magnet). One is fixed at your window or door frame, the other one is fixed at the wing of the door or window sash.
- Page 7 1. LED / Learn button 2. Magnetic contact marking 3. Switch for status monitoring 4. Tamper contact 5. Battery compartment 6. Fastening hook 7. Mounting holes (sensor bottom) 8. Notch for sensor opening 9. Opening for tamper contact 10. Opening for battery insulation tab 11.
- Page 8 Range test: To test the signal strength at the desired installation location, perform a range test. 1. Open the alarm panel menu “Sensors” “Range” and press “Start”. 2. Press the Learn button of the window/door contact. 3. The sensor and the signal strength should be indicated. The higher the indicated number the better the reception (1–9).
- Page 9 Sketch: • This sketch only serves as an example. The window/door sensor can also be installed at other positions. • We recommend installing the magnet on the door or window side and the sensor on the frame. • Pay attention to the marking (2) when installing the sensor. The magnet (13) must be installed close to this marking (maximum distance 20–30 mm) to close the sensor circuit.
-
Page 10: For Your Notes
For your notes __________________________________________________ __________________________________________________ __________________________________________________ __________________________________________________ __________________________________________________ __________________________________________________ __________________________________________________ __________________________________________________ __________________________________________________ __________________________________________________ __________________________________________________ __________________________________________________ __________________________________________________ __________________________________________________ __________________________________________________ __________________________________________________ __________________________________________________ __________________________________________________ __________________________________________________ __________________________________________________ __________________________________________________ __________________________________________________ __________________________________________________ __________________________________________________... - Page 11 For your notes __________________________________________________ __________________________________________________ __________________________________________________ __________________________________________________ __________________________________________________ __________________________________________________ __________________________________________________ __________________________________________________ __________________________________________________ __________________________________________________ __________________________________________________ __________________________________________________ __________________________________________________ __________________________________________________ __________________________________________________ __________________________________________________ __________________________________________________ __________________________________________________ __________________________________________________ __________________________________________________ __________________________________________________ __________________________________________________ __________________________________________________ __________________________________________________...
- Page 12 __________________________________________________ __________________________________________________ __________________________________________________ __________________________________________________ __________________________________________________ __________________________________________________ __________________________________________________ __________________________________________________ __________________________________________________ __________________________________________________ __________________________________________________ __________________________________________________ __________________________________________________ __________________________________________________ __________________________________________________ __________________________________________________ __________________________________________________ __________________________________________________ www.kathrein-ds.com support@kathrein-ds.com 9360000382/b/STM/0321/GB | Subject to change. KATHREIN Digital Systems GmbH Anton-Kathrein-Str. 1–3 83022 Rosenheim Germany Phone +49 731 270 909 70...
Need help?
Do you have a question about the FMK 100w and is the answer not in the manual?
Questions and answers