Advertisement
Quick Links
Installation Guide
3G Video Interface
Version 2.0
January 2010
Copyright Fusion Research
Tech Support: 925.217.1233
Important Note:
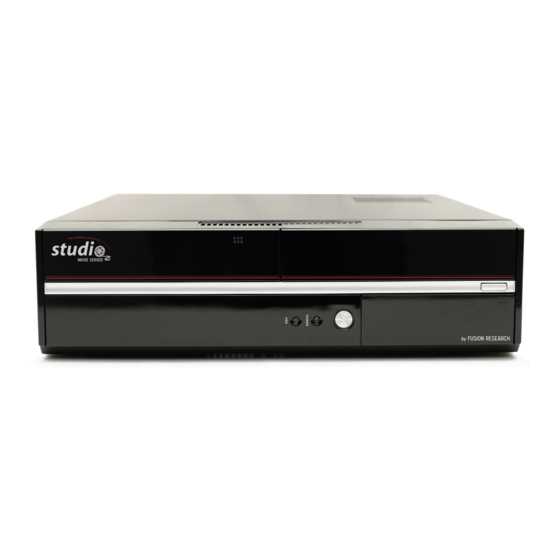
The Studio Movie Server is a highly specialized product
that requires a cool & well vented environment and an approved UPS unit, failure
to providing these items could result in your system not performing properly.
Advertisement

Related Manuals for Fusion Research studio


Summary of Contents for Fusion Research studio
- Page 1 Tech Support: 925.217.1233 Important Note: The Studio Movie Server is a highly specialized product that requires a cool & well vented environment and an approved UPS unit, failure to providing these items could result in your system not performing properly.
- Page 2 Studio Installation Guide Version 2.0 - 2 -...
-
Page 3: Section 1 - Studio Setup
Section 1 - Studio Setup: Before you get started Your Studio system is a powerful hard drive based video server with the ability to playback one zone (additional zones may be added with additional Studio units, which will also increase your storage). - Page 4 Studio Installation Guide Version 2.0 Things to remember when connecting the system: • You must connect to a network PRIOR to powering up unit • You must connect USB IR pickup PRIOR to powering up unit • System is default set to digital 5.1 coax or optical output, you must review the manual for changing the output to stereo analog output if desired.
- Page 5 3 Steps for Successful Media Server Installations: Prior to setting up your Studio System for the first time, it is critical to understand and plan for a proper installation that will avoid problems. By being prepared and taking these required steps you will insure a successful installation.
-
Page 6: Section 2 - Getting Started
Section 2 - Getting Started: DVD Movies The Studio Movie Server is a is capable of outputting a single stream of video and audio, the system can be expanded by adding additional units, which add another independent video stream as well as double the storage. - Page 7 Cinema Player. It is strongly recommended to set the Studio to an individual static IP. Remember to set each IP outside of the range of IP numbers that your router uses for assigning DHCP. If you have any questions about the correct way to do this please contact Fusion support.
- Page 8 Studio Installation Guide Version 2.0 Setup options: Setup options are available using the Fusion remote and are not available in 3 Party controllers (like Crestron or Control4 since these are for installation and not for use with control systems). Please use the Fusion remote control for the following procedure.
- Page 9 Studio Installation Guide Version 2.0 Setting IP Address: All Fusion products ship with IP settings set to DHCP for initial ease of installation and setup, we do however recommended that you set all Fusion components to static IP addresses for greatest reliability on your network.
- Page 10 Studio Installation Guide Version 2.0 If when initially setting up your system the startup screen shows “waiting on server”, this is an indication that no network connection was detected and the cat-5 cable needs to be inspected or pushed in all the way to make solid contact.
- Page 11 Studio Installation Guide Version 2.0 You can unlock any zone that has a rating limit on it by bringing up the “Menu” button on your remote or touch panel, or by selecting the DVD Menu key on the Fusion remote.
- Page 12 Studio Installation Guide Version 2.0 Step #4 - Loading a DVD Movie into the System: (Blu-ray loading is covered in another section) After you have completed the previous steps you begin by simply placing a DVD movie into the drive before selecting the record command.
- Page 13 Studio Installation Guide Version 2.0 After selecting the record or disc load option the system will begin to read the disc unique ID number and look it up on Fusion’s movie database. DVDs actually do not have any movie data or covers art on them and only have an identification number on them to make them unique.
- Page 14 Studio Installation Guide Version 2.0 Once the disc has been recognized you will be presented with the import screen seen below… By selecting “Import disc” you acknowledge that you own the material that you are loading onto the system. The Fusion media server should be seen as an archive of media that you own and should never be used otherwise.
- Page 15 Studio Installation Guide Version 2.0 Step #5 – Sorting, searching & filtering Movies Sorting: By selecting the “Sort” button you can arrange your movie by length, rating or program (program meaning the alphabetical order of the movie). By default, movies are always sorted by alphabetical order unless changed.
- Page 16 Studio Installation Guide Version 2.0 Filtering: Filtering is a powerful tool to use especially when there is a large number of choices in bigger collections. By using filters you can greatly reduce your list of choices, for example if you choose “Comedy”...
- Page 17 Studio Installation Guide Version 2.0 Managing Your Movies: There are two ways to manage your movies; by using the onscreen display, or with a manager on your PC. The first method is using the movie interface itself. As shown above, when you select a movie using the “select”...
- Page 18 Studio Installation Guide Version 2.0 Using the Cinema Movie Manager Application: The Cinema Manager is a program that can be loaded onto any PC on the owner’s network. This program gives you the ability to manage content on the Fusion System as well as the ability to manage and customize the capabilities of the individual players in the system.
- Page 19 Studio Installation Guide Version 2.0 Editing Movie Information: When opening the Cinema Manager program, a list of movies currently in the system will appear. Owner Rated In addition to the official MPAA film rating, the user has the option of adding his or her own rating to the video.
- Page 20 Studio Installation Guide Version 2.0 Expires Box Videos in the system can be set to expire after a certain number of days. Ordinarily, videos do not expire, but if for any reason the owner does not want it in their permanent system, they may select the expire option and the system will purge that particular video.
- Page 21 Studio Installation Guide Version 2.0 Genres (tab) Genres are used to categorize a video by well-known groupings, such as Action, Suspense, Western, etc. They also have a rank, and a video can have more than one genre. An owner may add, edit or delete genres at their discretion however the actual genres must be chosen from the predefined values.
- Page 22 Studio Installation Guide Version 2.0 Editing Owner Rating The owner rating was discussed in an earlier section of the manual under the General tab in editing information. You can also change multiple videos quickly by simply going to [Programs] [Owner Rating]. This box will pop up and allow...
- Page 23 Studio Installation Guide Version 2.0 Checking Available Storage: By selecting the [Management] [Available Storage], a window will pop up letting you know how much combined music and video storage space is available on the Fusion Cinema Server as well as approximately how many DVD’s can be imported.
- Page 24 Studio Installation Guide Version 2.0 Screen Saver Delay For displays where the owner is concerned about ‘burn-in’ issues, they may select a screen saver option. The screen saver simply shows individual cover art available on the system, moving against a black background.
- Page 25 This procedure is intended as a security measure to protect the archived files on the Studio system. This will not give the ability to add extra storage, to purchase a license to add you own storage, please contact your Fusion representative.
- Page 26 Studio Installation Guide Version 2.0 Step #4 – Confirming your export Your list of movies will now be shown within the export video window. By clicking on the folder button you can select the destination for your backup. Step #5 – Select final destination...
-
Page 27: Troubleshooting Guide
If you are using Fusion’s component adapter (FR-COM), be sure to have it set to YUV and resolution set to 720p or 1080i (not 1080p) When the Studio boots up the system cannot get Make sure that you have cat-5 cables connected through the check list prior to powering on the system;... - Page 28 Studio Installation Guide Version 2.0 Typical DVD Movie related issues: When loading a DVD the movie shows as When “UNKNOWN” appears in all capital letters the “UNKNOWN” in all capital letters and does not Fusion server cannot get access to Fusion’s online...
- Page 29 Studio Installation Guide Version 2.0 Fusion Limited Warranty: Terms of Coverage Each Fusion branded system sold comes with a 13-month limited warranty. This warranty provides no- charge coverage under normal product usage, for a period of thirteen months from the date the product is shipped from the factory, the warranty period does not commence when the system is installed.
-
Page 30: Return Policy
Version 2.0 How to Return a Product for Repair You must contact Fusion’s support group at (925) 217-1233 to receive a Return Material Authorization (RMA) number. This number is to be attached to the outside of the shipping carton. The technical support person will give additional instructions.
Need help?
Do you have a question about the studio and is the answer not in the manual?
Questions and answers