
Summary of Contents for sematic SDS
- Page 1 ENGLISH SDS Drive DC-PWM Compatible Drive - Instruction Manual E 2016-03-25 811-000-000...
- Page 3 Signals to/from the door controller ..................12 Sematic Drive System© (DC-PWM) COMPATIBLE connections Sematic Drive System© set-up and incoming/outgoing signals from the door controller Detector/Photocell/Barriers: Signal-Only Connection to the Door Controller (Direct Connection)
- Page 4 811-000-000 SDS© DC-PWM Compatible • Edition 25 March 2016 Maintenance Menu - diagnostics and alarm management ..............33 Consulting the Maintenance Menu with the Handset Controller software upgrade .
- Page 5 © Sematic Spa. All rights reserved. Sematic regards all the information contained in this instruction manual to be correct at the time of printing. This information does not constitute any obligation to Sematic and can be modified without prior notification. Sematic cannot be held responsible for any possible damages or claims caused to items or persons due to errors or...
- Page 6 811-000-000 SDS© DC-PWM Compatible • Edition 25 March 2016 Sematic Group: we care about your integrated solution! COMPONENT SYSTEMS • Automatic lift doors • Frame and frameless glass doors • Enhanced car door operator solutions • Complete cabins • Car Frames •...
- Page 7 Sematic will give an agreed reasonable time to all its customers to allow them to adapt to the new changes their complementary current constructions;...
- Page 8 Preface 811-000-000 SDS© DC-PWM Compatible • Edition 25 March 2016 b. RISKS OF ELECTRICAL HAZARDS • Persons in contact with energized parts (direct contact) • Persons in contact with parts that become energized due to a fault (indirect contact) c. RISKS OF OVERHEATING d.
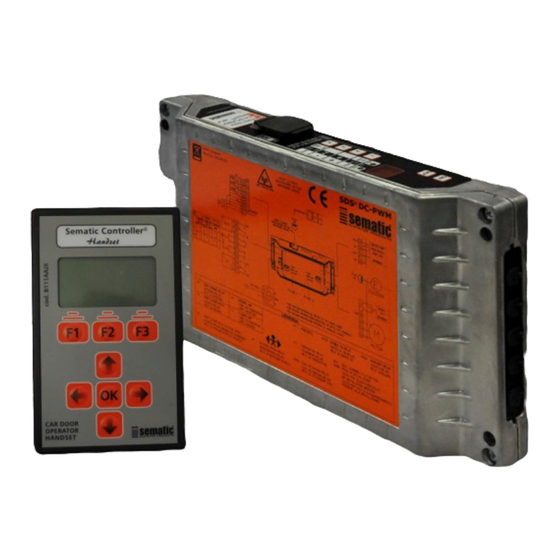
- Page 9 There are two independent speed curve profiles for the opening and closing cycles (5) which can be modified by means of the door controller push buttons or by means of the Sematic handset (an optional 8 digit keypad and display accessory which can be connected to the card by an RJ45 plug).
- Page 10 What is the Sematic DC-PWM Drive System© Compatible? 811-000-000 SDS© DC-PWM Compatible • Edition 25 March 2016 2.1 SPEED PROFILE Opening cycle Opening acceleration Opening hight speed Opening deceleration Closing cycle Closing acceleration Closing hight speed Closing deceleration Door opening...
- Page 11 General Features 811-000-000 SDS© DC-PWM Compatible • Edition 25 March 2016 GENERAL FEATURES TECHNICAL INFORMATION MAIN SUPPLY VOLTAGE 90-290 Vac (115 V-20%, 230V+26%), 50-60 Hz TYPICAL POWER CONSUMPTION 200 VA PEAK POWER CONSUMPTION 300 VA MOTOR OVERLOAD PROTECTION @In <15 minutes @2In <3 minutes...
- Page 12 Signals to/from the door controller 811-000-000 SDS© DC-PWM Compatible • Edition 25 March 2016 SIGNALS TO/FROM THE DOOR CONTROLLER SEMATIC DRIVE SYSTEM© (DC-PWM) COMPATIBLE CONNECTIONS DOOR POSITION LC SWITCH STATE RC SWITCH STATE RA SWITCH STATE LA SWITCH STATE Door closed...
- Page 13 Signals to/from the door controller 811-000-000 SDS© DC-PWM Compatible • Edition 25 March 2016 4.2 SEMATIC DRIVE SYSTEM© SET-UP AND INCOMING/OUTGOING SIGNALS FROM THE DOOR CONTROLLER Magnetic switches Safety chains Main Lift Controller Photocells or Detector...
- Page 14 Handset (Optional) Connector RJ45 (B) Note: Sematic Drive System© controller may be used also with incoming signal from the Main Lift Controller with voltage range between 6 and 24 Vdc. To use this feature: •...
- Page 15 24Vdc, 100ma contact. Contact is open when not active. • For the Door Operator mechanical installation refer to the “Installation and maintenance of Sematic doors” manual. • Warning: to avoid possible induced currents within field wiring, it is recommended to shield the Ka and Kc signals (connector pins 3, 5 and 15) with grounded, shielded cables.
- Page 16 Signals to/from the door controller 811-000-000 SDS© DC-PWM Compatible • Edition 25 March 2016 Connector pin 30 can be used as a pass-through (dummy) connector pin for connections between the detector system components. Example of photocells/barriers with transmitter and receiver connected between themselves through the dummy...
- Page 17 Signals to/from the door controller 811-000-000 SDS© DC-PWM Compatible • Edition 25 March 2016 4.5 MAGNETIC SWITCHES Fig. 1 Looking from the landing the switches are marked this way. Verify that the magnet (1) has the countersink for the self-threading screw on the side of the magnetic switch (2).
- Page 18 Instruction without handset 811-000-000 SDS© DC-PWM Compatible • Edition 25 March 2016 INSTRUCTION WITHOUT HANDSET Display in Automatic and Manual Mode AUTOMATIC MODE “AUTO” • When the Door Controller is working in automatic mode the “AUTO” red led is on, whereas the other two red leds are off.
- Page 19 Instruction without handset 811-000-000 SDS© DC-PWM Compatible • Edition 25 March 2016 PROGRAMMING MODE “PROG” • When the Door Controller is working in “programming mode” the “PROG” red led is on whereas the other two red leds are off. •...
- Page 20 Instruction without handset 811-000-000 SDS© DC-PWM Compatible • Edition 25 March 2016 The following table contains the available parameters, the relevant codes, the description and the allowed modification range: Param. codes Default Parameter Range Note Reversing system choice 00, 01 00->...
- Page 21 Functions available 811-000-000 SDS© DC-PWM Compatible • Edition 25 March 2016 FUNCTIONS AVAILABLE REVERSING SYSTEM FORCE SETTING The reverse motion torque parameter sets the sensitivity degree to detect an obstacle during the door closure, thus giving the reopening command. The parameter's value can be manually set.
- Page 22 • Emulation LM-DC 2011 It's possible to select the emulation type with the SDS Handset ( § 8.10 (pg. 32) ) or in programming mode “PROG” (§ 5.3 (pg. 19)). Note: if Digidoor controller compatibility is requested please verify the Main Lift Controller signals logic and voltage rate.
- Page 23 811-000-000 SDS© DC-PWM Compatible • Edition 25 March 2016 6.11ALARMS The Sematic Drive System© controller has the ability to diagnose and record a number of defects; such diagnostics is very helpful to the maintenance personnel in order to locate possible operational problems.
- Page 24 To make this connection, ask Sematic for the appropriate adapter cod. B147AABX (see picture 3) (a 16 mm. diameter hole is required in any chosen position within the Car walls).
- Page 25 Instruction with handset 811-000-000 SDS© DC-PWM Compatible • Edition 25 March 2016 USER HANDSET MENUS AND SUBMENUS * only for Digidoor Emulation...
- Page 26 Instruction with handset 811-000-000 SDS© DC-PWM Compatible • Edition 25 March 2016 7.3 REVERSING SYSTEM FORCE SETTING BY MEANS OF THE HANDSET • Connect the handset to RJ45 connector • If necessary, using keys choose the required language and confirm with the “OK” key •...
- Page 27 Instruction with handset 811-000-000 SDS© DC-PWM Compatible • Edition 25 March 2016 • The parameter “Comfort” determines acceleration value or deceleration value that the controller has to comply with while changing profile velocity. This parameter is important to establish the panel fluidness movement.
- Page 28 Instruction with handset 811-000-000 SDS© DC-PWM Compatible • Edition 25 March 2016 For each of the above listed parameter the parameter name is displayed at the top, the current value is displayed at the bottom with the relevant unit measure; the up/down arrow keys allow changing the current value.
- Page 29 Instruction with handset 811-000-000 SDS© DC-PWM Compatible • Edition 25 March 2016 7.5.6 Option “Opening slow down delay to opening rest current” (Only for digidoor emulation) This option allows the user to change the opening rest current delay from the opening slow down Ra signal.
- Page 30 General option 811-000-000 SDS© DC-PWM Compatible • Edition 25 March 2016 GENERAL OPTION • Connect the handset to RJ45 connector; • If necessary, using keys choose the required language and confirm with the “OK” key • Using keys run through the MAIN MENU and choose GENERAL OPTIONS •...
- Page 31 General option 811-000-000 SDS© DC-PWM Compatible • Edition 25 March 2016 – “BACK”: Press key F1 to restore the menu GENERAL OPTIONS – “MENU”: Press key F3 to restore the MAIN MENU MAIN LIFT CONTROLLER ALARM - (MLC INPUT ALARM) •...
- Page 32 General option 811-000-000 SDS© DC-PWM Compatible • Edition 25 March 2016 • The following options are available: – “BACK”: Press key F1 to restore the menu GENERAL OPTIONS – “MENU”: Press key F3 to restore the MAIN MENU AUX OUTPUT RELAY SETTING BY MEANS OF THE HANDSET •...
- Page 33 Maintenance Menu - diagnostics and alarm management 811-000-000 SDS© DC-PWM Compatible • Edition 25 March 2016 MAINTENANCE MENU - DIAGNOSTICS AND ALARM MANAGEMENT CONSULTING THE MAINTENANCE MENU WITH THE HANDSET • Connect the handset to the RJ45 connector • If necessary, using keys choose the required language and confirm with the “OK”...
- Page 34 Maintenance Menu - diagnostics and alarm management 811-000-000 SDS© DC-PWM Compatible • Edition 25 March 2016 If the option BATTERY is chosen, the display shows either battery voltage (in Volt) and status (in charge or in use) or just “not present”. The following options are available: •...
- Page 35 Controller software upgrade 811-000-000 SDS© DC-PWM Compatible • Edition 25 March 2016 10 CONTROLLER SOFTWARE UPGRADE • Connect the handset to the RJ45 connector • If necessary, using keys choose the required language and confirm with the “OK” key or confirm the suggested language with “OK”...
- Page 36 SDS Rel.3 DC COMPATIBILE controller 39 - 15 - 40 - 15 input terminals (as shown in the table). Connect SDS Rel. 3 DC COMPATIBILE La and Lc outputs to the main lift controller, at terminals 16 - 17 - 18 - 19.
- Page 37 Magnetic switches installed on the door operator Connection examples: Sematic SDS vs ASC20 This schematic example shows the connection between SDS DC-compatible and ASC10/20. Due to the variety of lift controllers and connections, it may be necessary to modify this schematics, to adapt to the particular situation.
- Page 38 Upgrade from F28/F29 and LMDC 2010/2011/DIGIDOOR 811-000-000 SDS© DC-PWM Compatible • Edition 25 March 2016 12 UPGRADE FROM F28/F29 AND LMDC 2010/2011/DIGIDOOR Short instruction replacement F28/F29 and LMDC 2010/2011/DIGIDOOR Digidoor 1 Nm LMDC 2010 Digidoor 2 Nm LMDC 2011 Select the correct Emulation type at P22...
- Page 39 811-000-000 SDS© DC-PWM Compatible • Edition 25 March 2016 13 UPGRADE FROM F28/F29 CONTROLLER • Eliminate the transformer 220/24 V with all its cables because the new SDS is fitted with an in-built switching transformer • Disconnect the wires from the old connectors and wire them again according to the correspondence given in the underneath table.
- Page 40 SDS Rel.3 DC COMPATIBILE controller 39 - 15 - 40 - 15 input terminals (as shown in the table). Connect SDS Rel. 3 DC COMPATIBILE La and Lc outputs to the main lidt controller, at terminals 16 - 17 - 18 - 19.
- Page 41 811-000-000 SDS© DC-PWM Compatible • Edition 25 March 2016 14 UPGRADE FROM F28/F29 CONTROLLER REL. 2.0 CONTROLLER • Eliminate the transformer 220/24 V with all its cables because the new SDS is fitted with an in-built switching transformer • Disconnect all the connectors on the controller to be substituted and connect them again to the new controller using the connectors-adatpers Code nr.
- Page 42 811-000-000 SDS© DC-PWM Compatible • Edition 25 March 2016 15 UPGRADE FROM LMDC 2010/11 CONTROLLER • Eliminate the transformer 220/24 V with all its cables because the new SDS is fitted with an in-built switching transformer • Disconnect all the connectors on the controller to be substituted and connect them again to the new controller using the connectors-adatpers Code nr.
- Page 43 811-000-000 SDS© DC-PWM Compatible • Edition 25 March 2016 16 UPGRADE FROM DIGIDOOR CONTROLLER • Eliminate the transformer 220/24 V with all its cables because the new SDS is fitted with an in-built switching transformer • Disconnect all the connectors to be substituted on the controller and connect them again to the new controller using the connectors-adatpers Code nr.
- Page 44 Check and clean the cable connections of the motor and of the motor Encoder 18 SPARE PARTS It is possible to order all the Sematic Drive System© spare parts using the spare parts catalogue, by specifying the required quantity and the code of the ordered piece.
- Page 46 A MEMBER OF...
Need help?
Do you have a question about the SDS and is the answer not in the manual?
Questions and answers
Door learn run not successful
To resolve a "Door learn run not successful" issue with Sematic SDS, follow these steps:
1. Power the system and turn the door controller “ON”.
2. Switch to manual self-learning mode:
- Press and hold key 4 until the AUTO red LED turns off and the MAN red LED turns on.
3. Start the self-learning cycle:
- Press and hold key 1 to begin the self-learn process.
4. Use keys 2 and 3 to command opening and closing:
- Key 2 for opening and key 3 for closing.
- Ensure the operator moves through its full expected travel during both opening and closing.
- The display should show “SL” during the cycles, and “SL” should flash during opening.
5. Verify travel completion:
- Carefully check that the door completes its full travel range smoothly and completely.
If the door does not complete the full travel or the SL indication does not behave as expected, check for:
- Obstructions or mechanical issues.
- Proper door configuration settings.
- Correct parameter settings such as for glass doors or door locks.
Make corrections as needed and repeat the self-learning cycle.
This answer is automatically generated