Table of Contents
Advertisement
Advertisement
Table of Contents

Subscribe to Our Youtube Channel
Related Manuals for GN Hearing ReSound Key

Summary of Contents for GN Hearing ReSound Key
- Page 1 User guide ReSound Receiver-In-Ear hearing aids...
- Page 2 Hearing aid information Left hearing aid Right hearing aid Serial number Serial number Model number Model number £ 312 £13 Battery type £ Tulip dome £ RIE earmould Dome/ Closed dome Open dome Power dome £ Small £ Small £ Small earmould type £...
-
Page 3: Table Of Contents
Table of Contents Introduction Your hearing aid Preparing your hearing aids for use Placing your hearing aids in your ears Removing your hearing aids from your ears Using your hearing aids Using a telephone Direct Audio Input Advanced options Wireless accessories Cleaning and caring for your hearing aids General warnings and precautions Hearing aid expectations... -
Page 5: Introduction
Introduction Thank you for choosing our hearing aids. We recommend that you use your hearing aids every day. This way you will fully benefit from them. NOTE: Read this booklet carefully before you start using your hearing aids. Intended use Generic air-conduction hearing aids are wearable sound-amplifying devices intended to compensate for impaired hearing. -
Page 6: Your Hearing Aid
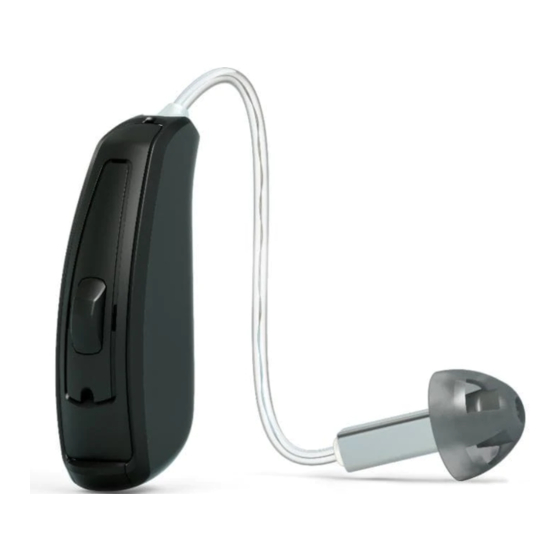
Your hearing aid Zinc-Air battery model (62) 1. Receiver wire 2. Receiver 3. Dome (an open dome is shown) 4. Multi-function button 5. Microphone inlets 6. Battery compartment 7. Model and serial number (in the battery compartment) Your hearing aid... - Page 7 Zinc-Air battery model (61) 1. Receiver wire 2. Receiver 3. Dome (an open dome is shown) 4. Push button 5. Microphone inlets 6. Battery compartment 7. Model and serial number (in the battery compartment) Your hearing aid...
- Page 8 Domes and earmoulds Tulip dome Closed dome Open dome Power dome Custom earmould The closed, open and power domes are available in different sizes. Tulip domes are one size. Domes are all light grey. Only use domes supplied by ReSound. Your hearing aid...
-
Page 9: Preparing Your Hearing Aids For Use
Preparing your hearing aids for use Battery warnings WARNING: Batteries contain dangerous substances and should be disposed of carefully in the interest of your safety and for the environment. Please note: 1. Keep batteries away from children, mentally disabled persons, and pets. 2. - Page 10 Inserting the battery into your hearing aid 3. Insert the new battery, with the plus 1. Open the battery door with 2. Remove the packaging (+) sign correctly positioned, into the your fingernail. Remove and protective foil from the battery compartment door. Do not the old battery (if there is new battery.
- Page 11 Low battery warning When the batteries are low on power, your hearing aids reduce the volume, and play a melody every 15 minutes, until they are empty and turn off. NOTE: Keep spare batteries on hand. Low battery warning when paired with wireless accessories (optional) NOTE: The batteries drain faster when you use wireless functionalities like streaming from your smartphone or from your TV via our TV streamer.
- Page 12 Remote control Battery level Signal Hearing aid Streaming Fully charged 4 even tones Depleted 3 even tones and 1 longer tone These will work again when you insert a new battery. Preparing your hearing aids for use...
-
Page 13: Placing Your Hearing Aids In Your Ears
Placing your hearing aids in your ears How to tell left from right If you have two hearing aids, they may be programmed differently. One for your left ear, the other for your right. Do not swap them. Please pay attention to this when cleaning, storing and inserting the hearing aids. You might want to ask your hearing care practitioner to mark your hearing aids with a coloured Left and Right indication: Left is blue and Right is red. - Page 14 Inserting the receiver dome into your ear If your hearing aids have domes, follow these instructions: 1. Hang the hearing aid over 2. Hold the receiver wire where 3. Push the dome far enough the top of your ear. it bends and gently into your ear canal so that the place/push the receiver dome wire rests against your head.
- Page 15 CAUTION: Never attempt to modify the shape of the receiver wire yourself. Sport lock If you lead an active life, your hearing aids may come loose. To avoid this situation, your hearing care professional can attach and adjust a sport lock to the receiver.
- Page 16 Inserting earmoulds into your ears If your hearing aids have earmoulds, follow these instructions: 1. Hold the earmould 2. Slide the earmould into your ear 3. Place the hearing aid behind between your thumb and with a gentle, twisting movement. your ear and ensure it is index finger and position Move the earmould up and down...
- Page 17 CAUTION: Never attempt to modify the shape of the hearing aids, earmoulds, domes or receiver wires yourself. Placing your hearing aids in your ears...
-
Page 18: Removing Your Hearing Aids From Your Ears
Removing your hearing aids from your ears Removing receiver domes from your ears If your hearing aids have domes, follow these instructions: 1. Lift the hearing aid off your ear. 2. Hold the receiver wire with your thumb and forefinger where it bends and pull the dome out of your ear canal. - Page 19 Removing earmoulds from your ears If your hearing aids have earmoulds, follow these instructions: 1. Lift the hearing aid from behind your 2. Using your thumb and index finger, gently pull the ear. Let it hang beside your ear earmould (not the hearing aid or the wire) loose from your momentarily.
-
Page 20: Using Your Hearing Aids
Using your hearing aids Turning your hearing aids on and off Once you have placed the hearing aids on your ears, you can turn them on. Your hearing aids always start on program 1 at the pre-set volume. To turn your hearing aid on, close the battery door. To turn the hearing aid off, open the battery door (with your fingernail). - Page 21 The push button/multi-function button Your hearing aid has either a push button or a multi-function button. These buttons allow you to use a variety of listening programs. Each program is suitable for a different situation. Multi-function button (62 models only) Push button (61 models only) 1.
- Page 22 It should not be necessary to control the volume manually. However, in addition to controlling listening programs, the multi-function/push button provides you with the ability to adjust the amplification to your liking. The multi-function/push button is designed to change the volume or listening programs of the hearing aid, based on different ways it is pressed.
- Page 23 NOTE: If you have two hearing aids with the Synchronised Button feature enabled, program changes to one hearing aid automatically repeat in the second hearing aid. When you change a program in one hearing aid, it responds with one or more beeps. The same number of confirmation beeps in the second aid follow.
- Page 24 NOTE: The telecoil does not work without a teleloop (that is, an induction loop) or an HAC telephone. If you are having trouble hearing with the telecoil, ask you hearing care professional to adjust the program. If there is no sound from your hearing aids in a teleloop system with an active Telecoil function, the teleloop system may not be turned on or may not be operating correctly.
-
Page 25: Using A Telephone
Using a telephone Your hearing aid allows you to use your telephone as you normally do. Finding the optimal position for holding the phone may require practice. The following suggestions may be helpful: 1. Hold the telephone up to your ear canal or hold it close to the hearing aid microphones as illustrated. - Page 26 Mobile phones Your hearing aids comply with the most stringent Standards of International Electromagnetic Compatibility. Any degree of disturbance can be due to the nature of your particular mobile phone or of your wireless telephone service provider. NOTE: If you find it difficult to get a good result while using your mobile phone, your hearing care professional can give you advice on available wireless accessories to enhance listening capabilities.
- Page 27 sensitive device/equipment (pacemakers and defibrillators) in question. If the manufacturer cannot issue a statement, we recommend keeping the magnet or a telephone equipped with the magnet 30 cm (12”) away from magnetically sensitive devices (e.g. pacemakers). Phone Now precautions • If you experience frequent signal loss or noise during calls, move the magnet to another place on the telephone receiver.
- Page 28 Placing the Phone Now magnet Place the magnet on your telephone receiver as follows: 1. Clean the surface thoroughly. Use 2. Remove the foil from the 3. Place the magnet on the a recommended cleaning agent. magnet. phone. CAUTION: • If you experience frequent signal loss or noise during calls, move the Phone Now magnet to another place on the telephone receiver.
- Page 29 How to use Phone Now 1. Lift the telephone to your ear. 2. When you hear a short melody, the phone program is active. NOTE: • You may need to move the telephone receiver slightly to find the best position for a reliable Phone Now activation and a good hearing experience on the telephone.
-
Page 30: Direct Audio Input
Direct Audio Input (Optional for 62 models only) You can connect a DAI (Direct Audio Input) adapter to the bottom of your hearing aid. Once connected, the hearing aid automatically switches to DAI. The sound is then sent directly to your hearing aid using a cable or a wireless FM system. - Page 31 Connecting a DAI adapter 1. Align the tip of your DAI 2. Move the adapter towards 3. Click the adapter onto the adapter with the groove on the battery door hearing aid top of the battery door Disconnecting a DAI adapter •...
- Page 32 Important points for FM • Do not use two transmitters on the same FM channel. • Do not use water or fluids for cleaning the FM click-on (DAI) receiver. • Do not use an FM transmitter in locations where it is forbidden to use electronic devices, for instance in airplanes/oil rigs.
-
Page 33: Advanced Options
Advanced options ReSound Assist and ReSound Assist Live (optional) If you have signed up to use ReSound Assist available with your hearing aids, you can allow your hearing aids to be adjusted remotely without having to visit your hearing care professional. This service also includes ReSound Assist Live. - Page 34 This service only works if your smart device is connected to the Internet. Your hearing care professional will provide information regarding this option, and how it works with the ReSound Smart 3D™ app. Using your hearing aids with iPhone, iPad and iPod touch The advanced models of our hearing aids are Made for iPhone, iPad and iPod touch, which allow for direct audio streaming and control from these devices.
- Page 35 NOTE: For assistance with pairing and using these products with your hearing aids, contact your hearing care professional. Using your hearing aid with smartphone apps (optional) The smartphone apps send and receive signals to and from the hearing aids via smartphones. Our smartphone apps must only be used with our hearing aids, for which they were designed, and we take no responsibility if the app is used with other hearing aids.
- Page 36 NOTE: • For assistance with pairing and using these products with your hearing aids, contact your hearing care professional or visit our support site. • If your Bluetooth® enabled Android smartphone does not stream directly to your hearing aids, you can use our ReSound Phone Clip+ to answer the phone. Flight Mode (optional) Your hearing aids can be controlled from your smartphone or Remote Control –...
- Page 37 Activating wireless communication (exit Flight Mode) 1. Open and close the battery door on each hearing aid once. 2. Wireless communication will be activated after 10 seconds. NOTE: It is important to wait an additional 15 seconds after wireless function resumes before opening and closing the battery compartment again for any reason.
-
Page 38: Wireless Accessories
Wireless accessories ReSound’s wireless eco-system features a comprehensive range of seamlessly integrated wireless accessories. This allows you to control and stream high quality stereo sound and speech directly to your hearing aids. Please find the list of available wireless accessories below: •... - Page 39 NOTE: • Ask your hearing care professional for more information on the range of ReSound wireless accessories. • For use of wireless functionality only use ReSound wireless accessories. For further guidance, please refer to the user guide of the relevant ReSound wireless accessory. Wireless accessories...
-
Page 40: Cleaning And Caring For Your Hearing Aids
Cleaning and caring for your hearing aids Care and maintenance Please follow the advice below to have the best user experience and to prolong the life of your hearing aids. 1. Keep your hearing aids dry and clean. 2. Open the battery door to dry your hearing aids when you are not wearing them. 3. - Page 41 Daily maintenance It is important to keep your hearing aid clean and dry. On a daily basis, clean the hearing aids using a soft cloth or tissue. In order to avoid damage due to humidity or excessive perspiration, the use of a drying kit is recommended.
- Page 42 If the microphone inlets are clogged, gently brush across the microphone inlets with the brush. WARNING: Do not use force to press the bristles on the small brush into the inlets because the microphones may be damaged. CAUTION: Do not use alcohol or other solvents to clean your hearing aid, the protective coating will be damaged.
- Page 43 NOTE: The wire loop is only intended for earmoulds. Changing your hearing aid domes We recommend that your hearing care professional shows you how to change domes. You should change your domes every 3 months or more often according to the advice of your hearing care professional. Incorrect dome replacement can result in a dome being left in your ear when you remove your hearing aid.
- Page 44 NOTE: Change the dome at least every three months. Ask your hearing care professional for advice. 1. Remove the used dome by pulling it off the 2. Push the new dome over the ribbed end of the receiver and discard. This may require a bit of receiver.
- Page 45 Tulip domes To change a tulip dome, follow these instructions: 1. Remove the used dome by pulling 2. Push the largest petal back, then it off the receiver and discard. This press the tulip dome over the may require a bit of force. ribbed end of the receiver.
- Page 46 3. Check that the tulip dome is 4. Push the larger petal toward the This illustration shows a cor- securely mounted by verifying that receiver. rectly mounted tulip dome. the collar completely covers the Ensure the large petal is ribbed end of the receiver. outside the small petal.
- Page 47 Changing the wax filter The wax filter is located at the inward end of the receiver or custom earmould. The wax filter helps keep earwax away from the components of the hearing aid. You must replace it on a regular basis. Consult your hearing care professional for advice on how often you need to do this.
- Page 48 Removing the old wax filter 1. Remove the dome from the receiver. 2. Open the wax filter case and take out one of the tools. Each tool has a small hook (removal tip) in one end and a new wax filter in the other. 3.
- Page 49 Inserting the new wax filter 1. Insert the other end of the tool 2. Gently press the replacement 3. Pull the tool straight out – your into the sound outlet (the end straight into the sound outlet new wax filter will remain in with the replacement filter).
-
Page 50: General Warnings And Precautions
General warnings and precautions General warnings 1. Consult a hearing care professional if you think there may be a foreign object in your ear canal, if you experience skin irritation, or if excessive earwax accumulates with the use of the hearing aid. 2. - Page 51 7. Warning to hearing care professionals: Special care should be exercised in selecting and fitting hearing aids with maximum sound pressure level that exceeds 132dB SPL with an IEC 60711:1981 occluded ear simulator. There may be a risk of impairment of the remaining hearing. 8.
-
Page 52: Hearing Aid Expectations
Hearing aid expectations • A hearing aid will not restore normal hearing and will not prevent or improve a hearing impairment resulting from organic conditions. • Consistent use of the hearing aid is recommended. In most cases, infrequent use does not permit you to get full benefit from it. -
Page 53: Troubleshooting
Troubleshooting Issue Potential cause Potential solution Feedback or Is your earmould or dome inserted correctly in Re-insert it. "whistling" your ear? Is the volume very loud? Reduce the volume. Is the receiver wire broken or is the earmould Visit your hearing care professional. clogged? Are you holding an object (e.g. - Page 54 Issue Potential cause Potential solution No sound Is the hearing aid turned on? Turn it on. Is there a battery in the hearing aid? Insert a new battery. Is the battery still good? Replace with a new battery. Is the receiver wire broken or the earmould Consult your hearing care professional.
- Page 55 Issue Potential cause Potential solution Battery drains very Did you leave your hearing aid switched on for Always turn off your hearing aids when you quickly. long periods of time? are not using them, e.g. during the night. Is the battery old? Check the battery packaging.
-
Page 56: Warnings To Hearing Aid Dispensers (Us Only)
Warnings to Hearing Aid Dispensers (US only) A hearing aid dispenser should advise a prospective hearing aid user to consult promptly with a licensed physician (preferably an ear specialist) before dispensing a hearing aid, if the hearing aid dispenser determines through inquiry, actual observation, or review of any other available information concerning the prospective user, that the prospective user has any of the following conditions: 1. - Page 57 Licensed physicians who specialize in diseases of the ear are often referred to as otolaryngologists, otologists or otorhinolaryngologists. The purpose of medical evaluation is to assure that all medically treatable conditions that may affect hearing are identified and treated before the hearing aid is purchased. Following the medical evaluation, the physician will give you a written statement that states that your hearing loss has been medically evaluated and that you may be considered a candidate for a hearing aid.
- Page 58 Children with hearing loss In addition to seeing a physician for a medical evaluation, a child with a hearing loss should be directed to an audiologist for evaluation and rehabilitation because hearing loss may cause problems in language development and the educational and social growth of a child. An audiologist is qualified by training and experience to assist in the evaluation and rehabilitation of a child with hearing loss.
-
Page 59: Tinnitus Management
Tinnitus Management Tinnitus Sound Generator module Your ReSound hearing aids include the Tinnitus Sound Generator (TSG) module. The Tinnitus Sound Generator (TSG) Module is a software tool that generates sounds to be used in tinnitus management programs to relieve suffering from tinnitus. The TSG can generate sounds adjusted to your personal preference and your specific therapeutic needs as determined by your doctor, audiologist or hearing care professional. - Page 60 If deemed feasible by the hearing professional, subsequent fittings of the Tinnitus Sound Generator Module may be performed remotely and in real time while having live communication via live audio, video and chat on the user's dedicated app. User instructions for the TSG module Description of the device The Tinnitus Sound Generator (TSG) Module is a software tool that generates sounds to be used in tinnitus management programs to relieve suffering from tinnitus.
- Page 61 If you have two wireless hearing aids that support ear-to-ear synchronisation, this functionality can be enabled by your hearing care professional. This will cause the Tinnitus Sound Generator to synchronise the sound in both hearing aids. If your tinnitus troubles you only in quiet environments, your doctor, audiologist or hearing care professional can set the TSG Module so that it becomes audible exclusively in such surroundings.
- Page 62 To assist habituation to tinnitus, this needs to be audible. The ideal level of the TSG module, therefore, should be set so that it starts to blend with the tinnitus, and so that you can hear both your tinnitus as well as the sound used.
- Page 63 hearing aids when a hearing care professional has enabled the TSG functionality during fitting of the hearing aid. NOTE: To use smartphone apps, the hearing aid must be connected with the smartphone or mobile device. TSG - Technical specifications Audio signal technology: Digital. Available sounds White noise signal which can be shaped with the following configurations: High-pass filter...
- Page 64 The white noise signal can be modulated in amplitude with an attenuation depth of up to 14 dB. Prescription use of a Tinnitus Sound Generator hearing aid The TSG should be used as prescribed by your doctor, audiologist or hearing healthcare professional. In order to avoid permanent hearing damages, the maximum daily usage depends on the level of the generated sound.
- Page 65 Good health practice requires that a person with a tinnitus condition have a medical evaluation by a licensed physician (preferably a physician who specializes in diseases of the ear) before using a sound generator. Licensed physicians who specialize in diseases of the ear are often referred to as otolaryngologists, otologists or otorhinolaryngologists.
- Page 66 CAUTION: • Should the user develop any side effects from using the sound generator, such as dizziness, nausea, headaches, perceived decrease in auditory function or increase in tinnitus perception, the user should discontinue use of the sound generator and seek medical evaluation. •...
- Page 67 WARNING TO THE HEARING CARE PROFESSIONAL: A hearing care professional should advise a prospective sound generator user to consult promptly with a licensed physician (preferably an ear specialist) before getting a sound generator, if the hearing care professional determines through inquiry, actual observation, or review of any other available information concerning the prospective user that the prospective user has any of the following conditions: 1.
- Page 68 CAUTION: The maximum output of the sound generator falls into the range that can cause hearing loss according to OSHA regulations. In accordance with NIOSH recommendations, the user should not use the sound generator for more than eight (8) hours a day when this is set to a level of 85 dB SPL or above.
- Page 69 e. Unilateral hearing loss of sudden or recent onset within the previous 90 days. f. Visible evidence of significant cerumen accumulation or a foreign body in the ear canal. g. Pain or discomfort in the ear. 3. Discontinue use of the sound generator and consult promptly with your hearing care professional, if you experience changes in the tinnitus perception, discomfort or interrupted speech perception, while using the Tinnitus Sound Generator.
- Page 70 Tinnitus Sound Generator warning to hearing care professionals A hearing care professional should advise a prospective sound generator user to consult promptly with a licensed physician (preferably an ear specialist) before getting a sound generator. If the hearing care professional determines through inquiry, actual observation, or review of any other available information concerning the prospective user that the prospective user has any of the following conditions: 1.
- Page 71 CAUTION: The maximum output of the sound generator falls into the range that can cause hearing loss according to OSHA regulations. In accordance with NIOSH recommendations, the user should not use the sound generator for more than eight (8) hours a day when this is set to a level of 85 dB SPL or above.
-
Page 72: Regulatory Information
Regulatory information Warranties and repairs The manufacturer provides a warranty on hearing aids in the event of defects in workmanship or materials, as described in applicable warranty documentation. In its service policy, the manufacturer pledges to secure functionality at least equivalent to the original hearing aid. As a signatory to the United Nations Global Compact initiative, the manufacturer is committed to doing this in line with environment-friendly best practices. - Page 73 During normal operation the temperature should not exceed the limit values of 0 °C (+32 °F) to +45° C (+113 °F), at a relative humidity of 90% , non-condensing. During transport or storage, the temperature should not exceed the limit values of -20 °C (-4 °F) to +60° C (+140 °F) at a relative humidity of 90% RH, non-condensing (for a limited time).
- Page 74 Statement This device complies with part 15 of the FCC rules and ISED rules. Operation is subject to the following two conditions: 1. This device may not cause harmful interference. 2. This device must accept any interference received, including interference that may cause undesired operation.
- Page 75 – Connect the equipment to an outlet or a circuit different from the one to which the receiver is connected – Consult the dealer or an experienced radio/TV technician for help. Changes or modifications can void the user's authority to operate the equipment. The products are in compliance with the following regulatory requirements: •...
- Page 76 Business Law (電 気 通 信 事 業 法 ). This device should not be modified (otherwise the granted designation number will become invalid). Type designations Hearing aid type designations for models included in this user guide are: BER13, FCC ID:X26BER13, IC: 6941C-BER13 and VER12, FCC ID: X26VER12, IC: 6941C-VER12.
- Page 77 Mini Receiver In-the-Ear (RIE) hearing aids of type VER12 with FCC ID X26VER12, IC number 6941C- VER12 and size 312 battery are available in the following variants: KE461-DRW, KE361-DRW, KE261-DRW Nominal RF output power transmitted is +1 dBm. Regulatory information...
- Page 78 Symbols WARNING: Points out a situation that could lead to serious injuries. CAUTION: Indicates a situation that could lead to minor and moderate injuries. Advice and tips on how to handle your hearing aid better. Equipment includes an RF transmitter. Follow instructions for use.
- Page 79 Complies with IMDA Standards Complies with IMDA standards. DA105282 Regulatory information...
-
Page 80: Technical Specifications
Technical specifications RIE - LP receiver Models: KE462-DRW, KE362-DRW, KE262-DRW KE461-DRW, KE361-DRW, KE261-DRW Maximum Output (OSPL90) Reference test gain (60 dB SPL input) Full-on gain (50 dB SPL input) Max. Maximum output (90 dB SPL input) Max. dB SPL Total harmonic distortion 500 Hz 800 Hz Frequency (Hz) - Page 81 RIE - MP receiver Models: KE462-DRW, KE362-DRW, KE262-DRWKE461-DRW, KE361-DRW, KE261-DRW Reference test gain (60 dB SPL input) Full-on gain (50 dB SPL input) Max. Maximum output (90 dB SPL input) Max. dB SPL Total harmonic distortion 500 Hz 800 Hz 1600 Hz Telecoil sensitivity (1 mA/m input)* Max.
- Page 82 RIE - HP receiver Models: KE462-DRW, KE362-DRW, KE262-DRWKE461-DRW, KE361-DRW, KE261-DRW Maximum Output (OSPL90) Reference test gain (60 dB SPL input) Full-on gain (50 dB SPL input) Max. Maximum output (90 dB SPL input) Max. dB SPL Total harmonic distortion 500 Hz 800 Hz Frequency (Hz) 1600 Hz...
- Page 83 RIE - UP receiver Models: KE462-DRW, KE362-DRW, KE262-DRWKE461-DRW, KE361-DRW, KE261-DRW Reference test gain (60 dB SPL input) Full-on gain (50 dB SPL input) Max. Maximum output (90 dB SPL input) Max. dB SPL Total harmonic distortion 500 Hz 800 Hz 1600 Hz Telecoil sensitivity (1 mA/m input)* Max.
-
Page 84: Additional Information
Additional information Acknowledgments Portions of this software are written by Kenneth MacKay (micro-ecc) and licensed under the following terms and conditions: Copyright ® 2014, Kenneth MacKay. All rights reserved. Redistribution and use in source and binary forms, with or without modification, are permitted provided that the following conditions are met: •... - Page 85 © 2020 GN Hearing A/S. All rights reserved. ReSound is a trademark of GN Hearing A/S. Apple, the Apple logo, iPhone, iPad, iPod touch are trademarks of Apple Inc., registered in the U.S. and other countries. App Store is a service mark of Apple Inc., registered in the US and other countries.
- Page 86 Notes Additional information...
- Page 87 Notes Additional information...
- Page 88 United Kingdom GN Hearing Australia Pty Ltd New Zealand Lautrupbjerg 7 Gate C, 19-25 Khartoum Rd GN Hearing UK Ltd. GN Hearing New Zealand Lim ited DK-2750 Ballerup M acquarie Technology Park Kirtlington Business Centre Ground Floor, North Entrance Denm ark...
Need help?
Do you have a question about the ReSound Key and is the answer not in the manual?
Questions and answers
Как сделать беспрерывный блютуз в слуховых аппаратах?
The document does not provide specific steps to enable continuous Bluetooth connection in GN Hearing ReSound Key hearing aids. However, it mentions that ReSound wireless accessories, such as the ReSound Phone Clip+ and others, allow streaming audio and phone calls directly to the hearing aids. To use Bluetooth features, you should use compatible ReSound wireless accessories and refer to their user guides. For setup and enabling Bluetooth functionality, consult your hearing care professional.
This answer is automatically generated