Table of Contents
Advertisement
th
One Blue Hill Plaza, 16
Floor, PO Box 1546
Pearl River, NY 10965
1-800-PC-AMERICA, 1-800-722-6374
(Voice) 845-920-0800 (Fax) 845-920-0880
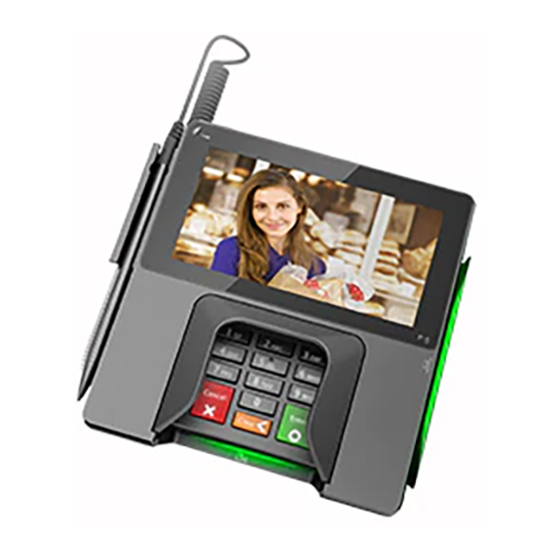
PAX PX5 Pinpad
This document provides step-by-step instructions on installing, configuring settings, and processing transactions in
CRE/RPE using the PAX PX5 Pinpad. This device is configured for an Ethernet interface.
Advertisement
Table of Contents

Summary of Contents for PAX PX5
- Page 1 Pearl River, NY 10965 1-800-PC-AMERICA, 1-800-722-6374 (Voice) 845-920-0800 (Fax) 845-920-0880 PAX PX5 Pinpad This document provides step-by-step instructions on installing, configuring settings, and processing transactions in CRE/RPE using the PAX PX5 Pinpad. This device is configured for an Ethernet interface.
-
Page 2: Table Of Contents
CONFIGURING CRE FOR THE PAX PX5 TO PROMPT FOR DEBIT CONFIGURING THE PAX PX5 IN CRE TO ACCEPT EBT PAYMENTS – TCP/IP INTERFACE CONFIGURING THE PAX PX5 IN CRE TO ACCEPT GIFT CARD PAYMENTS – TCP/IP INTERFACE CONFIGURING THE PAX PX5 TO ACCEPT TIPS... -
Page 3: Revision History
Revision History Document Version Date Author Description of Changes October 16, 2018 Release... -
Page 4: Installing Pax Px5 Stylus
Installing PAX PX5 Stylus Important: Every register processing card transactions MUST have its own PAX unit. Installing the stylus 1. Location of stylus Port is on the bottom left side of the pinpad. 2. Locate stylus and connect it to the pinpad. -
Page 5: Remove Smart Card Reader Plug
How to Restart the PAX PX5 Note: This will be used for making changes and to load updates. On the bottom left of the PAX Device. Next to the stylus port. There is a button labeled reset. This is used to restart the device. So, when asked to power cycle the device. -
Page 6: Connecting Ethernet And Power
Connecting Ethernet and Power Please connect the Ethernet cable to the pinpad before connecting the power. 1. On the back of the Pinpad all interfaces are color coded. Note: Only LAN1 is supported at this time 2. Please connect the Ethernet Cable to the LAN1 Port (RED). -
Page 7: Configuring The Pax Communication Port For Tcp/Ip Only
Configuring the PAX communication port for TCP/IP only Communication between the PAX, PC, and payment processing done over TCP/IP. The pinpad must be configured for TCP/IP. Steps below will show you how to check and/or configured the pinpad. 1. To access the confirmation Menu, Press both the Green and number 1 buttons at the same time. - Page 8 6. Tap on ECR Comm. Type or press 3 on the keypad. 7. Tap on Ethernet or Press 3 on the keypad. 8. Confirm the Communication port is 10009 Press green button on the keypad. Make a note of this. Will need it later, to enter this information into CRE.
- Page 9 11. Tap on IP Address or press 2 on the keypad 12. Make Note of the IP Address that is displayed. Will need it later, to enter this information into CRE. Then press the OK Button (Green) on the key pad, to return back to the LAN Parameters Menu.
- Page 10 192.25.2.123, this will have to be keyed in as 192.025.002.123. Take note of the new IP address then press the green key with the O to save your changes. Press the red button with the X repeatedly until you are back at the Pax splash screen (Insert Anytime).
-
Page 11: Configuring The Pax Px5 Not To Prompt For Debit
Configuring the PAX PX5 not to prompt for Debit Configuring the device not to prompt for debit, allows CRE to use the cashback feature. 1. To access the confirmation Menu, Press both the Green and number 1 buttons at the same time. - Page 12 6. Tap on Debit Prompt or press 3 on the keypad. 7. Tap on OFF or press 1 on the keypad. 8. Press the Red button on the keypad until you back at the splash screen. (Insert Anytime). Note: This allows CRE to use the cash back feature for Debit as well as EBT cash.
-
Page 13: Configuring The Pax Px5 To Prompt For Debit
If you want the customer to choose credit or debit on the pinpad follow the steps below Note: If the PAX is configured to prompt for Debit, then cashback with a debit sale cannot be performed regardless if cashback is enabled thru the pinpad. - Page 14 6. Tap on Debit Prompt or press 3 on the keypad. 7. Tap ON or press 2 on the keypad. 8. Press the Red button on the keypad until you back at the splash screen. (Insert Anytime).
-
Page 15: Configured Pax Px5 To Prompt For Cashback
Configured PAX PX5 to prompt for Cashback To have the option for cashback for Debit and EBT Cash, you must have it configured on the PAX Unit. Follow instructions below. Note: The PAX must have debit prompt set to off in order for cashback to prompt. - Page 16 5. Enter Password. 6. Tap on Cashback Prompt or press 1 on the keypad. 7. Tap ON or press 2 on the keypad.
-
Page 17: Enabling Pax Px5 For Contactless Payments
Enabling PAX PX5 for Contactless Payments The PAX PX5 supports Contactless Payment via contactless enabled cards, Apple Pay, and Google Wallet. For more information on setting this up, contact your payment processor or visit the following links: https://www.apple.com/apple-pay/, https://www.google.com/wallet/. 1. To access the confirmation Menu, Press both the Green and number 1 buttons at the same time. - Page 18 5. Tap on Ctless Card Reader or press 1 on the keypad. 6. Tap on Internal or press 2 on the keypad.
-
Page 19: Configuring Pax Px5 In Cre To Accept Credit/Debit Payments - Tcp/Ip Interface
Configuring PAX PX5 in CRE to accept Credit/Debit payments – TCP/IP Interface 1. From the Options/Manager screen, select Setup > Setup Screen. 2. Under the Payment Processing > Processing tab select Credit/Debit. From the dropdown select Pax (TCP/IP Interface). Enter the Static IP Address you assigned to the PAX;... -
Page 20: Configuring Cre For The Pax Px5 To Prompt For Debit
Configuring CRE for the PAX PX5 to prompt for debit 1. From the Options/Manager screen, select Setup > Setup Screen. 2. Under the Payment Processing > Processing tab select Credit/Debit. From the dropdown select Pax (TCP/IP Interface). Enter the Static IP Address you assigned to the PAX;... -
Page 21: Configuring The Pax Px5 In Cre To Accept Ebt Payments - Tcp/Ip Interface
Configuring the PAX PX5 in CRE to accept EBT payments – TCP/IP Interface 1. From the Options/Manager screen, select Setup > Setup Screen. 2. Under the Payment Processing > Processing tab select EBT. From the dropdown select Pax (TCP/IP Interface). Enter the Static IP Address you assigned to the PAX;... -
Page 22: Configuring The Pax Px5 In Cre To Accept Gift Card Payments - Tcp/Ip Interface
Configuring the PAX PX5 in CRE to accept Gift Card payments – TCP/IP Interface 1. From the Options/Manager screen, select Setup > Setup Screen. 2. Under the Payment Processing > Processing tab select Gift Card. From the dropdown select Pax (TCP/IP Interface). -
Page 23: Configuring The Pax Px5 To Accept Tips
Configuring the PAX PX5 to accept tips Note: You cannot process Debit Card sales when tips are enabled. 1. From the Options/Manager screen, select Setup > Setup Screen. 2. Under the Payment Processing > Processing tab select Credit/Debit. Make sure the box for Process Debit Cards through this Credit Card Processor is unchecked. -
Page 24: Performing A Credit Card Sale With Tips Enabled (Fine Dining)
Performing a Credit Card sale with Tips enabled (Fine Dining) Note: When tips are enabled the PAX PX5 device won’t prompt for signature. 1. Open a table. 2. Ring up an item, then select PAY. 3. At the Amount Tendered screen,... - Page 25 4. The Credit Card Information screen will be grayed out while the transaction is processing though the PAX. 5. The subtotal will appear along with instructions to Insert/Tap/Swipe Your Card/Device. 6. Insert the EMV Chip card into the slot on the bottom of the PX5.
- Page 26 7. Remove the card when prompted. If the EMV card is left in the PX5, it will beep and a reminder will appear to Remove Your Card. 8. Once the card is remove Transaction Approved message is displayed...
- Page 27 9. Here is what the restaurant copy receipt should look like. 10. Here is what the customer copy receipt should look like.
- Page 28 11. Click on the open table. 12. Enter tip amount, then click on OK. 13. Click on Yes to confirm the tip amount.
- Page 29 14. The PAX should display a processing screen while the tip is being added. 15. A confirmation of the tip applied should appear in RPE. Click OK to clear the screen. 16. The table should now be open.
- Page 30 1. Alternatively, you can also apply the tip by going directly to Administrative > Credit Card Settlement. Note: This is the same procedure for adding tips in Quick Service and Retail. 2. Click on Add Tip. 3. Enter the invoice number and click...
- Page 31 4. Enter tip amount and click OK. 5. Click on Yes to confirm the tip amount. 6. The PAX should display a processing screen while the tip is being added.
- Page 32 7. A confirmation of the tip applied should appear in RPE. Click OK to clear the screen.
-
Page 33: Performing A Credit Card Sale With Emv In Cre
Performing a Credit Card sale with EMV in CRE Note: This is with the Debit Prompt in the Pax PX5 set to off. 1. Ring up a sale in CRE then hit the PAY button. From the amount tendered screen, select Credit/Debit. - Page 34 3. Insert the EMV Chip card into the slot on the bottom of the PX5. 4. Wait while the transaction is processed. Do Not Remove the card at this time. 5. You will be prompted for Signature: sign and hit accept Pin number: enter using keypad.
- Page 35 6. Remove the card when prompted. If the EMV card is left in the PX5, it will beep and a reminder will appear to Remove Your Card. 7. Once the card is remove Transaction Approved message is displayed 8. Receipt print signature on both receipts.
-
Page 36: Performing A Credit Card Sale With A Contactless Enabled Card
Performing a Credit Card sale with a Contactless enabled card 1. Ring up a sale in CRE then hit the PAY button. From the amount tendered screen, select Credit/Debit. 2. Select Credit. 3. Tap the Contactless credit card on the bottom left side of the Screen. You will see the icon below... - Page 37 4. Wait while the transaction processes. 5. Sign on the screen using a finger or the stylus then hit the ACCEPT button 6. The transaction is now completed...
- Page 38 7. Receipt shows Card Entry Method as Contactless EMV as well as Signature...
-
Page 39: Performing A Debit Card Sale In Cre
Performing a Debit Card sale in CRE Note: This is with the Debit Prompt in the Pax PX5 set to off. Cashback prompt is set to on. 1. Ring up a sale in CRE then hit the PAY button. From the amount tendered screen, select Credit/Debit. - Page 40 4. Verify the amount with cashback then swipe Debit Card on the right side of the PX5 with the stripe facing down and towards the device. 5. Enter the Pin number for the debit card, then press green button. 6. Once the approval message appears...
-
Page 41: Performing An Ebt Food Stamp Sale
Performing an EBT Food Stamp Sale 1. Ring up a sale with Food stamp Items and proceed to the Amount Tendered (Pay) screen. Select EBT. **NOTE** If you’ve enabled Tax Exempt on Foodstamp Purchases, you can see the amount the customer will be charged after the tax has been removed from Foodstamp items 2. - Page 42 4. Enter the PIN number of the card when the pinpad prompts for the 5. Wait for the sale to finish processing 6. The Pinpad will display Transaction Approved when sale is completed and return to the splash screen. 7. A receipt will print that displays the type of sale.
-
Page 43: Performing A Ebt Cash Sale With Cashback
Performing a EBT Cash Sale with cashback Note: The PAX PX5 must have cashback prompt set to on to order for cashback to work. 1. Ring up a sale in CRE then hit the PAY button. From the amount tendered screen, select EBT. - Page 44 5. Enter the EBT Card PIN then press the green button with the O on it. 6. Wait while the transaction processes 7. You should receive a “Transaction Approved!” message once completed 8. Here is what the receipt for the above transaction looks like.
-
Page 45: Performing A Debit Sale With Pax Px5 Configured To Prompt For Debit
Performing a Debit Sale with PAX PX5 configured to prompt for Debit Note: With this configured you won’t be able to do debit cashback or EBT cash 1. Ring up a sale in CRE then hit the PAY button. From the amount tendered screen, select Credit Card. - Page 46 5. Wait while the transaction processes 6. Once the approval message appears the transaction is completed.
-
Page 47: Performing A Manual Card Entry Using The Keypad Of The Pax Px5 Device
Performing a manual Card entry using the keypad of the PAX PX5 Device 1. Ring up a sale in CRE then hit the PAY button. From the amount tendered screen, select Credit/Debit. 2. Select Credit. 3. On the PAX, wait for the screen... - Page 48 4. Using the PAX keypad, enter the complete credit card number. Note: EBT Foodstamp can also performed a manual entry as well. 5. Enter the credit card expiry date using the keypad, as a 2 digit month and last 2 digits of the year.
- Page 49 7. Enter the Number of your Address is optional (enter “0” to bypass this field). Example: 12 Elm Street. Enter 12 8. Enter the billing Zip Code for the card. 9. Sign on the screen using the device’s stylus or your finger then hit ACCEPT.
-
Page 50: Performing A Settlement/Batch Close And Setting Up Auto Settlement
If performing Manual Settlements, settling must be done on each station that has a PAX device. Alternatively, if setting up Auto Settlement, this must be enabled on each station that has a PAX device. NOTE: using Auto Settlement is NOT recommended if you are set up to take tips. - Page 51 Manager/Options then selecting Setup>Setup Screen. Under the Payment Processing>Other Options tab, enable Perform Auto Settlement. Enter the time that the settlement will occur each day. **Auto Settlement MUST be enabled on each station that has a PAX device enabled.
Need help?
Do you have a question about the PX5 and is the answer not in the manual?
Questions and answers
My manager with the password to access the px5 machine quit, and now we are unable to allow tap on the card reader. Is there some way to recover a password for the card reader in order to access the settings?