Advertisement
Table of Contents
Assembly Instructions
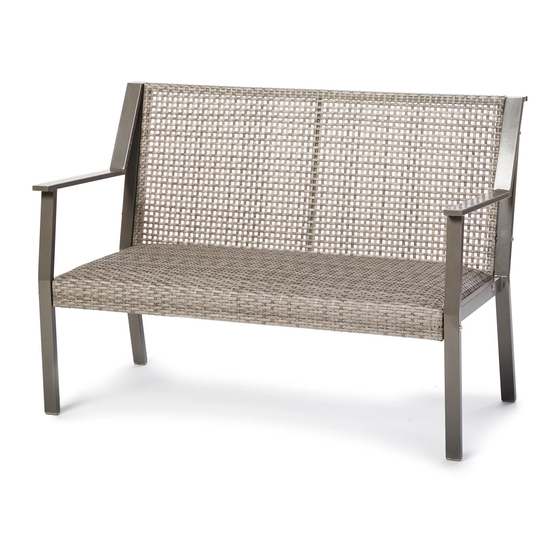
AW WEATHER WICKER GARDEN BENCH
A
C
E
When assembling, do not let children play around the working area.
Please check the carton and packing material before disposing to make sure that you have all of the correct
parts to assemble this product.
BENCH IS RATED TO SUPPORT 350 LBS. FAILURE TO FOLLOW WEIGHT LIMIT GUIDELINE MAY RESULT IN
DAMAGE OR INJURY.
Use the correct screws as indicated. All screws should be hand tight untill the complete pieces is assembled ( This
will make the assembly process much easier ). Once the piece is fully assembled, then go back and tight all screws
with provided tool.
Maintenance
1.Inspect and tighten all bolts and fasteners on regular basis to ensure the proper performance and safety of your product.
2.Do not drag it when moving the product.
3.Do not let any sharp objects touch or rub the surface of the product.
4.Save these instructions for future reference.
5.If any parts missing, DO NOT return this product to the store. Questions on assembly or missing parts contact our customer
service at.
service@bfbvi.com
SKU#810500159(MEYCHA05)
We recommend a minimum of 2 people to assemble this bench.
Seat x1
Left Handrail x1
Bolt x6
TOOLS INCLUDED
TOOL
PROVIDED
B
Backrest x1
D
Right Handrail x1
F
G
Plastic cap X9
Put all the caps on to cover the
screws and bolts when finishing assembly.
Screw x3
Advertisement
Table of Contents

Subscribe to Our Youtube Channel
Related Manuals for Big Lots MEYCHA05


Summary of Contents for Big Lots MEYCHA05
- Page 1 Assembly Instructions AW WEATHER WICKER GARDEN BENCH SKU#810500159(MEYCHA05) We recommend a minimum of 2 people to assemble this bench. Seat x1 Backrest x1 Left Handrail x1 Right Handrail x1 Bolt x6 Screw x3 Plastic cap X9 TOOLS INCLUDED TOOL PROVIDED Put all the caps on to cover the screws and bolts when finishing assembly.
- Page 2 STEP 1 STEP 2 Assemble the left handrail (CX1) to Follow step1 to assemble the right the seat (AX1) by using bolt (EX1) handrail (DX1) by using bolt (EX1) and screw (FX1) as shown. and screw (FX1) as shown. STEP 3 Assemble the backrest (BX1) to the finished body after step2 by using bolts (EX4) and screw (FX1) as shown.
Need help?
Do you have a question about the MEYCHA05 and is the answer not in the manual?
Questions and answers