Table of Contents
Advertisement
Quick Links
®
SmileCAM
SU-320H
Manual
Please refer to FAQ in the last part of the manual before requesting service.
In order to get the best results, please read the manual carefully before use.
As this product complies with the guidelines of CE, FCC Rules and EMC Registration, it can
be used in all residential and other areas.
All right are reserved. Copying in whole or in part this manual is prohibited by law.
The information contained herein is subject to change in order to improve reliability, design,
or function without prior notice.
1
Advertisement
Table of Contents

Summary of Contents for USB SmileCAM SU-320H
- Page 1 ® SmileCAM SU-320H Manual Please refer to FAQ in the last part of the manual before requesting service. In order to get the best results, please read the manual carefully before use. As this product complies with the guidelines of CE, FCC Rules and EMC Registration, it can be used in all residential and other areas.
-
Page 2: Cautions
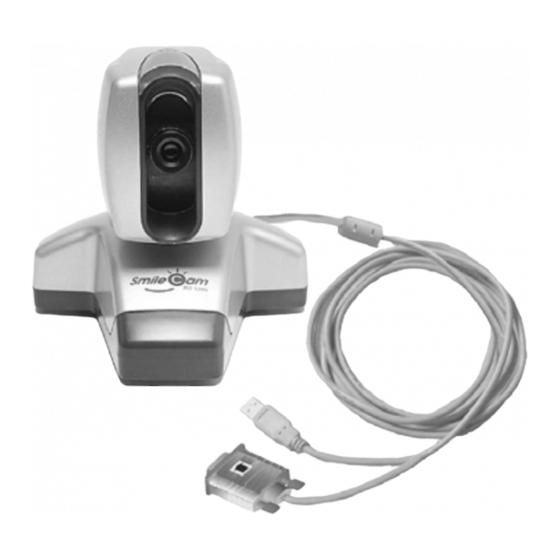
Do not drop the camera, or it will cause operational problems. Please make sure the lens cap is on when the camera is not in use. Please, install ezWebCam21 software and USB Driver first and then connect ※ USB PORT and SERIAL PORT of the camera to your PC. -
Page 3: Table Of Contents
TABLE OF CONTENTS Cautions Package Contents Specifications System Requirements Software (ezWebCam21) Install Driver Install (USB Driver) Windows 98/SE Windows ME Windows 2000 Windows XP Windows 2003 Function ezWebCam21 (Server) Image Viewer ezWebCam21 (Client) -
Page 4: Specifications
□ Windows compatible sound card, speaker and microphone □ CD-ROM Driver □ Graphic card with 8MB memory or more □ PC with available USB Port and Serial Port □ 800 x 600, 16bit Color display (1024 x 768, 24bit recommended) -
Page 5: Software (Ezwebcam21) Install
Please insert CD into CD-ROM before connecting SmileCAM / Applications (USB) to your PC. Install the ezWebCam21 firstly and then USB Driver After finishing Installation of USB Driver, please connect SmileCAM to your PC. To install the ezWebCam21 software please use the following steps: 1) Insert the Installation CD into CD-Rom Drive. - Page 6 4) Appoint a folder for setting up the program. By clicking on the “Next” button, the program will automatically set up in the appointed folder. 5) If the installation is set up like the screen below, click “Finish” button.
- Page 7 6) Simple registration allows you to obtain web broadcasting service, without additional setup. Type in your user ID, password, country, channel, e-mail address and Serial key. You are connected to http://www.smilecam.com automatically and then the information will be registered. * Once you registered your ID on the screen below, the registered ID cannot be changed, so please enter ID cautiously and memorize it.
-
Page 8: Driver Install (Usb Driver)
Driver Install (Windows 98/SE, ME, 2000, XP, 2003) Windows 98 / SE 1) Click “USB Driver” 2) Click “Next” to continue. - Page 9 If the computer system come back to normal condition after rebooting, the SmileCAM CD does not run any more. 4) After rebooting your computer, connect USB cable and RS232 Serial cable to each USB Port and Serial Port on your computer.
- Page 10 5) New Hardware found. 6) Hardware wizard detects automatically SmileCAM as newly added hardware. Click “Next”. 7) Select “Search for the best driver for your device (recommended)” and click “Next”...
- Page 11 8) Select “specify a location” and click “Next”. 9) Click “Next” to continue. 10) Insert Windows 98 CD.
- Page 12 11) After designate of path clicking “Browse..”, please click “OK”. 12) After designate of path, please click “OK”. In case of your OS is “Window 98”, select “kstvtune.ax” file which is in “\Win98\System” of the install CD. In case of your OS is “Window 98 SE”, please select “ks.sys” file which is in “\Win98\System32\Drivers”...
-
Page 13: Windows Me
Windows ME 1) Click “USB Driver” 2) Click “Next” to continue. 3) Click “Finish” and PC will automatically restarted.(Rebooting is recommended) - Page 14 4) After rebooting your computer, connect USB cable and RS232 Serial cable to each USB Port and Serial Port on your computer. USB PORT SERIAL PORT 5) New hardware found 6) Installing… ※ After installing Driver, above window will disappear.
-
Page 15: Windows 2000
Windows 2000 1) Click “USB Driver” 2) Click “Next” to continue. 3) Digital signature dialogue box for “Unknown software package” will appear. Click “Yes” to continue. - Page 16 4) If the installation is set up like the screen below, click “Finish” button. 5) After rebooting your computer, connect USB cable and RS232 Serial cable to each USB Port and Serial Port on your computer. USB PORT SERIAL PORT...
- Page 17 7) Digital signature dialogue box for “ USB PC Camera 301P” will appear. Click “Yes” to continue. 8) Installing… 9) Click “Finish” and PC will automatically restarted.(Rebooting is recommended)
-
Page 18: Windows Xp
Windows XP 1) Click “USB Driver”. 2) Click “Next” to continue. 3) Windows will then display a warning screen that the driver has not passed Windows Logo Testing. SmileCAM has tested the camera thoroughly on Windows XP and has found no... - Page 19 4) Click the “Finish” button. 5) After rebooting your computer, connect USB cable and RS232 Serial cable to each USB Port and Serial Port on your computer. USB PORT SERIAL PORT 6) New hardware found (PC Camera) (USB PC Camera 301P)
- Page 20 8) Click “Next” to continue. 9) Click the “Continue Anyway” button. 10) The installation will complete and when prompted click the “Finish” button.
-
Page 21: Windows 2003
Windows 2003 1) Click “USB Driver” 2) Click “Next” to continue. 3) Click the “Continue Anyway” button. - Page 22 4) Click the “Finish” button. 5) Click “Exit”.
- Page 23 6) After rebooting your computer, connect USB cable and RS232 Serial cable to each USB Port and Serial Port on your computer. USB PORT SERIAL PORT 7) New hardware found. 8) Getting USB device information.
- Page 24 9) Click “Next” to continue. 10) Click the “Continue Anyway” button. 11) The installation will complete and when prompted click the “Finish” button.
- Page 25 12) Click “Yes” to reboot your PC. 13) Click “ Exit” ※ After installation, you can find files in an installed folder. Execute ezWHost.exe among the installed files or click the ezWeCam21 icon created on the Desktop. Or go to Start Program SmileCam ezWebCam21...
-
Page 26: Ezwebcam21 (Server)
Software Function ezWebCam21 (Server) Button Server Client Control video on / off Show video on / off Control voice on/off Show voice on/off Control on/off Show control on/off Start tracking / Stop tracking Start tracking / Stop tracking Start saving / Stop Saving Save (Time Limit/10 Minute) ezWebCam21 Server setup(Setup, Save, About) Replay saved image consecutively... - Page 27 Feature Instruction Help for ezWebCam21 Start menu of Task bar (Minimization icon) Close button www.smilecam.com/ open hompage LIVE SmileCAM ON-AIR press SmileCam information Input the user name Change the user name 1) Finished version check 2) Uploading HTML file 3) Connecting to www.smilecam.com server...
- Page 28 Move the cam clicking on the screen ezWebCam21 Server Setup (ezWebCam21, Save, About)
- Page 29 Delinquent Profiles : View List Clear users of the list Input title Refer to the explanation Select USB PC Camera 301P Source Property (Refer to below) Camera Controls Brightness, Contrast.. Reset(default) Save...
- Page 30 When the IP is changed during webcam service, Update dynamic IP users must transfer an IP clicking on Update button Registered server and ID originally Registered server and ID originally IP address transfer setup Registered ID IP address of the computer to which connected Registered Directory with SmileCAM is transferred to Webserver in which installed Client.
-
Page 31: Imageviewer
ImageViewer Help Minimization Button Full screen Finish button Rewind Play Pause Stop Forward Open / File Path Zoom In Zoom Out Reset screen size Setup / Play velocity Fast Search using Track-Bar Saving location ImageViewer : ImageViewer shows you images which ezWebCam21 program had saved. 1) Making the recorded images played continuously 2) Making the recorded images played in order to the time. -
Page 32: Ezwebcam21 (Client)
ezWebCam21 (Client ) How to use ezWebCam21 Client 1 ) Execute ezWebCam21 Server program 2) If you type URL, ID and then Enter, you are connected as a ezWebCam21 Client. Example) www.smilecam.com/smilecam... - Page 33 Caution Cancellation of Screen saver or Power schemes mode When the ezWebCam21 is in use for an extended time, sometimes the video image cannot be displayed due to the function of the Screen saver or Power scheme of your computer. When using for an extended time, control your computer as follows ①...
-
Page 34: Faq
SmileCAM your after installing ezWebCam21 and USB Driver (ImPortant!). If you have connected SmileCAM to your PC first, please delete driver following the instruction of “Driver deleting method”. After deleting previously installed driver, please install again ezWebCam21 software and Driver, and then connect SmileCAM to your PC. - Page 35 When I open the my CHECK: Perform the following steps to below webcam, it’s a say Check the firewall Disconnected with server Windows XP user has to cancel the Internet Connection Firewall function in advanced tap of the Local Area Connection properties Cause This problem is due Position:...
Need help?
Do you have a question about the SmileCAM SU-320H and is the answer not in the manual?
Questions and answers