Table of Contents
Advertisement
Available languages
Available languages
Advertisement
Chapters
Table of Contents

Subscribe to Our Youtube Channel
Related Manuals for SPORTSTECH LCX800


Summary of Contents for SPORTSTECH LCX800
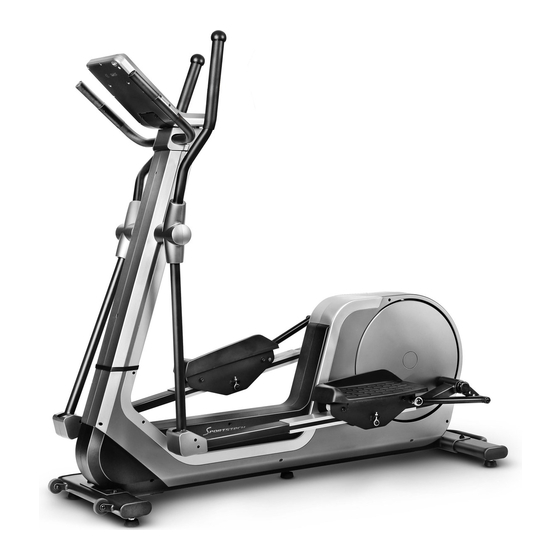
- Page 1 LCX800 Crosstrainer...
- Page 3 Sehr geehrter Kunde wir freuen uns, dass Sie sich für ein Gerät aus der SPORTSTECH Produktpalette entschieden haben. SPORTSTECH Sportgeräte bieten Ihnen hohe Qualität und neue Technologie. Um die Leistungsfähigkeit des Gerätes voll nutzen zu können und viele Jahre Freude an Ihrem Gerät zu haben, lesen Sie bitte vor der Inbetriebnahme und dem Beginn des Trainings dieses Benutzerhandbuch sorgfältig durch und verwenden Sie das Gerät den Anweisungen entsprechend.
- Page 4 Aufbau, Benutzung, Abbau. 1. QR-Code scannen 2. Videos anschauen 3. Schnell und sicher starten Link zu den Videos: https://service.innovamaxx.de/lcx800_video Uns gibt es auch auf Social Media! Hol dir die neuesten Produktinfos, Trainingsinhalte uvm. auf unserer: Instagram-Seite Facebook-Seite https://www.instagram.com/sportstech.de https://www.facebook.com/sportstech.de...
-
Page 5: Table Of Contents
INHALT WICHTIGE SICHERHEITSHINWEISE ..............6 DIES KÖNNTE SIE AUCH INTERESSIEREN .............8 EXPLOSIONSZEICHNUNG/ERSATZTEILLISTE ............9 MONTAGE ......................10 BEDIENUNGSANLEITUNG FÜR DIE ANZEIGE ............14 BEDIENUNGSANLEITUNG .................33 DEHNÜBUNGEN ....................35 ANWENDUNGSSOFTWARE (APP)..............37 ENTSORGUNG ....................38 KONFORMITÄT ....................38... -
Page 6: Wichtige Sicherheitshinweise
WICHTIGE SICHERHEITSHINWEISE Diese allgemeinen Sicherheitsinformationen müssen unbedingt für die Benutzung dieses Produktes beachtet werden. Lesen Sie alle Hinweise, bevor Sie das Produkt in Benutzung nehmen. ACHTUNG: Konsultieren Sie einen Arzt, bevor Sie trainieren. Dieser Hinweis ist unbedingt für ältere oder gesundheitlich eingeschränkte Personen zu beachten. Lesen Sie alle Sicherheits- hinweise dieser Anleitung sorgfältig durch, bevor Sie das Gerät benutzen. - Page 7 • Wenn Sie ein Problem vermuten, schalten Sie das Gerät so schnell wie möglich aus und entfernen Sie das Netzkabel aus der Steckdose. • Wenn das Netzkabel beschädigt ist, muss es durch autorisierte und qualifizierte Personen ersetzt werden. Sicherheitshinweise Netzteil 1.
-
Page 8: Dies Könnte Sie Auch Interessieren
DIES KÖNNTE SIE AUCH INTERESSIEREN DER IDEALE SCHUTZ. FÜR IHR HOMETRAINING. Damit Ihr Fußboden zu Hause von Ihren Fitnessgeräten nicht beschädigt wird, gibt es von Sportstech eine Bodenschutzmatte. Natürlich ist diese in verschiedenen Größen erhältlich und kann auch für Yoga oder andere Übungen genutzt werden. Sie schützt Ihren Boden vor Abdrücken, Schmutz oder Kratzern. -
Page 9: Explosionszeichnung/Ersatzteilliste
EXPLOSIONSZEICHNUNG/ERSATZTEILLISTE Unter folgendem Link Unter folgendem Link finden Sie die Explosionszeichnung finden Sie die Explosionszeichnung und die Ersatzteilliste: und die Ersatzteilliste: https://service.innovamaxx.de/lcx800_spareparts https://service.innovamaxx.de/lcx800_spareparts... -
Page 10: Montage
MONTAGE ALLE BAUTEILE UND VORMONTIERTEN TEILE FEST ANZIEHEN! Schritt 1 1. Den vorderen Stabilisator (11) mit Innensechskant-Flachkopfschraube (15), Federscheibe (22) und Unterlegscheibe (26) am Hauptrahmen (1) befestigen. 2. Den hinteren Stabilisator (12) mit Innensechskant-Flachkopfschraube (15), Federscheibe(22) und Unterlegscheibe (26) am Hauptrahmen (1) befestigen. 3. - Page 11 Schritt 3 1. Die Pendelstange (4L/R) mit Innensechskant-Flachkopfschraube (18), Federscheibe (23) und Unterlegscheibe (27) an der Griffstangensäule (3) anbringen, bitte nicht zu fest anziehen. 2. Die Pendelstange (4L/R) und die Pedalstange (5L/R) mit Sechskantschraube (13), Unterlegscheibe (28) und Nylonmutter (32) befestigen. 3.
- Page 12 Schritt 5 Das Pedal (59L/R) mit der Innensechskantschraube (19) am Pedalrahmen (8) befestigen. Schritt 6 1. Bitte das Kardangelenk (31) mit Innensechskant-Flachkopfschraube (14) und Manschette (71) zuerst am Pedalrahmen (8R) anbringen und dann mit Innensechskantflachkopf (48), Wellscheibe (75), Unterlegscheibe (25) und Mutter (74) am einstellbaren Kurbelarm (9) befestigen.
- Page 13 Schritt 7 1. Die Hauptleitung (62) und das Pulskabel (65) an die Anzeige (63) anschließen. Dann das Display (63) mit Kreuzschlitz- Flachkopfschraube (63) befestigen. 2. Die Griffstangensäulen-Abdeckung (41a/b) mit Kreuzschlitz-Flachkopfblechschraube (60) an der Griffstangensäule (3) befestigen. 3. Befestigen Sie die Handlaufabdeckung (51a/b) an der Griffstangensäule (3) mittels Kreuzschlitz- Flachkopfblechschraube (60).
-
Page 14: Bedienungsanleitung Für Die Anzeige
BEDIENUNGSANLEITUNG FÜR DIE ANZEIGE 1. Einführung in die verschiedenen Schaltflächen Starttaste Stop-Taste Home-Taste Zurück-Taste Widerstand erhöhen... - Page 15 Widerstand reduzieren Anhalte-Taste Aufwärts-Taste Abwärts-Taste Taste für Links Taste für Rechts Eingabe-Taste Lautstärke erhöhen Lautstärke reduzieren Abspielen/anhalten Das Vorherige Das Nächste...
- Page 16 2. Hardware-Konfiguration Anzeige 7 Zoll 1024*600TFT Hauptprozessor ITE9854 Musik Musik: MP3 Video: Verfügbar für max. 1280x768 Auflösung; MP4, MKV-Dateien, die von H.264 dekodiert und komprimiert wurden FLASH 8M NOR + 8G EMMC 3. Bedienung und Funktion der Symbole 1) Homepage-Einführung Einführung über die Symbole 1 Speed (Geschwindigkeit): Zeigt die aktuelle Geschwindigkeit an, Einheit: km/h Umdrehungen pro Minute...
- Page 17 Anzeige über verbrannte Kalorien, Einheit: kcal Heart rate (Herzfrequenz): Zeigt die aktuelle Herzfrequenz an Konstante Leistung Widerstandsstufe, im Zustand des Modus konstanter Leistung werden Aufwands- Watt angezeigt Einführung über die Symbole 2 Um das Symbol auszuwählen, drücken Sie zur Bestätigung. Zeit Countdown-Modus.
- Page 18 III) Einführung in Multimedia-Symbole: Musik. Ausgewählt Video. Ausgewählt Setting (Einstellungen). Ausgewählt IV) Einleitung zu den Zustands-Symbolen Das USB-Symbol leuchtet nach dem Einlegen der U-Disk permanent auf. Oder es wird immer heller werden. Wenn Bluetooth erfolgreich verbunden wurde, wird das Symbol anbleiben.
- Page 19 Drücken Sie die Taste, um das Training zu beenden. Der Trainingsdatensatz wird nach dem Drücken der Taste sofort angezeigt. Countdown-Modus Wählen Sie das Zielzeit-Symbol, drücken Sie zur Bestätigung (nehmen Sie einfach den Zeit-Countdown-Modus als Beispiel): Drücken Sie die Taste zum Einstellen der Zielzeit.
- Page 20 Drücken Sie zur Bestätigung, dann wird ein neuer Dialog angezeigt. Drücken , um mit dem Training zu beginnen. Countdown-Modus: Wählen Sie einen bestimmten Countdown-Modus, legen Sie Bewegungsdaten fest und beginnen Sie mit dem Training. In den letzten 10 Sekunden wird das System 5 Mal nach jeweils 2 Sekunden Alarm geben. Zeit-Countdown Bereich: 0:01-10 Stunden, Standardeinstellung 0:30:00 Entfernungs-Countdown-...
- Page 21 Drücken Sie die Taste, um das Symbol auszuwählen, drücken Sie Bestätigung. Drücken Sie die Taste, um den Widerstandsmodus und den Leistungsmodus umzuwandeln. Drücken Sie die Taste zum Einstellen der Daten. Drücken Sie die Taste, um den Widerstand zu ändern. Drücken Sie zur Bestätigung.
- Page 22 Virtueller Kulissenmodus Drücken Sie die Taste , um in den virtuellen Kulissenmodus zu gelangen: Drücken Sie die Taste, um das Symbol auszuwählen, drücken Sie , um mit dem Training zu beginnen. Standardwiderstandsstufe ist 10, drücken Sie , um den Widerstand individuell einzustellen. Die Videowiedergabegeschwindigkeit wird Ihrer Trainingsgeschwindigkeit entsprechen.
- Page 23 Drücken Sie die Taste um das Symbol auszuwählen, drücken Sie Bestätigung. Drücken Sie die Taste, um den Widerstandsmodus und den Leistungsmodus umzuwandeln. Drücken Sie die Taste zum Einstellen der Daten. Drücken Sie die Taste, um mit dem Training zu beginnen.
- Page 24 Betriebslogik Drücken Sie die Taste, um zur vorherigen Seite zurückzukehren. Drücken Sie die Taste, um zur Startseite zu gelangen. Drücken Sie das "Racing"-Symbol auf der Startseite, um zur Übungsseite zu gelangen. Wenn Sie ein anderes Symbol drücken (z. B. virtuelle Kulissen, Benutzerprogramm usw.), wird gleich danach ein neuer Dialog angezeigt. Drücken Sie , um zu stoppen, danach können Sie andere Übungen beginnen.
- Page 25 Geschwindigkeit jedes Abschnitts von 12 voreingestellten Programmen Aerobe Regeneration Abschnitt 10 11 12 13 14 15 16 18 18 24 24 30 30 30 30 30 24 24 24 24 24 18 18 Geschwindigkeit Widerstand 10 10 18 10 10 18 10 10 18 10 10 18 10 10 10 18 Abschnitt 10 11 12 13 14 15 16 Nehmen Sie ab...
- Page 26 Training Drücken Sie die Taste, um in den Trainingsbereich zu gelangen (z. B. Fettverbrennung): Drücken Sie die Taste um das Symbol auszuwählen, drücken Sie Bestätigung. Drücken Sie die Taste, um den Widerstandsmodus und den Leistungsmodus umzuwandeln. Drücken Sie die Taste zum Einstellen der Daten. Drücken Sie die Taste, um mit dem Training zu beginnen.
- Page 27 Training: Wählen Sie zuerst ein bestimmtes Programm und beenden dann die Eingabe der Bewegungsdaten. Es gibt 16 Abschnitte für jedes Programm. Und in jedem Abschnitt gilt Zeit=Einstellzeit/16. Der Widerstand für jeden Abschnitt ist wie folgt: 12 voreingestellte Programmdaten Fettverbrennung Abschnitt 10 11 12 13 14 15 16 Widerstand 10 10 10 12 12 12 14 14 14 14 16 16 16 18 18 18 Geschwindigkeits-...
- Page 28 Drücken Sie , um Daten einzustellen, drücken Sie , um verschiedene Elemente auszuwählen. Aufwärmen 2 Minuten HRC-Prozess Abkühlen...
- Page 29 Wenn kein Herzfrequenzsignal erkannt wird, sehen Sie sich bitte die obenstehende Abbildung an. Drücken Sie , um in den Konstantleistungs-Modus zu wechseln: Statischer Konstantleistungs-Modus Drücken , um mit dem Training zu beginnen.
- Page 30 5. Einführung in Multimedia und Einstellungen Musik Drücken Sie , um ins Musikmenü zu gelangen: Drücken Sie , um Musik auszuwählen, drücken Sie zur Wiedergabe. Abspielen/Anhalten; Lautsärke +-; ; Vorheriges ; Nächstes Video Drücken Sie , um in das Video-Menü zu gelangen:...
- Page 31 a) Playlisten werden nach 5 Sekunden ohne Bedienung ausgeblendet. Drücken Sie , um zum Vollbild zu gelangen. Drücken Sie nochmal, um zur vorherigen Seite zurückzukehren. b) Nachdem die Playlists ausgeblendet sind, drücken Sie , um die Playlists wieder aufzurufen. c) Drücken Sie , um abzuspielen/anzuhalten, drücken Sie , um die Lautstärke einzustellen.
- Page 32 Drücken Sie , um in den Technik-Modus zu wechseln. Er ist für die Systemwartung konzipiert. Sie brauchen dafür einen Zugangscode. 6. Fehlercode Wenn E01 angezeigt ist, bedeutet dies einen Signalfehler. E01: Signalfehler Wenn E02 angezeigt wird, ist es höchstwahrscheinlich, dass etwas mit dem Widerstandsmotor nicht stimmt.
-
Page 33: Bedienungsanleitung
BEDIENUNGSANLEITUNG Zustandsrichtlinien • Die folgenden Richtlinien helfen Ihnen dabei, Ihr Trainingsprogramm zu planen. Denken Sie daran, dass die richtige Ernährung und ausreichende Ruhe für erfolgreiche Ergebnisse von wesentlicher Bedeutung sind. Wenn Sie ein Trainingsprogramm beginnen, sollten Sie zunächst mit Ihrem Arzt sprechen, wenn: •... - Page 34 • Erhöhen Sie das Tempo und den Widerstand nur leicht und trainieren Sie, solange Sie können. Es kann sein, dass Sie nur ein paar Minuten am Stück trainieren können. Dies wird sich aber ändern, wenn Sie regelmäßig trainieren. Beenden Sie jede Trainingseinheit mit einer 5-minütigen Abkühlphase, indem Sie den Widerstand auf ein niedrigeres Level einstellen.
-
Page 35: Dehnübungen
DEHNÜBUNGEN Vor jedem Training sollten Sie Ihre Muskeln mindestens 5-10 Minuten lang dehnen, um sie ausreichend aufzuwärmen. Wiederholen Sie die nachfolgenden Dehnungsübungen daher fünf Mal. Das Dehnen vor dem Training trägt zur Verbesserung der Flexibilität bei und verringert das Verletzungsrisiko. MIT DEM KOPF ROLLEN Drehen Sie den Kopf nach rechts für eine Sekunde, fühlen Sie die Streckung auf der linken Seite des Nackens, dann drehen Sie den Kopf zurück für eine Sekunde, recken Sie Ihr Kinn nach oben und lassen... - Page 36 TRAININGSZONEN-ÜBUNG Nach dem Aufwärmen erhöhen Sie bitte die Intensität entsprechend Ihrem gewünschten Trainingsprogramm. Achten Sie darauf, Ihre Intensität für maximale Leistung beizubehalten. Atmen Sie regelmäßig und tief während des Trainings - halten Sie keinesfalls den Atem an. ABKÜHLEN Beenden Sie jedes Training mit einem leichten Joggen oder gehen Sie mindestens 1 Minute lang. Zur Vervollständigung machen Sie über 5 bis 10 Minuten hinweg Dehnungsübungen, um ganz abzukühlen.
-
Page 37: Anwendungssoftware (App)
Android Kinomap Hinweise zur Nutzung der App: Sie sollten nur Apps installieren, deren Quellen Sie vertrauen. Sportstech Brands Holding kann keine Haftung für Software übernehmen, die von Drittanbietern bereitgestellt wird. Bitte denken Sie daran, die Bluetooth-Funktion auf Ihrem Gerät einzuschalten. -
Page 38: Entsorgung
Für die Löschung personenbezogener Daten auf den zu entsorgenden Elektroaltgeräten sind Sie als Endnutzer vor der Abgabe selbst verantwortlich. KONFORMITÄT Hiermit erklärt Sportstech Brands Holding, dass der Funkanlagentyp der Richtlinie 2014/53/EU entspricht. Der vollständige Text der EU-Konformitätserklärung ist unter der folgenden Internetadresse verfügbar: https://service.innovamaxx.de/lcx800_conformity... - Page 39 Dear customer, We are pleased you chose a device from the SPORTSTECH product range. With sports equipment from SPORTSTECH sports equipment offers you high quality and new technology. In order to fully use the potential of your device and be able to enjoy it for many years, please read this manual carefully before starting up and beginning of training, and use the device according to the instruc- tions.
- Page 40 1. Scan the QR code 2. Watch videos 3. Start fast and safely Link to the videos: https://service.innovamaxx.de/lcx800_video We are also on social media! Get the latest product information, training content and much more on our: Instagram-page Facebook-page https://www.instagram.com/sportstech.de https://www.facebook.com/sportstech.de...
- Page 41 CONTENT IMPORTANT SAFETY INFORMATION ..............42 YOU MAY ALSO INTERESTED IN THESE ACCESSOIRES ........44 EXPLODED DRAWING/SPARE PARTS LIST ............45 ASSEMBLY .....................46 DISPLAY OPERATION MANUAL .................50 INSTRUCTIONS FOR USE .................69 STRETCH EXERCISE ..................71 APPLICATION SOFTWARE (APP) ...............73 DISPOSAL ...................... 74 CONFORMITY ....................74...
-
Page 42: Important Safety Information
IMPORTANT SAFETY INFORMATION Basic precautions should always be followed, including the following safety instruc- tions when using the crosstrainer: Read all instructions before using this equipment. WARNING: Before beginning any exercise program consult your physician. This is especially import ant for people who are over 35 years old or who have pre-existing health problems. - Page 43 • If you suspect a problem, turn off the power as soon as possible and unplug the power cord from the wall outlet. • If the power cord is damaged, it must be replaced by an authorized and qualified person. Power Supply Safety Instructions 1.
-
Page 44: You May Also Interested In These Accessoires
THE IDEAL PROTECTION. FOR YOUR HOME WORKOUT. Sportstech has a floor protection mat to prevent your fitness equipment from damaging your floor at home. Of course it is available in different sizes and can also be used for yoga or other exercises. It protects your floor from marks, dirt or scratches. -
Page 45: Exploded Drawing/Spare Parts List
EXPLODED DRAWING/SPARE PARTS LIST At the following link At the following link you will find the exploded drawing you will find the exploded drawing and the spare parts list: and the spare parts list: https://service.innovamaxx.de/lcx800_spareparts https://service.innovamaxx.de/lcx800_spareparts... -
Page 46: Assembly
ASSEMBLY FIRMLY TIGHTEN ALL COMPONENT PARTS AND PRE-ASSEMBLED PARTS! Step 1 Fix front stabilizer (11) with inner hex pan head bolt (15), spring washer (22),washer (26) to the mainframe (1) Fix rear stabilizer (12) with inner hex pan head bolt (15), spring washer (22),washer (26) to the mainframe (1) press the rubber ring (78) onto the mainframe (1). - Page 47 Step 3 Install the reciprocating bar (4L/R) to the handlebar post (3) with inner hex pan head bolt (18), spring washer (23), and washer (27), please do not fix it too firmly now. Fix the reciprocating bar (4L/R) and pedal bar (5L/R) with hex bolt (13), washer (28), and nylon nut (32). At last fasten the inner hex pan head bolt (18).
- Page 48 Step 5 Fix the pedal (59L/R) to the pedal frame (8) with inner hex cylinder head bolt (19). Step 6 please fix the universal joint (31) to the pedal frame (8R) with inner hex pan head bolt (14), sleeve (71) first, and then fasten it to the adjustable crank (9) with inner hex pan head (48), corrugated washer (75), washer (25) and nut (74).
- Page 49 Step 7 Connect trunk wire (62), pulse wire (65) to the display (63). And the fix the display (63) with cross pan head screw (63) Fix the handlebar post cover (41a/b) to the handlebar post (3) with cross pan head self-drilling screw (60). Fix the handrail cover (51a/b) to the handlebar post (3) with cross pan head self-drilling screw (60).
-
Page 50: Display Operation Manual
DISPLAY OPERATION MANUAL 1. Button introduction Start key Stop key HOME key Back key Resistance up... - Page 51 Resistace down Pause Up key Down key Left key Right key Enter key Volume up Volume down Play/pause The previous The next...
- Page 52 2. Hardware configuration Display 7inches 1024*600TFT ITE9854 64M inside Music: Mp3 Video: available for max 1280X768 resolution; Mp4, MKV files that decoded and packed by H.264 FLASH 8M NOR + 8G EMMC 3. Icon operation and function Homepage introduction Icon introduction 1 Speed: Displays the current speed., unit::Km/h Rotation per minute Distance: Display running distance, unit: Km...
- Page 53 Display burned calorie, unit: Kcal Heart rate: display current heart rate. Constant power Resistance level. In condition of constant power mode, it shows effort watt. Icon introduction 2 to select icon, press to confirm. Time countdown mode. Selected Distance countdown mode. Selected Calorie countdown mode.
- Page 54 III) Multi-media icon introduction: Music. Selected Video Selected Setting Selected IV) Status icon introduction USB icon will be kept lightening on all the time after U disk inserted. Or it will be kept lightening out. If the blue tooth icon is paired successfully, it will be kept lightening on.
- Page 55 Press key to stop exercise. Exercise record will be displayed after you press key immediately. Countdown mode Select Target Time icon, press to confirm (just take time countdown mode for example): Press key to set target time.
- Page 56 Press to confirm, and then a new dialogue will be displayed. Press to begin exercise. Countdown mode: selected a certain countdown mode, set movement data and begin exercise. For the last 10 seconds system will keep alarming for 5 times per 2 seconds. Time countdown Range : 0:01-10 hour, default 0:30:00 Distance countdown...
- Page 57 Press key to select icon, press to confirm. Press key to convert resistance mode and power mode. Press key to set data. Press key to change the resistance. Press to confirm. And then system will keep the data automatically. Press key to begin exercise...
- Page 58 Virtual scene mode Press to enter into virtual scene mode: Press key to select icon, press to begin exercise. Default resistance level is 10, press to adjust resistance. The video playing speed will be in accordance with your exercise speed. Racing Press to enter into racing mode.(there are 12 preset modes):...
- Page 59 Press key to select icon, press to confirm. Press key to convert resistance mode and power mode. Press key to set data. Press key to begin exercise.
- Page 60 Operation logic: Press key to go back to the previous page. Press key to go to home page. Press “Racing” icon in homepage to go to exercising page. If you press other icon (for example virtual scene, user program and so on), a new dialogue will be display soon. press to stop, after that you can begin other exercises.
- Page 61 Speed of each section of 12 preset programs Aerobic recovery Section 10 11 12 13 14 15 16 Speed 18 18 24 24 30 30 30 30 30 24 24 24 24 24 18 18 Resistance 10 10 18 10 10 18 10 10 18 10 10 18 10 10 10 18 Section 10 11 12 13 14 15 16 Lose weight...
- Page 62 Work-out Press key to enter into Work-Out (take fat burn for example): Press key to select icon, press to confirm. Press key to convert resistance mode and power mode. Press key to set data. Press key to begin exercise.
- Page 63 Work-Out: first choose a certain program and then finish setting movement data. There are 16 sections inside for each program. And each section time=setting time/16. The resistance for each section is as following table: 12 preset program data Fat burn Section 10 11 12 13 14 15 16 resistance...
- Page 64 Press to set data, press to select different items. Warm up 2min HRC process Cool down...
- Page 65 If no heart rate signal detected, please see the picture above. Press to enter into constant power mode: Static constant power mode Press to begin exercise...
- Page 66 5. Multi-media and setting introduction Music Press to enter into music menu: Press to select music, press . to playback. play/pause; volume+; volume-; the previous ; the next Video Press to enter into video menu:...
- Page 67 Playlists will be hidden after 5 seconds without any operation. Press to go to full screen. Press again to go back to the previous page. After the playlists is hidden, press to wake up the playlists. Press to play/pause, press to adjust volume.
- Page 68 Press to go to engineering mode. It is designed for system maintenance. You need pass code to enter into. 6. Error code If E01 happened, it means signal error. EO1:signal error If E02 happened, it is most probably that there is something wrong with resistance motor...
-
Page 69: Instructions For Use
INSTRUCTIONS FOR USE Conditioning Guidelines The following guidelines will help you to plan your exercise program. Remember that correct nutrition and adequate rest are essential for successful results. If you’re beginning an exercise program, you should check with your doctor if: •... - Page 70 • End each work-out with a 5 minute cool down with the resistance set to a low level. You should then stretch the muscles you’ve just worked to prevent injury and cramp. • Increase your work-out time by a few minutes each week until you can work continuously for 30 minutes per session.
-
Page 71: Stretch Exercise
STRETCH EXERCISE Before each workout you should stretch your muscles for at least 5-10 minutes to warm them up sufficiently. Repeat the following stretching exercises five times. Stretching before training helps improve flexibility and reduces the risk of injury. HEAD ROLLS Rotate your head to the right for one count, feeling the stretch up the left side of your neck, then rotate your head back for one count, stretching your chin to the ceiling and letting your mouth open. - Page 72 TRAINING ZONE EXERCISE After warming up, increase the intensity to your desired exercise programme. Be sure to maintain your Intensity for maximum performance. Breathe regularly and deeply as you exercise -never hold your breath. COOL DOWN Finish each workout with a light jog or walk for at least 1 minute. Then complete 5 to 10 minutes of stretching to cool down.
-
Page 73: Application Software (App)
Kinomap Notes on using the App: You should only install apps from sources you trust. Sportstech Brands Holding cannot accept any liabili- ty for software provided by third parties. Please remember to turn on the Bluetooth feature on your device. -
Page 74: Disposal
As the end user, you are responsible for the deletion of all manner of personal data on electronic devices before handing the devices over for disposal. CONFORMITY Sportstech Brands Holding hereby declares that the radio system type is compliant with EU Directive 2014/53 / EU. The full text of the EU declaration of conformity is available at the following internet address: https://service.innovamaxx.de/lcx800_conformity... - Page 75 Estimado cliente, Nos complace que haya elegido un dispositivo de la línea de productos SPORTSTECH. Las máquinas de deporte de Sportstech ofrecen una gran calidad y una tecnología innovadora. Con el fin de usar todo el potencial de su dispositivo y para que pueda disfrutarlo durante muchos años, por favor lea este manual cuidadosamente antes de comenzar a ejercitarse, y use el dispositivo de acuer- do a las instrucciones.
- Page 76 Montaje, Utilizar, Desmontaje. 1. Escanear el código QR 2. Ver vídeos 3. Comienza rápido y seguro Enlace a los videos: https://service.innovamaxx.de/lcx800_video ¡También estamos en redes sociales! Obtenga la última información sobre nuestros productos, entrenamientos y mucho más aquí: Instagram Facebook https://www.instagram.com/sportstech.de https://www.facebook.com/sportstech.de...
- Page 77 TABLA DE CONTENIDO INFORMACIÓN IMPORTANTE DE SEGURIDAD .............78 TAMBIÉN PODRÍA INTERESARLE ...............80 DIBUJO DE EXPLOSIÓN/LISTA DE REPUESTOS ...........81 MONTAJE ......................82 MANUAL DE OPERACIÓN DEL MONITOR ............86 INSTRUCCIONES DE USO ................105 EJERCICIOS DE ESTIRAMIENTO ..............107 SOFTWARE (APLICACIÓN)................109 DESECHO ....................110 CONFORMIDAD ....................
-
Page 78: Información Importante De Seguridad
INFORMACIÓN IMPORTANTE DE SEGURIDAD Al usar la caminadora siempre se deben seguir las precauciones básicas, incluy- en-do las siguientes instrucciones de seguridad importantes. Lea todas las instruc- cio-nes antes de usar este producto. ADVERTENCIA: Antes de comenzar cualquier programa de ejercicios consulte a su médico. Esto es especialmente importante para personas mayores de 35 años o para quienes tienen problemas prexistentes de salud. - Page 79 • Si sospecha que hay algún problema, desconecte la alimentación lo antes posible y desenchufe el cable de la toma de corriente. • Si el cable de alimentación está dañado, debe ser reemplazado, pero sólo por una persona autorizada y cualificada.
-
Page 80: También Podría Interesarle
Para que el suelo de su casa no sufra daños por parte de su equipo de ejercicios, utilice la alfombril- la protectora de Sportstech. Por supuesto, está disponible en diferentes tamaños y también se pue- de utilizar para yoga u otros ejercicios. Protege su piso de huellas, suciedad o arañazos. Mano de obra de alta calidad y una superficie especial evitan marcas de los dispositivos que se encuentran sobre la alfombrilla. -
Page 81: Dibujo De Explosión/Lista De Repuestos
DIBUJO DE EXPLOSIÓN/LISTA DE REPUESTOS En el siguiente enlace En el siguiente enlace encontrarás el dibujo de explosión encontrarás el dibujo de explosión y la lista de repuestos: y la lista de repuestos: https://service.innovamaxx.de/lcx800_spareparts https://service.innovamaxx.de/lcx800_spareparts... -
Page 82: Montaje
MONTAJE APRIETE TODOS LOS COMPONENTES Y PIEZAS PREMONTADAS! Paso 1 1. Fije el estabilizador delantero (11) con el perno de cabeza hexagonal interna (15), la arandela elástica (22), laa arandela (26) al bastidor principal (1) 2. Fije el estabilizador trasero (12) con el perno de cabeza hexagonal interior (15), arandela elástica (22), arandela (26) al bastidor principal (1) 3. - Page 83 Paso 3 1. Instale la barra oscilante (4 D/I) en el poste del manillar (3) con el perno de la cabeza hexagonal interna (18), la arandela elástica (23) y la arandela (27), por favor no lo arregle con firmeza ahora. 2.
- Page 84 Paso 5 Fije el pedal (59 I/D) al marco del pedal (8) con el perno de la cabeza del cilindro hexagonal interior (19). Paso 6 1. Fie por favor la junta universal (31) al marco del pedal (8R) con el perno de cabeza hexagonal interna (14), la manga (71) primero y sujétalo a la manivela ajustable (9) con la cabeza hexagonal interna ( 48), arandela corrugada (75), arandela (25) y tuerca (74).
- Page 85 Paso 7 1. Conecte el cable troncal (62), el cable de pulso (65) a la pantalla (63). Arregle la pantalla (63) con el tornillo de cabeza troncocónica (63). 2. Fije la cubierta del poste del manillar (41a/b) al poste del manillar (3) con el tornillo autorroscante de la cabeza de la bandeja transversal (60).
-
Page 86: Manual De Operación Del Monitor
MANUAL DE OPERACIÓN DEL MONITOR 1. Introducción de los botones START (para empezar) STOP (para parar) INICIO ATRÁS (para volver) Más resistencia... - Page 87 Menos resistencia Pausa Arriba Abajo Izquierda Derecha Entrar Más volumen Menos volumen En marcha/pausa Anterior Siguiente...
- Page 88 2. Configuración del soporte físico Monitor 7 pulgadas 1024*600TFT ITE9854 64M dentro Música: Mp3 Vídeo: disponible para 8M NOR + 8G EMMC máx. 1280X768 resolución; Mp4MKV archivos decodificados y empaquetados por H.264 FLASH 8M NOR + 8G EMMC 3. Operación y función de los iconos Introducción a la página de inicio Introducción del icono 1 Velocidad: muestra la velocidad actual.
- Page 89 Caloría quemada, Unidad: kcal Frecuencia cardíaca: muestra la frecuencia cardíaca actual. Potencia constante Nivel de resistencia. En condición de modo de potencia constante, muestra esfuerzo en vatios. Introducción del icono 2 Utilice para seleccionar el icono. Presione el botón para confirmar. Modo de cuenta regresiva.
- Page 90 Introducción multimedia del icono: Música. Seleccionado Vídeo. Seleccionado Ajuste. Seleccionado IV) Introducción del estado del icono El ícono de USB se mantendrá iluminado todo el tiempo después de insertar el disco U. O se mantendrá aligerando. Si el icono de Bluetooth se empareja con éxito, se man- tendrá...
- Page 91 Presione el botón para parar ejercicio. El registro de ejercicio se mostrará después de presionar inmediatamente. Modo de cuenta Seleccione el Ícono de tiempo objectivo, presione el botón para confirmar (simplemente tome el modo de cuenta regresiva, por ejemplo) Presione el botón para ajustar el tiempo objetivo.
- Page 92 Presione el botón para confirmar, y luego se mostrará un nuevo diálogo. Presione el botón para comenzar el entrenamiento. Modo de cuenta: seleccionando un cierto modo de cuenta, estableciendo los datos de movimiento y comenzar el ejercicio. Durante los últimos 10 segundos, el sistema hará un sonido 5 veces cada 2 segundos. Cuenta del tiempo Distancia : 0:01-10 hora, predeterminada 0:30:00 Cuenta de la distancia...
- Page 93 Presione el botón para seleccionar el icono, presione el botón para confirmar. Presione el botón para convertir el modo de resistencia y el modo de potencia. Presione el botón para ajustar los datos. Presione el botón para cambiar la resistencia. Presione el botón para confirmar.
- Page 94 Modo de escena virtual Presione el botón para entrar en modo de escena virtual: Presione el botón para seleccionar el icono. Presione el botón para comenzar el entrenamiento. El nivel de resistencia predeterminado es 10, presione el botón para ajustar la resistencia. La velocidad de reproducción de video estará...
- Page 95 Presione el botón para seleccionar el icono, presione el botón para confirmar. Presione el botón para convertir el modo de resistencia y el modo de potencia. Presione el botón para ajustar los datos. Presione el botón para comenzar el entrenamiento.
- Page 96 Lógica de operación: Presione el botón para volver a la página anterior. Presione el botón para ir a la página de inicio Presione el botón el icono "Racing" en la página de inicio para ir a la página de ejercicios. Si presiona otro ícono (por ejemplo, escena virtual, programa de usuario, etc.), pronto se mostrará...
- Page 97 Velocidad de cada sección de 12 programas preestablecidos Recuperación Sección 10 11 12 13 14 15 16 Velocidad 18 18 24 24 30 30 30 30 30 24 24 24 24 24 18 18 Resistencia 10 10 18 10 10 18 10 10 18 10 10 18 10 10 10 18 Sección 10 11 12 13 14 15 16 Perder peso...
- Page 98 Rutina de ejercicio (o Work-Out) Presion e el botón para entrar en Work-Out (para quemar grasa, por ejemplo) Presione el botón para seleccionar el icono, presione el botón para confirmar. Presione el botón para convertir el modo de resistencia y el modo de potencia. Presione el botón para ajustar los datos.
- Page 99 Rutina de ejercicio (o Work-Out): primero, elija un programa determinado y luego termine de configurar los datos de movimiento. Hay 16 secciones para cada programa. Cada tiempo de sección = tiempo de configuración/16. La resistencia para cada sección es la siguiente tabla: 12 datos de programa preestablecidos Quema grasa Sección...
- Page 100 Presione el botón para ajustar los datos, presione para seleccionar diferentes artículos. Calentamiento de 2 minutos Proceso HRC Enfrîamento...
- Page 101 Si no se detecta ninguna señal de frecuencia cardíaca, consulte la imagen de arriba. Presione el botón para entrar en modo de potencia constante: Modo estático de potencia constante Presione el botón para comenzar el entrenamiento...
- Page 102 5. Introducción multimedia y Configuración Música Presione el botón para entrar al menú de música: Presione el botón para seleccionar música, presione el botón para escuchar. play/pausa; más volumen; menos volumen; anterior; siguiente Video Presione el botón para entrar al menú de video:...
- Page 103 a) Las listas de playlist son ocultadas después de 5 segundos sin ninguna operación. Presione el botón para ir a la pantalla completa. Presione el botón de nuevo para volver a la página anterior. b) Después de que las listas de playlist estén ocultas, presione el botón para abrir la listas de playlist.
- Page 104 Presione el botón para ir al modo de ingeniería, diseñado para el mantenimiento del sistema. Se necesita un código de acceso para acceder. 6. Códigos de error Si E01 ha sucedido, es un error de señal. EO1: error de señal Si E02 ocurrió, es muy probable que haya algún problema con el motor de resistencia.
-
Page 105: Instrucciones De Uso
INSTRUCCIONES DE USO Lineamientos de condicionamiento • Las siguientes pautas lo ayudarán a planificar su programa de ejercicios. Recuerde que la nutrición correcta y el descanso adecuados son esenciales para obtener resultados exitosos. Si está comenzando un programa de ejercicios, debe consultar con su médico si: •... - Page 106 • Finalice cada ejercicio con un enfriamiento de 5 minutos y la resistencia ajustada a un nivel bajo. A continuación, para evitar lesiones y calambres, es importante de estirar cada músculo sometido. • Aumente el tiempo de ejercicio unos minutos cada semana hasta que pueda trabajar continuamente durante 30 minutos por sesión.
-
Page 107: Ejercicios De Estiramiento
EJERCICIOS DE ESTIRAMIENTO Antes de cada entrenamiento debes estirar tus músculos durante al menos 5-10 minutos para calentarlos lo suficiente. Repita los siguientes ejercicios de estiramiento cinco veces. El estiramiento antes del entrenamiento ayuda a mejorar la flexibilidad y reduce el riesgo de lesiones. GIROS CON LA CABEZA Gire su cabeza hacia la derecha por un segundo, sienta como se estira el lado izquierdo de su cuello, luego gire su cabeza hacia tras por un segundo, estirando su barbilla hacia el techo y dejando su boca... - Page 108 INTENSIDAD DEL EJERCICIO Después de calentar, aumente la intensidad de su programa de ejercicio deseado. Asegúrese de mantener su intensidad para un máximo rendimiento. Respire de manera constante y profunda mientras se ejercita-nunca aguante la respiración. ENFRIAMIENTO Termine cada ejercicio con un trote ligero o camine durante al menos 1 minuto. Después complete de 5 a 10 minutos de estiramiento para el enfriamiento.
-
Page 109: Software (Aplicación)
Android Kinomap Consejos para el uso de las aplicaciones: Instale solo aplicaciones de fuentes de confianza. Sportstech Brands Holding no se hace responsable de softwares proporcionados por terceros. Por favor, recuerde activar la función Bluetooth en su dispositivo. El código QR al principio del manual le llevará varios tutoriales en YouTube. Allí encontrará más infor- mación sobre la aplicación y el dispositivo. -
Page 110: Desecho
Como usuario final, usted es responsable de eliminar los datos personales de los residuos de aparatos eléctricos y electrónicos antes de su entrega. CONFORMIDAD Sportstech Brands Holding declara que el sistema de radio tipo cumple con la directiva 2014/53/EU. El texto completo de la Declaración UE de Conformidad está disponible en el siguiente enlace: https://service.innovamaxx.de/lcx800_conformity... - Page 111 FRANÇAIS Cher client, Nous sommes ravis que vous ayez choisi un appareil de la gamme de produits SPORTSTECH. Les équi- pements sportifs SPORTSTECH vous offrent une qualité élevée et une technologie innovante. Afin d'utiliser pleinement le potentiel de votre appareil et de pouvoir l'apprécier pendant de nombreuses années, lisez attentivement ce manuel avant l'utilisation et le début de votre entraînement et utilisez l'ap-...
- Page 112 3. Démarrez rapidement et en toute sécurité Lien vers les vidéos: https://service.innovamaxx.de/lcx800_video Vous pouvez aussi nous trouver sur les réseaux sociaux! Retrouve les dernières informations sur les produits, le contenu des entraînements et bien plus encore sur notre: la page Instagram la page Facebook https://www.instagram.com/sportstech.de https://www.facebook.com/sportstech.de...
- Page 113 TABLE DES MATIÈRES INFORMATIONS DE SÉCURITÉ IMPORTANTES ..........114 CELA POURRAIT AUSSI VOUS INTÉRESSER ............. 116 DESSIN ÉCLATÉ/LISTE DES PIÈCES DE RECHANGE .......... 117 ASSEMBLAGE ....................118 MANUEL D’UTILISATION DE L’INTERFACE ............122 INSTRUCTIONS D’UTILISATION ............... 141 EXCERCICE D'ÉTIREMENT ................143 LOGICIEL D’APPLICATION (APP) ..............
-
Page 114: Informations De Sécurité Importantes
INFORMATIONS DE SÉCURITÉ IMPORTANTES Les précautions de base, y compris les consignes de sécurité importantes suivantes doivent toujours être respectées lorsque vous utilisez ce tapis roulant. Lisez toutes les instructions avant d'utiliser cette appareil. AVERTISSEMENT: Avant de commencer un programme d'exercice, consultez votre médecin. Ceci particulièrement important pour les personnes qui ont plus de 35 ans ou qui ont des problèmes de santé... - Page 115 • Si vous soupçonnez un problème, éteignez l'appareil dès que possible et débranchez le cordon d'alimentation de la prise murale. • Si le cordon d'alimentation est endommagé, il doit être remplacé, mais uniquement par une personne autorisée et qualifiée. Consignes de sécurité bloc d'alimentation 1.
-
Page 116: Cela Pourrait Aussi Vous Intéresser
Afin que votre sol ne soit pas endommagé par votre équipement de fitness, il existe un tapis de protection Sportstech. Il est disponible en différentes tailles et peut également être utilisé pour le yoga ou d'autres exercices. Il protège votre sol contre les traces de pas, la saleté ou les rayures. La fabrication de haute qualité... -
Page 117: Dessin Éclaté/Liste Des Pièces De Rechange
DESSIN ÉCLATÉ/LISTE DES PIÈCES DE RECHANGE A l‘adresse suivante A l‘adresse suivante vous trouverez le dessin éclaté vous trouverez le dessin éclaté et la liste des pièces de rechange : et la liste des pièces de rechange : https://service.innovamaxx.de/lcx800_spareparts https://service.innovamaxx.de/lcx800_spareparts... -
Page 118: Assemblage
ASSEMBLAGE SERREZ FERMEMENT TOUS LES COMPOSANTS ET LES PIÈCES PRÉASSEMBLÉES ! Étape 1 1. Fixez le stabilisateur avant (11) au cadre principal (1) à l’aide des boulons hexagonaux à tête cylindrique (15), des rondelles ressort (22) et des rondelles (26). 2. - Page 119 Étape 3 1. Serrez légèrement les bras inférieurs (4L/R) au tube de support guidon (3) l’aide du boulon hexagonal à tête cylindrique (18), des rondelles ressort (23) et des rondelles (27). Ne la fixez pas encore fermement. 2. Fixez les bras inférieurs (4L/R) à la barre de pédale (5L/R) à l’aide du boulon hexagonal (13), de la rondelle (28) et de l’écrou nylon (32).
- Page 120 Étape 5 Fixez les pédales (59L/R) au pédalier (8) avec les boulons hexagonaux à tête cylindrique (19). Étape 6 1. Fixez d’abord les joints universels (31) au pédalier (8R) avec les boulons hexagonaux à tête cylindrique (14) et les manchons (71) et serrez-les ensuite sur les manivelles ajustables (9) avec les boulons hexagonaux à tête cylindrique (48), les rondelles ondulées (75), les rondelles (25) et les écrous (74).
- Page 121 Étape 7 1. Connectez le câble (62) et la câble de capteur cardiaque (65) à l’écran d’interface. Fixez ensuite l’écran d’interface (63) avec les vis cruciformes à tête cylindrique (67). 2. Fixez la cache du tube de support-guidon (41a/b) au tube de support-guidon (3) avec les vis autoperceuses (60). 3.
-
Page 122: Manuel D'utilisation De L'interface
MANUEL D’UTILISATION DE L’INTERFACE 1. Liste des boutons Allumer Éteindre Accueil Retour Augmenter la résistance... - Page 123 Diminuer la resistance Pause Haut Gauche Droite Entrée Augmenter le volume Diminuer le volume Lecture/pause Précédent Suivant...
- Page 124 2. Caractéristiques du système Écran 7inches 1024*600TFT ITE9854 64 Mb interne Musique : Mp3 Vidéo : compatible avec une 8M NOR + 8G EMMC résolution de 1280 x 768 max. et avec des fichiers MP4 et MKV décodés et compressés selon la norme de codage vidéo H.264 FLASH 8M NOR + 8G EMMC...
- Page 125 Affiche les calories brûlées. Unité : Kcal Rythme cardiaque : affiche le rythme cardiaque actuel Puissance constante Niveau de résistance : en mode puissance constante, affiche les watts Icônes d’entrainement Utilisez pour sélectionner les icones et appuyez sur pour confirmer. Compte à...
- Page 126 III) Icônes multimédia Musique. Lorsque sélectionné : Vidéo. Lorsque sélectionné : Paramètres. Lorsque sélectionné : IV) Icônes de statut L’icône est allumée lorsque qu’une clé USB est insérée. Si la connexion Bluetooth est effectuée avec succès, l’icône s’allume. 4. Fonction des icônes de la page d’accueil Démarrage rapide Appuyer sur pour que le système entre en mode manuel :...
- Page 127 Appuyer sur le bouton pour arrêter l’exercice. Les données et résultats de l’exercice s’affichent dès que vous appuyez sur le bouton Mode compte à rebours Sélectionnez votre objectif et appuyez sur pour confirmer. Exemple pour le compte à rebours de temps : Appuyez sur les boutons pour sélectionner le temps.
- Page 128 Appuyez sur pour confirmer et une nouvelle boite de dialogue s’affiche. Appuyez sur pour commencer l’exercice.. Mode compte à rebours : sélectionnez le mode de compte à rebours souhaité, entrez votre objectif et commencez l’exercice. Durant les 10 dernières secondes, le système émettra 5 signaux sonores toutes les 2 secondes. Compte à...
- Page 129 Utilisez les boutons pour sélectionner un emplacement de programme et appuyez sur pour confirmer et commencer à le configurer. Appuyez sur les boutons pour passer du mode résistance au mode puissance et vice versa. Appuyez sur les boutons pour sélectionner la valeur. Appuyez sur les boutons pour changer la résistance.
- Page 130 Mode paysage virtuel Appuyez sur pour accéder au mode Paysage virtuel : Appuyez sur les boutons pour sélectionner l’icône souhaitée, puis sur pour commencer l’exercice. Le niveau de résistance par défaut est de 10, appuyez sur les boutons pour ajuster la résistance. La vitesse de lecture de la vidéo s’ajustera en fonction de votre vitesse de course.
- Page 131 Appuyez sur les boutons pour sélectionner la course souhaitée, puis sur pour confirmer. Appuyez sur les boutons pour passer du mode résistance au mode puissance et vice versa. Appuyez sur les boutons pour entrer les valeurs souhaitées. Appuyez sur les boutons pour commencer l’exercice.
- Page 132 Commandes de base : Appuyez sur pour retourner à la page précédente. Appuyez sur pour retourner à la page d’accueil. Appuyez sur l’icône Course sur la page d’accueil pour retourner à la page d’exercice. Si vous appuyez sur une autre icone (par exemple Paysage virtuel, Programmes personnalisés, etc.), une nouvelle boite de dialogue s’affichera.
- Page 133 Vitesse au niveau de chaque section de chaque programme préconfiguré Aérobic Section 10 11 12 13 14 15 16 Vitesse 18 18 24 24 30 30 30 30 30 24 24 24 24 24 18 18 Résistance 10 10 18 10 10 18 10 10 18 10 10 18 10 10 10 18 Section 10 11 12 13 14 15 16 Perte de poids...
- Page 134 Entrainement physique Appuyez sur pour accéder au mode Entrainement physique (prenez par exemple le programme Fonte de Calories) : Appuyez sur les boutons pour sélectionner le programme souhaite, puis appuyez sur pour confirmer. Appuyez sur les boutons pour passer du mode résistance au mode puissance et vice versa. Appuyez sur les boutons pour ajuster les valeurs.
- Page 135 Entrainement : choisissez d’abord un programme et finissez d’entrer les données. Chaque programme contient 16 sections, chacune d’elle étant d’une durée égale à durée totale/16. La résistance de chaque section est comme suit : Résistance au niveau de chaque section pour chaque programme préconfiguré : Fonte de calories Section 10 11 12 13 14 15 16...
- Page 136 Appuyez sur les boutons pour ajuster les valeurs, et sur les boutons pour sélectionner le type de valeur à ajuster. Échauffement : 2 min Entrainement HRC Fin d’entrainement...
- Page 137 Si aucun rythme cardiaque n’est détecté, l’affichage apparait comme ci-dessus. Appuyez sur pour accéder au mode Puissance constante Mode puissance constante à l’arrêt Appuyez sur pour commencer l’exercice...
- Page 138 5. Mode multimédia et paramètres Musique Appuyez sur pour accéder au menu de musique : Appuyez sur les boutons pour sélectionner la musique et appuyez sur . pour lancer la lecture. lecture/pause ; volume + ; volume - ; précédent ; suivant Vidéo Appuyez sur...
- Page 139 Les playlists sont masquées au bout de 5 secondes d’inactivité. Appuyez sur pour passer en mode plein écran. Appuyez à nouveau sur pour retourner à la page précédente. Une fois la playlist masquée, appuyez sur les boutons pour la faire réapparaître. Appuyez sur pour mettre la lecture en pause et la relancer, et appuyez sur pour ajuster le...
- Page 140 Appuyez sur pour accéder au menu du système. Ce menu est conçu pour la maintenance du système interne et n’est accessible qu’à l’aide d’un code. 6. Codes d’erreur Lorsque le code E01 s’affiche, cela signifie qu’il y a eu une erreur dans le système. EO1:signal d’erreur Si le code E02 s’affiche, cela signifie qu’il y a probablement un problème avec le moteur de résistance.
-
Page 141: Instructions D'utilisation
INSTRUCTIONS D’UTILISATION Règles générales d’entrainement • Les règles suivantes vont vous aider à planifier votre programme d’entrainement. Gardez à l’esprit qu’une nutrition saine et adéquate est essentielle pour obtenir de bons résultats. Avant de commencer un nouveau programme d’entrainement, veuillez consulter votre médecin si : •... - Page 142 • Terminez chaque session d’entraînement avec 5 minutes à faible résistance. Étirez ensuite les muscles utilisés afin d’éviter toute blessure ou crampe. • Augmentez la durée de votre entraînement de quelques minutes chaque semaine jusqu’à ce que vous puissiez vous entraîner 30 minutes sans pause.
-
Page 143: Excercice D'étirement
EXCERCICE D'ÉTIREMENT Avant chaque séance d'entraînement, vous devez étirer vos muscles pendant au moins 5 à 10 minutes pour les réchauffer suffisamment. Répétez les exercices d'étirement suivants cinq fois. Les étirements avant l'entraînement permettent d'améliorer la flexibilité et de réduire le risque de blessure. ROULER LA TÊTE Tournez la tête vers la droite une fois, en étirant le côté... - Page 144 EXERCICE DANS LA ZONE D'ENTRAÎNEMENT Après l'échauffement, augmentez l'intensité de votre programme d'exercice désiré. Assurez-vous de maintenir votre intensité pour une performance maximale. Respirez régulièrement et profondément pendant que vous faites un exercice - ne retenez jamais votre respiration. REFROIDIR Terminez chaque entraînement avec un jogging léger ou marchez pendant au moins 1 minute.
-
Page 145: Logiciel D'application (App)
Kinomap Informations sur l’utilisation de l’application : Vous ne devriez installer que des applications pour lesquelles vous êtes sûr des sources. Sportstech Brands Holding ne peut accepter aucune responsabilité pour les logiciels fournis par des tiers. N’oubliez pas d’activer la fonction Bluetooth de votre appareil. -
Page 146: Mise Au Rebut
CONFORMITÉ Sportstech Brands Holding déclare par la présente que l‘installation radio de type est conforme à la directive 2014/53/CE. Le texte intégral de la déclaration UE de conformité est disponible à l‘adresse Internet suivante: https://service.innovamaxx.de/lcx800_conformity... - Page 147 ITALIANO Gentile cliente Siamo lieti che abbiate scelto un dispositivo della gamma SPORTSTECH. L'attrezzatura sportiva SPORT- STECH ti offre alta qualità e tecnologia innovativa. Per sfruttare a pieno il potenziale del dispositivo e poterlo utilizzare per molti anni, raccomandiamo di leggere attentamente questo manuale prima di iniziare l’allenamento e di utilizzare il dispositivo seguen-...
- Page 148 2. Guarda il video 3. Inizia ad allenarti veloce e sicuro Link per il Video: https://service.innovamaxx.de/lcx800_video Ci siamo anche sui social! Scopri le ultime novità sui prodotti, contenuti per l'allenamento e molto altro ancora sul nostro: pagina Instagram pagina Facebook https://www.instagram.com/sportstech.de https://www.facebook.com/sportstech.de...
- Page 149 INDICE IMPORTANTI INFORMAZIONI DI SICUREZZA ............. 150 VI POTREBBE ANCHE INTERESSARE ............... 152 DISEGNO ESPLOSO/LISTA DEI PEZZI DI RICAMBIO..........153 ISTRUZIONI PER L´ A SSEMBLAGGIO ..............154 UTILIZZIO DEL DISPLAY ................158 ISTRUZIONI D’USO ..................177 ESERCIZI DI STRETCHING ................179 SOFTWARE DI UTILIZZO (APP)................
-
Page 150: Importanti Informazioni Di Sicurezza
IMPORTANTI INFORMAZIONI DI SICUREZZA Precauzioni minime, incluse importanti istruzioni di sicurezza incluse nel presente manual dovrebbero essere sempre seguite durante l’uso del tapisroulant. Leggere tutte le istruzioni prima di utilizzare il dispositivo. ATTENZIONE: Prima di iniziare qualsiasi programma di esercizio consultare il proprio medico. Ques- to è... - Page 151 • Se si sospetta un problema, spegnere il più presto possibile il dispositivo e scollegare il cavo di alimentazione dalla presa elettrica. • Se il cavo di alimentazione è danneggiato, deve essere sostituito, ma solo da personale autorizzato e qualificato. Istruzioni di sicurezza per l'adattatore di alimentazione 1.
-
Page 152: Vi Potrebbe Anche Interessare
∙ MATERIALE PREGIATO: Realizzato con i materiali migliori per un allenamento senza problemi e preoccupazioni. Materasso fitness ideale altamente resistente e dalla tenuta massima. Sopporta un peso elevato. Puoi acquistare questo prodotto nelle dimensioni desiderate tramite il se- guente codice QR o link. www.sportstech.de/bodenschutzmatte... -
Page 153: Disegno Esploso/Lista Dei Pezzi Di Ricambio
DISEGNO ESPLOSO/LISTA DEI PEZZI DI RICAMBIO Al seguente link Al seguente link troverete il disegno esploso troverete il disegno esploso e la lista dei pezzi di ricambio: e la lista dei pezzi di ricambio: https://service.innovamaxx.de/lcx800_spareparts https://service.innovamaxx.de/lcx800_spareparts... -
Page 154: Istruzioni Per L´assemblaggio
ISTRUZIONI PER L´ASSEMBLAGGIO AVVITARE BENE TUTTI GLI ELEMENTI E I PEZZI PREASSEMBLATI! Passo 1 Fissare lo stabilizzatore anteriore (11) con il bullone a testa esagonale interno (15), con la rondella elastica (22) e la rondella (26) nell’unità centrale (1). Fissare lo stabilizzatore posteriore (12) con il bullone a testa esagonale interno (15), con la rondella elastica (22) e la rondella (26) nell’unità... - Page 155 Passo 3 Fissare l’asta (4L/R) nel sostegno manubrio (3) con il bullone a testa esagonale interno (18), la rondella elastica (23), e la rondella (27). Si prega di non fissare troppo saldamente per il momento. Fissare l’asta (4L/R) e la pedaliera (5L/R) con il bullone esagonale (13), la rondella (28) e il dado in nylon (32). Adesso è...
- Page 156 Passo 5 Fissare il pedale (59L/R) nel telaio della pedaliera (8) con il bullone a testa esagonale interno (19). Passo 6 Fissare la giunzione universale (31) nel telaio della pedaliera (8R) con il bullone a testa esagonale interno (14) e la boccola (71). Quindi fissarla con la pedivella regolabile (9) con il bullone a testa esagonale interno (48), la rondella ondulata (75), la rondella (25) e il dado (74).
- Page 157 Passo 7 Collegare il sensore (62) e il sensore (65) al display (63). Quindi fissare il display (63) con la vite con testa a croce (67) Fissare la cover del sostegno manubrio (41a/b) nel sostegno manubrio (3) con la vite con testa a croce (60). Fissare la cover del manubrio (51a/b) nell’apposito supporto (3) con la vite con testa a croce (60).
-
Page 158: Utilizzio Del Display
UTILIZZIO DEL DISPLAY 1. Panoramica comandi Avvia Arresta HOME Indietro Aumenta resistenza... - Page 159 Diminuisci resistenza Pausa Sopra Sotto Sinistra Destra Accedi Aumenta il volume Diminuisci il volume Play/Pausa Precedente Successivo...
- Page 160 2. Configurazione Hardware Display 7inches 1024*600TFT ITE9854 64M interna Musica: Mp3 Video: disponibile con una 8M NOR + 8G EMMC risoluzione massima di 1280X768; Mp4:MKV files decodificati e confezionati da H.264 FLASH 8M NOR + 8G EMMC 3. Operazioni e funzioni icone Introduzione pagina iniziale Introduzione icona 1 Velocità: mostra la velocità...
- Page 161 Mostra le calorie bruciate, unità: kcal Frequenza cardiaca: mostra la frequenza cardiaca attuale Potenza costante Livello di resistenza. In modalità di potenza costante mostra lo sforzo in watt. Introduzione icona 2 Usare per selezionare un’icona, premere per confermare. Modalità conto alla rovescia. Selezionata Modalità...
- Page 162 Introduzione icone multimediali: Musica. Selezionata Video. Selezionato Impostazioni. Selezionate Introduzione status icone Dopo aver inserito il disco U l`icona USB rimane accesa o illuminata. Se l`icona del Bluetooth è correttamente selezionata continua a lampeggiare o rimane illuminata. Nota: la funzione Bluetooth è opzionale. 4.
- Page 163 Premere per interrompere l´esercizio. Il risultato degli esercizi compare sul display dopo aver premuto Modalità countdown Selezionare l´icona target time e premere per confermare (tempo in modalità conto alla rovescia): Premere per selezionare il tempo.
- Page 164 Premere per confermare, una nuova finestra di dialogo compare sullo schermo. Premere per iniziare l´esercizio. Modalità conto alla rovescia: selezionare una determinata modalità di conto alla rovescia, selezionare il tipo di movimento e iniziare l’esercizio. Durante gli ultimi 10 secondi il sistema invia un segnale per 5 volte ogni 2 secondi. conto alla rovescia - tempo Intervallo : 0:01-10 ore, impostazione predefinita 0:30:00 Conto alla rovescia - distanza Intervallo: 1.0-200Km, impostazione predefinita 5Km...
- Page 165 Premere per selezionare un`icona, premere per confermare. Premere per convertire la modalità resistenza e la modalità potenza Premere per impostare i dati. Premere per modificare la resistenza. Premere per confermare. Il sistema mantiene salvati i dati in automatico. Premere per iniziare l`esercizio.
- Page 166 Modalità scena virtuale Premere per entrare nella modalità scena virtuale: Premere per selezionare un`icona, premere per iniziare l`esercizio. Il livello di resistenza preimpostato è di 10, premere per regolare la resistenza. La velocità di riproduzione del video dipende dalla velocità dell´esercizio. Competizione Premere per entrare nella modalità...
- Page 167 Premere per selezionare un´icona, premere per confermare. Premere per convertire la modalità resistenza e la modalità potenza. Premere per impostare i dati. Premere per iniziare l’esercizio.
- Page 168 Operazioni Premere per tornare alla pagina precedente. Premere per tornare alla pagina iniziale. Premere l’icona “Racing - competizione” nella pagina iniziale per tornare alla pagina degli esercizi. Se si premono altre icone (per esempio l’icona scena virtuale, l’icona programma utente e così via) viene mostrata una nuova finestra di dialogo.
- Page 169 Velocità di ciascuna sezione dei 12 programmi preimpostati. Recupero aerobico Sezione 10 11 12 13 14 15 16 Velocità 18 18 24 24 30 30 30 30 30 24 24 24 24 24 18 18 Resistenza 10 10 18 10 10 18 10 10 18 10 10 18 10 10 10 18 Sezione 10 11 12 13 14 15 16 Perdita peso...
- Page 170 Allenamento all’aperto Premere per entrare nella modalità allenamento all’aperto (per bruciare grassi ad esempio): Premere per selezionare un’ icona, premere per confermare. Premere per convertire la modalità resistenza e la modalità potenza. Premere per impostare i dati. Premere per iniziare l’esercizio.
- Page 171 Allenamento all’aperto: scegliere prima un determinato programma e successivamente impostare il movimento. Ogni sezione di tempo = impostazione ora/16. La resistenza di ogni sezione viene mostrata nella seguente tabella: 12 programmi preimpostati Brucia grassi Sezione 10 11 12 13 14 15 16 Resistenza 10 10 10 12 12 12 14 14 14 14 16 16 16 18 18 18 Sfida veloce...
- Page 172 Premere per impostare i dati, premere per selezionare differenti items. Riscaldamento 2 min. Processo HRC Raffreddamento...
- Page 173 Se la frequenza cardiaca non viene rilevata, visualizzare l’immagine riportata sopra. Premere per entrare nella modalità di potenza costante: Modalità potenza costante Premere per iniziare l’esercizio.
- Page 174 5. Introduzione multimedia e impostazioni Musica Premere per entrare nel menu musica: Premere per selezionare la musica, premere per riprodurre. play/pausa; volume+; volume-; precedente ; successivo Video Premere per entrare nel menu video:...
- Page 175 a) La playlist viene nascosta dopo 5 secondi senza aver effettuato nessuna operazione. Premere per entrare in modalità schermo intero. Premere di nuovo per tornare alla pagina precedente. Una volta nascosta la playlist, premere to wake up the playlists. b) Premere to play/pausa, premere per regolare il volume..
- Page 176 Premere per passare alla modalità engineering mode. Riguarda la manutenzione del sistema. E’ necessario un codice per entrare in questa modalità. 6. Codice errore Se compare il codice E01, si è verificato un errore. EO1:signal error Il codice E02 segnala che probabilmente la resistenza del motore non funziona correttamente.
-
Page 177: Istruzioni D'uso
ISTRUZIONI D’USO Linee guida • Le seguenti linee guida aiutano a pianificare il proprio programma di allenamento. E’ importante tenere a mente che una corretta alimentazione e un riposo adeguato sono essenziali per ottenere risultati di successo. Prima di iniziare un programma di allenamento consultare il proprio medico: per accertarsi che: •... - Page 178 • Aumentate di volta in volta la velocità e la resistenza fino a dove riuscite. Inizialmente riuscirete ad esercitarvi per pochi minuti, ma allenandovi regolarmente, riuscirete presto ad aumentare la durata. • Prevedete 5 minuti di allenamento meno intensi durante la sessione. Successivamente dovrete allungare i muscoli che avete lavorato al fine di prevenire lesioni o crampi.
-
Page 179: Esercizi Di Stretching
ESERCIZI DI STRETCHING Prima di ogni allenamento si dovrebbe allungare i muscoli per almeno 5-10 minuti per riscaldarli a sufficienza. Ripetere i seguenti esercizi di stretching per cinque volte. Lo stretching prima dell'allenamento aiuta a migliorare la flessibilità e riduce il rischio di lesioni. RULLI PER LA TESTA Ruotare la testa a destra, fino a sentir allungare il lato sinistro del collo, poi ruotare la testa indietro, allungando il mento verso il soffitto e aprendo la bocca. - Page 180 ESERCIZIO PER ZONA DI ALLENAMENTO Dopo il riscaldamento, aumenta l'intensità del tuo programma di esercizio desiderato. Assicurati di mantenere la tua intensità per ottenere una migliore performance. Respira regolarmente e profondamente durante i tuoi esercizi, non trattenere mai il respiro. RAFFREDDAMENTO Termina ogni allenamento con una corsa o una camminata breve di almeno 1 minuto.
-
Page 181: Software Di Utilizzo (App)
Android Kinomap Note sull'uso dell'app: Si dovrebbero installare solo le applicazioni da una fonte affidabile. Sportstech Brands Holding non si assume alcuna responsabilità per software forniti da terzi. Ricordarsi di attivare la funzionalità Bluetooth sul dispositivo. Il codice QR all'inizio del manuale ti guiderà a vari tutorial di YouTube. Lì otterrai maggiori informazioni sull'app e sul dispositivo. -
Page 182: Smaltimento
L'utente finale è responsabile della cancellazione dei dati personali relativi ai rifiuti di apparecchiature elettriche ed elettroniche da smaltire prima della consegna. CONFORMITÀ Sportstech Brands Holding dichiara che il tipo di sistema radio è conforme alla direttiva 2014/53/UE. Il testo completo della dichiarazione di conformità UE è disponibile al seguente indirizzo internet: https://service.innovamaxx.de/lcx800_conformity... - Page 183 GEBRUIKSAANWIJZING NEDERLANDS Geachte klant, We zijn blij dat je een apparaat uit het SPORTSTECH-assortiment hebt gekozen. De sportuitrusting van SPORTSTECH brengt hoogwaardige apparaten met nieuwe technologieën. Lees vóór gebruik deze gebruikershandleiding aandachtig door en gebruik het apparaat zoals aangege- ven. Zo zul je ten volle van de prestaties van het apparaat kunnen profiteren en er vele jaren geniet van hebben.
- Page 184 1. Scan de QR-code 2. Bekijk video‘s 3. Begin snel en veilig Link naar de video's: https://service.innovamaxx.de/lcx800_video We zijn ook actief op social media! Raadpleeg voor de meest recente productinformatie, trainingen en nog veel meer, onze: Instagram-pagina Facebook-pagina https://www.instagram.com/sportstech.de https://www.facebook.com/sportstech.de...
- Page 185 INHOUD BELANGRIJKE VEILIGHEIDSINSTRUCTIES ............186 DIT KAN OOK INTERESSANT VOOR JE ZIJN ............. 188 EXPLOSIETEKENING/ONDERDELENLIJST ............189 MONTAGE ....................190 GEBRUIKSAANWIJZING VOOR HET DISPLAY ............ 194 GEBRUIKSAANWIJZING ................. 213 STRETCHOEFENINGEN .................. 215 APPLICATIESOFTWARE (APP) ................. 217 VERWIJDERING ..................... 218 CONFORMITEIT ..................... 218...
-
Page 186: Belangrijke Veiligheidsinstructies
BELANGRIJKE VEILIGHEIDSINSTRUCTIES Deze algemene veiligheidsinformatie moet strikt worden nageleefd bij het gebruik van dit product. Lees alle instructies voordat je het product gebruikt. LET OP: Raadpleeg een arts voordat je gaat sporten. Deze opmerking moet in acht worden genomen voor ouderen of personen met een beperkte gezondheidstoestand. Lees alle veiligheidsin- structies in deze handleiding zorgvuldig door voordat je het toestel gebruikt. - Page 187 • Schakel de stroom zo snel mogelijk uit en trek de stekker uit het stopcontact als je een probleem vermoedt. • Als het netsnoer beschadigd is, moet het worden vervangen, maar alleen door een bevoegd en gekwalificeerd persoon. Veiligheidsinstructies voeding 1.
-
Page 188: Dit Kan Ook Interessant Voor Je Zijn
DIT KAN OOK INTERESSANT VOOR JE ZIJN DE IDEALE BESCHERMING VOOR JE TRAINING THUIS. Sportstech biedt een vloerbeschermingsmat om ervoor te zorgen dat je vloer thuis niet wordt be- schadigd door je fitnessapparatuur. De mat is natuurlijk in verschillende maten verkrijgbaar en kan ook worden gebruikt voor yoga of andere oefeningen. -
Page 189: Explosietekening/Onderdelenlijst
EXPLOSIETEKENING/ONDERDELENLIJST In de volgende link In de volgende link vind je de explosietekening vind je de explosietekening en de onderdelenlijst: en de onderdelenlijst: https://service.innovamaxx.de/lcx800_spareparts https://service.innovamaxx.de/lcx800_spareparts... -
Page 190: Montage
MONTAGE DRAAI ALLE COMPONENTEN EN VOORGEMONTEERDE ONDERDELEN GOED VAST! Stap 1 1. Bevestig de voorste stabilisator (11) aan het hoofdframe (1) met de platkop-inbusschroeven (15), veerringen (22) en sluitringen (26) 2. Bevestig de achterste stabilisator (12) aan het hoofdframe (1) met de platkop-inbusschroeven (15), veerringen (22) en sluitringen (26) 3. - Page 191 Stap 3 1. Bevestig de pendelstangen (4L/R) aan de centrale kolom (3) met de platkop-inbusschroeven (18), veerringen (23) en sluitringen (27). Draai het geheel nog niet te vast aan. 2. Bevestig de pendelstangen (4L/R) en de pedaalstangen (5L/R) met de inbusschroeven (13), de sluitringen (28) en de nylon moeren (32).
- Page 192 Stap 5 Zet de pedalen (59L/R) vast aan het pedaalframe (8) met de inbusschroeven (19). Stap 6 1. Bevestig de kruiskoppeling (31) aan het pedaalframe (8R) met de platte kop-inbusschroef (14) en de huls (71) en bevestig vervolgens de verstelbare pedaalarm (9) met platkop-inbusschroef (48), de asring (75), de sluitring (25) en de moer (74).
- Page 193 Stap 7 1. Sluit de hoofdleiding (62) en de hartslagkabel (65) aan op het display (63). Bevestig vervolgens het display (63) met een platkop-kruisschroef (67). 2. Bevestig de kap van de centrale kolom (41a/b) aan de centrale kolom (3) met de platkop-kruisschroeven (60). 3.
-
Page 194: Gebruiksaanwijzing Voor Het Display
GEBRUIKSAANWIJZING VOOR HET DISPLAY 1. De verschillende knoppen Start-knop Stop-knop Home-knop Terug-knop Weerstand verhogen... - Page 195 Weerstand verlagen Pauze-knop Omhoog-knop Omlaag-knop Knop voor links Knop voor rechts Enter Volume verhogen Volume verlagen Afspelen/pauze Vorige Volgende...
- Page 196 2. Hardwareconfiguratie Display 7 inch 1024x600TFT Hoofdprocessor ITE9854 Muziek: MP3 Video: beschikbaar voor max. 1280x768 resolutie; MP4, MKV-bestanden die zijn gedecodeerd en gecomprimeerd door H.264 Muziek: MP3 Video: Beschikbaar voor max. 1280x768 resolutie; MP4, MKV-bestanden die zijn gedecodeerd en gecomprimeerd door H.264 FLASH 8M NOR + 8G EMMC 3.
- Page 197 Geeft de verbrande calorieën weer, eenheid: Kcal Heart Rate (hartfrequentie): toont de huidige hartslag Constant vermogen Weerstandsniveau, in de constant vermogen-modus wordt het vermogen van de inspanning in Watt weergegeven Pictogrammen, deel 2 Bevestig met om een pictogram te selecteren. Tijd countdown-modus.
- Page 198 III) Multimediapictogrammen: Muziek. Selecteer Video. Selecteer Setting (Instellingen). Selecteer IV) Pictogrammen van de staat Na de U-disk te plaatsen, brandt het USB-pictogram permanent. Of het zal altijd helderder worden. Wanneer Bluetooth met succes is verbonden, blijft het pictogram branden. Of het zal altijd helderder worden. Let op: de Bluetooth-functie is optioneel. 4.
- Page 199 Druk op de knop om de huidige training te beëindigen. De trainingsgegevens worden na het indrukken van de knop direct weergegeven. Countdown-modus Selecteer het pictogram voor de gewenste tijd en druk op om te bevestigen (neem de tijd countdown-modus als voorbeeld): Druk de knoppen om de gewenste tijd in te stellen.
- Page 200 Druk op om te bevestigen en vervolgens verschijnt er een nieuw scherm. Druk op om de training te beginnen. Countdown-modus: selecteer een bepaalde countdown-modus, stel de nodige gegevens in en begin met de training. In de laatste 10 seconden geeft het systeem 5 keer een alarm na telkens 2 seconden. Tijd countdown Bereik: 0:01-10 uur, standaardinstelling 0:30:00 Afstand countdown-modus...
- Page 201 Druk op de knoppen om het pictogram te selecteren en druk op om te bevestigen. Druk op de knoppen om de weerstand en het vermogen te veranderen. Druk op de knoppen om de gegevens in te stellen. Druk op de knoppen om de weerstand te veranderen.
- Page 202 Virtuele landschapsmodus Druk op de knop om naar de virtuele landschapsmodus te gaan: Druk op de knoppen om het pictogram te selecteren en druk vervolgens op om met de training te beginnen. Het standaardniveau van de weerstand is 10, druk op om de weerstand individueel in te stellen.
- Page 203 Druk op de knoppen om het pictogram te selecteren en druk op om te bevestigen. Druk op de knoppen om de weerstand en het vermogen te veranderen. Druk op de knoppen om de gegevens in te stellen. Druk op de knop om de training te beginnen.
- Page 204 Werking Druk op de knop om terug te keren naar de vorige pagina. Druk op de knop om naar de homepagina terug te gaan. Druk op het 'Racing'-pictogram op het startscherm om naar de trainingen te gaan. Als je op een ander pictogram drukt (bijv.
- Page 205 Snelheid van elke fase van de 12 vooraf ingestelde programma's Aërobe regeneratie Fase 10 11 12 13 14 15 16 18 18 24 24 30 30 30 30 30 24 24 24 24 24 18 18 Snelheid Weerstand 10 10 18 10 10 18 10 10 18 10 10 18 10 10 10 18 Fase 10 11 12 13 14 15 16 Afvallen...
- Page 206 Training Druk op de knop om naar de trainingen te gaan (bijv. vetverbranding): Druk op de knoppen om het pictogram te selecteren en druk op om te bevestigen. Druk op de knoppen om de weerstand en het vermogen te veranderen. Druk op de knoppen om de gegevens in te stellen.
- Page 207 Training: Selecteer eerst een specifiek programma en voltooi vervolgens de invoer van de gegevens. Er zijn 16 fasen voor elk programma. In elke fase is de tijd gelijk aan de ingestelde tijd/16. De weerstand voor elke fase is als volgt: 12 vooraf ingestelde programma's Vetverbranding Fase...
- Page 208 Druk op om de gegevens in te stellen, druk op om verschillende elementen te selecteren. 2 minuten opwarmen Afkoelen...
- Page 209 Als er geen hartslagsignaal wordt gedetecteerd, wordt bovenstaand scherm weergegeven. Druk op om over te schakelen naar de modus voor constant vermogen: Statische constant vermogen-modus Druk op om je training te beginnen.
- Page 210 5. Multimedia en instellingen Muziek Druk op om naar het muziekmenu te gaan: Druk op om je muziek te selecteren en druk op om af te spelen. afspelen/pauze volume +- vorige volgende Video Druk op om naar het videomenu te gaan:...
- Page 211 a) De afspeellijsten verdwijnen na 5 seconden zonder bediening. Druk op om naar volledig scherm te gaan. Druk nog een keer op om terug te keren naar de vorige pagina. b) Als de afspeellijsten verborgen zijn, druk je op om de afspeellijsten opnieuw op te roepen. c) Druk op om af te spelen of te pauzeren en druk op om het volume aan te passen.
- Page 212 Druk op om naar de technische modus te gaan. Deze modus is voor systeemonderhoud. Daarvoor heb je een toegangscode nodig. 6. Foutcode Als E01 wordt weergegeven, betekent dit een signaalfout. E01: Signaalfout Als E02 verschijnt, is er waarschijnlijk iets mis is met de weerstandsmotor.
-
Page 213: Gebruiksaanwijzing
GEBRUIKSAANWIJZING Richtlijnen • De volgende richtlijnen helpen bij het plannen van je trainingsprogramma. Denk eraan dat de juiste voeding en voldoende rust essentieel zijn voor succesvolle resultaten. Als je met een trainingsprogramma begint, zou je eerst je arts moeten raadplegen als: •... - Page 214 • Verhoog het tempo en de weerstand slechts licht en train zo lang mogelijk. Het zou kunnen dat je maar een paar minuten aan een stuk door kunt trainen. Dit zal echter veranderen als je regelmatig traint. Sluit elke trainingssessie af met een afkoelfase van 5 minuten door de weerstand op een lager niveau te zetten.
-
Page 215: Stretchoefeningen
STRETCHOEFENINGEN Voor elke training moet u uw spieren minstens 5-10 minuten strekken om ze voldoende op te war-men. Herhaal de volgende stretchoefeningen vijf keer. Rekken voor de training helpt de flexibiliteit te verbeteren en vermindert het risico op letsel. MET JE HOOFD ROLLEN Draai je hoofd een seconde naar rechts, voel de stretch aan de linkerkant van je nek, draai dan je hoofd een seconde terug, strek je kin omhoog en laat je mond open. - Page 216 TRAINING Verhoog na het opwarmen de intensiteit volgens je gewenste trainingsprogramma. Zorg ervoor dat de intensiteit voor maximaal vermogen wordt gehandhaafd. Adem regelmatig en diep tijdens de training - houd in geen geval je adem in. AFKOELEN Sluit elke training af met een lichte jogging of wandeling van minstens 1 minuut. Om te voltooien, doe je rekoefeningen gedurende 5 tot 10 minuten om volledig af te koelen.
-
Page 217: Applicatiesoftware (App)
Kinomap Opmerkingen over het gebruik van de app: Installeer alleen apps waarvan je de bronnen vertrouwt. Sportstech Brands Holding kan geen aans- prakelijkheid aanvaarden voor software die door derden wordt geleverd. Vergeet niet om de Bluetooth-functie op je apparaat in te schakelen. -
Page 218: Verwijdering
Je bent als eindgebruiker zelf verantwoordelijk voor het verwijderen van persoonsgegevens op de te verwijderen elektrische apparaten voordat je deze aflevert. CONFORMITEIT Hierbij verklaart Sportstech Brands Holding dat het type radioapparatuur voldoet aan de richtlijn 2014/53/EU. De volledige tekst van de EU-conformiteitsverklaring is beschikbaar op het volgende internetadres: https://service.innovamaxx.de/lcx800_conformity... - Page 220 Verkauf durch / Distributed by / Distribuido por / Distribué / Verkoop via Sportstech Brands Holding GmbH Potsdamer Platz 11 10785 Berlin +49 30 220 663 520 www.sportstech.de...
Need help?
Do you have a question about the LCX800 and is the answer not in the manual?
Questions and answers