
Summary of Contents for Smarttech SDC-650
- Page 1 SMART Document Camera 650 USER GUIDE SDC-650 Was this document helpful? smarttech.com/docfeedback/171733...
- Page 2 Trademark notice SMART Board, smarttech, the SMART logo and all SMART taglines are trademarks or registered trademarks of SMART Technologies ULC in the U.S. and/or other countries. All third-party product and company names may be trademarks of their respective owners.
-
Page 3: Important Information
This objects to the battery terminals. equipment generates, uses and can radiate radio frequency energy and, if not installed and used in accordance with the Do not disassemble batteries. instructions, may cause harmful interference to radio communications. smarttech.com/kb/171733... - Page 4 47 CFR § 2.1077 Compliance Information iii. le gain maximal d’antenne permis pour les dispositifs utilisant les bandes 5 250-5 350 MHz et 5 470-5 725 MHz Unique Identifier: SDC-650, WD650 doit se conformer à la limite de p.i.r.e.; Responsible Party – U.S. Contact Information iv.
- Page 5 Directive 2014/53/EU. The full text of the EU lithium-ion batteries. The remote contains two AAA batteries. declaration of conformity is available at the following internet Recycle or dispose of batteries properly. address: smarttech.com/compliance. smarttech.com/compliance for more information. WARNING This equipment is compliant with Class A of CISPR 32.
-
Page 6: Table Of Contents
Downloading the software Viewing a document camera’s live image Using the software to control the live image Viewing saved images and videos in the library Chapter 5: Using with SMART Notebook software Connecting to SMART Notebook Using the Document Camera Viewer in SMART Notebook smarttech.com/kb/171733... -
Page 7: About This Guide
This guide is for users who set up and use the SMART Document Camera 650 in their organizations. It includes information about setting up the document camera and using the document camera’s on-screen display menu and software. For more information, such as videos, training, and how-to topics, visit support.smarttech.com/docs/redirect/?product=doccamera650. smarttech.com/kb/171733... -
Page 8: Chapter 1 Welcome
Ultra HD visualizer captures live video and images directly to the SMART Board®, SMART Notebook®, or your desktop. The SDC-650 is a fully UVC-compliant camera with built-in microphone that can be used as a high-quality webcam with SMART Board interactive displays, keeping the continuity of a classroom experience even while video conferencing. -
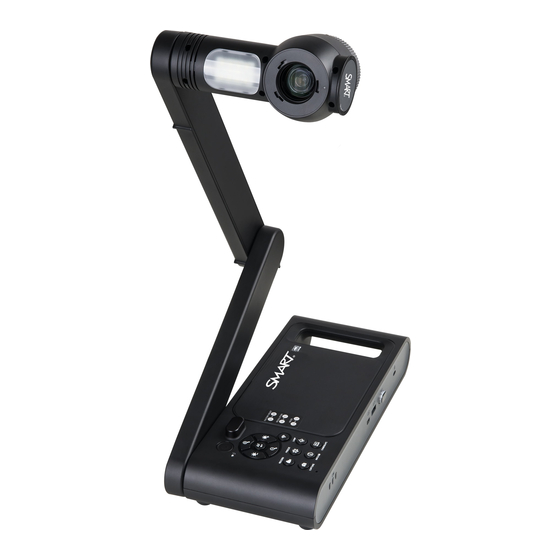
Page 9: Components
The SMART Document Camera has a flexible arm for positioning the lens at any angle. The camera head has LED overhead lighting to enhance lighting conditions. The SMART Document Camera 650 consists of the following components: Name Camera head LED light Camera arm IR sensor Control panel Built-in mic Front panel Right panel Handle smarttech.com/kb/171733... -
Page 10: Control Panel
Increase or decrease the image magnification in Camera mode Access options from the OSD menu Navigate up/down Brightness Increase or decrease the level of brightness when capturing a live images increase/decrease Access options from the OSD menu Navigate left/right smarttech.com/kb/171733... -
Page 11: Right Panel
The right panel of the document camera consists of the following: Name More information HDMI input Use to connect a computer to the document camera HDMI output Use to connect to an external display (monitor, projector, or interactive display) DC power jack Use to recharge the document camera’s battery smarttech.com/kb/171733... -
Page 12: Front Panel
SMART support USB mini port Port for connecting the document camera to a computer using a USB connection USB port Port for a USB flash drive Wi-Fi dongle receiver Receiver for the Wi-Fi dongle Anti-theft slot Attachment for a Kensington compatible lock smarttech.com/kb/171733... -
Page 13: Remote Control
Capture still image in Camera mode. When in continuous capture mode, press this button again to stop. Record Start or stop recording video and audio NOTE Video recording can be saved to a connected USB drive or a connected computer only when using SMART Notebook or SMART Document Camera 650 software. smarttech.com/kb/171733... -
Page 14: Power Adapter
If you need to extend the USB connection, see the Troubleshooting and extending USB 2.0 and USB 3.0 connection knowledge base article for guidance. Wi-Fi dongle Use the Wi-Fi dongle to connect your document camera to the network. See Using the HDMI method to connect on page 22. smarttech.com/kb/171733... -
Page 15: Understanding Camera And Pc Modes
HDMI cable from the document camera’s HDMI OUT port to a display or projector. NOTES The Capture button on the document camera’s control panel has no effect in PC mode. In PC mode, you can view the document camera live image only in SMART Notebook software. smarttech.com/kb/171733... -
Page 16: Features Of Each Mode
The following table describes the differences between each mode. Feature Camera mode PC mode View computer input View document camera image Control the document camera from a computer Capture to SMART Notebook software Access the related on-screen display menu Capture to a USB drive smarttech.com/kb/171733... -
Page 17: Chapter 2: Getting Started
To unfold and position your document camera 1. Hold the handle of the document camera to stabilize it. 2. Lift the camera arm up, then pull the camera arm outward. 3. Rotate the camera head and aim the lens at your object. smarttech.com/kb/171733... -
Page 18: Turning Your Document Camera On And Off
The power indicator light turns off. NOTE If you press and hold the power button for less than three seconds, the document camera enters Standby mode and the power indicator light shines solid red. smarttech.com/kb/171733... -
Page 19: Installing Software For Your Document Camera
SMART Board interactive displays) To access downloads and installation instructions for the software on Windows and Mac operating systems, see support.smarttech.com//docs/redirect/?product=doccamera650&context=downloads. The SMART Document Camera 650 Android app for SMART Board interactive displays with iQ is available from the iQ app store or from the Google Play store for other Android devices. -
Page 20: Connecting To A Computer Or Display
There are three wireless connection methods: Peer-to-Peer (P2P) (recommended) Wi-Fi Miracast Read the sections below for the connection method you want to use. IMPORTANT Before completing these procedures, make sure you install the required software. smarttech.com/kb/171733... -
Page 21: Using The Usb Method To Connect
3. Turn the document camera on and then press Camera/PC on the control panel or remote control. 4. Open the SMART Document camera software or SMART Notebook software, depending on which application you want to use to display the document camera’s live images. smarttech.com/kb/171733... -
Page 22: Using The Hdmi Method To Connect
You can use the included Wi-Fi dongle to create a direct Peer-to-Peer (P2P) wireless connection between the document camera and your computer. This direct connection enables you to quickly connect the document camera without having to enter a password to connect school’s network. This is the easiest and recommended way to connect wirelessly. smarttech.com/kb/171733... - Page 23 2. Connect the included Wi-Fi dongle to a USB port on your computer. 3. Open the SMART Document Camera software. You will see your document camera listed. Check the serial number on the bottom of the camera to find the camera name. 4. Click 5. Click Next. smarttech.com/kb/171733...
-
Page 24: Using The Wi-Fi Connection
The Wi-Fi indicator light turns blue. 3. Open the SMART Document Camera software. The software automatically detects available document cameras. 4. Click for the document camera you want to connect with. A message appears asking if you want to set up Wi-Fi mode. smarttech.com/kb/171733... -
Page 25: Connecting Your Document Camera To Miracast
If the Wireless tab is disabled, the Wi-Fi mode is turned off. To turn it on, press the Wi-Fi button and wait for the indicator light on the document camera to turn blue. 3. Browse to Mode and then press smarttech.com/kb/171733... - Page 26 5. Use the down arrow button on the remote control or on the control panel to browse to Miracast Setup and then press 6. Select your remote display from the list. The camera’s image appears on the remote display’s screen after connecting. smarttech.com/kb/171733...
-
Page 27: Chapter 3: Using Your Document Camera
Image The Image tab contains options for adjusting these live image settings: Brightness Contrast Saturation Preview Mode Effect Mirror Exposure White balance Wireless The Wireless tab contains options for setting the wireless connection, such as AP, Wi-Fi, or Miracast. smarttech.com/kb/171733... -
Page 28: Browsing To The Osd Menus And Sub-Menus In Camera Mode
OSD menu. Accessing the Image menu 1. Set your document camera to Camera mode. 2. Press Info on the control panel or remote control. The OSD menu appears. 3. Browse to and select the Image tab. smarttech.com/kb/171733... -
Page 29: Accessing The Wireless Menu
Manual White Balance Blue and Manual White Balance Red options become available for you to adjust. Accessing the Wireless menu 1. Set your document camera to Camera mode. 2. Press Info on the control panel or remote control. The OSD menu appears. smarttech.com/kb/171733... -
Page 30: Accessing The System Menu
The OSD menu appears. 3. Press the button on the control panel or remote control to browse to the System tab. System setting options Description Select or change the language. Language smarttech.com/kb/171733... -
Page 31: Using Camera Mode To Display Objects And Documents
Your document camera must be connected to a display to use the OSD menu. Using Camera mode 1. Connect your document camera to a projector or flat-panel display with an HDMI cable. 2. Press Camera/PC on the control panel or remote control. The camera’s image appears on the display. smarttech.com/kb/171733... -
Page 32: Displaying Printed Documents
Rotating and mirroring the image To rotate the image Adjust the camera head to the desired shooting area, and press Rotate on the remote control to rotate the image 180° or twist the control on the camera’s head to rotate the image 90°. smarttech.com/kb/171733... -
Page 33: Changing The Picture Mode Or Adding An Effect
Microscope: For use when using the microscope adapter with the document camera. Macro: For use while capturing objects is 4" (10 cm) or less away from the document camera. Infinity: For use while capturing objects that are more than 30" (80 cm) away from the document camera. smarttech.com/kb/171733... -
Page 34: Capturing Images And Videos To A Usb Drive
Record button to start recording video. Press the Record button again to stop recording. When you are ready to view the files, connect the USB drive to a computer or interactive display. smarttech.com/kb/171733... -
Page 35: Using A Microscope With Your Document Camera
1. Select the appropriate rubber coupler size for the microscope eyepiece and insert it in the microscope adapter. 2. Attach the microscope adapter to the document camera and tighten the three bolts until the adapter is secured. IMPORTANT Make sure the arrow on the camera head and microscope adapter are on the same side. smarttech.com/kb/171733... -
Page 36: Displaying A Microscope Slide
5. Adjust and aim the camera head at the furthest point, and then press the AUTO FOCUS button on the control panel or remote control. 6. Adjust the microscope’s focus as needed. Displaying a microscope slide 1. Place a slide or object on the stage of the microscope. 2. Focus the microscope so that the subject is sharp. smarttech.com/kb/171733... -
Page 37: Using Miracast To View Images On A Display
3. Browse to Mode and then press 4. Select Miracast and then press The Miracast setup option is now available. 5. Use the down arrow button on the remote control or on the control panel to browse to Miracast Setup and then press smarttech.com/kb/171733... - Page 38 Chapter 3 Using your document camera 6. Select your remote display from the list. The camera’s image appears on the remote display’s screen after connecting. smarttech.com/kb/171733...
-
Page 39: Chapter 4: Using The Smart Document Camera 650 Software
You can use the SMART Document Camera software to view live images from the document camera to a device connected through a USB or wireless connection. When you first open the SMART Document Camera 650 software, you will see the following main window with the following features: smarttech.com/kb/171733... -
Page 40: Downloading The Software
Using the SMART Document Camera 650 software Downloading the software To download the software for Windows and Mac operating systems, visit support.smarttech.com//docs/redirect/?product=doccamera650&context=downloads. For SMART Board interactive displays with iQ, visit the iQ app store on the display to download the software for Android. - Page 41 The live stream window opens, showing the live image from the document camera. To add and connect to a document camera manually using its IP address Open the On-screen display menu for the document camera. 2. Navigate to the System > Information tab to find the IP address. smarttech.com/kb/171733...
-
Page 42: Using The Software To Control The Live Image
If you don’t enter a name, the document camera’s serial number is used. 6. Click Done. Using the software to control the live image When you view the live image from a connected document camera, the following controls appear: smarttech.com/kb/171733... - Page 43 Select the microphone to mute or unmute the microphone. Select Record to begin the recording. Select the pause button to pause the recording. Select Stop to end the recording. Takes a screen capture of a selected section of the live image. smarttech.com/kb/171733...
- Page 44 Then select the images you want to view alongside the live image, then click the check mark. To stop split-screen mode, clear the selection of all the images you previously selected, then click the check mark to apply the changes. Click the X in the split-screen bar to close it. Rotates the live image. smarttech.com/kb/171733...
-
Page 45: Viewing Saved Images And Videos In The Library
Recordings or screen captures you take using the SMART Document Camera 650 software are saved to the Library, which is synchronized with your device’s local drive. To view saved images and videos, open the Library tab. Then select either the Image or Video folder to see saved files. smarttech.com/kb/171733... -
Page 46: Adding Images Or Videos To Your Library From Other Sources (Windows Only)
To export images or videos on a Windows computer 1. Open Windows’ File Explorer. 2. For images, browse to Pictures > SMART Document Camera 650 software . For videos, browse to Videos > SMART Document Camera 650 software. 3. Copy the files you want to a new location. smarttech.com/kb/171733... -
Page 47: Chapter 5: Using With Smart Notebook Software
To connect to the computer and turn on USB connection mode 1. Connect the document camera to the computer using the included USB cable. 2. Turn the document camera on and then press Camera/PC on the control panel or remote control. 3. On the computer, open SMART Notebook. smarttech.com/kb/171733... - Page 48 The SMART Document Camera Viewer window in 4K presenter: NOTE The 4K presenter is recommended to use when you are connected to a 4K display device so that you ensure the best picture quality. Otherwise, the controls and features are the same. smarttech.com/kb/171733...
-
Page 49: Using The Document Camera Viewer In Smart Notebook
Use these controls to zoom in or out on the live image. Use these controls to increase or decrease the brightness of the live image. Use these controls to adjust the focus. You can select Auto-Focus, Focus Out, and Focus In. smarttech.com/kb/171733... - Page 50 Chapter 5 Using with SMART Notebook software Description Select this control to view the following additional settings for changing the live image’s appearance: Rotate 180° Convert to color Convert to black and white Convert to negative Convert to positive smarttech.com/kb/171733...
- Page 51 SMART TECHNOLOGIES smarttech.com/support smarttech.com/contactsupport smarttech.com/kb/171733...
Need help?
Do you have a question about the SDC-650 and is the answer not in the manual?
Questions and answers