Table of Contents
Advertisement
Available languages
Available languages
allen + roth
is a registered trademark
®
of LF, LLC. All Rights Reserved.
Serial Number:
Questions, problems, missing parts? Before returning to your retailer, call our customer service department at 1-866-439-9800, 8 a.m. - 8
p.m., EST, Monday - Sunday. You may also contact us anytime at Lowes.com/allenandroth
VR20201
Purchase Date:
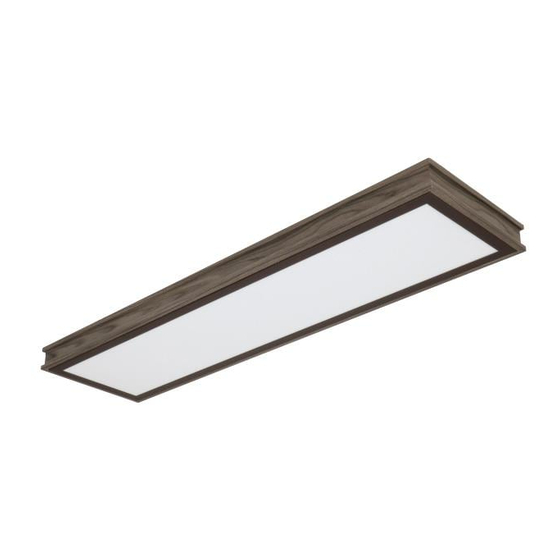
1 ft. x 4 ft. LED Flat Panel
1
ITEM #2592470
MODEL #FP1285-PRP-48LFC-R
Français p. 9
Español p. 17
ATTACH YOUR RECEIPT HERE
JOIGNEZ VOTRE REÇU ICI
ADJUNTE SU RECIBO AQUÍ
Français p.
Français p.
Advertisement
Chapters
Table of Contents

Subscribe to Our Youtube Channel
Related Manuals for Allen + Roth FP1285-PRP-48LFC-R

Summary of Contents for Allen + Roth FP1285-PRP-48LFC-R
- Page 1 ITEM #2592470 1 ft. x 4 ft. LED Flat Panel MODEL #FP1285-PRP-48LFC-R allen + roth is a registered trademark ® Français p. of LF, LLC. All Rights Reserved. Français p. 9 Français p. Español p. 17 ATTACH YOUR RECEIPT HERE JOIGNEZ VOTRE REÇU ICI...
-
Page 2: Table Of Contents
TABLE OF CONTENTS PACKAGE CONTENTS ............................2 HARDWARE CONTENT ............................3 PREPARATION ................................ 3 SAFETY INFORMATION ............................3 5 LIGHT SETTING SLIDE SWITCH ......................... 4 ASSEMBLY INSTRUCTIONS ..........................4 CARE AND MAINTENANCE ............................ 8 TROUBLESHOOTING ............................. 8 WARRANTY ................................8 REPLACEMENT PARTS LIST .......................... -
Page 3: Hardware Content
HARDWARE CONTENT (shown actual size) Mounting Screw Qty. 2 Wood Screw Washer Drywall Anchor Wire Nut Qty. 4 Qty. 4 Qty. 4 Qty. 3 Cable tie Qty. 2 Machine screw Machine screw Plastic push-in Qty. 2 Qty. 2 fastener Qty. 1 SAFETY INFORMATION Please read and understand this entire manual before attempting to assemble, operate or install the product. -
Page 4: Light Setting Slide Switch
5 Light Setting Slide Switch Slide switch that allows the color temperature of the light to be adjusted between 5 values: 6500K, 5000K, 4000K, 3000K, 2700K ASSEMBLY INSTRUCTIONS 1. Remove mounting plate (A) from LED panel (C) by sliding into the direction of the slots closest to the mounting screws (AA), and then lifting up. - Page 5 3a. WOOD: Locate the open holes for mounting at the corners of the mounting plate (A) and drill 1/8 in. pilot hole in the center. If a wooden stud is encountered, use the wood screws (BB) and washers (CC) provided to secure the mounting plate directly to stud. Hardware Used Wood Screw Qty.
- Page 6 5. Fixture must be properly grounded. Connect fixture ground wire to ground wire in electrical box using a wire nut (EE). Ground wires can be either green or bare copper. Connect black supply lead to black fixture wire and white supply lead to white fixture wire using wire nuts (EE).
- Page 7 8. Slide panel (C) until tabs are locked into place. Note that the direction will be either left or right, depending on panel (C) orientation. Slowly release fixture, making sure it stays in place. Slowly release fixture, making sure it stays in place. IMPORTANT: To lock the panel (C) in place, insert a plastic push-in fastener (II) into the predrilled hole on the side of the panel (C).
-
Page 8: Care And Maintenance
CARE AND MAINTENANCE Periodically clean the fixture and diffuser using a mild, non-abrasive cleaner and soft cloth. When cleaning the fixture, make sure the power is turned off. Do not spray cleaner directly onto any part of the fixture or LEDs. TROUBLESHOOTING PROBLEM POSSIBLE CAUSE... - Page 9 ARTICLE #2592470 Panneau à DEL de 30 cm x 122 cm allen + roth est une marque de commerce ® déposée de LF, LLC. Tous droits réservés. MODÈLE #FP1285-PRP-48LFC-R Numéro de série : Date d’achat : Des questions, des problèmes, des pièces manquantes? Avant de retourner l’article au détaillant, appelez notre service à la clientèle au 1 866 439-9800, entre 8 h et 20 h (HNE), du lundi au dimanche.
-
Page 10: Contenu De L'emballage
TABLE DES MATIÈRES CONTENU DE L’EMBALLAGE ..........................10 QUINCAILLERIE INCLUSE ............................. 11 PRÉPARATION ................................ 11 CONSIGNES DE SÉCURITÉ ........................... 11 INTERRUPTEUR À GLISSIÈRE À 5 POSITIONS ....................12 INSTRUCTIONS POUR L’ASSEMBLAGE ....................... 12 ENTRETIEN ................................16 DÉPANNAGE ................................16 GARANTIE ................................16 LISTE DES PIÈCES DE RECHANGE........................ -
Page 11: Quincaillerie Incluse
QUINCAILLERIE INCLUSE (grandeur réelle) Vis de montage Qté : 2 Vis à bois Rondelle Cheville d’ancrage pour Capuchon de connexion Qté: 4 Qté: 4 cloison sèche Qté: 3 Qté: 4 Attache de câble Qté: 2 Vis à métaux Vis de soutien Fixation à... -
Page 12: Interrupteur À Glissière À 5 Positions
INTERRUPTEUR À GLISSIÈRE À 5 POSITIONS Interrupteur à glissière qui permet de régler la température de couleur de la lumière entre 5 valeurs : 6 500 K, 5 000 K, 4 000 K, 3 000 K, 2 700 K INSTRUCTIONS POUR L’ASSEMBLAGE 1. - Page 13 3a. BOIS : Repérez les trous de montage aux coins de la plaque de montage (A) et percez un avant-trou de 1/8 po au centre. Si vous touchez un montant de bois, utilisez les vis à bois (BB) et les rondelles (CC) fournies pour fixer la plaque de montage directement au montant.
- Page 14 5. Le luminaire doit être correctement mis à la terre. Raccordez le fil de mise à la terre du luminaire au fil de mise à la terre du coffret de Conducter branchement à l’aide d’un capuchon de connexion (EE). Les fils de sous de ligne tension...
- Page 15 8. Faites glisser le panneau (C) jusqu’à ce que les languettes soient verrouillées en place. Notez que la direction sera soit à gauche soit à droite, selon l’orientation du panneau (C). Relâchez doucement le luminaire en vous assurant qu’il reste en place. IMPORTANT : Pour maintenir le panneau (C) en place, insérez une fixation à...
-
Page 16: Entretien
ENTRETIEN Nettoyez périodiquement le luminaire et le diffuseur à l’aide d’un nettoyant pour vitres doux et non abrasif et d’un linge doux. Assurez-vous que le luminaire est éteint avant de le nettoyer. Ne vaporisez pas de produit nettoyant directement sur les pièces du luminaire ou sur les ampoules à DEL. DÉPANNAGE PROBLÈME CAUSE POSSIBLE... - Page 17 ARTÍCULO n.º 2592470 Panel plano LED de 0,30 m x 1,21 m allen + roth® es una marca registrada MODELO #FP1285-PRP-48LFC-R de LF, LLC. Todos los derechos reservados. Número de serie: Fecha de compra: ¿Preguntas, problemas, piezas faltantes? Antes de volver a la tienda, llame a nuestro Departamento de Servicio al Cliente al 1-866-439-9800, de lunes a domingo de 8 a.m.
-
Page 18: Contenido Del Paquete
ÍNDICE CONTENIDO DEL PAQUETE ..........................18 ADITAMENTOS ................................ 19 PREPARACIÓN ................................ 19 INFORMACIÓN DE SEGURIDAD ..........................19 5 INTERRUPTOR DESLIZANTE PARA LA CONFIGURACIÓN DE LUZ ..............20 INSTRUCCIONES DE ENSAMBLAJE ........................20 CUIDADO Y MANTENIMIENTO ..........................24 SOLUCIÓN DE PROBLEMAS ..........................24 GARANTÍA ................................ -
Page 19: Aditamentos
ADITAMENTOS (se muestran en tamaño real) Tornillos de montaje Cant. 2 Tornillos para madera Arandela Ancla de expansión Empalme plástico Cant. 4 Cant. 4 para panel de yeso Cant. 3 Cant. 4 Amarres de cable Cant. 2 Tornillo para metal Tornillo de asistencia Sujetador de presión Cant. -
Page 20: Interruptor Deslizante Para La Configuración De Luz
5 INTERRUPTOR DESLIZANTE PARA LA CONFIGURACIÓN DE LUZ Interruptor deslizante que permite ajustar la temperatura de color de la luz entre 5 valores: 6500K, 5000K, 4000K, 3000K, 2700K INSTRUCCIONES DE ENSAMBLAJE 1. Retire la placa de montaje (A) del panel LED (C) al deslizar en la dirección de las ranuras más cercanas a los tornillos de montaje (AA) y, a continuación, levántela. - Page 21 3a. MADERA: ubique los orificios abiertos para montar en las esquinas de la placa de montaje (A) y taladre un orificio guía de 1/8 pulg. (0,3 cm) en el centro. Si detecta una viga de madera, use los tornillos para madera (BB) y las arandelas (CC) provistos para fijar la placa de mon- taje directamente a la viga.
- Page 22 5. La lámpara debe tener una puesta a tierra adecuada. Conecte el conductor de puesta a tierra de la lámpara al conductor de Línea puesta a tierra de la caja eléctrica con el empalme plástico (EE). Los corriente conductores de puesta a tierra pueden ser de cobre desnudo o de color verde.
- Page 23 8. Deslice el panel (C) hasta que las pestañas estén bloqueadas en su lugar. Tenga en cuenta que la dirección será izquierda o derecha, según la orientación del panel (C). Suelte lentamente la lámpara y asegúrese de que permanezca en la posición correcta. Suelte lentamente la lámpara y asegúrese de que permanezca en la posición correcta.
-
Page 24: Cuidado Y Mantenimiento
CUIDADO Y MANTENIMIENTO Limpie la lámpara y el difusor periódicamente con un paño suave y un limpiador suave y no abrasivo. Cuando limpie la lámpara, asegúrese de desconectar la fuente de alimentación. No use limpiador directamente en ninguna parte de la lámpara o de las luces LED. SOLUCIÓN DE PROBLEMAS PROBLEMA CAUSA POSIBLE...
Need help?
Do you have a question about the FP1285-PRP-48LFC-R and is the answer not in the manual?
Questions and answers