Advertisement
Quick Links
Advertisement

Related Manuals for Lavish Home Collection 80-ENTRYF-6

Summary of Contents for Lavish Home Collection 80-ENTRYF-6
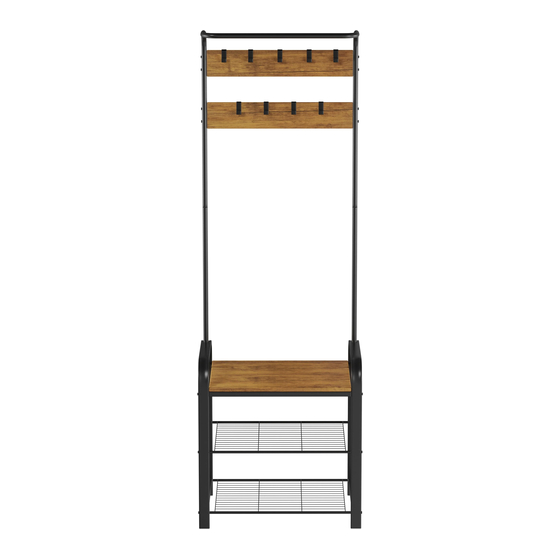
- Page 1 COAT RACK page#1...
- Page 2 Table of contents............................2 General Information..........................3 Use and Storage of the Handbook.......................3 Intended use............................3 Safety....................................................... Parts list............................Hardware...............................4 Assembly instructions........................5-10 Cleaning, care and Maintenance....................
- Page 3 Thank you for purchasing our Lavish Home Collection product, we have designed our furniture with you, the customer in mind. Our clear and easy step by step instructions will guide you through the project from start to finish. This user manual contains important and useful information to accompany your purchase. Failure to follow the instructions outlined may result in personal injury or damage to the product.
-
Page 4: Part List
PART LIST PART A PART B PART C PART D First board 1pc Top board 2pcs bottom net rack 2pcs Steel leg 2pcs PART E PART F PART G PART H top connected tube 1pc support tube 2pcs support tube 2pcs support tube 2pcs PART I hook-9pcs... - Page 5 Assembly instructions Attention: In order to help with assembly, do not tighten the screws until you have assembled all the other parts STEP 1 #2x12 #8x1 a) Connect Middle Shelf D to Part A, using hardware #2 & #8 b) Connect F to Part A, using hardware #2 & #8 c) Connect Bottom D Shelf to Part A, using hardware #2 &...
- Page 6 STEP 3 #4x2 #8x1 Assemble part H with hardware #4,#8 STEP 4 #4x2 #8x1 Assemble part E with hardware #4,#8 page#6...
- Page 7 STEP 5 #4x4 #8x1 Assemble part B with hardware #4,#8 STEP 6 #1x8 #9x1 Assemble part C with hardware #1,#8 page#7...
- Page 8 STEP 7 PART I PART Assemble on the board directly STEP 8 #8x1 Using the Allen key tighten all screws. page#8...
- Page 9 STEP 9 #7x2 #5x2 #6x2 To prevent tipping. Secure coat rack to a wall using #8 straps on both sides of unit page#9...
- Page 10 Final Step STEP 10 page#10...
- Page 11 Cleaning, Care and Maintenance Regularly check all fastenings to ensure that they are properly tightened. Clean with a wet soft cloth, then use a soft lint free cloth to dry. Do not clean furniture with harsh cleaners or polish. Do not place furniture in direct sunlight or near heating/cooling vents. For indoor residential use, do not place furniture outside.
Need help?
Do you have a question about the 80-ENTRYF-6 and is the answer not in the manual?
Questions and answers