Advertisement
Table of Contents
- 1 Table of Contents
- 2 Outer Shell Size and Material
- 3 Transfer Ring Selection
- 4 Front View
- 5 Side View
- 6 Function Description
- 7 Display Function
- 8 Control - Setting up Functions
- 9 Battery Power Display
- 10 Key Introduction
- 11 Switching Liquid Crystal Display
- 12 Set Parameters
- 13 Under Settings Interface
- 14 Continuous Fast Modify Parameters
- Download this manual
Advertisement
Table of Contents

Summary of Contents for ProGear LCD-M5
- Page 1 DISPLAY MANUAL LCD-M5 HAND CONTROL PANEL OPERATION INSTRUCTIONS ONLY TO BE ASSEMBLED BY A SKILLED BICYCLE MECHANIC. Read all instructions carefully before using this product. Retain this owner’s manual for future reference.
- Page 3 TABLE OF CONTENTS I. OUTER SHELL SIZE AND MATERIAL II. FUNCTION DESCRIPTION III. KEY INTRODUCTION...
- Page 4 I. OUTER SHELL SIZE AND MATERIAL Outer shell material is ABS, Liquid crystal transparent window material is high hardness acrylic. 56.4mm 6.4mm 22.2mm 93.4mm FRONT VIEW SIDE VIEW 31.8mm 31.8mm stent is available 22.2mm, Ø25.4mm, 28.6mm 86mm Transfer Ring Selection. 48mm 18.15mm 22.2mm...
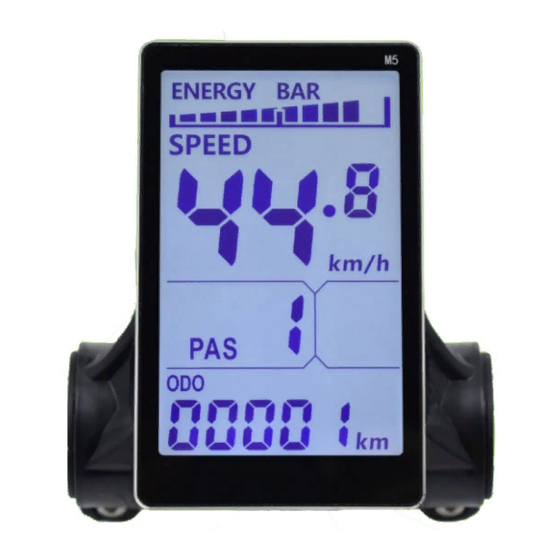
- Page 5 II. FUNCTION DESCRIPTION 1. DISPLAY FUNCTION. Show Content Introduction. Speed display, power level display, power indicator, failure warning, total mileage, 3.1 BATTERY POWER DISPLAY. single mileage, single driving time display. 2. CONTROL - SETTING UP FUNCTIONS. Battery Power switch control, 6Km/h point control, wheel diameter setting, maximum speed setting, idle automatic hibernation time setting, backlight brightness setting, voltage level setting.
- Page 6 III. KEY INTRODUCTION. The specific combination of keys is as follows: When riding, you need to modify the power/speed file, short press. Toggle display data for multi-function areas during cycling, short click. Single key length is mainly used to switch the mode / switch state.
- Page 7 III. KEY INTRODUCTION. 4. Set / Disable 6Km/h Cruise, Switch Headlight, ODO Clear Zero. 7. Set Parameters. Long press Will enter the parameter setting interface. Static state of vehicles, long press Will enter 6KM/h cruise mode, Parameters that can be set include, wheel diameter (in: inches), number of let go of cruise mode.
- Page 8 www.progearbikes.com.au...
Need help?
Do you have a question about the LCD-M5 and is the answer not in the manual?
Questions and answers
How to install it on my ebike
The ProGear LCD-M5 hand control panel should only be installed by a skilled bicycle mechanic. Follow these general steps for installation:
1. Mount the Display: Attach the LCD-M5 to the handlebar using the appropriate stent size (22.2mm, 25.4mm, or 28.6mm).
2. Secure the Transfer Ring: Ensure the transfer ring is properly selected and secured.
3. Connect the Wiring: Plug in the necessary connectors according to the ebike's wiring system.
4. Power On and Configure: Turn on the display and adjust the settings such as wheel diameter, speed limits, and display brightness.
5. Test Functionality: Check the display functions, including speed, power level, battery status, and other indicators.
For precise installation, refer to the detailed manual and ensure proper electrical connections.
This answer is automatically generated