Table of Contents
Advertisement
Available languages
Available languages
Quick Links
Advertisement
Table of Contents

Summary of Contents for Duramaxx Grizzy-Charger
- Page 1 Solar Power Kit 10028944...
- Page 2 Sehr geehrter Kunde, wir gratulieren Ihnen zum Erwerb Ihres Gerätes. Lesen Sie die folgenden Anschluss- und An- wendungshinweise sorgfältig durch und befolgen Sie diese, um möglichen technischen Schäden vorzubeugen. Für Schäden, die durch Missachtung der Sicherheitshinweise und unsachgemä- ßen Gebrauch entstehen, übernehmen wir keine Haftung. Sicherheitshinweise •...
-
Page 3: Lieferumfang Und Geräteübersicht
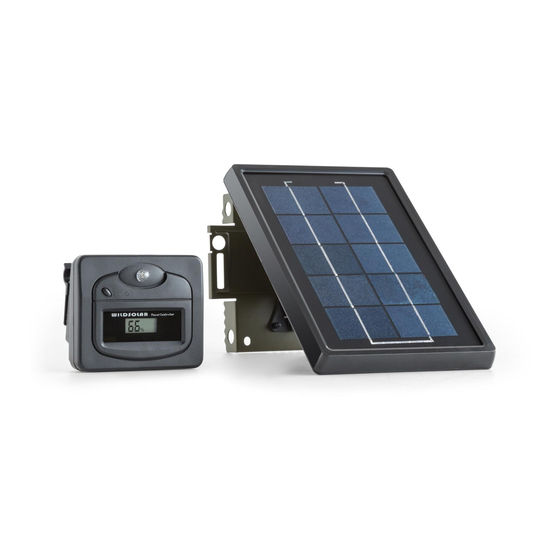
Lieferumfang und Geräteübersicht Solar Panel Schraube A (x4) Power Pack Controller Schraube B (x5) Stativ-Bauteil A Schraube C (x1) Stativ-Bauteil B Flügelmutter Gurt Kabel Montageklammer Technische Eigenschaften Artikelnummer 10028944 Maximaler Energieerzeugung Solarpanel 3W Abgaberate (PowerPack) 6V, 3000mAh ~5 std. (Netzgerät 5V, 1A) Ladezeit 5~7 std. -
Page 4: Montage
Montage Schritt 1 Legen Sie das Panel mit der Vorderseite auf eine ebene Oberfläche. Montieren Sie das „Stativ-Bauteil A“ an das Solar Panel und verschrauben Sie mit Schraube A (x4):... - Page 5 Schritt 2 Montieren Sie die Montageklammer (6) an das „Stativ-Bauteil B“ und verschrauben Sie mit Schraube B (x4).
- Page 6 Schritt 3 Bringen Sie die Teile nun zusammen. Fixieren Sie mit Schraube B (x1), Schraube C und der Flügelmutter:...
- Page 7 Fertig:...
- Page 8 Montage im Freien - Beispiele Achten Sie bei der Aufstellung darauf, dass der Aufstellort möglichst viel Sonneneinstrahlung abbekommt. Am besten frontal:...
- Page 9 Das Powerpack Bevor Sie das System im Freien verwenden können, sollten Sie das Power Pack einmal auf herkömmliche Weise aufladen. Dies können Sie mit einem ganz normalen Smartphone-/USB- Ladegerät tun, welches eine Ausgangsspannung von 5V (1A) hat. Das Display zeigt den Ladeverlauf in Prozent an. Bedienung: •...
- Page 10 Inbetriebnahme • Bringen Sie das Solar Panel an einer Sonnen beschienenen Stelle überhalb der Kamera an. • Stellen Sie sicher, dass die POWER-IN und POWER-OUT Anschlüsse sich auf der Unterseite befinden, so dass Regen- oder Tauwasser nicht hineinlaufen kann. • Verbinden Sie den POWER-OUT des Solar Panels mit dem POWER-IN des PowerPacks.
-
Page 11: Hinweise Zur Entsorgung
Hinweise zur Entsorgung Elektroaltgeräte Befi ndet sich die diese Abbildung (durchgestrichene Mülltonne auf Rädern) auf dem Produkt, gilt die Europäische Richtlinie 2002/96/EG. Diese Produkte dürfen nicht mit dem normalen Hausmüll entsorgt werden. Informieren Sie sich über die örtlichen Regelungen zur getrennten Sammlung elektrischer und elektronischer Gerätschaften. -
Page 12: Important Safety Instructions
Dear Customer, Congratulations on purchasing this product. Please read and follow these instructions, in order to avoid damaging the item. We do not cover any damages that may arise from improper use of the item or the disregard of the safety instructions. Important Safety Instructions •... -
Page 13: Technical Data
Package Contents and Overview Solar Panel Screw A (x4) Power Pack Controller Washer Screw B (x5) Adjustable junction A Screw C (x1) Adjustable junction B Butterfl y nut Belt Power cable Mounting bracket Technical Data Art. no. 10028944 Max Wattage 3.6W Discharge rate 6V, 3000mAh ~5 std. - Page 14 Assembly Step 1 Attach the adjustable junction A to the solar panel and fasten with 4x screw A:...
- Page 15 Step 2 Attach the mounting bracket to the adjustable junction B and fasten with 4x washer screw B:...
- Page 16 Step 3 Now attach both parts together - fasten with 1x washer screw B, 1x screw C and the butterfly nut:...
- Page 17 Done:...
- Page 18 Examples for the Assembly Make sure that the solar panel is located in a place that gains most possible sunlight.
- Page 19 The Powerpack Before applying the system outside, it is recommended to charge the PowerPack at home. Use a traditional smartphone charger (5V/1A) for this purpose. The display shows the charging status in per cent. Operation • Press and hold the POWER button for 2 secs to activate the power delivery to the camera. The display lightens up and shows the current electric capacity.
- Page 20 Set into Use • Never attempt to connect other Trail Cameras or devices that only work with 6V supplied. Once used improperly, it will damage the curcuit instantly. • Attach the solar panel to a sun lighten place near/above the camera. •...
-
Page 21: Environmental Concerns
Environmental Concerns According to the European waste regulation 2002/96/EG this symbol on the product or on its packaging indicates that this product may not be treated as household waste. Instead it should be taken to the appropriate collection point for the recycling of electrical and electronic equipment. By ensuring this product is disposed of correctly, you will help prevent potential negative consequences for the environment and human health, which could otherwise be caused by in- appropriate waste handling of this product.
Need help?
Do you have a question about the Grizzy-Charger and is the answer not in the manual?
Questions and answers