Table of Contents
Advertisement
Advertisement
Table of Contents

Related Manuals for Axion AXN-8705


Summary of Contents for Axion AXN-8705
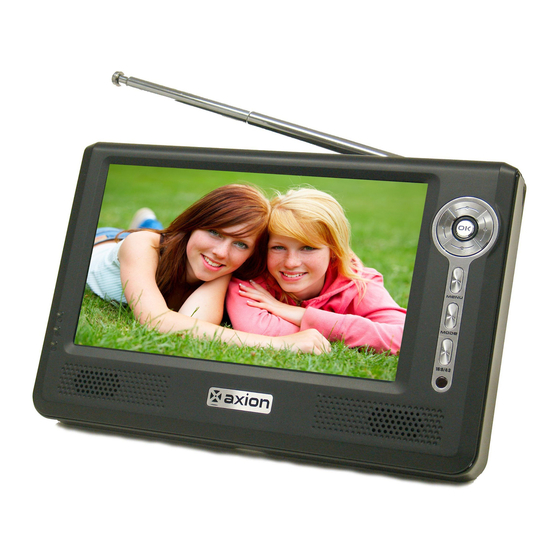
- Page 1 PORTABLE DIGITAL LCD TV AXN-8705 USER’S MANUAL...
-
Page 3: Important Safety Instructions
Introduction Congratulations on purchasing your Portable Digital TV. On June 12, 2009 the conversion to digital television broadcasting will be complete throughout the United States and Puerto Rico. Your portable digital television is designed to pick up both the older analog signals as well as the new digital signals. In addition, you can use your digital TV to view movies from a VCR or DVD player. - Page 4 Unplug this apparatus during lightning storms or when unused for long periods of time. Refer all servicing to qualified service personnel. Servicing is required when the apparatus has been damaged in any way, such as power-supply cord or plug is damaged, liquid has been spilled or objects have fallen into the apparatus, the apparatus has been exposed to rain or moisture, does not operate normally, or has been dropped.
-
Page 5: Fcc Compliance
FCC Compliance This device complies with part 15 of the FCC Rules. Operation is subject to the following two conditions: This device may not cause harmful interference. This device must accept any interference received, including interference that may cause undesired operation. This equipment has been tested and found to comply with limits for Class B digital device, pursuant to part 15 of the FCC Rules. -
Page 6: Table Of Contents
Table of Contents Introduction Important Safety Information……………………...Ⅰ FCC Compliance……………………………………Ⅲ Accessories…………………...Ⅲ Getting Started Controls Inputs&Outputs ...1 Antenna...2 Power Adapter...3 Remote Control ...3 External DVD or VCR Connection...5 Connecting to Earphones...5 Display Options & Channel Setup Picture Menu ...6 Audio Menu ...7 Time Menu ...7 Options Menu...8 Channel Setup ...10... -
Page 7: Getting Started Controls Inputs&Outputs
Getting Started Controls Inputs&Outputs Front panel and side panels Portable receiving antenna (the antenna jack can plug the accessory antenna) Front panel buttons (include Ok, Cursor up, Cursor down, Cursor left, Cursor right, Menu, Mode, 16:9/4:3) LCD Screen Infrared remote receiver Headphone jack Video input and audio input jack Power supply jack... -
Page 8: Antenna
Getting Started Red – Device turns off and charge battery. Blue –Device turns off and charge battery full. Green –Device turns on and battery not charges. Green, red –Device turns on and charge battery. Green, blue –Device turns on and charge battery full. 10. -
Page 9: Power Adapter
Getting Started AC Power Adapter The TV unit is supplied with a 120V AC Power Adapter for charging the internal battery and for powering the unit. Plug the adapter into the wall socket and plug the small DC plug into the DC jack adjacent to the power switch. About Rechargeable Battery Your portable TV device comes with a built-in rechargeable Lithium-Ion battery. - Page 10 Getting Started 0-9 Number buttons: To change the channel and to select individual menu options. Volume Down ◄: Move left/change settings in menus. Decrease the volume level in viewing mode. Return button (return to the last channel): To exit a selection or to close the menu.
-
Page 11: External Dvd Or Vcr Connection
Getting Started External DVD or VCR Connection You can also use the TV to display a program using a DVD player or VCR. Use the included AV cable and connect as shown. Pay careful attention to the color codes. Yellow is for the video signal. The Red and White plugs are for the audio right and left. -
Page 12: Display Options & Channel Setup
Display Options & Channel Setup Use the on-screen menus to adjust the picture, audio, channels and other functions. Navigate the menus with the navigation buttons on the front of the TV or the Remote Control. Press to enter the setup modes. Press MENU menu. -
Page 13: Audio Menu
Display Options & Channel Setup Audio Menu Press the ◄ ► buttons to select Press the ▼ button to enter. Press the ▲▼ buttons to select the desired sub-menu. Balance Press the ▲▼ buttons to select Press the ◄ ► buttons to adjust the level. -
Page 14: Options Menu
Display Options & Channel Setup Time Zone Press the ▲▼ buttons to select Press the ◄ ► buttons to select the desired time zone. Note: This item is only available under ATSC signal mode. Day Saving Time Press the ▲▼ buttons to select adjust the internal clock when Daylight Savings Time is in effect. - Page 15 Display Options & Channel Setup Closed Caption Press the ▲▼ buttons to select and press the ► button to enter Caption the submenu. Press ▲▼ buttons to select desired submenu. CC Mode Press the ▲▼ buttons to select CC Mode. Press the ◄...
-
Page 16: Channel Setup
Display Options & Channel Setup Channel Setup Each region has different broadcast channels. Your portable TV will scan for all the channels in the area and remember each location. You can then go through and add or delete channels individually as you prefer. When completed, pressing the up / down channel buttons will take you through all of your selected channels in sequence. - Page 17 Display Options & Channel Setup Start to Scan Press the ▲▼ buttons to select scan. The unit will automatically memorize the available channels in sequence. When completed the unit will tune the first scanned channel. To stop scanning, press Auto Scan Add CH Press the ▲▼...
-
Page 18: Troubleshooting
▼ buttons to select the desired character or symbol to edit the Channel name. Press the button to return to the previous menu. MENU Troubleshooting Before contacting customer service, review the steps below to solve simple problems. If you still suspect something wrong with this unit, immediately turn the power off, disconnect the power connector from the unit, and contact Customer Service. -
Page 19: Specifications
Troubleshooting Remote Control Does Not Work Problem No Display Other possibilities Static or other external interference may cause the unit to function abnormally. In order to reset normal status, turn off the unit and unplug the power supply and try again. If the problem is still present, turn off the unit, disconnect the power supply and consult a qualified technician. -
Page 20: Product Warranty Information
What brand(s) can be covered under the warranty: Any “ACTION” and “AXION” branded products sold by America Action, Inc. Whom the warranty protects: The warranty is valid only for the original purchaser within the continental of USA. - Page 21 Module. 5. No Defect Found (product returned to AXN as defective but failure is not duplicated by AXN’s test method). 6. Customer instruction, installation, set up adjustments, or signal reception problems. 7. Rechargeable batteries. 8. Product without proof of purchase. (The proof of purchase should be one of the following documents: purchase receipt, gift receipt, sales invoice, and packing list that contains the...
- Page 22 2. AXN will contact the customer upon receipt of the RMA Request Form, and will issue an RMA number if the RMA Request Form is completed and delivered as requested. 3. Please take or ship RMA product to AXN or any AXN authorized service center with RMA number clearly and marked on the outside of the packing.
- Page 23 AMERICA ACTION INC. 100 EXCHANGE PL POMONA, CA 91768 PH: (909) 869-6600 FAX: (909) 869-5545 CONTACTUS@AXIONZONE.COM HTTP://WWW.AXIONZONE.COM...
Need help?
Do you have a question about the AXN-8705 and is the answer not in the manual?
Questions and answers