Advertisement
Quick Links
INSTRUCTION MANUAL
BEDIENUNGSANLEITUNG
MANUEL D'UTILISATION
GEBRUIKSAANWIJZING
UK:
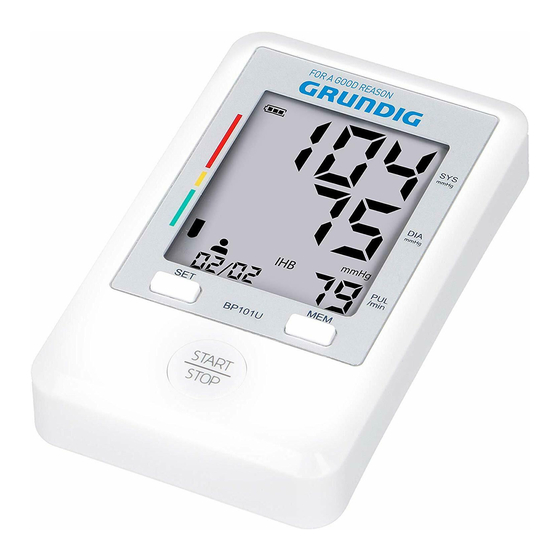
Digital Blood pressure monitor
DE:
Digitales Blutdruckmessgerät
FR:
Tensiomètre numérique
NL:
Digitale bloeddrukmeter
Item number: 871125208143
Item number: 871125208143
© copyright Edco Deutschland GmbH
Siemensstr. 81 47588 Kleve
© copyright Edco Deutschland GmbH
Deutschland.
Siemensstr. 31 47533 Kleve
Deutschland.
25208143.indd 1
Fully Automatic Upper Arm Style
Digital Blood Pressure Monitor
Model No.: BP101U
14-03-18 14
Advertisement

Summary of Contents for Grundig BP101U
- Page 1 Digital Blood pressure monitor Digitales Blutdruckmessgerät Tensiomètre numérique Digitale bloeddrukmeter Fully Automatic Upper Arm Style Digital Blood Pressure Monitor Model No.: BP101U Item number: 871125208143 Item number: 871125208143 © copyright Edco Deutschland GmbH Siemensstr. 81 47588 Kleve © copyright Edco Deutschland GmbH Deutschland.
- Page 2 Digital Blood pressure monitor Thanks for choosing the Digital Blood Pressure Monitor. • Please read this instruction manual before using your unit. • Please keep this instruction manual safe for future use. • Introduction • Thank you for purchasing Fully Automatic Upper Arm Style Digital Blood Pressure Monitor. The unit uses the oscillometric method of blood pressure measurement.
- Page 3 • Remove the batteries if the unit will not be used for Three months or More. Regarding the application of the CUFF over a wound, as this can cause further injury; • Regarding the effect of blood flow interference and resulting harmful injury to the PATIENT •...
- Page 4 Arm Cuff Fit for 22cm~36cm range of upper arm perimeter. • Air Plug (Insert to Air Socket) Hose Metal If your arm cuff is broken or not functional. Please use a new cuff. A new arm cuff does not include an air plug. Please continue to use the old air plug on the new arm cuff.
- Page 5 Wrap your upper arm with the cuff. The hose runs down the inside of your arm. The bottom of the cuff should be approximately 1~2cm above your elbow. 4. Wrap the cuff tightly around your upper arm by using the Velcro strip. Do not leave any spacing between the arm and the cuff.
-
Page 6: Adjusting Settings
Battery Installation/ Replacement 1. Remove the battery cover from the battery compartment. 2. Install 3 “AA” size batteries so the + (positive) and - (negative) polarities match the polarities of the battery compartment as indicated. 3. Replace the battery cover. The battery cover will be closed tight when you hear a clicking sound. - Page 7 1.2 The mark of year appears and flashes after press the “SET” Setting button for 3~4 seconds, while the unit is off. Finally, press the “SET” button again and continue with step 2. Press the “MEM” button to increase one year. Long press the button and the value quickly changes Year Setting The year can be set between 2015 and 2050, and it will return to 2015 when the display of year...
-
Page 8: Hour Format
3. To Set the 12 Hour or the 24 Hour Then press the “MEM” button again to change the current the 12 hour or the 24 hour. • • Press the “SET” button again and Continue with step 4. The 12 hour or the 24 hour Setting 24 hour format 12 hour format 4. - Page 9 Before Taking a Measurement 1. Avoid eating, drinking alcohol, smoking, exercising and bathing for 30 minutes before taking a measurement and 5 minutes should elapse before the first reading is taken. 2. Stress raises blood pressure. Avoid taking measurements during stressful times. Relax as much as possible and no talking during the measurement procedure.
- Page 10 5. Put your arm through the loop, then pull it up to the position of your upper arm. 6. The hose runs down the inside of your arm. The bottom of the cuff should be approximately 1~2cm above your elbow. 7.
- Page 11 Take a Measurement How to Take a Measurement 1. Press the START/ STOP button. All display symbols appear on the screen, the cuff starts to inflate automatically. All Symbols Display Deflating Automatically Start to Inflate 2. Inflation stop automatically and the measurement is started. The heartbeat symbol flashes once a pulse is detected.
- Page 12 Use the Memory Function • The unit stores the blood pressure and pulse rate in the memory after completing a measurement every time. It can automatically store 90 sets of measurement values. The oldest record is deleted to save the latest measurement value when more than 90 sets. The unit also calculates an average reading based on the values of the latest 3 times •...
- Page 13 About Blood Pressure Irregular Heartbeat Symbol (IHB) When the unit detects an irregular rhythm two or more times during the measurement, the Irregular Heartbeat Symbol will appear on the display with the measurement values. An irregular heartbeat rhythm is defined as a rhythm that is more than 25% slower or 25% faster from the average rhythm detected while the monitor is measuring the systolic blood pressure and the diastolic blood pressure.
- Page 14 Upper Curve: Systolic Blood Pressure Lower Curve: Diastolic Blood Pressure Time of the Day Classification of Blood Pressure After each measurement is completed, the LCD display will show your position automatically on the six segments of the bar indicator which corresponds to World Health Organization (WHO) Blood Pressure Indicator.
- Page 15 Treatment of High Blood Pressure If your blood pressure reaches upper values of 140~160 mmHg and lower values of 90~95 mmHg in repeated measurements over several days, you should consult your doctor for detailed medical examination. You can assist the treatment prescribed by your doctor in the following ways: Lose weight and lower your cholesterol level;...
-
Page 16: Specifications
50 mmHg (6,7kPa) and 200 mmHg(26,7kPa). Please contact the local distributor for details. Specifications Model No. BP101U Display LCD Digital Display Measuring Principle Oscillometric Method... -
Page 17: Compliance Level
overvoltage: Il; pollution degree:2 The risk of patient and user can be lowered to acceptable level. • • The unit might not meet its performance specification if stored or • Used outside the following specified temperature, humidity and Altitude ranges. The unit satisfies the requirements of IEC60601-1 Medical electrical equipment, •... - Page 18 GUIDANCE AND MANUFACTURE’S DECLARATION – ELECTROMAGNETIC IMMUNITY The Digital Blood Pressure Monitor is intended for use in the electromagnetic environment specified below. The customer or the user of Digital Blood Pressure Monitor should assure that it is used in such an environment. IEC 60601 test Compliance Immunity test...
- Page 19 Warranty Information: The unit, excluding the unit cuff, is guaranteed to be free of defects in workmanship and materials • for a period of two years from the date listed on the purchase record, when used in accordance with the instructions provided with the unit. The unit cuff is warranted to be free from defects in materials and workmanship appearing within one year from the date listed on the purchase record when the unit •...
Need help?
Do you have a question about the BP101U and is the answer not in the manual?
Questions and answers