
Related Manuals for Oshkosh Corporation JLG TOUCAN 8E

Summary of Contents for Oshkosh Corporation JLG TOUCAN 8E
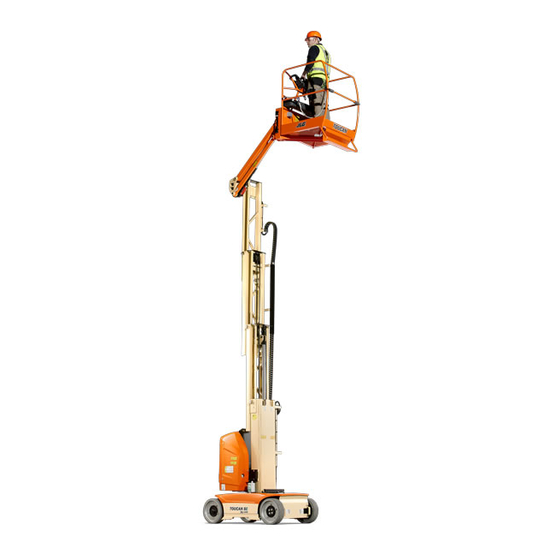
- Page 1 Operation and Safety Manual Original Instructions - Keep this manual with the machine at all times. TOUCAN 8E TOUCAN 20E TOUCAN 10E TOUCAN 26E 31210312 September 17, 2019 English - Operation & Safety ®...
- Page 2 TO PURCHASE THIS PRODUCT PLEASE CONTACT US Equipment Financing and Extended Warranties Available Discount-Equipment.com is your online resource for commercial and industrial quality parts and equipment sales. 561-964-4949 visit us on line @ www.discount-equipment.com Select an option below to find your Equipment We sell worldwide for the brands: Genie, Terex, JLG, MultiQuip, Mikasa, Essick, Whiteman, Mayco, Toro Stone, Diamond Products, Generac Magnum, Airman, Haulotte, Barreto, Power Blanket, Nifty Lift, Atlas Copco, Chicago Pneumatic, Allmand, Miller Curber, Skyjack, Lull,...
- Page 3 WARNING Operating, servicing and maintaining this vehicle or equipment can expose you to chemicals including engine exhaust, carbon monoxide, phthalates, and lead, which are known to the State of California to cause cancer and birth defects or other reproductive harm. To minimize exposure, avoid breathing exhaust, do not idle the engine except as necessary, service your vehicle or equipment in a well-ventilated area and wear gloves or wash your hands frequently when servicing.
- Page 4 FOREWORD FOREWORD This manual is a very important tool! Keep it with the machine at all times. The purpose of this manual is to provide owners, users, operators, lessors, and lessees with the precautions and operating procedures essential for the safe and proper machine operation for its intended purpose. Due to continuous product improvements, JLG Industries, Inc.
- Page 5 FOREWORD SAFETY ALERT SYMBOLS AND SAFETY SIGNAL WORDS This is the Safety Alert Symbol. It is used to alert you to the potential personal injury hazards. Obey all safety messages that follow this symbol to avoid possible injury or death. INDIC ATES A POTENTIALLY HA ZARDOUS SITUATION.
- Page 6 FOREWORD For: • Accident Reporting • Standards and Regulations Compliance Information THIS PRODUCT MUST COMPLY WITH ALL SAFETY RELATED BULLE- • Product Safety Publica- tions • Questions Regarding Special TINS. CONTACT JLG INDUSTRIES, INC. OR THE LOCAL AUTHORIZED Product Applications JLG REPRESENTATIVE FOR INFORMATION REGARDING SAFETY- •...
- Page 7 FOREWORD REVISION LOG Original Issue - September 17, 2019 – JLG Lift – 31210312...
-
Page 8: Table Of Contents
TABLE OF CONTENTS SECTION - PARAGRAPH, SUBJECT PAGE SECTION - PARAGRAPH, SUBJECT PAGE SECTION - 1 - SAFETY PRECAUTIONS PREPARATION, INSPECTION, AND MAINTENANCE..2-2 PRE-START INSPECTION.......2-4 GENERAL . - Page 9 TABLE OF CONTENTS SECTION - PARAGRAPH, SUBJECT PAGE SECTION - PARAGRAPH, SUBJECT PAGE Jib Manual Lift Up Valve (20E only) ....3-13 3.14 MACHINE SAFETY SYSTEM OVERRIDE (MSSO) Manual Swinging Operating Devices - 8E/20E.
- Page 10 TABLE OF CONTENTS SECTION - PARAGRAPH, SUBJECT PAGE SECTION - PARAGRAPH, SUBJECT PAGE SECTION - 5 - GENERAL SPECIFICATIONS AND MAINTENANCE Swing Bearing Teeth ......5-40 Lifting Chains .
- Page 11 TABLE OF CONTENTS SECTION - PARAGRAPH, SUBJECT PAGE SECTION - PARAGRAPH, SUBJECT PAGE 8-1 Tilt Sensor ........5-67 8-2 Platform Load Sense .
- Page 12 LIST OF TABLES SECTION - PARAGRAPH, SUBJECT PAGE LIST OF TABLES Minimum Approach Distance (M.A.D.) ....1-6 Beaufort Scale (For Reference Only) ....1-8 Inspection and Maintenance Table .
- Page 13 TABLE OF CONTENTS SECTION - PARAGRAPH, SUBJECT PAGE SECTION - PARAGRAPH, SUBJECT PAGE LIST OF FIGURES 3-20. Machine Tie-Down - 8E/20E ......3-42 3-21.
-
Page 14: Section - Paragraph, Subject
TABLE OF CONTENTS SECTION - PARAGRAPH, SUBJECT PAGE SECTION - PARAGRAPH, SUBJECT PAGE 5-21. Decal Installation - 26E ANSI Market ..... 5-34 5-22. - Page 15 TABLE OF CONTENTS NOTES: viii – JLG Lift – 31210312...
- Page 16 TO PURCHASE THIS PRODUCT PLEASE CONTACT US Equipment Financing and Extended Warranties Available Discount-Equipment.com is your online resource for commercial and industrial quality parts and equipment sales. 561-964-4949 visit us on line @ www.discount-equipment.com Select an option below to find your Equipment We sell worldwide for the brands: Genie, Terex, JLG, MultiQuip, Mikasa, Essick, Whiteman, Mayco, Toro Stone, Diamond Products, Generac Magnum, Airman, Haulotte, Barreto, Power Blanket, Nifty Lift, Atlas Copco, Chicago Pneumatic, Allmand, Miller Curber, Skyjack, Lull,...
-
Page 17: Section 1 - Safety Precautions
SECTION 1 – SAFETY PRECAUTIONS SECTION 1. SAFETY PRECAUTIONS GENERAL This section outlines the necessary precautions for proper and FAILURE TO COMPLY WITH THE SAFETY PRECAUTIONS LISTED IN THIS MAN- safe machine operation and maintenance. In order to promote UAL COULD RESULT IN MACHINE DAMAGE, PROPERTY DAMAGE, PERSONAL proper machine usage, it is mandatory that a daily routine is INJURY OR DEATH. -
Page 18: Workplace Inspection
SECTION 1 – SAFETY PRECAUTIONS Workplace Inspection • An operator must not accept operating responsibilities until adequate training has been given by competent • Precautions to avoid all hazards in the work area must and authorized persons. be taken by the user before and during operation of the •... -
Page 19: Machine Inspection
SECTION 1 – SAFETY PRECAUTIONS Machine Inspection to optimize operation outside of this temperature range. • Do not operate this machine until the inspections and • This machine must be used in a sufficient ambient light. functional checks have been performed as specified in Section 2 of this manual. -
Page 20: Operation
SECTION 1 – SAFETY PRECAUTIONS OPERATION • Do not allow personnel to tamper with or operate the machine from the ground with personnel in the plat- General form, except in an emergency. • Do not carry materials directly on platform railing unless •... -
Page 21: Trip And Fall Hazards
SECTION 1 – SAFETY PRECAUTIONS Trip and Fall Hazards hands and one foot or two feet and one hand at all times during entry and exit. • Prior to operation, ensure all gates are fastened and secured in their proper position. •... -
Page 22: Electrocution Hazards
SECTION 1 – SAFETY PRECAUTIONS Electrocution Hazards • The minimum approach distance may be reduced if insulating barriers are installed to prevent contact and the barriers are rated for the voltage of the line being guarded. These barriers shall not be part of (or attached to) the machine. -
Page 23: Tipping Hazards
SECTION 1 – SAFETY PRECAUTIONS Tipping Hazards • Ensure that the ground conditions are adequate to sup- DO NOT MANEUVER MACHINE OR PERSONNEL INSIDE PROHIBITED port the maximum tire load indicated on the tire load ZONE (MAD). ASSUME ALL ELECTRICAL PARTS AND WIRING ARE ENERGIZED UNLESS KNOWN OTHERWISE. -
Page 24: Beaufort Scale (For Reference Only)
SECTION 1 – SAFETY PRECAUTIONS IF THE MACHINE IS USABLE WITH WIND (DEPENDING ON MODEL), DO NOT OPERATE THE MACHINE WHEN WIND CONDITIONS EXCEED 28 MPH (12,5 M/S OR 45 KM/H). Table 1-2. Beaufort Scale (For Reference Only) Wind Speed Beaufort Description Land Conditions... - Page 25 SECTION 1 – SAFETY PRECAUTIONS • If the extending structure assembly or platform is caught so that one or more wheels are off the ground, all persons must be removed before attempting to free the machine. Use cranes, forklift trucks, or other appro- priate equipment to stabilize machine and remove per- sonnel.
-
Page 26: Crushing And Collision Hazards
SECTION 1 – SAFETY PRECAUTIONS Crushing and Collision Hazards nel, and other factors which may cause hazard of colli- sion or injury to personnel. • Approved head gear must be worn by all operating and • Be aware of stopping distances in all drive speeds. When ground personnel. -
Page 27: Towing, Lifting, And Hauling
SECTION 1 – SAFETY PRECAUTIONS TOWING, LIFTING, AND HAULING Maintenance Hazards • Shut off power to all controls and ensure that all moving • Never allow personnel in platform while towing, lifting, parts are secured from inadvertent motion prior to per- or hauling. -
Page 28: Battery Hazards
SECTION 1 – SAFETY PRECAUTIONS Wear gloves to help protect hands from spraying fluid. • Do not allow smoking, open flame, or sparks near bat- tery during charging or servicing. • Ensure replacement parts or components are identical or equivalent to original parts or components. •... - Page 29 TO PURCHASE THIS PRODUCT PLEASE CONTACT US Equipment Financing and Extended Warranties Available Discount-Equipment.com is your online resource for commercial and industrial quality parts and equipment sales. 561-964-4949 visit us on line @ www.discount-equipment.com Select an option below to find your Equipment We sell worldwide for the brands: Genie, Terex, JLG, MultiQuip, Mikasa, Essick, Whiteman, Mayco, Toro Stone, Diamond Products, Generac Magnum, Airman, Haulotte, Barreto, Power Blanket, Nifty Lift, Atlas Copco, Chicago Pneumatic, Allmand, Miller Curber, Skyjack, Lull,...
-
Page 30: Section 2 - User Responsibilities, Machine Preparation, And Inspection
SECTION 2 – USER RESPONSIBILITIES, MACHINE PREPARATION, AND INSPECTION SECTION 2. USER RESPONSIBILITIES, MACHINE PREPARATION, AND INSPECTION 2.1 PERSONNEL TRAINING Operator Training Operator training must cover: The aerial platform is a personnel handling device; so it is neces- sary that it be operated and maintained only by trained person- •... -
Page 31: Training Supervision
SECTION 2 – USER RESPONSIBILITIES, MACHINE PREPARATION, AND INSPECTION Training Supervision PREPARATION, INSPECTION, AND MAINTENANCE Training must be done under the supervision of a qualified per- Table 2-1 explains the periodic machine inspections and mainte- son in an open area free of obstructions until the trainee has nance required by JLG Industries, Inc. -
Page 32: Inspection And Maintenance Table
SECTION 2 – USER RESPONSIBILITIES, MACHINE PREPARATION, AND INSPECTION Table 2-1. Inspection and Maintenance Table Primary Service Type Frequency Reference Responsibility Qualification Pre-Start Inspection Before using each day; User or Operator User or Operator Operation and Safety Manual or whenever there’s an Operator change. Pre-Delivery Inspec- Before each sale, lease, or rental delivery. -
Page 33: Pre-Start Inspection
SECTION 2 – USER RESPONSIBILITIES, MACHINE PREPARATION, AND INSPECTION PRE-START INSPECTION Operation and Safety Manuals – Ensure that a copy of the Operation and Safety manual, AEM Safety Man- The Pre-Start Inspection should include each of the following: ual (ANSI markets only), and ANSI Manual of Responsi- bility (ANSI markets only) is enclosed in the weather Cleanliness –... -
Page 34: Daily Walk-Around Inspection
SECTION 2 – USER RESPONSIBILITIES, MACHINE PREPARATION, AND INSPECTION DAILY WALK-AROUND INSPECTION return to neutral position and emergency stop switch functions properly. Begin the “Walk-Around Inspection” at Item 1, see Figure 2-1. or Steering Assembly - See inspection note. Figure 2-2. depending on model. Continue checking each item in sequence for the conditions listed in the following checklist. -
Page 35: Daily Walk-Around Inspection - 8E / 20E
SECTION 2 – USER RESPONSIBILITIES, MACHINE PREPARATION, AND INSPECTION Figure 2-1. Daily Walk-Around Inspection - 8E / 20E – JLG Lift– 31210312... -
Page 36: Daily Walk-Around Inspection - 10E / 26E
SECTION 2 – USER RESPONSIBILITIES, MACHINE PREPARATION, AND INSPECTION Figure 2-2. Daily Walk-Around Inspection - 10E / 26E 31210312 – JLG Lift –... -
Page 37: Function Check
SECTION 2 – USER RESPONSIBILITIES, MACHINE PREPARATION, AND INSPECTION FUNCTION CHECK From the Platform Control Console: a. Operate all functions including horn button to Refer to Section 3 for description and operation of machine ensure proper operation. functions. b. Ensure that all machine functions are disabled when the emergency stop button is depressed. -
Page 38: Tilt Sensor Check
SECTION 2 – USER RESPONSIBILITIES, MACHINE PREPARATION, AND INSPECTION Tilt Sensor Check With the platform in the transport (stowed) position: a. Swing the boom over either of the rear tires and ensure that the Drive Orientation indicator illumi- nates and that the Drive Orientation Override switch must be used for the drive function to operate. -
Page 39: Overload Sensor Check
SECTION 2 – USER RESPONSIBILITIES, MACHINE PREPARATION, AND INSPECTION Overload Sensor Check Check the overload indicator light/alarm to ensure proper operation. Wedge a block (P/N: ST2741 - located in the manual storage container) to activate the overload sensor and keep it activated. Refer to Figure 2-4. From the Platform Control Console: a. -
Page 40: Gate Sensors Check (8E Xl Basket Only)
SECTION 2 – USER RESPONSIBILITIES, MACHINE PREPARATION, AND INSPECTION Gate sensors check (8E XL basket only) Check proper operation of the gate opening warning light and interlock. Open each gate in turn. From the Platform Control Console: a. Ensure the gate open warning light is illuminated. b. - Page 41 SECTION 2 – USER RESPONSIBILITIES, MACHINE PREPARATION, AND INSPECTION NOTES: 2-12 – JLG Lift– 31210312...
- Page 42 TO PURCHASE THIS PRODUCT PLEASE CONTACT US Equipment Financing and Extended Warranties Available Discount-Equipment.com is your online resource for commercial and industrial quality parts and equipment sales. 561-964-4949 visit us on line @ www.discount-equipment.com Select an option below to find your Equipment We sell worldwide for the brands: Genie, Terex, JLG, MultiQuip, Mikasa, Essick, Whiteman, Mayco, Toro Stone, Diamond Products, Generac Magnum, Airman, Haulotte, Barreto, Power Blanket, Nifty Lift, Atlas Copco, Chicago Pneumatic, Allmand, Miller Curber, Skyjack, Lull,...
-
Page 43: Section 3 - Machine Controls, Indicators And Operation
SECTION 3 – MACHINE CONTROLS, INDICATORS AND OPERATION SECTION 3. MACHINE CONTROLS, INDICATORS AND OPERATION GENERAL DESCRIPTION This machine is a self-propelled hydraulic lift equipped with a work platform on the end of an elevating and rotating mast. THE MANUFACTURER HAS NO DIRECT CONTROL OVER MACHINE The primary operator control station is in the platform and shall APPLICATION AND OPERATION, THE USER AND OPERATOR ARE only be accessed with the extending structure fully stowed. -
Page 44: Operating Characteristics And Limitations
SECTION 3 – MACHINE CONTROLS, INDICATORS AND OPERATION OPERATING CHARACTERISTICS AND LIMITATIONS Capacities General The mast and the jib can be raised above horizontal with or without any load in the platform if: A thorough knowledge of the operating characteristics and lim- itations of the machine is always the first requirement for any Machine is positioned on a smooth, firm and level sur- user, regardless of user’s experience with similar types of equip-... -
Page 45: Stability
SECTION 3 – MACHINE CONTROLS, INDICATORS AND OPERATION Stability Machine stability is based on two (2) conditions which are called FORWARD and BACKWARD stability. The machine’s position of least FORWARD stability is shown in Figure 3-2. and its position of least BACKWARD stability is shown in Fig- ure 3-1. -
Page 46: Position Of Least Backward Stability
SECTION 3 – MACHINE CONTROLS, INDICATORS AND OPERATION Figure 3-1. Position of Least BACKWARD stability Figure 3-2. Position of Least FORWARD stability – JLG Lift– 31210312... -
Page 47: Machine Control Locations
SECTION 3 – MACHINE CONTROLS, INDICATORS AND OPERATION MACHINE CONTROL LOCATIONS 1- Driving wheels 8- Platform 15- Manual swinging operating device 2- Steering Wheels 9- Platform Control console 16- Chassis 3- Access door to Pump/Motor Control valves 10- Manual Storage Container 17- Charger 4- Counterweight 11- Access door to battery... -
Page 48: Basic Nomenclature - Machine Control Locations - 10E / 26E
SECTION 3 – MACHINE CONTROLS, INDICATORS AND OPERATION 1- Driving wheels 7- Telescopic mast 13- Jib manual descent valve 2- Steering Wheels 8- Platform 14- Swinging motor release valve 3- Access door to Pump/Motor Control valves 9- Platform Control console 15- Manual swinging operating device 4- Counterweight 10- Manual Storage Container... -
Page 49: Controls And Indicators
SECTION 3 – MACHINE CONTROLS, INDICATORS AND OPERATION CONTROLS AND INDICATORS GROUND CONTROL STATION TO AVOID SERIOUS INJURY, DO NOT OPERATE MACHINE IF ANY CONTROL DO NOT OPERATE FROM GROUND CONTROL STATION WITH PERSONNEL IN LEVERS OR TOGGLE SWITCHES CONTROLLING PLATFORM MOVEMENT DO NOT THE PLATFORM EXCEPT IN AN EMERGENCY. - Page 50 SECTION 3 – MACHINE CONTROLS, INDICATORS AND OPERATION 5 Amp Circuit Breaker Overload Warning Light Multi-Display Indicator (MDI) Platform/Off/Ground Selector Switch Machine Safety System Override (MSSO) (If equipped) Battery Charger Status Indicators (depending on equipment) Emergency Stop Switch Mast Lift/Lower Buttons Jib Lift/Lower Buttons Superstructure Swing Buttons Brake Release Button...
- Page 51 SECTION 3 – MACHINE CONTROLS, INDICATORS AND OPERATION 5 Amp. Circuit Breaker - This circuit breaker protects Multi-Display Indicator (MDI) the control circuit in case of a short circuit or other Hourmeter - The hourmeter symbol is lit when the malfunction.
- Page 52 SECTION 3 – MACHINE CONTROLS, INDICATORS AND OPERATION Platform/Off/Ground Selector Switch - A three-posi- Emergency Stop Switch - Depress the switch to stop tion, key-operated power select switch supplies power all functions of the machine. The switch must be to the platform or ground controls and powers turned clockwise to restore the machine functions.
-
Page 53: Platform Manual Descent Valves - 8E/20E
SECTION 3 – MACHINE CONTROLS, INDICATORS AND OPERATION Platform Manual Descent Valves - 8E/20E a. Install the actuator on the remote pull bar. b. Pull on the actuator. Release the actuator when the The platform manual descent valves are used in the event of platform is lowered to the desired level. -
Page 54: Mast Manual Descent Valve And Actuator - 8E/20E
SECTION 3 – MACHINE CONTROLS, INDICATORS AND OPERATION Mast Manual Descent Valve and Actuator - 8E/20E - The mast manual descent valve actuator (1) is stored behind the access door to the battery. - The mast manual descent remote pull bar (2) is located on the right side of the platform. -
Page 55: Jib Manual Descent Valve - 8E/20E
SECTION 3 – MACHINE CONTROLS, INDICATORS AND OPERATION Jib Manual Descent Valve - 8E/20E Jib Manual Lift Up Valve (20E only) - The jib manual descent button (3) is located on the jib The jib manual lift up operating device is used in the event of cylinder valve. -
Page 56: Manual Swinging Operating Devices - 8E/20E
SECTION 3 – MACHINE CONTROLS, INDICATORS AND OPERATION Manual Swinging Operating Devices - 8E/20E - a solid hand wheel (2), located behind the access door. The manual swinging operating devices are used in the event of total power failure to manually swing the superstructure. Those devices are composed of: - a rotary valve (1) located on the pump/motor control valves assembly to release the swinging motor. - Page 57 SECTION 3 – MACHINE CONTROLS, INDICATORS AND OPERATION DO NOT RELEASE THE SWINGING MOTOR UNLESS THE MACHINE IS ON A LEVEL SURFACE. Remove the access door to the pump/motor assem- bly. Fully unscrew the rotary valve (1). Open the access cover to the operating hand wheel. Turn the hand wheel (2) clockwise to swing the struc- ture to the right or turn the hand wheel counter-clock- wise to swing the structure to the left.
-
Page 58: Platform Manual Descent Valves - 10E/26E
SECTION 3 – MACHINE CONTROLS, INDICATORS AND OPERATION Platform Manual Descent Valves - 10E/26E To lower the mast: a. Install the actuator on the remote push bar. The platform manual descent valves are used in the event of b. Push on the actuator. Release the actuator when total power failure to lower the platform using gravity. -
Page 59: Mast Manual Descent Valve And Actuator - 10E/26E
SECTION 3 – MACHINE CONTROLS, INDICATORS AND OPERATION Mast Manual Descent Valve and Actuator - 10E/26E - The mast manual descent valve actuator (1) is stored behind the access door to the battery. - The mast manual descent valve remote push bar (2) is located behind the access door to the pump/motor assembly. -
Page 60: Jib Manual Descent Valve - 10E/26E
SECTION 3 – MACHINE CONTROLS, INDICATORS AND OPERATION Jib Manual Descent Valve - 10E/26E Jib Manual Lift Up Valve (26E only) - The jib manual descent button (3) is located on the jib The jib manual lift up operating device is used in the event of cylinder valve. -
Page 61: Manual Swinging Operating Devices - 10E/26E
SECTION 3 – MACHINE CONTROLS, INDICATORS AND OPERATION Manual Swinging Operating Devices - 10E/26E DO NOT RELEASE THE SWINGING MOTOR UNLESS THE MACHINE IS ON A The manual swinging operating devices are used in the event LEVEL SURFACE. of total power failure to manually swing the superstructure. Those devices are composed of: - a rotary valve (1) located on the pump/motor control valves assembly to release the swinging motor (Refer to Figure 3-14.). - Page 62 SECTION 3 – MACHINE CONTROLS, INDICATORS AND OPERATION Open the access door to the pump/motor assembly. Fully unscrew the rotary valve. Lift the folding lever. Push on top of the pinion to engage it in the turntable bearing teeth. Turn the lever clockwise to swing the structure to the right or turn the lever counter-clockwise to swing the structure to the left.
-
Page 63: Platform Control Station
SECTION 3 – MACHINE CONTROLS, INDICATORS AND OPERATION PLATFORM CONTROL STATION TO AVOID SERIOUS INJURY, DO NOT OPERATE MACHINE IF ANY CONTROL LEVERS OR SWITCHES CONTROLLING PLATFORM MOVEMENT DO NOT RETURN TO THE OFF OR NEUTRAL POSITION WHEN RELEASED. 1. Indicator Panel 2. -
Page 64: Platform Control Indicator Panel
SECTION 3 – MACHINE CONTROLS, INDICATORS AND OPERATION Indicator Panel NOTE: The indicator lights will illuminate for approximately 1 second when the key is positioned to the ON position to act as a self test. Figure 3-16. Platform Control Indicator Panel a- Control Enable Indicator b- Creep Speed Indicator c- System Distress Indicator... - Page 65 SECTION 3 – MACHINE CONTROLS, INDICATORS AND OPERATION a.When lit, indicates that the controls are enabled. If a e.Indicates that the chassis is out of level (refer to function is not actuated within seven seconds, or a machine specifications for max. allowable slope seven seconds lapse between ending one func- angle).
- Page 66 SECTION 3 – MACHINE CONTROLS, INDICATORS AND OPERATION Emergency Stop Switch - A two-position, red, emer- handle to the left to swing the superstructure to the gency stop switch, when positioned to ON furnishes left or toggle the control handle to the right to swing operating power to the platform control station.
- Page 67 SECTION 3 – MACHINE CONTROLS, INDICATORS AND OPERATION and hold the Function Enable Button (6), moving the joystick Up will raise the jib and moving the joystick Down will lower the jib. The speed of the movements is proportionally controlled by the distance of travel of the joystick.
-
Page 68: Grade And Side Slope
SECTION 3 – MACHINE CONTROLS, INDICATORS AND OPERATION Grade and Side Slope See Figure 3-17., Grade and Side Slope NOTE: Refer to the Operating Specifications table for Gradeability and Sideslope rat- ings. With the machine in transport mode, travelling is limited by two factors: gradeability and side slope. -
Page 69: Grade And Side Slope
SECTION 3 – MACHINE CONTROLS, INDICATORS AND OPERATION Figure 3-17. Grade and Side Slope 3-27 31210312 – JLG Lift –... -
Page 70: Operation
SECTION 3 – MACHINE CONTROLS, INDICATORS AND OPERATION OPERATION 3.10 STEERING AND TRAVELLING (DRIVING) At ground control station, position the key-select switch to PLATFORM. DO NOT DRIVE WITH MAST OR JIB OUT OF TRANSPORT (STOWED) POSITION Position the emergency stop switch to the on (out) EXCEPT ON A SMOOTH, FIRM AND LEVEL SURFACE FREE OF OBSTRUCTIONS position by turning it clockwise. -
Page 71: Steering
SECTION 3 – MACHINE CONTROLS, INDICATORS AND OPERATION Steering Squeeze and hold the trigger switch (1) on front of the joy- stick. Activate the thumb switch on top of the joystick to right (2) for travelling right or to left (3) for travelling left. -
Page 72: Drive Orientation System (Dos)
SECTION 3 – MACHINE CONTROLS, INDICATORS AND OPERATION matching the directional arrow, for the intended direc- tion of travel. IF THE TILT INDICATOR WARNING LIGHT/ALARM IS ACTIVATED WHILE DRIV- ING WITH THE MAST RAISED, LOWER THE MAST COMPLETELY AND DRIVE TO A SMOOTH, FIRM AND LEVEL SURFACE. -
Page 73: Raising And Lowering The Platform
SECTION 3 – MACHINE CONTROLS, INDICATORS AND OPERATION 3.11 RAISING AND LOWERING THE PLATFORM Raising and lowering the jib With all control levers in neutral position, push in and hold the Function Enable Button. DO NOT RAISE THE PLATFORM EXCEPT ON A SMOOTH, FIRM AND LEVEL To raise or lower the jib, move the jib controller in the SURFACE FREE OF OBSTRUCTIONS AND HAZARDS. -
Page 74: Swinging
SECTION 3 – MACHINE CONTROLS, INDICATORS AND OPERATION 3.12 SWINGING 3.13 ALARMS Overload Warning Light/Alarm DO NOT SWING THE SUPERSTRUCTURE EXCEPT ON A SMOOTH, FIRM AND When the maximum rated load in the platform is exceeded, LEVEL SURFACE, FREE OF OBSTRUCTIONS AND HOLES. RED light indicators at both the ground and the platform con- trol stations will blink and an audible alarm will sound. -
Page 75: Slack Chain Warning Light/Alarm
SECTION 3 – MACHINE CONTROLS, INDICATORS AND OPERATION Slack Chain Warning Light/Alarm When the tilt indicator warning is activated, the following functions are affected: When the system detects a slack chain condition, the RED - The Drive function is disabled out of stowed position. light indicator at platform control station will illuminate and an audible alarm will sound. -
Page 76: Gate Opening Warning Light (8E Xl Basket Only)
SECTION 3 – MACHINE CONTROLS, INDICATORS AND OPERATION - An incorrect play (see the Service Manual). IF THE SELF RESCUE PROCEDURE FAILED, DISCONTINUE OPERATION IMMEDI- ATELY. IF THE SLACK CHAIN ALARM HAS BEEN TRIGGERED BY THE MAST JAMMING, DO NOT USE MANUAL DESCENT CONTROLS. FAILURE TO RESPECT THE PROCEDURES BELOW CAN CAUSE SERIOUS INJU- PLATFORM OCCUPANTS MUST BE RESCUED AND THE MAST MECHANISM SER- RIES. -
Page 77: Machine Safety System Override (Msso)
SECTION 3 – MACHINE CONTROLS, INDICATORS AND OPERATION 3.14 MACHINE SAFETY SYSTEM OVERRIDE (MSSO) (IF 3.15 SHUT DOWN AND PARK EQUIPPED) Shut down and park the machine as follows: The Machine Safety System Override (MSSO) is used to over- Drive the machine to a reasonably well-protected and well-ventilated area. -
Page 78: Battery Charging
SECTION 3 – MACHINE CONTROLS, INDICATORS AND OPERATION 3.16 BATTERY CHARGING NOTE: Be sure that the machine is parked in a well-ventilated area before charging begins. ONLY PLUG THE CHARGER INTO A PROPERLY INSTALLED AND GROUNDED OUTLET. DO NOT USE GROUND ADAPTORS OR MODIFY PLUG. DO NOT TOUCH NON-INSULATED PORTION OF OUTPUT CONNECTOR OR NON-INSULATED BAT- TERY TERMINAL. -
Page 79: Charger Interface
SECTION 3 – MACHINE CONTROLS, INDICATORS AND OPERATION Charger Interface Status Bar Display panel Status Bar Fault Error / USB Indicator The Charging Output Indicator is solid yellow when Solid red=Charge fault the charger output is active. Take appropriate See display panel for details actions while handling the charger, as there is a risk of electric shock. -
Page 80: Troubleshooting
SECTION 3 – MACHINE CONTROLS, INDICATORS AND OPERATION Troubleshooting The IC650 Charger is continuously monitoring itself and its environment for unusual conditions. There are a few indications that may require the user’s attention. Symptom Recommended Action No indicator lights Check AC power and connection to batteries Flashing red Fault / Error / USB Indicator Read fault code (e.g. - Page 81 SECTION 3 – MACHINE CONTROLS, INDICATORS AND OPERATION Charger Error Codes Code Description Solution E-0-0-1 Battery high voltage Check the battery voltage and cable connections. Check battery size and E-0-2-1 condition. This error will automatically clear once the condition has been corrected.
- Page 82 SECTION 3 – MACHINE CONTROLS, INDICATORS AND OPERATION E-0-0-8 Battery temperature is out of range Possible battery temperature sensor error. Check temperature sensor and connections. Reset charger. This error will automatically clear once the condition has been corrected. E-0-1-1 Charger is disabled by external command This error will only appear in the charger’s log files, not on the user interface.
- Page 83 SECTION 3 – MACHINE CONTROLS, INDICATORS AND OPERATION E-0-2-5 Low AC voltage oscillation error AC source is unstable. Could be caused by undersized generator and /or severely undersized input cables. Connect charger to an AC source that provides stable AC between 85 - 270 VAC / 45-65 Hz.
-
Page 84: Tie-Down/Lift Lugs
SECTION 3 – MACHINE CONTROLS, INDICATORS AND OPERATION 3.17 TIE-DOWN/LIFT LUGS Tie Down When transporting the machine: - Platform must be fully lowered in the stowed position. - Remove all loose items from the machine. - Machine must be tied down to the truck bed or trailer deck as shown in Figure 3-20. -
Page 85: Machine Tie-Down - 10E/26E
SECTION 3 – MACHINE CONTROLS, INDICATORS AND OPERATION Figure 3-21. Machine Tie-Down - 10E/26E 3-43 31210312 – JLG Lift –... -
Page 86: Lifting
SECTION 3 – MACHINE CONTROLS, INDICATORS AND OPERATION Lifting The machine may also be lifted using a fork truck: - Fully lower the mast and the jib. When lifting the machine: - Position the platform in line with the chassis with the jib over the rear axle. -
Page 87: Towing
SECTION 3 – MACHINE CONTROLS, INDICATORS AND OPERATION 3.18 TOWING It is not recommended that this machine be towed, except in the event of an emergency or a machine power failure. THE ALLOWABLE TOWING SPEED IS 3 KM/H (1.9 MPH). THE MAXIMUM ALLOWABLE TOWING DISTANCE IS 500 M (0.3 MILES). -
Page 88: Electric Brake Release
SECTION 3 – MACHINE CONTROLS, INDICATORS AND OPERATION Electric Brake Release Chock wheels or secure machine with tow vehicle. Position the key-select-switch to ground control sta- NOTE: Electrical release of the brakes requires enough battery power to hold the tion (1). brakes in released mode until destination is reached. - Page 89 TO PURCHASE THIS PRODUCT PLEASE CONTACT US Equipment Financing and Extended Warranties Available Discount-Equipment.com is your online resource for commercial and industrial quality parts and equipment sales. 561-964-4949 visit us on line @ www.discount-equipment.com Select an option below to find your Equipment We sell worldwide for the brands: Genie, Terex, JLG, MultiQuip, Mikasa, Essick, Whiteman, Mayco, Toro Stone, Diamond Products, Generac Magnum, Airman, Haulotte, Barreto, Power Blanket, Nifty Lift, Atlas Copco, Chicago Pneumatic, Allmand, Miller Curber, Skyjack, Lull,...
-
Page 90: Section 4 - Emergency Procedures
SECTION 4 – EMERGENCY PROCEDURES SECTION 4. EMERGENCY PROCEDURES GENERAL INFORMATION EMERGENCY CONTROL This section explains the steps to be taken in case of an emer- The machine has a Ground Control Station which will override gency situation during operation. the Platform Control Station. -
Page 91: Emergency Controls
SECTION 4 – EMERGENCY PROCEDURES Position the key-select switch (1) to GROUND. Actuate the appropriate function button (2) until the desired elevation or position of the platform is achieved. Figure 4-1. Emergency Controls – JLG Lift– 31210312... -
Page 92: Platform Manual Descent
SECTION 4 – EMERGENCY PROCEDURES PLATFORM MANUAL DESCENT FOLLOWING ANY INCIDENT, THOROUGHLY INSPECT THE MACHINE The platform manual descent valves are used in the event of a AND TEST ALL FUNCTIONS FIRST FROM THE GROUND CONTROLS. DO total power failure to retract and lower the platform using NOT LIFT ABOVE 3 M (10 FT) UNTIL YOU ARE SURE THAT ALL DAMAGE gravity. -
Page 93: Machine Safety System Override (Msso)
SECTION 4 – EMERGENCY PROCEDURES MACHINE SAFETY SYSTEM OVERRIDE (MSSO) (IF EQUIPPED) The Machine Safety System Override (MSSO) is only to be used to retrieve an operator that is pinned, trapped, or unable to operate the machine and function controls are locked out from the platform due to a platform overload sit- uation. -
Page 94: Section 5. General Specifications And Maintenance
SECTION 5 – GENERAL SPECIFICATIONS AND MAINTENANCE SECTION 5. GENERAL SPECIFICATIONS AND MAINTENANCE INTRODUCTION This section of the manual provides additional necessary information to the operator for proper operation and mainte- nance of this machine. The maintenance portion of this section is intended as infor- mation to assist the machine operator to perform daily main- tenance tasks only, and does not replace the more thorough Preventive Maintenance and Inspection Schedule included in... -
Page 95: Operating Specifications
SECTION 5 – GENERAL SPECIFICATIONS AND MAINTENANCE OPERATING SPECIFICATIONS Table 5-1. Operating Specifications And Dimensions - CE Models Model 8E-L 8E XL 10E-L Maximum Work Load 200 kg Maximum Persons Maximum Manual Side Force 400 N 200 N 400 N 200 N 400 N 400 N... - Page 96 SECTION 5 – GENERAL SPECIFICATIONS AND MAINTENANCE Table 5-1. Operating Specifications And Dimensions - CE Models Model 8E-L 8E XL 10E-L Maximum Tire Load (per wheel) 1170 kg 1020 kg 1160 kg 1660 kg 1450 kg Maximum Hydraulic Pressure 16 MPa 18 MPa Maximum Ground Bearing Pressure 17.2 kg/cm²...
-
Page 97: Operating Specifications And Dimensions - Ansi Models
SECTION 5 – GENERAL SPECIFICATIONS AND MAINTENANCE Table 5-2. Operating Specifications And Dimensions - ANSI Models Model 20E-L 26E-L Maximum Work Load 227 kg (500 lbs) Maximum Persons 400 N 200 N 400 N 400 N 200 N 400 N Maximum Manual Side Force (90 lbf) (90 lbf) - Page 98 SECTION 5 – GENERAL SPECIFICATIONS AND MAINTENANCE Table 5-2. Operating Specifications And Dimensions - ANSI Models Up and Over Clearance 5.08 m (1.67’) 6.51 m (21.4’) 20E-L 26E-L Model 2210 kg 1965 kg 3130 kg 2750 kg Approximate Gross Machine Weight (4875 lbs) (4335 lbs) (6900 lbs)
- Page 99 SECTION 5 – GENERAL SPECIFICATIONS AND MAINTENANCE – JLG Lift– 31210312...
- Page 100 SECTION 5 – GENERAL SPECIFICATIONS AND MAINTENANCE 31210312 – JLG Lift –...
- Page 101 SECTION 5 – GENERAL SPECIFICATIONS AND MAINTENANCE – JLG Lift– 31210312...
-
Page 102: Tires Specifications
SECTION 5 – GENERAL SPECIFICATIONS AND MAINTENANCE Table 5-3. Dimensions DESCRIPTION 8E/20E 8E-L/20E-L 8E XL 10E-26E 10E-L/26E-L Platform Height - Stowed 0.63 m (2.1’) 0.35 m (1.1’) Overall Stowed Machine Height 1.99 m (6.2’) Overall Machine Width 0.99 m (3.3’) Drop bar 2.10 m (6.9’) 2.82 m (9.3’) -
Page 103: Drive Motors - Hydraulic Power Unit
SECTION 5 – GENERAL SPECIFICATIONS AND MAINTENANCE Table 5-5. Drive Motors - Hydraulic Power Unit DESCRIPTION All Models Voltage 15 VAC Drive Motor Power 0.85 kW Voltage 24 VDC Motor Power 3 kW Hydraulic Displacement 3.1 cc/rev - (0.19 cu.in/rev) Power Pump Flow Rate... -
Page 104: Battery Specifications
SECTION 5 – GENERAL SPECIFICATIONS AND MAINTENANCE NOTE: Aside from JLG recommendations, it is not advisable to mix oils of different brands or types, as they may not contain the same required additives or be of Table 5-6. Battery Specifications comparable viscosities. -
Page 105: Hydraulic Oil Specifications - Optional
SECTION 5 – GENERAL SPECIFICATIONS AND MAINTENANCE Table 5-9. Hydraulic Oil Specifications - Optional SPECIFICATIONS PANOLIN HLP SYNTH 3504 NERVOL EQUIVIS XV32 NERVOL AGROFLUID 32 Oil Type Synthetic Biodegradable Low Temperature Synthetic Food Compatible ISO Viscosity Grade 32 cSt 32 cSt 32 cSt Cinematic Viscosity @ 1150 cSt... -
Page 106: Operator Maintenance
SECTION 5 – GENERAL SPECIFICATIONS AND MAINTENANCE OPERATOR MAINTENANCE Battery Lifting Chains Lubrication Oil Level/Oil Filter Overload System Verification Tires & Wheels Tilt Sensor Verification Turntable Bearing Lubrication Figure 5-4. Operator Maintenance & Lubrication Diagram - 8E/20E 5-13 31210312 – JLG Lift –... -
Page 107: Operator Maintenance & Lubrication Diagram - 10E/26E
SECTION 5 – GENERAL SPECIFICATIONS AND MAINTENANCE Battery Lifting Chains Lubrication Oil Level/Oil Filter Overload System Verification Tires & Wheels Tilt Sensor Verification Turntable Bearing Lubrication Figure 5-5. Operator Maintenance & Lubrication Diagram - 10E/26E 5-14 – JLG Lift– 31210312... -
Page 108: Chassis Hood Removal
SECTION 5 – GENERAL SPECIFICATIONS AND MAINTENANCE CHASSIS HOOD REMOVAL BATTERY MAINTENANCE - Unscrew the four (4) retaining screws (a); Battery Maintenance and Safety Practices - Remove first the left chassis cover (b): Slide the cover to the rear of the machine (1) by approx. 20 mm (1”), then lift the covers (2) to remove it completely;... -
Page 109: Battery Voltage
SECTION 5 – GENERAL SPECIFICATIONS AND MAINTENANCE Battery Voltage Battery Not Working Continuously or Inactive Battery NOTE: Voltage measures must be done after a complete charge, once the charger has A battery that is not used or used intermittently must be been unplugged and after the battery has been standing for at least 15 min- stored charged in a dry area away from freezing tempera- utes. -
Page 110: Battery Troubleshooting
SECTION 5 – GENERAL SPECIFICATIONS AND MAINTENANCE Battery Troubleshooting 5-17 31210312 – JLG Lift –... -
Page 111: Oil Level/Oil Filter - 8E/20E
SECTION 5 – GENERAL SPECIFICATIONS AND MAINTENANCE OIL LEVEL/OIL FILTER - 8E/20E NOTE: Care should be taken not to introduce any impurities (dirt, water etc.) while cap or plug is removed. Hydraulic Oil Check Lube Point - Hydraulic Tank Reservoir Capacity: 6 liters Lube - Hydraulic Oil (See Table 5-8) Interval - Check Daily NOTE:... -
Page 112: Oil Level/Oil Filter - 10E/26E
SECTION 5 – GENERAL SPECIFICATIONS AND MAINTENANCE OIL LEVEL/OIL FILTER - 10E/26E NOTE: Care should be taken not to introduce any impurities (dirt, water etc.) while cap or plug is removed. Hydraulic Oil Check Lube Point - Hydraulic Tank Reservoir Capacity: 6 liters Lube - Hydraulic Oil (See Table 5-8) Interval - Check Daily NOTE:... -
Page 113: Hydraulic Filter Replacement
SECTION 5 – GENERAL SPECIFICATIONS AND MAINTENANCE HYDRAULIC FILTER REPLACEMENT Lube Point - Replaceable Element (JLG P/N: 930134) Interval - After first 50 hours of operation and every 250 hours thereafter. Turn machine power off at ground control station. Remove the left mast hood (8E/20E), open the access door (10E/26E) to access to the hydraulic power unit (1). -
Page 114: Tires & Wheels
SECTION 5 – GENERAL SPECIFICATIONS AND MAINTENANCE TIRES & WHEELS • If the metal wheel is visible at any point through the tread area of the tire. Tire Wear and Damage • If more than one discrepancy exists in any quadrant of the wheel (within 90 degrees of one another). -
Page 115: Wheel Torque Chart
SECTION 5 – GENERAL SPECIFICATIONS AND MAINTENANCE Start all lug nuts by hand to prevent cross threading. The tightening of the lug nuts should be done in DO NOT use a lubricant on threads or nuts. stages. Following the recommended sequence, tighten lug nut per wheel torque. -
Page 116: Decal Installation
SECTION 5 – GENERAL SPECIFICATIONS AND MAINTENANCE 5.10 DECAL INSTALLATION Figure 5-10. Decal Installation - 8E/20E All Markets - Sheet 1/3 5-23 31210312 – JLG Lift –... - Page 117 SECTION 5 – GENERAL SPECIFICATIONS AND MAINTENANCE Figure 5-11. Decal Installation - 8E/20E All Markets - Sheet 2/3 5-24 – JLG Lift– 31210312...
- Page 118 SECTION 5 – GENERAL SPECIFICATIONS AND MAINTENANCE Figure 5-12. Decal Installation - 8E/20E All Markets - Sheet 3/3 5-25 31210312 – JLG Lift –...
-
Page 119: Decal Installation - 8E Ce Market
SECTION 5 – GENERAL SPECIFICATIONS AND MAINTENANCE Figure 5-13. Decal Installation - 8E CE Market 5-26 – JLG Lift– 31210312... - Page 120 SECTION 5 – GENERAL SPECIFICATIONS AND MAINTENANCE Figure 5-14. Decal Installation - 20E ANSI Market - Sheet 1/2 5-27 31210312 – JLG Lift –...
- Page 121 SECTION 5 – GENERAL SPECIFICATIONS AND MAINTENANCE Figure 5-15. Decal Installation - 20E ANSI Market - Sheet 2/2 5-28 – JLG Lift– 31210312...
-
Page 122: Decal Installation - 8E As/Nzl Market
SECTION 5 – GENERAL SPECIFICATIONS AND MAINTENANCE Figure 5-16. Decal Installation - 8E AS/NZL Market 5-29 31210312 – JLG Lift –... - Page 123 SECTION 5 – GENERAL SPECIFICATIONS AND MAINTENANCE Figure 5-17. Decal Installation - 10E/26E All Markets - Sheet 1/3 5-30 – JLG Lift– 31210312...
- Page 124 SECTION 5 – GENERAL SPECIFICATIONS AND MAINTENANCE Figure 5-18. Decal Installation - 10E/26E All Markets - Sheet 2/3 5-31 31210312 – JLG Lift –...
- Page 125 SECTION 5 – GENERAL SPECIFICATIONS AND MAINTENANCE Figure 5-19. Decal Installation - 10E/26E All Markets - Sheet 3/3 5-32 – JLG Lift– 31210312...
-
Page 126: Decal Installation - 10E Ce Market
SECTION 5 – GENERAL SPECIFICATIONS AND MAINTENANCE Figure 5-20. Decal Installation - 10E CE Market 5-33 31210312 – JLG Lift –... - Page 127 SECTION 5 – GENERAL SPECIFICATIONS AND MAINTENANCE Figure 5-21. Decal Installation - 26E ANSI Market 5-34 – JLG Lift– 31210312...
- Page 128 SECTION 5 – GENERAL SPECIFICATIONS AND MAINTENANCE Figure 5-22. Decal Installation - 10E AS/NZL Market 5-35 31210312 – JLG Lift –...
-
Page 129: Machine Decal Installation Chart - 8E/10E Ce/As/Nzl
SECTION 5 – GENERAL SPECIFICATIONS AND MAINTENANCE Table 5-11. Machine Decal Installation Chart - 8E/10E CE/AS/NZL Item # 8E-L 8E XL 10E-L Item # 8E-L 8E XL 10E-L 1702773 1702773 1702773 1705781 1705781 AU1423 AU1423 AU1423 AU2105 AU2105 1705781 1705781 1705781 AU2061 AU2061... -
Page 130: Machine Decal Installation Chart - 20E/26E Ansi/Ansi
SECTION 5 – GENERAL SPECIFICATIONS AND MAINTENANCE Table 5-12. Machine Decal Installation Chart - 20E/26E ANSI/ANSI Export/CSA 20E-L 20E-L 20E-L 20E-L Item # SPA/POR SPA/POR ENG/SPA ENG/SPA ENG/FR ENG/FR 1001223845 1001223846 1001223847 1001223848 1001223849 1001223850 1001223851 1001223852 1001223853 1001223854 1001223855 1001223856 1001223853 1001223854... -
Page 131: Lubrication
SECTION 5 – GENERAL SPECIFICATIONS AND MAINTENANCE 5.11 LUBRICATION NOTE: Recommended lubricating intervals are based on machine operation under normal conditions. For machines used in multi-shift operations and/or exposed to hostile environments or conditions, lubrication frequencies must be increased accordingly. 5-38 –... -
Page 132: Swing Bearing Race
SECTION 5 – GENERAL SPECIFICATIONS AND MAINTENANCE Swing Bearing Race Lube Points - 2 grease fittings Capacity: A/R Lube - A (See Table 5-7) Interval - Every 250 hours of operation Remove chassis hoods. From ground control station, raise the mast to gain access to the turntable plate. -
Page 133: Swing Bearing Teeth
SECTION 5 – GENERAL SPECIFICATIONS AND MAINTENANCE Swing Bearing Teeth Lube Points - Coat each tooth Capacity: A/R Lube - B (See Table 5-7) Interval - Every 1000 hours of operation Remove chassis hoods. From ground control station, raise the mast to gain access to the turntable plate. -
Page 134: Lifting Chains
SECTION 5 – GENERAL SPECIFICATIONS AND MAINTENANCE Lifting Chains Lube Points - 4 chains (8E/20E), 6 chains (10E/26E) Capacity: A/R Lube - C (See Table 5-7) Interval - After the first 50 hours of operation and every 125 hours of operation (or every 30 days) thereafter. Lubricant can be applied manually with a brush or by spray- ing. -
Page 135: Overload System Verification
SECTION 5 – GENERAL SPECIFICATIONS AND MAINTENANCE 5.12 OVERLOAD SYSTEM VERIFICATION Add an additional weight of 15 kg (33 lbs) to the load (L). Interval - At least every 6 months of operation. Lift the platform with your hands to apply a small Position the platform/ground select switch to the plat- upwards force (F), then remove the force to let the form position. -
Page 136: Tilt Sensor Verification
SECTION 5 – GENERAL SPECIFICATIONS AND MAINTENANCE 5.13 TILT SENSOR VERIFICATION Interval - At least every 6 months of operation. Drive the machine on a known level surface. Chock both rear wheels. Remove chassis hoods and place a level on the chassis positioned in line w/chassis. -
Page 137: Slack Chain Sensors Check
SECTION 5 – GENERAL SPECIFICATIONS AND MAINTENANCE 5.14 SLACK CHAIN SENSORS CHECK Check the 2 (8E/20E) or 3 (10E/26E) slack chain sensors to ensure proper operation. Interval - Check after every 6 months of operation. Location: -8E/20E: one at the top of mast #1 and one at the bottom of mast #4. -10E/26E: one at the top of mast #1, one at the top of mast #2 and one at the bottom of mast #5. -
Page 138: Supplemental Information
SECTION 5 – GENERAL SPECIFICATIONS AND MAINTENANCE 5.15 SUPPLEMENTAL INFORMATION 5.16 DIAGNOSTIC TROUBLE CODES (DTC) The following information is provided in accordance with the Introduction requirements of the European Machinery Directive 2006/42/ This sub-section provides a reference for Diagnostic Trouble EC and is only applicable to CE machines. -
Page 139: Dtc Index
SECTION 5 – GENERAL SPECIFICATIONS AND MAINTENANCE 5.17 DTC INDEX DTC TABLE PAGE 0-0 Help Comments ....... 5-47 2-1 Power-Up. -
Page 140: Dtc Check Tables
SECTION 5 – GENERAL SPECIFICATIONS AND MAINTENANCE 5.18 DTC CHECK TABLES 0-0 Help Comments FAULT MESSAGE DESCRIPTION CHECK EVERYTHING OK The normal help message in Platform Mode. Dis- plays on the analyzer only. GROUND MODE OK The normal help message in Ground Mode. Dis- plays on the analyzer only. - Page 141 SECTION 5 – GENERAL SPECIFICATIONS AND MAINTENANCE FAULT MESSAGE DESCRIPTION CHECK FUNCTION SELECTED BUT One of the drive joystick functions was activated, • Release joystick and allow to center. TRIGGER SWITCH OPEN but the trigger switch was not. • Check if the joystick is obstructed or jammed. 0023 •...
-
Page 142: Power-Up
SECTION 5 – GENERAL SPECIFICATIONS AND MAINTENANCE 2-1 Power-Up FAULT MESSAGE DESCRIPTION CHECK POWER CYCLE The normal help message is issued at each power Normal operation. No check necessary. cycle. Displays on the analyzer only. KEYSWITCH FAULTY Both Platform and Ground Modes are selected Refer problem to a qualified JLG mechanic. - Page 143 SECTION 5 – GENERAL SPECIFICATIONS AND MAINTENANCE FAULT MESSAGE DESCRIPTION CHECK ACCELERATOR FAULTY - The joystick wiper signal input is outside the • Center joystick and check to see if a power cycle will clear DTC. WIPER OUT OF RANGE acceptable voltage range.
-
Page 144: Ground Controls
SECTION 5 – GENERAL SPECIFICATIONS AND MAINTENANCE FAULT MESSAGE DESCRIPTION CHECK FUNCTION LOCKED OUT - The Mast Joystick was not centered at power-up • Release joystick and allow to center. 2242 MAST JOYSTICK NOT in platform mode. • Check if the joystick is obstructed or jammed. CENTERED Refer problem to a qualified JLG mechanic. - Page 145 SECTION 5 – GENERAL SPECIFICATIONS AND MAINTENANCE FAULT MESSAGE DESCRIPTION CHECK FUNCTION PROBLEM - MAST The Mast Lift Up Switch was closed during • Check if the concerned switch is damaged, obstructed or 2368 LIFT UP PERMANENTLY power-up in ground mode. jammed.
- Page 146 SECTION 5 – GENERAL SPECIFICATIONS AND MAINTENANCE FAULT MESSAGE DESCRIPTION CHECK MAST SWITCH FAULTY The Mast Lift Up and Down Switches are active • Check if one of the concerned switches is damaged, obstructed 2374 simultaneously. or jammed. Refer problem to a qualified JLG mechanic. JIB SWITCH FAULTY The Jib Lift Up and Down Switches are active •...
-
Page 147: Function Prevented
SECTION 5 – GENERAL SPECIFICATIONS AND MAINTENANCE FAULT MESSAGE DESCRIPTION CHECK MAST LIMIT SWITCH 2 - A problem has been detected in this function. Refer problem to a qualified JLG mechanic. 2381 FAULTY FUNCTION PREVENTED - The structure is swung beyond the rear tires or •... - Page 148 SECTION 5 – GENERAL SPECIFICATIONS AND MAINTENANCE FAULT MESSAGE DESCRIPTION CHECK FUNCTION PREVENTED - Manual brake release mode is activated. Drive or • Push manual brake release switch again or cycle power to clear BRAKES ELECTRONICALLY lift is not possible. manual brake release mode.
-
Page 149: Line Contactor Open Circuit
SECTION 5 – GENERAL SPECIFICATIONS AND MAINTENANCE 3-1 Line Contactor Open Circuit FAULT MESSAGE DESCRIPTION CHECK OPEN CIRCUIT LINE There is a problem with the line contactor. Refer problem to a qualified JLG mechanic. CONTACTOR CONTACTOR DRIVER There is a problem with the power module line Refer problem to a qualified JLG mechanic. -
Page 150: Ground Output Driver
SECTION 5 – GENERAL SPECIFICATIONS AND MAINTENANCE 3-3 Ground Output Driver FAULT MESSAGE DESCRIPTION CHECK LEFT BRAKE - SHORT TO A problem has been detected in this function. Refer problem to a qualified JLG mechanic. 3312 BATTERY RIGHT BRAKE - SHORT TO A problem has been detected in this function. - Page 151 SECTION 5 – GENERAL SPECIFICATIONS AND MAINTENANCE FAULT MESSAGE DESCRIPTION CHECK JIB LIFT DOWN VALVE - SHORT A problem has been detected in this function. Refer problem to a qualified JLG mechanic. 33105 TO BATTERY LEFT BRAKE - SHORT TO A problem has been detected in this function.
- Page 152 SECTION 5 – GENERAL SPECIFICATIONS AND MAINTENANCE FAULT MESSAGE DESCRIPTION CHECK PROPORTIONAL RELIEF A problem has been detected in this function. Refer problem to a qualified JLG mechanic. 33367 VALVE - SHORT TO GROUND PROPORTIONAL RELIEF A problem has been detected in this function. Refer problem to a qualified JLG mechanic.
-
Page 153: Thermal Limit
SECTION 5 – GENERAL SPECIFICATIONS AND MAINTENANCE FAULT MESSAGE DESCRIPTION CHECK OVERLOAD LIGHT - SHORT TO A problem has been detected in this function. Refer problem to a qualified JLG mechanic. 33387 GROUND OVERLOAD LIGHT - OPEN A problem has been detected in this function. Refer problem to a qualified JLG mechanic. - Page 154 SECTION 5 – GENERAL SPECIFICATIONS AND MAINTENANCE FAULT MESSAGE DESCRIPTION CHECK SLAVE MODULE The Slave Module (left controller) temperature Refer problem to a qualified JLG mechanic. TEMPERATURE - OUT OF sensor is out of the permitted range. RANGE MASTER MODULE TOO HOT - The Master Module (right controller) has reached •...
-
Page 155: Battery Supply
SECTION 5 – GENERAL SPECIFICATIONS AND MAINTENANCE FAULT MESSAGE DESCRIPTION CHECK LEFT DRIVE MOTOR A problem has been detected in this function. Refer problem to a qualified JLG mechanic. 4213 TEMPERATURE - OUT OF RANGE 4-4 Battery Supply FAULT MESSAGE DESCRIPTION CHECK BATTERY VOLTAGE TOO LOW -... - Page 156 SECTION 5 – GENERAL SPECIFICATIONS AND MAINTENANCE FAULT MESSAGE DESCRIPTION CHECK MASTER MODULE VOLTAGE A problem has been detected with the batteries or • Recharge batteries. OUT OF RANGE power module. • Check for damaged batteries, battery cables or connections. 4418 •...
-
Page 157: Transmission And Drive System
SECTION 5 – GENERAL SPECIFICATIONS AND MAINTENANCE 4-6 Transmission and Drive System FAULT MESSAGE DESCRIPTION CHECK RIGHT SPEED SENSOR - NOT A problem has been detected with the right drive Refer problem to a qualified JLG mechanic. 4610 RESPONDING PROPERLY motor speed sensor (encoder). -
Page 158: Accessory
SECTION 5 – GENERAL SPECIFICATIONS AND MAINTENANCE FAULT MESSAGE DESCRIPTION CHECK CANBUS COMM LOST The platform module failed to receive messages Refer problem to a qualified JLG mechanic. 6634 from both the master and the slave modules. 6-7 Accessory FAULT MESSAGE DESCRIPTION CHECK FUNCTIONS CUTOUT - SOFT... - Page 159 SECTION 5 – GENERAL SPECIFICATIONS AND MAINTENANCE FAULT MESSAGE DESCRIPTION CHECK RIGHT MOTOR FEEDBACK The right motor voltage feedback circuits are Refer problem to a qualified JLG mechanic. 7723 FAILURE damaged (Master Module). LEFT MOTOR FEEDBACK The left motor voltage feedback circuits are dam- Refer problem to a qualified JLG mechanic.
-
Page 160: Tilt Sensor
SECTION 5 – GENERAL SPECIFICATIONS AND MAINTENANCE FAULT MESSAGE DESCRIPTION CHECK STALLED RIGHT MOTOR The right motor has been detected stalled. • Ensure vehicle is not stuck on something preventing move- 7732 ment. Refer problem to a qualified JLG mechanic. STALLED LEFT MOTOR The left motor has been detected stalled. -
Page 161: Steering/Axle
SECTION 5 – GENERAL SPECIFICATIONS AND MAINTENANCE FAULT MESSAGE DESCRIPTION CHECK FUNCTIONS CUTOUT - The platform is overloaded and functions are • Unload the platform. PLATFORM OVERLOADED restricted. • Check if the overload switch is obstructed or jammed. Refer problem to a qualified JLG mechanic. OVERLOAD SENSOR ERROR Inconsistency in the overload sensor information. -
Page 162: Safety System Override
SECTION 5 – GENERAL SPECIFICATIONS AND MAINTENANCE FAULT MESSAGE DESCRIPTION CHECK STEER SENSOR - NOT Invalid signal from the steer sensor. • Check the steer sensor for damage. 8667 RESPONDING • Check that the steer sensor is securely mounted. Refer problem to a qualified JLG mechanic. STEER SENSOR - NOT The steering sensor has not been calibrated. - Page 163 SECTION 5 – GENERAL SPECIFICATIONS AND MAINTENANCE FAULT MESSAGE DESCRIPTION CHECK SLAVE MODULE A/D FAILURE There is an internal error in the Slave Module (left • Cycle power to clear the fault. 9993 controller). Refer problem to a qualified JLG mechanic. MASTER MODULE EEPROM There is an internal error in the Master Module •...
- Page 164 SECTION 5 – GENERAL SPECIFICATIONS AND MAINTENANCE FAULT MESSAGE DESCRIPTION CHECK SLAVE MODULE FAILURE - A short circuit on the power outputs of the Slave • Cycle power to clear the fault. 99101 CHECK POWER CIRCUITS OR Module (left controller) has been detected. Refer problem to a qualified JLG mechanic.
- Page 165 SECTION 5 – GENERAL SPECIFICATIONS AND MAINTENANCE FAULT MESSAGE DESCRIPTION CHECK SLAVE MODULE - INTERNAL There is an internal error in the Slave Module (left • Cycle power to clear the fault. 99109 ERROR controller). Refer problem to a qualified JLG mechanic. MASTER MODULE - INTERNAL There is an internal error in the Master Module •...
- Page 166 SECTION 5 – GENERAL SPECIFICATIONS AND MAINTENANCE FAULT MESSAGE DESCRIPTION CHECK SLAVE MODULE - INTERNAL There is an internal error in the Slave Module (left • Cycle power to clear the fault. 99119 ERROR controller). Refer problem to a qualified JLG mechanic. MASTER MODULE - INTERNAL There is an internal error in the Master Module •...
- Page 167 SECTION 5 – GENERAL SPECIFICATIONS AND MAINTENANCE FAULT MESSAGE DESCRIPTION CHECK MASTER MODULE - INTERNAL There is an internal error in the Master Module • Cycle power to clear the fault. 99128 ERROR (right controller). Refer problem to a qualified JLG mechanic. MASTER MODULE - INTERNAL There is an internal error in the Master Module •...
-
Page 168: Section 6. Inspection And Repair Log
SECTION 6 – INSPECTION AND REPAIR LOG SECTION 6. INSPECTION AND REPAIR LOG Type of machine: ________________________________________ Machine Serial Number: __________________________________ Table 6-1. Inspection and Repair Log Date Comments 31210312 – JLG Lift –... - Page 169 SECTION 6 – INSPECTION AND REPAIR LOG Table 6-1. Inspection and Repair Log Date Comments Name: ______________________________________________ Signature: _____________________________________________ – JLG Lift – 31210312...
- Page 170 TO PURCHASE THIS PRODUCT PLEASE CONTACT US Equipment Financing and Extended Warranties Available Discount-Equipment.com is your online resource for commercial and industrial quality parts and equipment sales. 561-964-4949 visit us on line @ www.discount-equipment.com Select an option below to find your Equipment We sell worldwide for the brands: Genie, Terex, JLG, MultiQuip, Mikasa, Essick, Whiteman, Mayco, Toro Stone, Diamond Products, Generac Magnum, Airman, Haulotte, Barreto, Power Blanket, Nifty Lift, Atlas Copco, Chicago Pneumatic, Allmand, Miller Curber, Skyjack, Lull,...
Need help?
Do you have a question about the JLG TOUCAN 8E and is the answer not in the manual?
Questions and answers