
Related Manuals for Caen RFID Quattro R4321P

Summary of Contents for Caen RFID Quattro R4321P
- Page 1 TECHNICAL INFORMATION MANUAL Revision 3 – 29 September 2020 R4321P Smart 4-port RAIN RFID Long Range Reader...
- Page 2 All you need to start using your reader in a few clicks! Scope of Manual The goal of this manual is to provide the basic information to work with the Quattro R4321P Smart 4-port RAIN RFID Long Range Reader. This manual refers to Quattro R4321P DISTRO firmware revision 1.2.0.
- Page 3 The information contained herein has been carefully checked and is believed to be accurate; however, no responsibility is assumed for inaccuracies. CAEN RFID reserves the right to modify its products specifications without giving any notice; for up to date information please visit www.caenrfid.com.
- Page 4 Index Scope of Manual ................................. 2 Change Document Record ............................2 Reference Document ..............................2 Index ....................................4 List of Figures ..................................5 List of Tables ..................................5 INTRODUCTION ................................ 6 Product Description ..............................6 Ordering Options ............................... 6 Installation Notice ..............................7 GETTING STARTED ..............................
-
Page 5: Table Of Contents
Quattro R4321P FCC Grant ............................70 List of Figures Fig. 1.1: Quattro reader (Model R4321P) ..........................6 Fig. 1.2: Quattro R4321P Technical drawings: top view....................... 7 Fig. 3.1: LEDs..................................12 Fig. 3.2: Interfaces Panel ..............................13 Fig. 3.3: GPIO Connector ..............................13 Fig. -
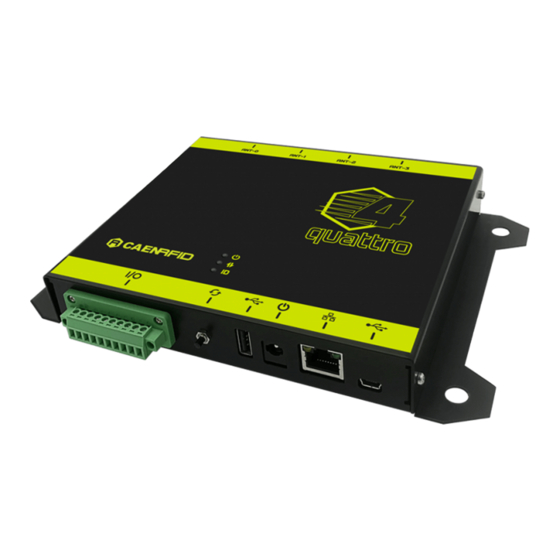
Page 6: Fig. 1.1: Quattro Reader (Model R4321P)
1 INTRODUCTION Product Description © The Quattro (Model R4321P) is a smart 4-port RAIN RFID long range reader of the easy2read product line, well suited for retail and warehousing installations. The Quattro reader has 4 antenna ports capable of a 31.5 dBm maximum power enabling to build RAIN RFID portals for long range reading. -
Page 7: Fig. 1.2: Quattro R4321P Technical Drawings: Top View
The Quattro R4321P reader could be mounted either horizontally or vertically. Locate the four mounting slots on the reader, as illustrated in Fig. 1.2: Quattro R4321P Technical drawings: top view. In the four mounting slots there are rubber gaskets to facilitate adherence to smooth surfaces. - Page 8 One of the fastenings that are very requested in the industrial field is the possibility of mounting on Bosch profiles. The 4 fixing slots of the Quattro R4321P reader are sized to facilitate this type of assembly. An M8 screw with the respective M8 nut is required to fix the reader using Bosch profiles: M8 nut Bosch Rexroth’s profile...
- Page 9 For proper operation of the device: Ethernet cable shall be CAT6 at least (type S/FTP or S/STP) Put two ferrites (P.N. RRC-13-7-23-M-K5B by RICHCO; CAEN RFID ordering code LFAAFFP00004) on the Ethernet cable, near the reader connector. GETTING STARTED - Quattro Technical Information Manual...
- Page 10 Easy Controller Follow these steps to connect the Quattro reader using the Easy Controller application for Windows: Download the latest version of the Easy Controller software from the Quattro R4321P web page, Downloads section and install it. Launch the Easy Controller application: On the main screen click on File →...
- Page 11 Place a tag in the read range of the reader, click on start inventory and see the tag information displayed on the main window: For more info on the use of the Easy Controller, please refer to the CAEN RFID Easy Controller Software Technical Information Manual, you can download it from the...
-
Page 12: Fig. 3.1: Leds
3 EXTERNAL INTERFACE DESCRIPTION LEDS Fig. 3.1: LEDs Name Description Power Power On – Green LED Communication Communication activity – Blinking Yellow LED Tag-ID Tag Detection – Blinking Red LED Tab. 3.1: LEDs EXTERNAL INTERFACE DESCRIPTION - Quattro Technical Information Manual... -
Page 13: Fig. 3.2: Interfaces Panel
Connectors Fig. 3.2: Interfaces Panel Name Description GPIO General Purpose Input Output UPGRADE Upgrade operative system USB host USB 2.0 Hi-speed Host port Power Power Supply Connector Ethernet Ethernet 10/100/1000BASE-T (RJ45) / POE standard IEEE 802.3af USB device USB 2.0 Hi-Speed Device port Tab. -
Page 14: Fig. 3.4: Gpio Input Signal
(GND) and return (RTN) is also required to complete the circuit. Fig. 3.4: GPIO Input Signal It is possible to verify the correct functioning of the circuit by connecting the reader to the CAEN RFID Easy Controller software, Tools-I/O management section:... - Page 15 The OUTPUT1.1 – OUTPUT1.2 and OUTPUT2.1 – OUTPUT2.2 pins are the terminals of a normally open dry contacts. By connecting to the CAEN RFID Easy Controller Software, Tools-I/O management section, you can close the contact by removing the check from the Status box related to GPIO 2 and GPIO 3 and then press the Apply button.
-
Page 16: Fig. 3.5: Gpio Output Signal
To power a generic device at 5V DC (U1 symbol in Fig. 3.5: GPIO Output Signal), for example a light signal tower, a photocell or an alert siren, it is possible to use the connection shown in the drawing below. When you close the contact by the software command, the device is powered. - Page 17 For proper operation of the device: Ethernet cable shall be CAT6 at least (type S/FTP or S/STP) Put two ferrites (P.N. RRC-13-7-23-M-K5B by RICHCO; CAEN RFID ordering code LFAAFFP00004) on the Ethernet cable, near the reader connector. CONFIGURATION USING THE WEB INTERFACE - Quattro Technical Information Manual...
-
Page 18: Fig. 4.1: Quattro R4321P Web Interface
When the connection with the reader is established, the main screen of the web interface is displayed: Fig. 4.1: Quattro R4321P Web Interface The Web Interface menu options are the following: NETWORK SYSTEM RFID INFO CONFIGURATION USING THE WEB INTERFACE - Quattro Technical Information Manual... - Page 19 NETWORK The NETWORK submenu options are the following: DHCP: Enable/Disable. By default the DHCP is set to disable. You can change the default value using the drop-down menu IP Address: the reader default IP address is 192.168.0.2. The Quattro reader can be connected to a PC using an Ethernet cable: in order to correctly operate with the reader refer to Ethernet Communication Setup page 41.
- Page 20 SYSTEM The SYSTEM CONFIGURATION options are the following: Login User Name: To access the web interface, the default username is “root”. Use this option to change the login username. If you forgot your username you must necessarily make a factory reset (see § FIRMWARE UPGRADE page 61) ...
- Page 21 EASY2READ (factory default) is the CAEN RFID easy2read communication protocol that permits to control the reader using the CAEN RFID Easy Controller Application or the SDK (Software Development Kit) library. For details on the use of the EASY2READ profile please refer to §...
- Page 22 EASY2READ Configuration Options Choosing the EASY2READ profile, the RFID Configuration submenu options are the following: RF Output Power: the default RF Power is 60%. The RF Power value at power up is expressed as a percentage value of the maximum RF output power. Through the RF Output Power submenu you can set the power level emitted by the reader.
-
Page 23: Tab. 4.1: Conducted Power
Tab. 4.1: Conducted power Note that, when the reader is configured in the EASY2READ profile, to set the power you can also use the CAEN RFID Easy Controller Application or the SetPower function of the SDK (Software Development Kit) library. - Page 24 Tag ID Beep: enable or disable. By default, the Tag ID beep is disabled. You can change the default value using the drop-down menu. If the Tag ID beep is enabled, the reader will beep when detects 1 tag during the inventory. Warning: To save the changes click on the “SAVE”...
- Page 25 HID Configuration Options The use of the HID profile allows the user to select the keyboard emulation protocol. Choosing the HID profile, the HID Configuration submenu options are the following: RF Output Power: the default RF Power is 60%. The RF Power value at power up is expressed as a percentage value of the maximum RF output power.
-
Page 26: Tab. 4.2: Conducted Power
10% 20% 40% 60% 80% 100% The correspondent values are: Conducted Power Conducted Power Percentage ETSI (mW) (mW) 1120 1000 100% 1400 1000 Tab. 4.2: Conducted power EPCC1G2 Q: Q parameter (integer 0÷15) is useful for the optimization of the inventory efficiency: as a rule of thumb, if you have to read a huge population of tags you need to select a high value for the Q parameter, otherwise you can select a lower value. - Page 27 Where: Parameter Description Values Range Unit action To start/ stop the inventory Start/stop duration Inventory duration ≥ 0 seconds repetition interval Time between two inventories 0÷inf seconds If on, the reader returns the echo command sent by the host as proof on/off of correct data receipt The interval is the equivalent of the Scan Delay (see §...
- Page 28 Antenna Source 2: enable or disable. By default, the Antenna Source 2 is disabled. You can change the default value using the drop-down menu. If the Antenna Source 2 is enabled, the reader performs the inventory using this antenna. ...
- Page 29 TCP/IP: choosing this option, it is requested to insert the IP Address:Port, see the example below: HTTP/HTTPS: choosing this option, it is requested to insert: the URL in the following format: http://server/path or https://server/path the Content-Type: using the drop-down menu choose the available options between text/plain, text/xml, text/xtml or application/json.
-
Page 30: Tab. 4.3: Epc Code Parameters
EPC code parameters Using the table below you can customize the text of the code displayed on the screen: Tab. 4.3: EPC Code parameters EPC Code: enable or disable. By default, the EPC Code is enabled and the EPC code is returned in the message sent by the reader. -
Page 31: Tab. 4.4: Escape Sequences Supported
Warning: if you are using a qwerty keyboard, pay attention that it is a standard qwerty keyboard because if not the conversion of symbols could create display problems. Escape Sequences Description Newline (Line Feed) Carriage Return Horizontal Tab Vertical Tab Backslash Tab. - Page 32 Warning: Once the HID profile has been activated, it is possible to carry out tests by changing values to the various HID options and clicking only on the “UPDATE” button to make the changes immediately active: Warning: To return to the last saved configuration, just click on SYSTEM option in the Web Interface panel and then click on the "Reboot"...
- Page 33 EXAMPLES Consider the following EPC MEMORY CONTENT (RAW): 0x41 0x42 0x43 0x44 0x45 0x46 0x47 0x48 0x49 0x4A 0x4B 0x4C HEX FORMAT: 4142434445464748494A4B4C OFFSET LENGTH GROUP SEPARATOR PREFIX POSTFIX Result: 1-4-2-4-3-4. OFFSET LENGTH GROUP SEPARATOR PREFIX POSTFIX Result: 0024:34:44:54:64:74:84 OFFSET LENGTH GROUP SEPARATOR...
- Page 34 CUSTOM Configuration Options The use of the CUSTOM profile allows the user to upload his own scripts to the reader. Choosing the CUSTOM profile, the RFID Configuration submenu options are the following: RF Output Power: the default RF Power is 60%. The RF Power value at power up is expressed as a percentage value of the maximum RF output power.
-
Page 35: Tab. 4.5: Conducted Power
The correspondent values are: Conducted Power Conducted Power Percentage ETSI (mW) (mW) 1120 1000 100% 1400 1000 Tab. 4.5: Conducted power EPCC1G2 Q: Q parameter (integer 0÷15) is useful for the optimization of the inventory efficiency: as a rule of thumb, if you have to read a huge population of tags you need to select a high value for the Q parameter, otherwise you can select a lower value. - Page 36 INFO The INFO submenu options are the following: Model: the model name (e.g. R4321P) Serial Number: the reader serial number (16 numbers) MAC Address: the reader MAC address Hardware Revision: the hardware revision of the reader ...
- Page 37 EASY2READ profile please refer to the next paragraph § Set the EASY2READ profile page With the EASY2READ profile active you will use the CAEN RFID easy2read communication protocol and the reader can be controlled using the...
-
Page 38: Fig. 5.1: Quattro R4321P Web Interface
When the connection with the reader is established, the main screen of the web interface is displayed: Fig. 5.1: Quattro R4321P Web Interface Click on RFID menu options in order to set the EASY2READ profile, you can change the profile using the... - Page 39 Warning: To save the changes click on the “SAVE” button. Note that all changes made via the web interface are active only after the reader’s reboot. Click on SYSTEM option in the Web Interface panel and then click on the “Reboot” button. After reboot, the new settings are active. EASY2READ PROFILE - Quattro Technical Information Manual...
- Page 40 EASY2READ configuration options It is possible to configure various options using the EASY2READ profile (configuration via web interface): For details on the EASY2READ configuration options, refer to § EASY2READ Configuration Options page 22. EASY2READ PROFILE - Quattro Technical Information Manual...
- Page 41 For proper operation of the device: Ethernet cable shall be CAT6 at least (type S/FTP or S/STP) Put two ferrites (P.N. RRC-13-7-23-M-K5B by RICHCO; CAEN RFID ordering code LFAAFFP00004) on the Ethernet cable, near the reader connector. EASY2READ PROFILE - Quattro Technical Information Manual...
- Page 42 Easy Controller Follow these steps to connect the Quattro using the Easy Controller application for Windows: Download the latest version of the Easy Controller software from the Quattro R4321P web page, Downloads section and install it. Launch the Easy Controller application: On the main screen click on File →...
- Page 43 Place a tag in the read range of the reader, click on start inventory and see the tag information displayed on the main window: For more info on the use of the Easy Controller, please refer to the CAEN RFID Easy Controller Software Technical Information Manual, you can download it from the...
- Page 44 Warning: If your PC is running a Windows version older than Windows 10, in order to correctly operate with the reader, you need to install the Gadget Serial USB driver. You can download it for Windows based systems from the Quattro R4321P web page, Downloads section or from the Software and Firmware download area.
- Page 45 Easy Controller Follow these steps to connect the Quattro using the Easy Controller application for Windows: Download the latest version of the Easy Controller software from the Quattro R4321P web page, Downloads section and install it. Launch the Easy Controller application: On the main screen click on File →...
- Page 46 Place a tag in the range of the reader, click on start inventory and see the tag information displayed on the main window: For more information on the CAEN RFID Easy Controller for Windows application usage, please refer to the relevant user manual: you can download it from the...
- Page 47 Inventory on GPIO state change This mode has been designed to enable the inventory at the change of state of the GPIO0 and GPIO1 as illustrated in the paragraph Input signal page 14. The inventory is executed until the state change persists. In the EASY2READ profile it is necessary a double activation to perform the inventory on GPIO state change: Activation via web interface (see §...
- Page 48 Now the tag inventory is performed at the change of state of the GPIO0/1. For more information on the CAEN RFID Easy Controller for Windows application usage, please refer to the relevant technical information manual: you can download it from the...
- Page 49 If your reader is in EASY2READ or CUSTOM profile active, in order to set the HID profile please refer to the next paragraph § Set the HID profile page 49. Warning: Note that, when configured in the HID profile, the Quattro R4321P reader cannot be controlled using the CAEN RFID Easy Controller Application.
-
Page 50: Fig. 6.1: Quattro R4321P Web Interface
When the connection with the reader is established, the main screen of the web interface is displayed: Fig. 6.1: Quattro R4321P Web Interface Click on RFID menu options in order to set the HID profile, you can change the profile using the drop-down... - Page 51 Warning: To save the changes click on the “SAVE” button. Note that all changes made via the web interface are active only after the reader’s reboot. Click on SYSTEM option in the Web Interface panel and then click on the “Reboot” button. After reboot, the new settings are active. HID PROFILE - Quattro Technical Information Manual...
- Page 52 HID configuration options It is possible to configure various options using the HID profile (configuration via web interface): For details on the HID configuration options, refer to § HID Configuration Options page 25. HID PROFILE - Quattro Technical Information Manual...
- Page 53 For proper operation of the device: Ethernet cable shall be CAT6 at least (type S/FTP or S/STP) Put two ferrites (P.N. RRC-13-7-23-M-K5B by RICHCO; CAEN RFID ordering code LFAAFFP00004) on the Ethernet cable, near the reader connector. HID PROFILE - Quattro Technical Information Manual...
- Page 54 For proper operation of the device: Ethernet cable shall be CAT6 at least (type S/FTP or S/STP) Put two ferrites (P.N. RRC-13-7-23-M-K5B by RICHCO; CAEN RFID ordering code LFAAFFP00004) on the Ethernet cable, near the reader connector. CUSTOM PROFILE - Quattro Technical Information Manual...
-
Page 55: Fig. 7.1: Quattro R4321P Web Interface
When the connection with the reader is established, the main screen of the web interface is displayed: Fig. 7.1: Quattro R4321P Web Interface CUSTOM PROFILE - Quattro Technical Information Manual... - Page 56 Click on RFID menu options in order to set the CUSTOM profile, you can change the profile using the drop- down menu: Warning: To save the changes click on the “SAVE” button. Note that all changes made via the web interface are active only after the reader’s reboot. Click on SYSTEM option in the Web Interface panel and then click on the “Reboot”...
- Page 57 Configuration options It is possible to configure various options using the CUSTOM profile (configuration via web interface): For details on the CUSTOM configuration options, refer to § CUSTOM Configuration Options page 34. CUSTOM PROFILE - Quattro Technical Information Manual...
- Page 58 For proper operation of the device: Ethernet cable shall be CAT6 at least (type S/FTP or S/STP) Put two ferrites (P.N. RRC-13-7-23-M-K5B by RICHCO; CAEN RFID ordering code LFAAFFP00004) on the Ethernet cable, near the reader connector. CUSTOM PROFILE - Quattro Technical Information Manual...
- Page 59 To use the uploaded script, the user needs a Java Virtual Machine. Contact the CAEN RFID support to obtain the Virtual Machine and the guideline to its use. CUSTOM PROFILE - Quattro Technical Information Manual...
- Page 60 8 RESET THE READER It is possible to reset the reader in two different ways: Turn off the reader (disconnect the power supply), wait about 15 seconds until the power LED power off, then turn on the reader again (connect the power supply). Wait for the reboot to be completed.
- Page 61 Warning! The firmware upgrade is a factory reset: any scripts uploaded to the reader are deleted. The Quattro R4321P firmware upgrade can be performed only via USB. In order to upgrade the firmware follow the steps described below: Download the Quattro Upgrade Tool and the firmware image file at the Quattro R4321P web page the CAEN RFID Web Site, Downloads section.
- Page 62 To connect the reader, press the upgrade button (see § Fig. 3.2: Interfaces Panel page 13) for about 10 seconds. The “No device connected” box will turn into “Detected 1 device” and informs you that the reader is correctly connected to the upgrade program: Select the FW image file by clicking on the “Browse”...
- Page 63 At the end of procedure, if the upgrade has been successfully performed, you will see the message “Status: ready”: Turn off the reader (disconnect the power supply), wait about 15 seconds and then turn on the reader again (connect the power supply). Now the reader is ready to work with the new firmware upgraded.
-
Page 64: Tab. 10.1: Technical Specifications
10 TECHNICAL SPECIFICATIONS Technical Specification Table 865.600÷867.600 MHz (ETSI EN 302 208 v3.1.1) Frequency Range 902÷928 MHz (FCC part 15.247) Up to 31.5 dBm (1.4W) conducted (ETSI) RF Power Up to 30 dBm (1W) conducted (FCC) 4 channels (compliant to ETSI EN 302 208 v3.1.1) Number of Channels 50 hopping channels (compliant to FCC part 15.247) Standard Compliance... -
Page 65: Connecting To Ra0003 Multiplexer
Five leds provide the user with information about module operation. Warning: The RA0003 device has a 9-36V power supply and cannot be powered directly by the Quattro R4321P reader which has only 5V. An external power supply is required. The power supply is available upon request. -
Page 66: Quattro R4321P - Ra0003 Multiplexer Connection
Quattro R4321P – RA0003 Multiplexer Connection The figure below shows how to connect the Quattro R4321P reader to the RA0003 multiplexer. Fig. 11.2: Quattro reader – RA0003 MUX Connection GPIO QUATTRO CONNECTOR MUX CONNECTOR pin 2 : GND pin 2 : GND ... -
Page 67: 12 Regulatory Compliance
Reference document: Test report n. 19517 [RD2]. See § Quattro R4321P CE Declaration of Conformity page 69 for the Quattro R4321P CE Compliance Certificate. Warning: The CE compliance is guaranteed only if the reader is used as described in this manual. -
Page 68: Fcc Compliance
RoHS EU Directive The Quattro R4321P RAIN RFID reader is compliant with the EU Directive 2011/65/CE on the Restriction of the Use of certain Hazardous Substances in Electrical and Electronic Equipment (RoHS2). REGULATORY COMPLIANCE– Quattro R4321P Technical Information Manual... -
Page 69: Quattro R4321P Ce Declaration Of Conformity
R4321P CE DECLARATION OF CONFORMITY Quattro R4321P CE Declaration of Conformity CAEN RFID Srl Via Vetraia, 11 55049 Viareggio (LU) Italy Tel.: +39.0584.388.398 Fax: +39.0584.388.959 Mail: info@caenrfid.com Web site: www.caenrfid.com herewith declare under our own responsibility that the product: Code:... -
Page 70: Quattro R4321P Fcc Grant
R4321P FCC GRANT Quattro R4321P FCC Grant...
Need help?
Do you have a question about the Quattro R4321P and is the answer not in the manual?
Questions and answers