
Summary of Contents for DMG GILDA
- Page 1 GILDA testate metalliche Pulsantiera GILDA metal end caps faceplate with Manuale di Installazione Installation manual / Notice technique Installationshandbuch / Manual de Instalación V. 1.2 93010197_P_gilda-TM_151110_v1.2...
- Page 2 Consultare il manuale "Precauzioni d'uso e sicurezza" Refer to the " Safety and usage precautions" manual Consulter manuel technique "Precautions de securite et d'emploi" Handbuch lesen "Sicherheits- und Gebrauchsanweisung" Consulte el manual "Precaucioned de seguridad" www.dmg.it...
- Page 3 15 Fixed 3.2) Apribile ___________________________________________________ pg. 15 Hinge opening 4) GILDA - 200 mm (colonna / column) Montaggio _______________________________________________________ pg. 17 Fixing Vite di massa • Screw for earth connection Vis pour mise à tèrre • Schraub für Erdkabel...
- Page 4 65/100 1) GILDA 65 / 100 mm 1.1) Kit di fissaggio Fixing kit Oggetto Q.tà Rif. Descrizione Item Q.ty Ref. Description Vite - Screw Ø 4 x 40 mm Vite Autofilettante - Self-tapping screw Ø 3,9 x 22 mm Vite Torx - Torx screw Ø...
- Page 5 65/100 1.2) Riferimenti di fissaggio Fixing reference I) Prima di iniziare l'installazione, attenersi alle indicazioni sottostanti GB) Pay attention to the information below before fixing the faceplate. 24 mm (per piastre larghe 65 mm) - 30 mm (per piastre larghe 100 mm) GB) 24 mm (for 65 mm width plates) - 30 mm (for 100 mm width plates) Ingombro della corsa di sgancio (la zona deve essere lasciata libera) GB) Needed space for LOP releasing (This space must be free).
- Page 6 1.3) Montaggio verticale Vertical fixing Dopo aver preso il riferimento marcare il punto dove verrà effettuato il foro. GB) Mark the fixing hole reference. Realizzare il foro. Per fissaggio su stipite il diametro del foro cambia in base allo spessore dello stesso (vedi Tab.1) Per fissaggio a muro il foro è...
- Page 7 I) Fissare il fungo di ancoraggio (E, pg.4) Per fissaggio su stipite utilizzare la vite autofilettante (B, pg.4) Per fissaggio a muro utilizzare la vite (A, pg.4) e il tassello (D, pg.4) GB) Enter the fixing hook (E, pg.4) For frame fixing use the self-tapping screw (B, pg.4) For wall fixing use the screw (A, pg.4) and the anchor (D, pg.4) I) Accostare la piastra alla parete facendo combaciare l’asola al fungo di ancoraggio.
- Page 8 I) Dopo aver verificato con una livella che la piastra sia verticale, prendere i riferimenti per i 2 fori di fissaggio. GB) After levelling the plate to the floor, mark the references for the 2 fixing holes. I) Rimuovere la piastra ed eseguire i fori ripetendo le fasi 1 e 2. GB) Remove the plate and drill the holes repeating steps 1 and 2.
- Page 9 65/100 1.4) Montaggio orizzontale Horizontal fixing Dopo aver preso il riferimento marcare il punto dove verrà effettuato il foro. GB) Mark the fixing hole reference. Realizzare il foro. Per fissaggio su stipite il diametro del foro cambia in base allo spessore dello stesso (vedi Tab.1) Per fissaggio a muro il foro è...
- Page 10 65/100 I) Fissare il fungo di ancoraggio (E, pg.4) Per fissaggio su stipite utilizzare la vite autofilettante (B, pg.4) Per fissaggio a muro utilizzare la vite (A, pg.4) e il tassello (D, pg.4) GB) Enter the fixing hook (E, pg.4) For frame fixing use the self-tapping screw (B, pg.4) For wall fixing use the screw (A, pg.4) and the anchor (D, pg.4) I) Accostare la piastra alla parete facendo combaciare l’asola al...
- Page 11 65/100 I) Dopo aver verificato con una livella che la piastra sia orizzontale, prendere i riferimenti per i 2 fori di fissaggio. GB) After levelling the plate, mark the references for the 2 fixing holes. I) Rimuovere la piastra ed eseguire i fori ripetendo le fasi 1 e GB) Remove the plate and drill the holes repeating steps 1 and I) Riagganciare la piastra e fissare le viti.
- Page 12 2) GILDA 150 mm 2.1) Kit di fissaggio Fixing Kit Q.tà Rif. Q.tà Rif. Q.ty Ref. Q.ty Ref. fissaggio su stipite 3,9 x 22 o parete cabina (metallo) for door frame or car wall fixing (metal) parete cabina 0,5 ÷ 0,9 mm...
- Page 13 Fissaggio a MURO Fissaggio su parete METALLICA (Con o senza scatola) METALLIC wall Fixing CONCRETE wall Fixing (With or without wall box)
- Page 14 90° H ≥ 600 mm H < 600 mm fissaggio su stipite o parete cabina (metallo) for door frame or car wall fixing (metal) parete cabina 0,5 ÷ 0,9 mm 2,95 mm car wall 0,9 ÷ 1,2 mm 3,10 mm 1,2 ÷...
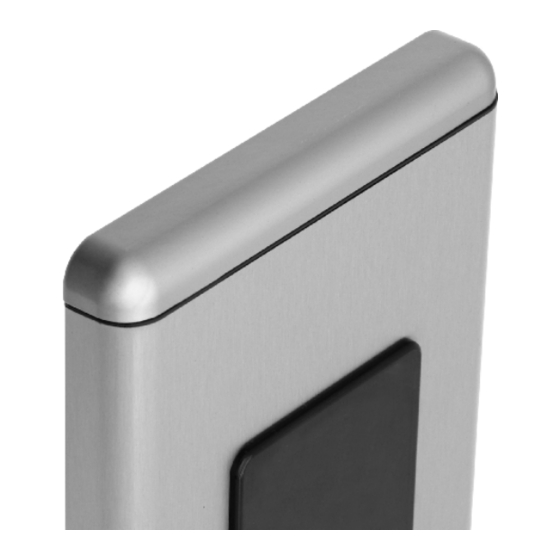
- Page 15 3) GILDA 200 mm 3.1) Fissa / Fixed Testata End piece Testata End piece Vite Autofilettante Torx Vite 3,9x22 Torx Self-tapping screw 3,9x22 screw 3.2) Apertura a cerniera / Hinge opening Vite 3,9x22 3,9x22 screw...
- Page 16 Vite 3x12 / 3x12 screw Vite 3,9x22 3,9x22 screw Vite 3,9x22 / 3,9x22 screw Testata End piece Testata End piece Vite Autofilettante Torx Vite 3x12 / 3x12 screw Torx Self-tapping screw...
- Page 17 COLONNA COLUMN 4) GILDA 200 mm (ver.colonna / column ver.) Zona pulsanti di SERVIZIO / SERVICE button zone Chiave KABA / EUROCYLINDER 1 1 0 key switch 1 1 0 1 1 0 8 2 m 8 2 m 8 2 m...
- Page 18 COLONNA COLUMN Vite Torx Torx screw Rondella 4 x 16 Washer Vite Autofilettante Self-tapping screw 3,9 x 22 mm...
- Page 20 DMG SpA Via delle Monachelle, 84/C 00040 POMEZIA (ROMA) • ITALIA Tel. +39 06930251 • Fax +39 0693025240 info@dmg.it • www.dmg.it 93010197...
Need help?
Do you have a question about the GILDA and is the answer not in the manual?
Questions and answers