Advertisement
Table of Contents
Advertisement
Table of Contents

Summary of Contents for Trojan TH Series
- Page 2 PREFACE Thank you very much for purchasing our product. TROJAN "TH" series Hydraulic Hammer is a high‐performance machine, which is successfully developed with the latest technology and years of our experiences. This machine is designed and manufactured to ensure durability even under the harshest working conditions. However, if it is not regularly maintained or properly ...
- Page 3 Most accidents are caused by failure to observe basic safety rules, so accidents are usually avoidable. Before any operation, maintenance or repairing, please read and understand all safety rules and warnings. If these warnings are ignored, special dangers may occur, causing injury or death to the operator or others. These warnings are marked with a " " symbol in this manual. For some operations that may damage the machine, this manual is marked with "Warning". Warning! Improper operation, maintenance or repairing of this machine will be dangerous, which may result in injury or death. ...
- Page 4 INDEX CHAPTER 1 MAIN SPECIFICATIONS‐‐‐‐‐‐‐‐‐‐‐‐‐‐‐‐‐‐‐‐‐‐‐‐4 CHAPTER 2 STRUCTURE, FEATURES‐‐‐‐‐‐‐‐‐‐‐‐‐‐‐‐‐‐‐‐‐‐‐‐‐‐5 CHAPTER 3 INSTALLATION, DISMANTLING, STORING‐‐‐‐‐‐‐‐‐‐‐‐‐‐‐‐‐‐‐‐‐‐‐‐‐6 3.1 INSTALLATION‐‐‐‐‐‐‐‐‐‐‐‐‐‐‐‐‐‐‐‐‐‐‐‐‐‐‐‐‐ 3.2 DISMANTLING ‐‐‐‐‐‐‐‐‐‐‐‐‐‐‐‐‐‐‐‐‐‐‐‐‐ 3.3 STORING‐‐‐‐‐‐‐‐‐‐‐‐‐‐‐‐‐‐‐‐‐‐‐‐‐ CHAPTER 4 OPERATION, WARNINGS‐‐‐‐‐‐‐‐‐‐‐‐‐‐‐‐‐‐‐‐‐‐‐‐‐‐‐‐‐‐‐7‐8 4.1 BEFORE & AFTER‐‐‐‐‐‐‐‐‐‐‐‐‐‐‐‐‐‐‐‐‐‐‐‐‐‐‐‐‐‐‐‐‐‐‐‐‐‐‐‐‐‐‐‐ 4.2 OPERATION‐‐‐‐‐‐‐‐‐‐‐‐‐‐‐‐‐‐‐‐‐‐‐‐‐‐‐‐‐‐‐‐‐‐‐‐ 4.3 WARNINGS‐‐‐‐‐‐‐‐‐‐‐‐‐‐‐‐‐‐‐‐‐‐‐‐‐‐‐‐‐‐‐ CHAPTER 5 CHISEL‐‐‐‐‐‐‐‐‐‐‐‐‐‐‐‐‐‐‐‐‐‐‐‐‐‐‐‐‐‐‐‐‐‐‐‐‐9 5.1 CHISEL TYPE‐‐‐‐‐‐‐‐‐‐‐‐‐‐‐‐‐‐‐‐‐‐‐‐‐‐‐‐‐‐‐‐‐‐‐‐‐‐‐‐‐‐ 5.2 CHISEL & CHISEL PINS REPLACEMENT‐‐‐‐‐‐‐‐‐‐‐‐‐‐‐‐‐‐‐‐‐‐‐‐‐‐‐‐‐‐‐‐‐‐ 5.3 CHISEL QUALITY ASSURANCE‐‐‐‐‐‐‐‐‐‐‐‐‐‐‐‐‐‐‐‐‐‐‐‐‐‐‐‐‐‐‐‐‐‐‐‐‐‐‐‐‐‐‐‐‐‐‐‐‐‐ CHAPTER 6 NITROGEN GAS RECHARGING‐‐‐‐‐‐‐‐‐‐‐‐‐‐‐‐‐‐‐‐‐‐‐‐‐‐‐‐‐‐‐‐‐‐‐‐‐‐‐‐‐10 6.1 N2 CHAMBER NITROGEN RECHARGING‐‐‐‐‐‐‐‐‐‐‐‐‐‐‐‐‐‐‐‐‐‐‐ 6.2 ACCUMULATOR NITROGEN RECHARGING‐‐‐‐‐‐‐‐‐‐‐‐‐‐‐‐‐‐‐‐‐‐ CHAPTER 7 MAINTENANCE‐‐‐‐‐‐‐‐‐‐‐‐‐‐‐‐‐‐‐‐‐‐‐‐11‐12 7.1 BOLTS & NUTS‐‐‐‐‐‐‐‐‐‐‐‐‐‐‐‐‐‐‐‐‐‐‐‐‐‐‐‐‐‐‐‐‐ 7.2 N2 CHAMBER & ACCUMULATOR‐‐‐‐‐‐‐‐‐‐‐‐‐‐‐‐‐‐‐‐‐‐‐‐‐‐‐‐‐‐‐‐‐‐‐‐‐‐‐‐‐‐ 7.3 HYDRAULIC OIL‐‐‐‐‐‐‐‐‐‐‐‐‐‐‐‐‐‐‐‐‐‐‐‐‐‐‐‐‐‐‐‐‐‐‐‐‐‐‐‐‐‐‐‐ 7.4 CHISEL &SURROUNDINGS‐‐‐‐‐‐‐‐‐‐‐‐‐‐‐‐‐‐‐‐‐‐‐‐‐‐‐‐‐‐‐‐‐‐‐‐‐‐‐ 7.5 LUBRICATION‐‐‐‐‐‐‐‐‐‐‐‐‐‐‐‐‐‐‐‐‐‐‐‐‐‐‐ 7.6 REPLACE WEARING PARTS REGULARLY‐‐‐‐‐‐‐‐‐‐‐‐‐‐‐‐‐‐‐‐‐‐‐‐‐‐‐‐‐‐‐‐‐‐‐‐‐‐ CHAPTER 8 TROUBLE SHOOTING‐‐‐‐‐‐‐‐‐‐‐‐‐‐‐‐‐‐‐‐‐‐‐13 CHAPTER 9 PART LIST‐‐‐‐‐‐‐‐‐‐‐‐‐‐‐‐‐‐‐‐‐‐‐‐‐‐‐‐‐‐‐‐‐‐‐14‐18 3 / 19 ...
-
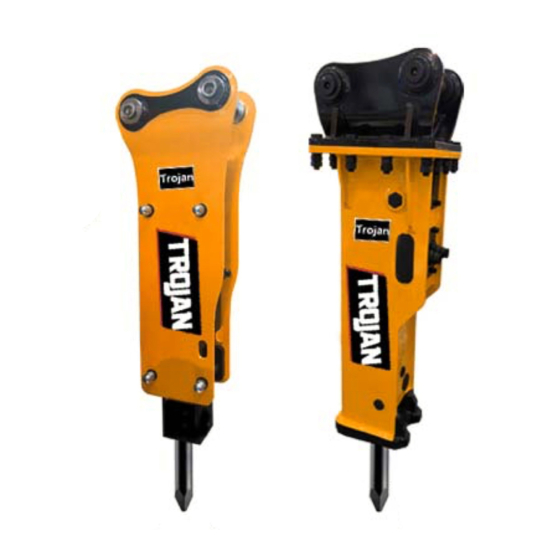
Page 5: Chapter 1 Main Specifications
CHAPTER 1 MAIN SPECIFICATIONS Description Unit TH‐SSL TH ‐35 TH ‐50 TH ‐80 TH ‐120 TH ‐140 TH ‐200 TH ‐300 kg 152 152 295 375 861 861 1795 2635 Operating Weight lb 335 335 650 827 1898 1898 3957 5809 Kg 86 86 151 210 471 471 846 ... -
Page 6: Chapter 2 Structure, Features
CHAPTER 2 STRUCTURE, FEATURES 5 / 19 ... -
Page 7: Chapter 3 Installation, Dismantling, Storing
CHAPTER 3 INSTALLATION, DISMANTLING, STORING 3.1 INSTALLATION Hydraulic hammer is connected to the excavator with two oil hoses and two pins. Lower down the excavator arm slowly, align the pin holes, and fix the pin and pin stopper. Operate the bucket cylinder, so as to fix the other pin. Remove the end caps of oil hoses, make sure the hoses clean. Connect to the hammer at one end and to the excavator pipeline at the other end. Finally, open up the Stop Valve on the excavator arm. If slowing down the engine, it will be much easier to align the pin holes. 3.2 DISMANTLING Shut off the Stop Valve on the excavator arm. Remove the two Oil Hoses from excavator pipeline. Remove the two Pins from hammer shell. Excavator Arm goes up slowly, and then the Hammer will be free. Fasten the End Caps to the hammer and excavator pipeline to prevent dirt. ... -
Page 8: Chapter 4 Operation, Warnings
CHAPTER 4 OPERATION, WARNINGS 4.1 BEFORE & AFTER Checking If Detailed Items Bolts & Nuts Through Bolt, Side Bolt, Accumulator Body Bolt, Accumulator Loosing, Missing or Damage Cover Bolt, etc. Chisel &Surroundings Chisel, Chisel Pin, Stop Pin, Inner & Outer Bushes, Rubber Missing or damage Plug, Cir clip, etc. Pipe & Hose Steel Pipe, Rubber Hose, Connectors, and the Whole Pipeline, Loosing or Leaking etc. Oil Leaking Between Chisel & Bush, Back Head & Cylinder, Accumulator & Cylinder, etc. Lubrication Lubricate with grease after every 2 or 3 working hours. Hydraulic Oil If it is hammer’s first running, please change new oil within Clean, Sufficient or not ... - Page 9 4.3 WARNINGS! Forbid any idle running of the Hammer. Idle Don’t strike the same position continuously, running means, the Hammer strikes while the which will cause abnormal wearing & damages. If chisel not yet pressed hard to the object for striking the same position for more than 1 minute ...
-
Page 10: Chapter 5 Chisels
CHAPTER 5 CHISELS 5.1 CHISEL TYPE Moil Point type Chisel It is specially used for quick breaking very hard object, but not breaking into pieces. If breaking object into pieces, the Blunt type will be more efficient. Wedge type Chisel It is usually used for Civil Engineering, such as Trenching, Asphalt Concrete Road, etc., or splitting Rocks. However, if breaking object into pieces, the Blunt type will be more efficient. Blunt type Chisel It is usually used for Demolition Work, such as breaking Rocks, Boulders and Construction Buildings, etc. into pieces quickly. However, if the object is too hard, the Moil Point type will be more efficient. 5.2 CHISEL & CHISEL PINS REPLACEMENT Clean surroundings of the Chisel Pins. Place the Hammer horizontally, from the opposite side of Rubber, hammer out the Stop Pin, Rubber and Chisel Pin with the Round Bar (packed in the Tool Box). Before fixing new Chisel, please firstly lubricate the groove of Chisel by heat‐resisting Albany Grease. ... -
Page 11: Chapter 6 Nitrogen Gas Recharging
CHAPTER 6 NITROGEN GAS RECHARGING Usually, Nitrogen Gas has already been charged and pressure has been adjusted before leaving factory, but it is necessary to check again before first use. Gas Pressure should be checked regularly every two months. 6.1 N2 CHAMBER NITROGEN RECHARGING Screw off anticlockwise the Charging Valve’s End Cap, and connect the 3‐way Valve to the N2 Chamber. Shut off the Overflow Valve. Keep the N2 Bottle closed, and press the Switch of 3‐way Valve to check the pressure. If pressure is too high, please discharge some N2 via the Overflow Valve. If the pressure too low, keep pressing the Switch of 3‐way Valve, meanwhile open the N2 Bottle to charge until proper pressure (around 16 Bar). Close the N2 Bottle, and close Charging Valve’s End Cap. 6.2 ACCUMULATOR NITROGEN RECHARGING Screw off anticlockwise the End Cap (#9 & #11), and connect the 3‐way Valve to #9 position. Shut off the Overflow Valve. Keep the N2 Bottle closed, press the Switch of 3‐way Valve, meanwhile loose anticlockwise the Charging Valve (#12) a little to check the pressure. If pressure is too high, discharge it via the Overflow Valve. If the pressure too low, keep pressing the Switch of 3‐way Valve, meanwhile open the N2 Bottle to charge until proper pressure (around 60 Bar). Close the N2 Bottle, Charging Valve (#12), and End Caps (#11 & #9). 10 / 19 ... -
Page 12: Chapter 7 Maintenance
CHAPTER 7 MAINTENANCE 7.1 BOLTS & NUTS All bolts & nuts should be checked before every using, please fasten in orders accordingly (Unit: kg.m). Items Unit Through Bolt Side Bolt Charging Valve Acc. Body Acc. Cover TH‐SSL Kg.m 40 100 35 * * TH‐35 Kg.m 40 100 35 * * TH‐50 Kg.m 40 100 35 * * TH‐80 Kg.m 40 145 35 * * TH‐120 ... - Page 13 7.4 CHISEL &SURROUNDINGS Before every using, check if the chisel, chisel pin & bush are in good conditions. Check regularly the clearance between bush and chisel, too much clearance will cause piston & chisel broken. If chisel diameter abrades more than 3mm, or bush inner diameter abrades more than 6mm, please replace new ones. 7.5 LUBRICATION Lubricate with grease before every using or after every 2 or 3 working hours. 7.6 REPLACE WEARING PARTS REGULARLY Please replace wearing parts in time. When buying Hammers, customers are suggested to buy extra wearing parts as below for regular replacement. Item Replacement Chisel According to the actual working conditions Rod Pin Every 30 days to change different interfaces to fix the chisel Stop Pin Every four months Rubber Cap Worn, missing or damaged. Please replace new ones. Oil Seal Every six months Cylinder Through Bolts & Nuts Every six months Hammer Shell Bolts & Nuts Every six months Hydraulic Hose Every six months Outer Bush Every three months Inner Bush Every four months All wearing parts are not guaranteed in the warranty policy. ...
-
Page 14: Chapter 8. Trouble Shooting
CHAPTER 8. TROUBLE SHOOTING Problems Possible causes Solution Too weak striking 1. Engine rotation speed low. 1. Regulate it. 2. Gas pressure too low in N2 Chamber. 2. Check and recharge. 3. Gas pressure too low in Accumulator. 3. Check and recharge. 4. Set wrong pressure, or overflow valve broken. 4. Check and regulate. 5. Chisel broken. 5. Grind the damages of chisel or bushing. 6. Hydraulic Oil not enough or not clean 6. Check, add or change new oil No striking 1. Wrong pressure of overflow valve. 1. Regulate to proper pressure. 2. Gas pressure too high in N2 chamber. 2. Regulate to proper pressure. 3. Oil leaks to chamber. 3. Replace oil seal. 4. Cylinder, piston or valves damaged. 4. Repair surface by abrasive paper. Unsteady striking 1. Gas pressure too high in N2 chamber. 1. Regulate to proper pressure. 2. Pressure low of overflow valve. 2. Regulate to proper pressure. 3. Chisel or bush damaged. 3. Grind to repair the damaged part. 4. Cylinder, piston or valves damaged. 4. Repair surface by abrasive paper. Nitrogen leaks ... - Page 15 TROJAN “TH” SERIES HYDRAULIC HAMMERS PART LIST TH‐SSL Main Body ‐ ‐ ‐ ‐ ‐ ‐ ‐ ‐ ‐ ‐ ‐ ‐ ‐ ‐ ‐ ‐ ‐ ‐ ‐ ‐ ‐ ‐ ‐ ‐ ‐ ‐ ‐ ‐ ‐ ‐ ‐ ‐ ‐ ‐ ‐ ‐ 15 TH‐35 Main Body ‐ ‐ ‐ ‐ ‐ ‐ ‐ ‐ ‐ ‐ ‐ ‐ ‐ ‐ ‐ ‐ ‐ ‐ ‐ ‐ ‐ ‐ ‐ ‐ ‐ ‐ ‐ ‐ ‐ ‐ ‐ ‐ ‐ ‐ ‐ ‐ ‐ 15 TH‐50 Main Body ‐ ‐ ‐ ‐ ‐ ‐ ‐ ‐ ‐ ‐ ‐ ‐ ‐ ‐ ‐ ‐ ‐ ‐ ‐ ‐ ‐ ‐ ‐ ‐ ‐ ‐ ‐ ‐ ‐ ‐ ‐ ‐ ‐ ‐ ‐ ‐ ‐ 15 TH‐80 Main Body ‐ ‐ ‐ ‐ ‐ ‐ ‐ ‐ ‐ ‐ ‐ ‐ ‐ ‐ ‐ ‐ ‐ ‐ ‐ ‐ ‐ ‐ ‐ ‐ ‐ ‐ ‐‐ ‐ ‐ ‐ ‐ ‐ ‐ ‐ ‐ ‐ ‐ ‐ 16 TH‐120 Main Body ‐ ‐ ‐ ‐ ‐ ‐ ‐ ‐ ‐ ‐ ‐ ‐ ‐ ‐ ‐ ‐ ‐ ‐ ‐ ‐ ‐ ‐ ‐ ‐ ‐ ‐ ‐‐ ‐ ‐ ‐ ‐ ‐ ‐ ‐ ‐ ‐ ‐‐ 17 TH‐140 Main Body ‐ ‐ ‐ ‐ ‐ ‐ ‐ ‐ ‐ ‐ ‐ ‐ ‐ ‐ ‐ ‐ ‐ ‐ ‐ ‐ ‐ ‐‐ ‐ ‐ ‐ ‐ ‐ ‐ ‐ ‐ ‐ ‐ ‐ ‐ ‐ ‐ ‐ ‐17 TH‐200 Main Body ‐ ‐ ‐ ‐ ‐ ‐ ‐ ‐ ‐ ‐ ‐ ‐ ‐ ‐ ‐ ‐ ‐ ‐ ‐ ‐ ‐ ‐ ‐ ‐ ‐ ‐ ‐ ‐ ‐ ‐ ‐ ‐ ‐ ‐ ‐ ‐ ‐ ‐18 TH‐300 Main Body ‐ ‐ ‐ ‐ ‐ ‐ ‐ ‐ ‐ ‐ ‐ ‐ ‐ ‐ ‐ ‐ ‐ ‐ ‐ ‐ ‐ ‐ ‐ ‐ ‐ ‐ ‐ ‐ ‐ ‐ ‐ ‐ ‐ ‐ ‐ ‐ ‐ ‐19 14 / 19 ...
- Page 16 TH‐SSL, TH‐35, TH‐50 Main Body Part List 15 / 19 ...
- Page 17 TH‐80 Main Body Part List 16 / 19 ...
- Page 18 TH‐120, TH‐140 Main Body Part List 17 / 19 ...
- Page 19 TH‐200 Main Body Part List 18 / 19 ...
- Page 20 TH‐300 Main Body Part List 19 / 19 ...
Need help?
Do you have a question about the TH Series and is the answer not in the manual?
Questions and answers
I bought a th-35 hydraulic jackhammer. The sticker next to the charging valve is missing and I can’t find in the manual where it says what psi the hydrogen gas needs to be.
The document specifies the required gas pressure for nitrogen (N₂), not hydrogen. For the Trojan TH Series, the proper nitrogen gas pressure is around 16 bar, which is approximately 232 psi.
This answer is automatically generated