Advertisement
Quick Links
Advertisement

Related Manuals for Ninja BL642UK


Summary of Contents for Ninja BL642UK
- Page 1 BL642UK ® OWNER’S GUIDE www.ninjakitchen.eu 0800 862 0453...
- Page 2 CAUTION: Remove the Pro Extractor Blades connected to a circuit that is regularly Assembly from the Nutri Ninja cup upon switched on and off by the utility. completion of blending. Do not store ingredients...
- Page 3 Extractor Blade onto the motor base without first surfaces (such as gas or electric burner or in a assembling the blade assembly to the Nutri Ninja Cup. heated oven). 36 DO NOT push food into the food chute with your 22 The use of attachments or accessories including fingers.
- Page 4 This guarantee does not affect your statutory rights. If this product proves unsatisfactory please contact our customer service department on freephone 0800 862 0453 or by e-mail ukservice@euro-pro.com. THIS BOOK COVERS MODEL NUMBERS: BL642UK 30 TECHNICAL SPECIFICATIONS Voltage: 220-240V~, 50/60Hz.
-
Page 5: Table Of Contents
Contents Thank you for Getting to Know Your Nutri Ninja | Ninja Blender with Auto-iQ Technology ......5 Before First Use......................7 purchasing The Assembly and Use for the Ninja Blender ................8 ® Nutri Ninja Assembly and Use for the Nutri Ninja Cups ..............10 ®... -
Page 6: Getting To Know Your Nutri Ninja | Ninja Blender With Auto-Iq Technology
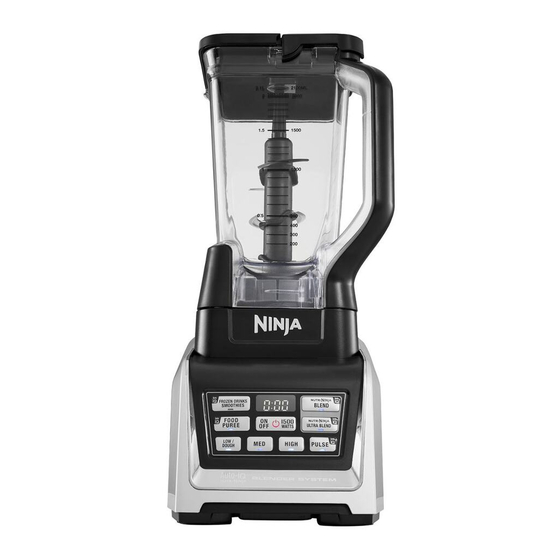
Getting To Know Your Nutri Ninja ® Ninja ® Blender with Auto-iQ ® Technology a 900ml Nutri Ninja Cup f Pitcher i Motor Base b 650ml Nutri Ninja Cup g Blender Lid with locking handle c 500ml Nutri Ninja Cup h Stacked Blade Assembly (blender) ™... - Page 7 Smart Lid technology for easy release • 3 speeds: Low/Dough, Medium, & High • 5 Auto-iQ settings - Auto-iQ Frozen Drinks/Smoothies, Auto-iQ Food Puree, Nutri Ninja Auto-iQ Blend, Nutri Ninja Auto-iQ Ultra Blend and Auto-iQ Pulse • Nutri Ninja Nutrient & Vitamin Extraction* *Extract a drink containing vitamins and nutrients from fruits and vegetables.
-
Page 8: Before First Use
Remove all packaging material and labels from the appliance. Separate/remove all parts from each other. Wash the lids, pitcher, Nutri Ninja cups and blade assemblies in warm, soapy water. When washing the blade assemblies, use a dish-washing utensil with a handle to avoid direct hand contact with blades. -
Page 9: Assembly And Use For The Ninja Blender
Assembly and Use for the Ninja ® Blender WARNING: Handle the Stacked Blade Assembly with care, as the blades are sharp. WARNING: Remove utensils prior to processing. Failure to remove may cause the pitcher to be damaged or to shatter, which may cause personal injury. - Page 10 Assembly and Use for the Ninja ® Blender - cont. Fig. 6 REMOVAL Fig. 7 Fig. 8 Fig. 9 Fig. 10 Fig. 11 NOTE: Nutri Ninja ® | Ninja ® Blender with 15 Turn the pitcher anticlockwise to remove and then lift ®...
-
Page 11: Assembly And Use For The Nutri Ninja Cups
™ Assembly with care, as the blades are sharp. WARNING: Remove utensils prior to processing. Failure to remove may cause the Nutri Ninja cup to be damaged or to shatter, which may cause personal injury. WARNING: Never leave the appliance unattended while in use. - Page 12 Assembly and Use for the Nutri Ninja ® Cups - cont. REMOVAL Fig. 4 Fig. 5 Fig. 6 Fig. 7 Review warning and caution statements on page 11 Do not store blended contents with the Pro Extractor 14 before proceeding.
-
Page 13: Programs, Speed Settings & Uses For The Pitcher
Nuts IMPORTANT: Do not run the appliance over 4 minutes at a time to prevent overheating of the appliance. * When blending sauces and soups, make sure they’re cooled to room temperature first - Ninja ® containers are not intended for hot blending. -
Page 14: Care & Maintenance
Hand Washing: Wash the containers, lids, blade NOTE: Do not store blended or unblended ingredients in assemblies and attachments in warm, soapy water. the Nutri Ninja cup with the blade assembly attached. When washing the blade assemblies, use a dish-washing RESETTING THE MOTOR THERMOSTAT utensil with a handle to avoid direct hand contact with blades. -
Page 15: Troubleshooting Guide
DO NOT attempt to use appliance when the motor base is stuck to a surface that is not secure, (cutting board, platter, plates, etc.). ® Your Ninja is able to detect which jar is on the base. You may be trying to use a You get an “Err” Message. - Page 16 Freephone 0800 862 0453 www.ninjakitchen.eu Copyright © 2016 Euro-Pro Europe Limited. Auto-iQ, Nutri-Ninja, Ninja, Sip & Seal and Total Crushing are registered trademarks of Euro-Pro Europe Limited. Pro Extractor Blades is a trademark of Euro-Pro Europe Limited. Printed in China Illustrations may differ from actual product.
Need help?
Do you have a question about the BL642UK and is the answer not in the manual?
Questions and answers