Advertisement
Table of Contents
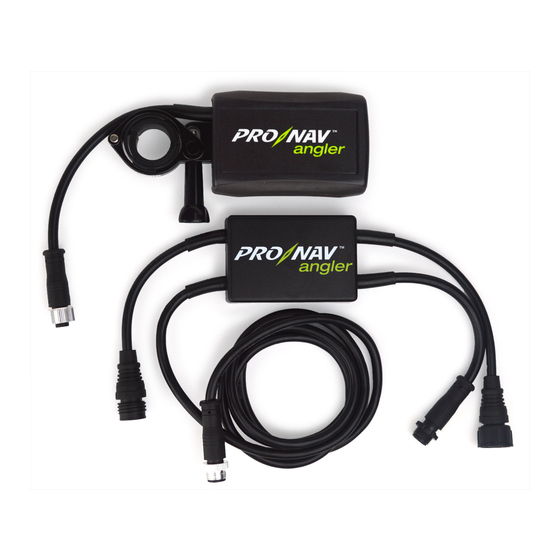
PRONAV ANGLER INSTALLATION GUIDE
Control Unit
A
E
To Foot Pedal
connection on
motor base
The following instructions cover basic installation on a motor that does not require an upgrade kit. If you are upgrading a motor
that requires an upgrade kit (ie. motor with AutoPilot, iPilot, legacy PowerDrive and 12 volt Terrova models) there will be additional
instructions included in the upgrade kit. Motors equipped with Co-Pilot, including all Minn Kota Riptide models, require additional
tasks in Step 6.
1. We strongly suggest watching the ProNav Angler Installation
Overview video on our website
articles/angler-installation-overview)
the ProNav Angler App-->Main Menu-->Tutorials. This will
take just two minutes and can save you time and potential
frustration.
2. Open the head of the trolling motor by removing the top
cover. Verify that there are no AutoPilot or iPilot components
and that the red and black power wires are twisted together
and to one side, as shown. Failing to complete this step can
result in excessive electromagnetic interference, which will
adversely impact the accuracy of your ProNav system.
• Note: If you discover any AutoPilot or iPilot components,
they must be removed and an upgrade kit will be
required.
Visit www.pronavmarine.com
The ProNav Marine team is committed to your success on the water.
We're here to help and answer any question you might have.
www.pronavmarine.com/support
support@pronavmarine.com
(906) 523-7007
GPS Unit
(www.pronavmarine.com/
or directly through
to learn more.
ProNav Marine
20134 Gagnon Circle, Ste 101
Hancock, MI 49930
Clamp
Thumb
Pin
Screw
Terrova
PowerDrive
Sizing Sleeves
B
F
C
To Foot Pedal
Step 1.
Step 2.
AutoPilot / iPilot
compass
To Battery
D
Fused power cable
*2 amp ATC fuse
Wires should be
Wires spread
twisted together
apart can cause
to eliminate
eratic behavior
magnetic
of the ProNav
interference
Angler
Advertisement
Table of Contents

Related Manuals for ProNav ANGLER


Summary of Contents for ProNav ANGLER
- Page 1 ProNav interference Angler The ProNav Marine team is committed to your success on the water. We’re here to help and answer any question you might have. www.pronavmarine.com/support ProNav Marine support@pronavmarine.com 20134 Gagnon Circle, Ste 101 (906) 523-7007 ...
- Page 2 Prior to hitting the water for the first time, safely deploy your trolling motor making sure it is free from obstructions and perform a brief function test with the ProNav Angler App. Connect App to ProNav Angler, turn motor left/right, prop on/off, thrust +/-, and make sure you have foot pedal and/or Co-Pilot control if you have them.
Need help?
Do you have a question about the ANGLER and is the answer not in the manual?
Questions and answers