Advertisement
Quick Links
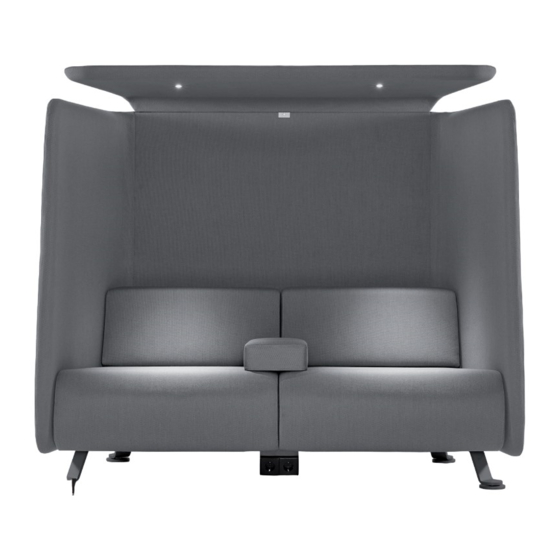
TYPES / TYPES / TYPEN
TYPE #002.01
ACCESSOIRIES / ACCESSOIRES / ACCESSOIRES
PROOFF Post office box 34095, 3005 GB Rotterdam, The Netherlands | Tel. +31 10 211 00 80 | contact@prooff.com | www.prooff.com
Disclaimer: This information was put together with great care. Nevertheless, changes regarding specifications, dimensions, typology or upholstery may be made at any time and without further notice. We therefore
cannot guarantee that the specifications given in this document correspond with those of the actual product. Please always verify the specifications with our representatives. PROOFF cannot be held responsible for
the consequences of using this information. 03/2016.
TYPE #002.02
a
c
b
#004
Niche by Axia Design
ASSEMBLY MANUAL
NOTICE D'ASSEMBLAGE
MONTAGEANLE ITUNG
Advertisement

Summary of Contents for Prooff Niche 004
- Page 1 Disclaimer: This information was put together with great care. Nevertheless, changes regarding specifications, dimensions, typology or upholstery may be made at any time and without further notice. We therefore cannot guarantee that the specifications given in this document correspond with those of the actual product. Please always verify the specifications with our representatives. PROOFF cannot be held responsible for...
-
Page 2: All Types
FURNITURE PARTS / PIÈCES DE MEUBLE / MÖBELKOMPONENTEN MOUNTING MATERIALS / MATÉRIEL DE MONTAGE / MONTAGE-HARDWARE x 32 x 16 m8 x 30 mm ROOF / DACH / TOIT FRAME / RAHMEN / CADRE x 12 m8 x 45 mm PLEASE NOTE: PLEASE NOTE: DEPENDING ON YOUR NICHE’S TYPE THE FRAME PLEASE NOTE: DEPENDING ON YOUR NICHE’S TYPE THE ROOF... - Page 3 #004 PAGE #2-5 PAGE #2-5 #004 Niche by Axia Design Niche by Axia Design x 16 x 16 (m8 x 45 mm) (m8 x 30 mm) (m8 x 45 mm) (m8 x 30 mm) #004 PAGE #2-5 x 16 x 16 Niche by Axia Design (m8 x 30 mm) (m8 x 30 mm)
- Page 4 D'ABORD LE PANNEAU ARRIÈRE AU CADRE SANS SERRER COMPLÈTEMENT, ASSEMBLEZ LE PANNEAU ARRIÈRE AUX PANNEAUX LATÉRAUX, SERREZ D'ABORD LES BOULONS FIXANT LE PANNEAU ARRIÈRE AU ASSEMBLEZ TOUT D'ABORD LE PANNEAU ARRIÈRE AU CADRE SANS SERRER COMPLÈTEMENT, ASSEMBLEZ LE PANNEAU ARRIÈRE AUX PANNEAUX LATÉRAUX, SERREZ D'ABORD LES BOULONS FIXANT LE PANNEAU ARRIÈRE AU RONDELLES POUR CHAQUE BOULON, PUIS ASSEMBLEZ LES PANNEAUX EN UTILISANT DEUX BOULONS POUR CHAQUE CÔTÉ.
- Page 5 (m8 x 45mm) NICHE (m8 x 45mm) (m8 x 45mm) (m8 x 45mm) NICHE NICHE WITH ROOF WITH ROOF WITH ROOF NICHE NICHE NICHE MIT DACH MIT DACH MIT DACH NICHE NICHE NICHE AVEC TOIT AVEC TOIT AVEC TOIT START WITH STEP 1 - 4. START WITH STEP 1 - 4.
- Page 6 8 BOULONS. HAUT DANS LES SUPPORTS ET FIXEZ-LE AVEC LES VIS. POSITIONNEMENT DANS LES TROUS CORRESPONDANTS DU CADRE, APPUYEZ Z LE PANNEAU DE TOIT AU PANNEAU ARRIÈRE À ASSEMBLEZ LE PANNEAU AVANT AU PANNEAU ARRIÈRE EN LE FAISANT COULISSER VERS LE PLACEZ LES COUSSINS DES SIÈGES EN INSÉRANT LES CHEVILLES DE SUR LES COUSSINS POUR FIXER LES BANDES VELCRO.
- Page 7 PLEASE NOTE: BITTE BEACHTEN SIE: VEUILLEZ NOTER: MAKE SURE THAT THE BACKSIDE STELLEN SIE SICHER, DASS DIE ASSUREZ-VOUS QUE L'ARRIÈRE DU PLEASE NOTE: BITTE BEACHTEN SIE: VEUILLEZ NOTER: OF THE TOUCH BUTTON (F) DOES RÜCKSEITE DER TOUCH-TASTE (F) BOUTON TACTILE (F) N’ENTRE PAS EN NOT TOUCH THE STEEL FRAME OF DEN STAHLRAHMEN DER HINTEREN CONTACT AVEC LE CADRE EN ACIER DU...
- Page 8 OF THE BUTTON (F) CAN BE SEITE DER TASTE (F) KANN MIT ADHÉSIF DE CONDUIT (DUCT TAPE) PLACEZ LE GRADATEUR (D) DANS LE SUPPORT À L'INTÉRIEUR DU PLACEZ LE GRADATEUR (D) DANS LE SUPPORT À L'INTÉRIEUR DU ASSEMBLEZ LE PANNEAU AVANT AU PANNEAU ARRIÈRE EN LE FAISANT ASSEMBLEZ LE PANNEAU AVANT AU PANNEAU ARRIÈRE EN LE FAISANT PASSEZ LE CÂBLE BLANC (G) DERRIÈRE ET PASSEZ LE CÂBLE BLANC (G) DERRIÈRE ET...
- Page 9 Niche by Axia Design Niche by Axia Design (m8 x 45mm) (m8 x 45mm) MOUNT THE SOCKET BOX (K) TO THE FRAME USING THE SUPPLIED SCREWS. FIXATE MOUNT THE SOCKET BOX (K) TO THE FRAME USING THE SUPPLIED SCREWS. FIXATE PLACE THE SEAT CUSHIONS BY INSERTING THE PINS INTO THE CORRESPONDING HOLES PLACE THE SEAT CUSHIONS BY INSERTING THE PINS INTO THE CORRESPONDING HOLES PLACE THE BACK CUSHIONS AND ENJOY YOUR NICHE!
Need help?
Do you have a question about the Niche 004 and is the answer not in the manual?
Questions and answers