Table of Contents
Advertisement
Available languages
Available languages
Quick Links
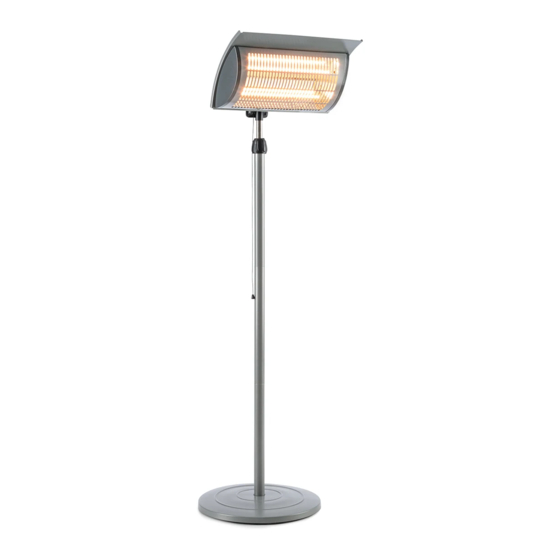
Terassenheizstrahler
Hinweis: Das Gerät eignet sich nur für den Außengebrauch.
Note: The device is only suitable for outdoor use.
Advertencia: Este aparato solo es apto para su uso en exteriores.
Remarque : l'appareil convient pour une utilisation extérieure uniquement.
Nota: il dispositivo è idoneo solo per un uso esterno.
10032518
Advertisement
Chapters
Table of Contents

Subscribe to Our Youtube Channel
Summary of Contents for Chal-tec blumfeldt 10032518
- Page 1 Terassenheizstrahler Hinweis: Das Gerät eignet sich nur für den Außengebrauch. Note: The device is only suitable for outdoor use. Advertencia: Este aparato solo es apto para su uso en exteriores. Remarque : l‘appareil convient pour une utilisation extérieure uniquement. Nota: il dispositivo è idoneo solo per un uso esterno. 10032518...
-
Page 3: Table Of Contents
Hinweise zur Entsorgung 8 TECHNISCHE DATEN Artikelnummer 10032518 Stromversorgung 220-240 V ~ 50-60 Hz Leistung 2000 W KONFORMITÄTSERKLÄRUNG Hersteller: Chal-Tec GmbH, Wallstraße 16, 10179 Berlin, Deutschland. Dieses Produkt entspricht den folgenden Europäischen Richtlinien: 2014/30/EU (EMV) 2014/35/EU (LVD) 2011/65/EU (RoHS) 2009/125/EG (ErP) -
Page 4: Sicherheitshinweise
SICHERHEITSHINWEISE Allgemeine Sicherheitshinweise • Verwenden Sie den Heizstrahler nicht in schlecht belüfteten Räumen. • Verwenden Sie das Gerät nicht an Orten, wo Gas, Benzin, Farbe oder andere leicht entzündliche Waren gelagert werden. • Stecken Sie keine Gegenstände durch das Gitter des Heizkopfes und blockieren und decken Sie diesen nicht ab. - Page 5 • Tauchen Sie das Gerät zur Reinigung nicht unter Wasser. • Nachdem Sie das Gerät eingeschaltet haben kann es vorkommen, dass zwei schwarze Punkte auf der Oberfl äche der Heizelemente sichtbar sind. Das ist normal und hat keinen Einfl uss auf die Funktionalität des Geräts. Montage •...
- Page 6 ZUSAMMENBAU Befestigen Sie die Stange mit einer Verbinden Sie die untere mit der Unterlegscheibe und einer M8*40 mittleren Stange. Schraube an der Gerätebasis. Verbinden Sie die obere Stange mit Stecken Sie den Heizkopf auf die der mittleren Stange. obere Stange und fixieren Sie diesen mit einer M5*15-Schraube in der gewünschten Position.
-
Page 7: Bedienung
BEDIENUNG • Verbinden Sie das Stromkabel mit einer Wandsteckdose, die sich in einem sicheren und trockenen Bereich befindet. • Ziehen Sie einmal an der Einschaltschnur, um den Heizstrahler mit niedriger Leistung (1000 W) zu betreiben. Sobald Sie an der Einschaltschnur gezogen haben, wird eines der Heizelemente zu glühen beginnen und Hitze abstrahlen. -
Page 8: Fehlersuche Und Fehlerbehebung
FEHLERSUCHE UND FEHLERBEHEBUNG Überprüfen Sie wenn das Gerät nicht funktioniert zunächst folgende Hinweise, bevor Sie den Kundendienst kontaktieren: • Überprüfen Sie, ob sich der Netzstecker des Geräts in einer Steckdose befindet. Falls nicht, stecken Sie ihn ein. • Überprüfen Sie, ob die Sicherung herausgesprungen ist. •... - Page 9 10032518 Power supply 220-240 V ~ 50-60 Hz Power consumtion 2000 W DECLARATION OF CONFORMITY Producer: Chal-Tec GmbH, Wallstraße 16, 10179 Berlin, Germany. This product is conform to the following European Directives: 2014/30/EU (EMC) 2014/35/EU (LVD) 2011/65/EU (RoHS) 2009/125/EC (ErP)
-
Page 10: Safety Instructions
SAFETY INSTRUCTIONS General Instuctions • Do not use in unventilated areas. • Do not use where gas, petrol, paint or other inflammable goods are stored. • Do not push any items through, obstruct or cover the grill of the heater •... - Page 11 Mounting • The unit must be securely placed on a horizontal and fl at surface. • Site the heater outside or in a large open area and well away from any obstructions such as branches or where the heater is near any objects that can effected by heat, such as furniture, curtains or other infl ammable objects (minimum distance 1 meter).
-
Page 12: Assembly
ASSEMBLY Put through the flat washer, and Tighten the middle tube and bottom then fixed the pole in the base by a tube. M8*40 screw. Tighten the top tube and middle Fix the heater head onto the top tube. tube and fix in position with M5*15 screw. -
Page 13: Operation
OPERATION • Connect the power cable to a supply that is located in a safe, dry area. • To operate the heater on low (1000 W), pull the Switch Cord once. Once the Switch Cord is pulled, one of the heating elements will glow and radiate heat. -
Page 14: Troubleshooting
TROUBLESHOOTING If the heater will not operate, please check the following before seeking repair of service: • Check if the power cord is plugged into an electrical outlet, if not plug in. • Check if electricity to the main fuse is working. •... - Page 15 10032518 Suministro eléctrico 220-240 V - 50-60 Hz Potencia 2000 W DECLARACIÓN DE CONFORMIDAD Fabricante: Chal-Tec GmbH, Wallstraße 16, 10179 Berlín (Alemania). Este producto cumple con las siguientes directivas europeas: 2014/30/UE (EMC) 2014/35/UE (baja tensión) 2011/65/UE (refundición RoHS) 2009/125/CE (ErP)
-
Page 16: Indicaciones De Seguridad
INDICACIONES DE SEGURIDAD Advertencias generales de seguridad • No utilice el aparato en espacios con ventilación deficiente. • No utilice el aparato en zonas donde se almacenen gases, gasolina, pintura y otros materiales fácilmente inflamables. • No introduzca ningún objeto en las ranuras de ventilación ni cubra dichas ranuras. - Page 17 • No sumerja el aparato en agua para limpiarlo. • Después de encender el aparato es posible que se vean dos puntos negros en la superfi cie de la resistencia. Se trata de un fenómeno normal y no infl uye en el funcionamiento del aparato. Montaje •...
- Page 18 MONTAJE Fije la barra con una arandela y un Una la barra central con la inferior. tornillo M8*40 a la base del aparato. Una la barra central con la superior. Encaje el calefactor en la barra superior y fíjelo con un tornillo M5*15 en la posición deseada.
-
Page 19: Utilización
UTILIZACIÓN • Conecte el cable de alimentación a una toma de corriente que se encuentre en una zona segura y seca. • Tire una vez de la cuerda de encendido para poner en marcha el radiador a baja potencia (1000 W). Cuando haya tirado de la cuerda de encendido, comienza a iluminarse la resistencia para irradiar calor. -
Page 20: Detección Y Resolución De Problemas
DETECCIÓN Y RESOLUCIÓN DE PROBLEMAS Si el aparato no funciona, compruebe primero las siguientes indicaciones antes de contactar con el servicio de atención al cliente. • Compruebe que el enchufe se encuentre conectado a una toma de corriente. De lo contrario, enchúfelo. •... - Page 21 Numéro d’article 10032518 Alimentation 220-240 V ~ 50-60 Hz Puissance 2000 W DÉCLARATION DE CONFORMITÉ Fabricant : Chal-Tec GmbH, Wallstraße 16, 10179 Berlin, Allemagne. Ce produit est conforme aux directives européennes suivantes : 2014/30/UE (CEM) 2014/35/UE (LVD) 2011/65/UE (RoHS) 2009/125/CE (ErP)
-
Page 22: Consignes De Sécurité
CONSIGNES DE SÉCURITÉ Consignes générales de sécurité • N‘utilisez pas l‘appareil dans des endroits mal ventilés. • N‘utilisez pas l‘appareil dans des zones où du gaz, de l‘essence, de la peinture ou d‘autres produits inflammables sont entreposés. • Ne glissez aucun objet à travers la grille de la tête chauffante et ne la recouvrez pas. - Page 23 • Ne plongez pas l‘appareil sous l‘eau pour le nettoyer. • Après la mise en marche de l‘appareil, il peut arriver que deux points noirs soient visibles sur la surface des éléments chauffants. Ceci est normal et n‘affecte pas la fonctionnalité de l‘appareil. Montage •...
- Page 24 ASSEMBLAGE Fixez la tige à la base avec une Reliez la tige inférieure à la tige du rondelle et une vis M8*40. milieu. Reliez la barre supérieure à la barre Insérez la tête chauffante sur la du milieu. barre supérieure et fixez-la dans la position souhaitée à...
-
Page 25: Fonctionnement
FONCTIONNEMENT • Branchez le câble d‘alimentation à une prise murale située dans un endroit sec et sûr. • Tirer une fois sur la cordelette-interrupteur pour faire fonctionner le radiateur à faible puissance (1000 W). Une fois que vous avez tiré sur la corde, l‘un des éléments chauffants commencera à... -
Page 26: Identification Et Résolution Des Problèmes
IDENTIFICATION ET RÉSOLUTION DES PROBLÈMES Si l‘appareil ne fonctionne pas, vérifiez d‘abord les points suivants avant de contacter le service client : • Vérifiez que la fiche secteur de l‘appareil est bien branchée dans une prise. Sinon, branchez-la. • Vérifiez si le fusible n‘a pas sauté. •... - Page 27 DATI TECNICI Articolo numero 10032518 Alimentazione 220-240 V ~ 50-60 Hz Potenza 2000 W DICHIARAZIONE DI CONFORMITÀ Produttore: Chal-Tec GmbH, Wallstraße 16, 10179 Berlino, Germania. Questo prodotto è conforme alle seguenti direttive europee: 2014/30/UE (EMC) 2014/35/UE (LVD) 2011/65/UE (RoHS) 2009/125/CE (ErP)
- Page 28 AVVERTENZE DI SICUREZZA Avvertenze di sicurezza generali • Non utilizzare il dispositivo in ambienti poco ventilati. • Non utilizzare il dispositivo in ambienti in cui sono conservati gas, benzina, vernice o altri prodotti facilmente infiammabili. • Non inserire oggetti attraverso la griglia. Non bloccare e non coprire la griglia.
- Page 29 • Non immergere mai il dispositivo in acqua per la pulizia. • Dopo l´accensione del dispositivo, è possibile che siano visibili due puntini neri sulla superfi cie dell´elemento riscaldante. Ciò è normale e non infl uisce sul funzionamento del dispositivo. Montaggio •...
- Page 30 ASSEMBLAGGIO Fissare l´asta alla base del Collegare l´asta inferiore all´asta dispositivo utilizzando una rondella centrale. e una vite M8*40. Collegare l´asta superiore all´asta Inserire la testa riscaldante sull´asta centrale. superiore e fissarla nella posizione desiderata utilizzando una vite M5*15. Ora è possibile mettere in funzione il dispositivo.
- Page 31 UTILIZZO • Inserire la spina in una presa a muro in un ambiente sicuro e asciutto. • Tirare una volta la cordicella per attivare la stufa a bassa potenza (1000 W). Una volta tirata la cordicella, uno degli elementi riscaldanti inizia ad accendersi e ad emanare calore.
- Page 32 RICERCA E RISOLUZIONE DEI PROBLEMI Se il dispositivo non funziona, controllare quanto segue prima di contattare il servizio clienti: • Controllare che la spina sia inserita nella presa. Altrimenti, inserire la spina nella presa. • Controllare che il fusibile sia funzionante. •...
Need help?
Do you have a question about the blumfeldt 10032518 and is the answer not in the manual?
Questions and answers