Table of Contents
Advertisement
Quick Links
Advertisement
Table of Contents

Related Manuals for GIGA-BYTE TECHNOLOGY AORUS S

Summary of Contents for GIGA-BYTE TECHNOLOGY AORUS S
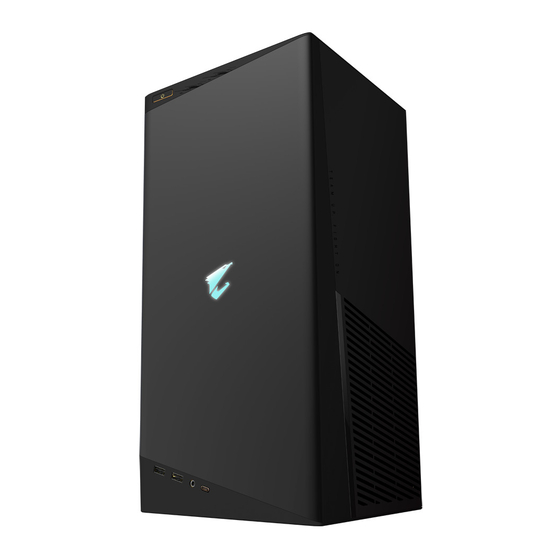
- Page 1 AORUS MODEL S GAMING DESKTOP PC (GB-AMSI9N8I-2051) User's Manual Rev. 1001 For more product details, please visit GIGABYTE's website. To reduce the impacts on global warming, the packaging materials of this product are recyclable and reusable. GIGABYTE works with you to protect the environment.
- Page 2 Copyright © 2021 GIGA-BYTE TECHNOLOGY CO., LTD. All rights reserved. The trademarks mentioned in this manual are legally registered to their respective owners. Disclaimer Information in this manual is protected by copyright laws and is the property of GIGABYTE. Changes to the specifications and features in this manual may be made by GIGABYTE without prior notice.
-
Page 3: Table Of Contents
Table of Contents Box Contents ........................4 Chapter 1 Hardware Installation ..................5 Safety Information .................... 5 Hardware Information ..................6 System Overview ......................6 Front View ........................6 Back View-A ........................7 Back View-B ........................10 Getting Started ....................11 Connecting Peripheral Devices ..................11 Connecting the Power Cord ...................12 Turning on ........................12 Chapter 2 BIOS Setup ....................13 Entering the BIOS Setup ................ -
Page 4: Box Contents
Box Contents 5 AORUS MODEL S GAMING DESKTOP PC 5 Quick Start Guide 5 Antennas 5 Power cord The box contents above are for reference only and the actual items shall depend on the product package you obtain. The box contents are subject to change without notice. - 4 -... -
Page 5: Chapter 1 Hardware Installation
Chapter 1 Hardware Installation Safety Information • Before connecting to the power outlet, make sure that the voltage rating of the power cable is compatible with the power specification in the country where you are located. • The power cord plug must be connected to a properly wired and grounded power outlet. •... -
Page 6: Hardware Information
Hardware Information System Overview Front View Power Button The power button allows users to turn on/off the computer. USB 3.2 Gen 1 Port The USB 3.2 Gen 1 port supports the USB 3.2 Gen 1 specification and is compatible to the USB 2.0 specification. -
Page 7: Back View-A
Back View-A USB 3.2 Gen 2 Type-A Port (Red) The USB 3.2 Gen 2 port supports the USB 3.2 Gen 2 specification and is compatible to the USB 3.2 Gen 1 and USB 2.0 specification. Use this port for USB devices. USB Type-C Port ®... - Page 8 DisplayPort DisplayPort delivers high quality digital imaging and audio, supporting bi-directional audio transmission. DisplayPort can support both DPCP and HDCP 2.3 content protection mechanisms. It provides improved visuals supporting Rec. 2020 (Wide Color Gamut) and High Dynamic Range (HDR) for Blu-ray UHD playback.
- Page 9 Audio Jack Configurations: Headphone/ Jack 4-channel 5.1-channel 7.1-channel 2-channel Line In/Rear Speaker Out Line Out/Front Speaker Out Mic In/Center/Subwoofer Speaker Front Panel Line Out/Side Speaker To configure 7.1-channel audio, you have to use an HD front panel audio module and enable the multi-channel audio feature through the audio driver.
-
Page 10: Back View-B
Back View-B DisplayPort The connector supports DisplayPort 1.4a version. HDMI Port The connector supports HDMI 2.1 version. - 10 -... -
Page 11: Getting Started
Getting Started This product is designed and intended to be used in vertical position only. Connecting Peripheral Devices Connect your peripheral devices such as keyboard, mouse, monitor, and etc. to the desktop computer. - 11 -... -
Page 12: Connecting The Power Cord
Connecting the Power Cord Connect the included power cord to the desktop computer and a power outlet. Turning on Press the power button to turn on the desktop computer. It is recommended that the product be used in an open and well-ventilated area; keep a distance of at least 10 cm around the product for ventilation to ensure proper system operation. -
Page 13: Chapter 2 Bios Setup
Chapter 2 BIOS Setup Entering the BIOS Setup To access the BIOS Setup program, press the <Delete> key during the POST when the power is turned on. When the power is turned off, the battery on the motherboard supplies the necessary power to the CMOS to keep the configuration values in the CMOS. -
Page 14: Setting The Bios Display Language
Setting the BIOS Display Language To set the BIOS display language, go to the System Info. menu. The BIOS Language setting allows you to select the default language used by the BIOS. - 14 -... -
Page 15: Setting Administrator/User Password
Setting Administrator/User Password Go to the Boot menu to set the administrator password or user password for your desktop computer. & Administrator Password Allows you to configure an administrator password. Press <Enter> on this item, type the password, and then press <Enter>. You will be requested to confirm the password. Type the password again and press <Enter>. -
Page 16: Loading Optimized Defaults
Loading Optimized Defaults Go to the Save & Exit menu to load the BIOS default settings. & Load Optimized Defaults Press <Enter> on this item and select Yes to load the optimal BIOS default settings. The BIOS defaults settings help the system to operate in optimum state. Always load the Optimized defaults after updating the BIOS or after clearing the CMOS values. -
Page 17: Saving The Bios Settings And Exiting
Saving the BIOS Settings and Exiting & Save & Exit Setup Press <Enter> on this item and select Yes. This saves the changes to the CMOS and exits the BIOS Setup program. Select No or press <Esc> to return to the BIOS Setup Main Menu. &... -
Page 18: Chapter 3 Appendix
Chapter 3 Appendix Using Q-Flash Plus A. Before You Begin: 1. From GIGABYTE's website, download the latest compressed BIOS update file that matches your product model. 2. Uncompress the downloaded BIOS file, save it to your USB flash drive, and rename it to GIGABYTE.bin. (Note: The USB flash drive must use FAT32/16/12 file system.) 3. -
Page 19: Regulatory Notices
Regulatory Notices United States of America, Federal Communications Commission Statement Supplier's Declaration of Conformity 47 CFR § 2.1077 Compliance Information Product Name: GIGABYTE DESKTOP PC Trade Name: GIGABYTE Model Number: GB-AMSI9N8I-2051 Responsible Party – U.S. Contact Information: G.B.T. Inc. Address: 17358 Railroad street, City Of Industry, CA91748 Tel.: 1-626-854-9338 Internet contact information: https://www.gigabyte.com FCC Compliance Statement:... - Page 20 Under Industry Canada regulations, this radio transmitter may only European Union (EU) CE-Konformitätserklärung operate using an antenna of a type and maximum (or lesser) gain Dieses Produkte mit CE-Kennzeichnung erfüllen folgenden EU- approved for the transmitter by Industry Canada. To reduce potential Richtlinien: EMV-Richtlinie 2014/30/EU, Niederspannungsrichtlinie radio interference to other users, the antenna type and its gain should 2014/35/EU, Funkanlagen Richtlinie 2014/53/EU, RoHS-Richtlinie...
- Page 21 European Community Radio Equipment Directive Compliance Statement: This equipment complies with all the requirements and other relevant provisions of Radio Equipment Directive 2014/53/EU. This equipment is suitable for home and office use in all the European Community Member States and EFTA Member States. The low band5.15 -5.35 GHz is for indoor use only.
-
Page 22: Contact Us
Contact Us GIGA-BYTE TECHNOLOGY CO., LTD. Address: No.6, Baoqiang Rd., Xindian Dist., New Taipei City 231, Taiwan TEL: +886-2-8912-4000, FAX: +886-2-8912-4005 Tech. and Non-Tech. Support (Sales/Marketing) : https://esupport.gigabyte.com WEB address (English): https://www.gigabyte.com WEB address (Chinese): https://www.gigabyte.com/tw GIGABYTE eSupport • To submit a technical or non-technical (Sales/Marketing) question, please link to: https://esupport.gigabyte.com...
Need help?
Do you have a question about the AORUS S and is the answer not in the manual?
Questions and answers