Advertisement
Quick Links
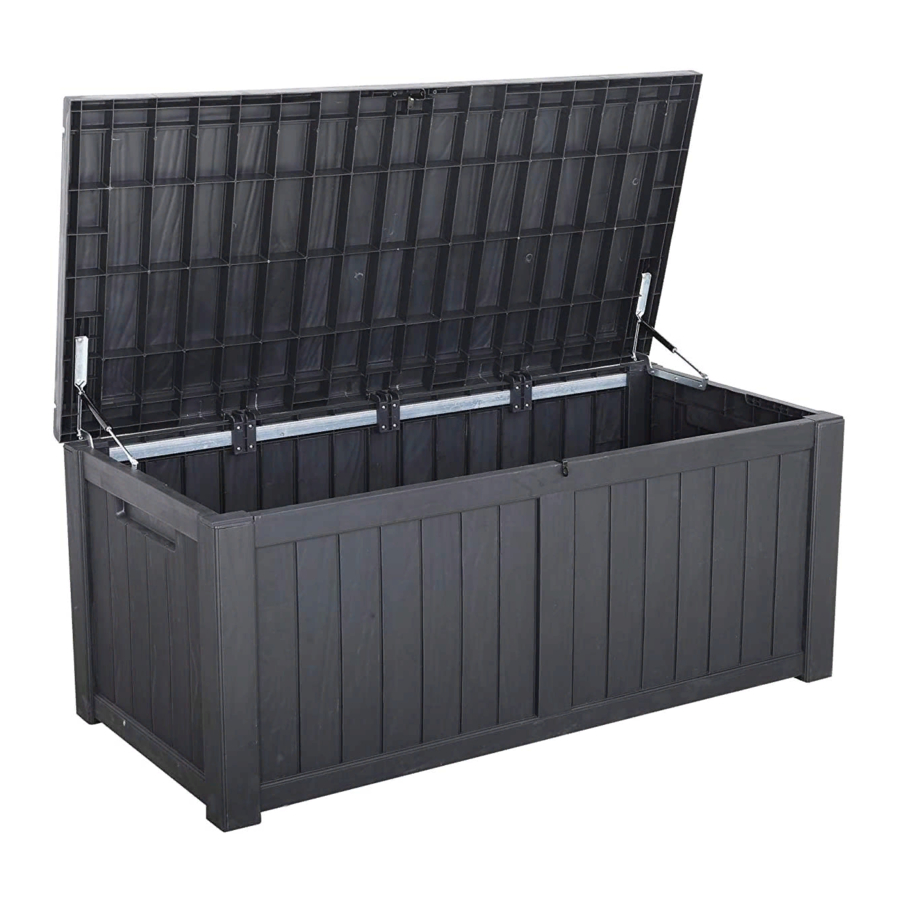
Product size: L 143*W67.5*H60.5 cm
Always be careful when you open and close the Lid to avoid finger pinch.
This is an environment-friendly product made of polypropylene which can
be recyclable after end of use.
The intended use of this product is for domestic use only.
Important, please retain for future reference.
Read carefully.
www.royalcraft.co.uk
Produced in China for A. Mir & Co., Ltd.
©
&
A. Mir
Co., Ltd.
1 / 9
Advertisement

Summary of Contents for Royalcraft Faro 450L
- Page 1 This is an environment-friendly product made of polypropylene which can be recyclable after end of use. The intended use of this product is for domestic use only. Important, please retain for future reference. Read carefully. www.royalcraft.co.uk Produced in China for A. Mir & Co., Ltd. © & A. Mir Co., Ltd.
-
Page 2: Before You Start
Faro 450L Storage Box - Grey Assembly Instructions Before you start Warnings Do not strike the products with hard or pointed items. IMPORTANT, RETAIN FOR FUTURE REFERENCE READ CAREFULLY Do not use power tools to construct this product. See enclosed instructions for assembly, safety and care Do not use this product if parts are missing, damaged or worn. -
Page 3: Parts List
Faro 450L Storage Box - Grey Assembly Instructions Components, fixtures & fittings (not actual size) Parts List Part Part Diagram Qty. Diagram Qty. 2 PCS 1 PC Front or Back Panel 1 PC 2 PCS Bottom Panel Side Panel 3 PCS... - Page 4 Faro 450L Storage Box - Grey Assembly Instructions 2 PCS 2 PCS Foot Cap Foot Cap Step by step assembly instructions Step One Attach the Foot Caps (L) and Foot Caps (R) to the Side Panels (C). Step Two Attach Side Panel (A) to the Bottom Panel (B).
- Page 5 Faro 450L Storage Box - Grey Assembly Instructions Step Three Attach Another Side Panel (A) to the Bottom Panel (B). Step Four Attach partly-assembled components to the Side Panel (C). www.royalcraft.co.uk Produced in China for A. Mir & Co., Ltd.
- Page 6 Faro 450L Storage Box - Grey Assembly Instructions Step Five Attach Reinforced Bar (F) to the Front or Black Panel (A). Step Six The Lock Part (G1) can be attached to any Front or Back Panel (A). The Panel is equipped with Lock Part (G1) will be called Front Panel.
- Page 7 Faro 450L Storage Box - Grey Assembly Instructions Step Seven Fix the Reinforced Bar (F) using Self-Tapping Screws (ST). Step Eight Attach another Side Panel (C) to the partly-assembled components. www.royalcraft.co.uk Produced in China for A. Mir & Co., Ltd.
- Page 8 Faro 450L Storage Box - Grey Assembly Instructions Step Nine Attach Lock Part (G2) to the Li d (K) using Self-Tapping Screws (ST). Attach Hinges (E) to the Lid (K). Step Ten Attach the Lid (K) to the Back Panel (A) using Hinges (E) and Self-Tapping Screws (ST).
- Page 9 Faro 450L Storage Box - Grey Assembly Instructions Step Eleven Attach the Gas Lifts (H) to the Side Panels (C) and Lid (K) using Self-Tapping Screws (ST). Place the Storage Box at the intended place you will use. Your Storage Box is now ready for use.
Need help?
Do you have a question about the Faro 450L and is the answer not in the manual?
Questions and answers