Advertisement
Quick Links
Advertisement

Summary of Contents for FANTEM Oomi MultiSensor
- Page 1 MULTISENSOR...
- Page 2 6 sensors. 1 impossibly small device. The corner of your room just got 6 times smarter. Oomi by Fantem’ MultiSensor looks like nothing that has come before. It’s a motion sensor and it’s also so much more. Installing this 1 piece of Z-Wave®technology is the same as installing 6 pieces of Z-Wave...
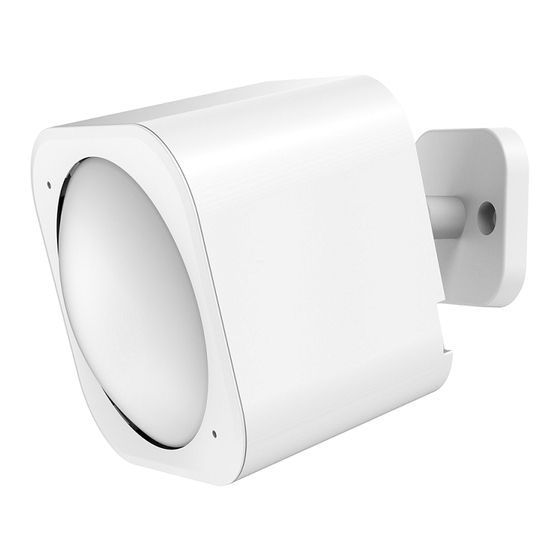
- Page 3 RGB LED Mition Sensor Temperature Vibration Sensor Light Sensor and UV Sensor Secondary battery hold Action Button USB Port Screw hole Primary battery hold...
-
Page 4: Quick Start
Quick start. Setup your power. MultiSensor can be powered by battery or by USB with an appropriate adaptor. For the purposes of installation and setup, even if you intend to power your sensor with batteries, we recommend usingthe provided USB cable for setup. For this, you’ll need an adaptor to plug your USB cable into;... - Page 5 For a battery powered installation; Remove your sensor’s rear cover as shown in the previous step 1. Insert two CR123A batteries orientated according to the diagram within your sensor. Your MultiSensor 6 is now powered on. Note: MultiSensor can be powered by a single CR123A, though batteries will require changing more frequently.
- Page 6 If you’re using a Z-Stick from Aeotec: Action Button If your Z-Stick is plugged into a gateway or a computer, unplug it. Take your Z-Stick to your MultiSensor 6. Press the Action Button on your Z-Stick. Press the Action Button on your MultiSensor. You can test if your MultiSensor has been successfully included into your Z-Wave network by pressing its Action Button.
- Page 7 its LED is solid green for a few seconds, then inclusion has been successful. If the LED blinks green when the button is pressed, the inclusion has been unsuccessful and you should repeat the above steps Selecting a location for your MultiSensor. MultiSensor can bring its intelligent readings to many locations of your home.
- Page 8 If installing MultiSensor on a ceiling it can take measurements within a 3 x 6 x 8 metre / 10 x 20 x 26 feet range: If installing MultiSensor in a corner where the wall meets the ceiling it can take measurements within a 2.5 x 5 x 5 metres / 8 x 15 x 15 feet range: Wall...
- Page 9 For optimal performance, your MultiSensor should NOT be mounted directly on or near metal framing or other large metallic objects. Large metal objects may weaken the Z-Wave wireless signal MultiSensor depends on for communication. Physically install your MultiSensor. With your MultiSensor now a part of your Z-Wave network and having determined its installation location, it’s time to finish its physical installation.
- Page 10 To install your MultiSensor on a shelf; You can place it upon a shelf without the need to attach further accessories. To install your MultiSensor with the Back-Mount Plate; You can affix the Back-Mount Arm by Double-Sided Tape or using the provided KA2.5×20 mm screws.
- Page 11 Lock Unlock The Back-Mount Arm may be locked at various angles by turning the Friction Lock clockwise and counter-clockwise to respectively tighten or loosen the angle of the arm. You can rotate the Friction Lock to change the measurement area of sensor.
-
Page 12: Advanced Functions
Advanced functions. Changing batteries. Your MultiSensor has built in battery level detection. It will automatically report its battery level to the associated controller/gateway throughout its life until the battery is fully drained and needs replacing. The battery status will often be displayed in the user interface of the controller/ gateway. - Page 13 Removing your MultiSensor from a Z-Wave network. Your MultiSensor can be removed from your Z-Wave network at any time.You’ll need to use your Z-Wave network’s main controller to do this and the following instructions tell you how to do this using Aeotec by Aeon Labs’...
- Page 14 If you’re using a Minimote: Remove Take your Minimote to your MultiSensor. Press the Remove Button on your Minimote. Press the Action Button on your MultiSensor . If your MultiSensor has been successfully removed from your network, the RGB LED will be active with a colourful gradient for 3 seconds. When you press the Action Button on the MultiSensor, its green LED will blink.
- Page 15 Sensor detects movement to control the associated devices to “OPEN” state. After 4 minutes by default, if the Motion Sensor is not triggered again, the MultiSensor will send Basic Set Command to these devices to set them to their “CLOSE” state. However, if the Motion Sensor is triggered again within 4 minutes, the MultiSensor will reset the timing and start timing again.
- Page 16 minimum sensitivity level. If set it to 0, the motion sensor will be disabled. Monitoring temperature, humidity, luminance and ultraviolet. Your MultiSensor can report temperature, humidity, luminancen and ultraviolet across a Z-Wave network when requested. If this function is supported by a controller, generally a gateway, the data will be displayed within its interface.
- Page 17 Example use of the report table. For example, if you want to report only the temperature and light sensor you would add 32 + 64 and set the sum (96) to parameter 101, 102, or 103. As another example, if you want to report only the light sensor and battery, you would add 1 + 128, then set the sum (129) to parameter 101, 102, or 103.
- Page 18 that it is active when configuring it. To do this, press the Action Button once, which will trigger to send out a wake up notification command. If you want it to wake up for 10 minutes, to do this, press and hold its Action Button for 3 seconds and then release it.
- Page 19 you may want your MultiSensor is a security device that uses secure/encrypted message to communicate in Z-wave network, so a security enabled controller/gateway is needed for the MultiSensor to be used as a security device. You need to press the MultiSensor’s Action Button 2 times within 1 second when your security controller/ gateway starts the network inclusion.
-
Page 20: Technical Specifications
factory defaults. To do this, press and hold the Action Button for 20 seconds and then release it. Your MultiSensor will now be reset to its original settings, and the green LED will be solid for 2 seconds and then be colourful gradient to confirm a success. Technical specifications. - Page 21 Warranty claims must be made by Customer in writing within thirty (30) days of the manifestation of a problem. Aeon Labs' sole obligation under the foregoing warranty is, at Aeon Labs' option, to repair, replace or correct any such defect that was present at the time of delivery, or to remove the Products and to refund the purchase price to Customer.
- Page 22 returned Products, and insure the shipment or accept the risk of loss or damage during such shipment and transportation. Aeon Labs will ship the repaired or replacement products to Customer freight prepaid. Customer shall indemnify, defend, and hold Aeon Labs and Aeon Labs' affiliates, shareholders, directors, officers, employees, contractors, agents and other representatives harmless from all demands, claims, actions, causes of action, proceedings, suits,...
- Page 23 IF ADVISED OF THE POSSIBILITY OF SUCH DAMAGES. AEON LABS' LIABILITY AND CUSTOMER'S EXCLUSIVE REMEDY FOR ANY CAUSE OF ACTION ARISING IN CONNECTION WITH THIS AGREEMENT OR THE SALE OR USE OF THE PRODUCTS, WHETHER BASED ON NEGLIGENCE, STRICT LIABILITY, BREACH OF WARRANTY, BREACH OF AGREEMENT, OR EQUITABLE PRINCIPLES, IS EXPRESSLY LIMITED TO, AT AEON LABS' OPTION, REPLACEMENT OF, OR REPAYMENT OF THE PURCHASE PRICE...
- Page 24 STORE INDOORS WHEN NOT IN USE. SUITABLE FOR DRY LOCATIONS. DO NOT IMMERSE IN WATER. NOT FOR USE WHERE DIRECTLY EXPOSED TO WATER. This device complies with Part 15 of the FCC Rules. Operation is subject to the following two conditions: This device may not cause harmful interference, and This device must accept any interference received, including interference that may cause undesired operation.
- Page 25 Warning Do not dispose of electrical appliances as unsorted municipal waste, use separate collection facilities. Contact your local government for information regarding the collection systems available. Certifications (regional): Z-Wave and Z-Wave Plus are registered trademarks of Sigma Designs and its subsidiaries in the United States and other countries FCC ID: XBAFT100 Oomihome.com/Multisensor...
- Page 26 Association informations...
- Page 27 Configuration parameters informations...
Need help?
Do you have a question about the Oomi MultiSensor and is the answer not in the manual?
Questions and answers