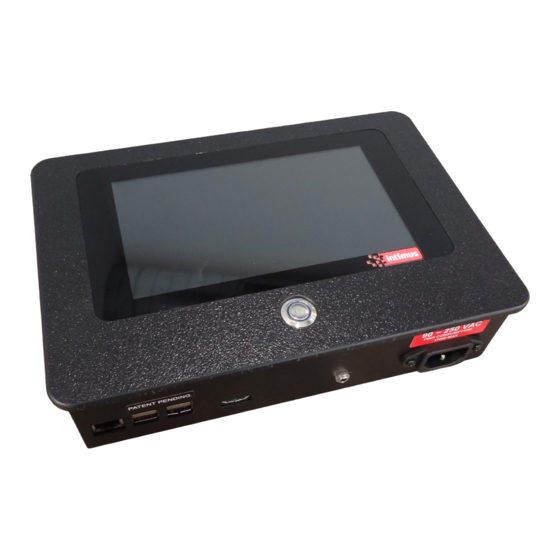
Intimus Auditor Pro Operator's Manual
Hide thumbs
Also See for Auditor Pro:
- Operator's manual (16 pages) ,
- Administrator's manual (40 pages)
Table of Contents
Advertisement
Available languages
Available languages
Quick Links
Advertisement
Chapters
Table of Contents

Related Manuals for Intimus Auditor Pro


Summary of Contents for Intimus Auditor Pro
- Page 1 Auditor Pro Operator Manual 000200 Betriebsanleitung Operating instructions...
- Page 2 Auditor Pro Betriebsanleitung für Anwender Operator Manual Typ: Vor der Inbetriebnahme die Betriebsanleitung durchlesen! Before operating, please read the Operating Instructions! Betriebsanleitung (Seite 3 - 9) Operating instructions (page 10 - 16) 94656 1 11/17...
-
Page 3: Table Of Contents
Auditor Pro System- Auditor Pro unverbunden ....4 konfiguration ....8 Eingabemöglichkeiten ... -
Page 4: Speicherkapazität
Originalbetriebsanleitung Degaussen und Vernichten 2.2 Speicherkapazität mit dem Auditor Pro Der intimus Auditor Pro besitzt 16 GB Speicherkapa- zität. Wenn der Speicher zu 90% belegt ist, erscheint ein Administratoren-Warnhinweis, gespeicherte Da- ten zu exportieren und zu löschen. Ab 95% Speicher- belegung wird der intimus Auditor Pro keine Daten mehr dokumentieren. - Page 5 „ Degausser 9000: Das Festplattenlaufwerk wird an „ Prüfen Sie die Aufzeichnungsdaten die Fotovorrichtung übergeben „ Berühren Sie die ACCEPT-Schaltfläche. (Falls das „ Der Auditor Pro erstellt automatisch ein Bild des Bild verschwommen sein sollte, berühren Sie RE- gelöschten Festplattenlaufwerks JECT und der Zyklus startet neu) „...
-
Page 6: Ansicht Auditor Pro Datenbank
Schritt 1: Bildschirm Dateneingabe Ausloggen und System he- „ Wählen Sie “List View” aus dem Menü runterfahren Schritt 1b: Falls Auditor Pro nicht mit einem De- gausser oder Destroyer verbunden ist „ Wählen Sie “List View” Schritt 1: Bildschirm Dateneingabe „... -
Page 7: Verbinden Mit Einem Degausser Oder Destroyer Nach Dem Einschalten
„ Geben Sie die Witness-ID ein „ Geben Sie das Witness-Password ein „ Berühren Sie die LOGIN-Schaltfläche Schritt 1: Auditor Pro „ Verbinden Sie den Auditor Pro per USB-Kabel mit dem Degausser/Destroyer Ort oder Job# hinzufügen „ Stellen Sie sicher, dass der Degausser/Destroyer eingeschaltet ist „... -
Page 8: Auditor Pro System
„ Wählen Sie “Unit Configure” Problem: Foto ist verschwommen (Degausser 20000 Schritt 2: Bildschirm Systemkonfiguration / 8000) „ Wählen Sie Ihr(e) Auditor Pro-Verbindungsgerät(e) Lösung: „ Berühren Sie die SAVE-Schaltfläche „ Festplattenlaufwerk mit Seriennummer nach oben in das Datenträgerfach legen (Fach noch nicht schließen) -
Page 9: Entsorgung Der Maschine
„ Sie sehen nun die aktuelle Kamerasicht auf dem Auditor Pro-Bildschirm „ Greifen Sie von der Rückseite in die Vorrichtung und justieren Sie die Kameralinse. Beobachten Sie dabei das Bild auf dem Auditor Pro-Bildschirm Problem: Nach Beendigen des Degaussen-Zyklus wechselt die Steuerung nicht automatisch in den Fo- toaufnahmemodus Lösung: Prüfen Sie die USB-Verbindung vom Auditor... -
Page 10: Safety Information
Overview ..... . . 10 on Auditor Pro ....14 Introduction ... -
Page 11: Storage Capacity
An on screen keyboard appears on all screens that re- quire you to enter data. You can also connect a key- board and mouse via USB port to the Auditor Pro sys- tem. Use the included stylus for ease of use. - Page 12 „ Press the ACCEPT button. (If the image is blurry, „ Degausser 9000 / 8000 will start automatically press REJECT and cycle will start over) „ If using Intimus Crusher only, go to Step 8 „ If accepted, remove hard drive Step 5: Degausser 20000 and 8000 „...
-
Page 13: Viewing Auditor Pro Database
Step 1: Data Entry Screen „ Select “List View” Logging Out and Shutting Down the System Step 1b: If Auditor Pro is not connected to a de- gausser or destroyer „ Select “List View” Step 1: Data Entry Screen „ When you are done go to the menu bar and select “Log Out”... -
Page 14: Connecting To A Degausser
„ Enter Witness ID „ Enter Witness Password „ Press the LOGIN button Step 1: Auditor Pro „ Connect Auditor Pro via USB cable to degausser Add Location or Job# or destroyer „ Ensure that the degausser or destroyer is turned „... -
Page 15: Configure Auditor Pro System
„ Select your Auditor Pro unit[s] „ Press MENU icon, select “Adjust Camera” „ Press SAVE „ You will see the camera view on the Auditor Pro screen „ Use the knob on the camera to adjust the focus Troubleshooting... -
Page 16: Disposal Of The Machine
Translation of the Original Operation Manual Übersetzung der Originalbetriebsanleitung „ Reach in from back side to adjust camera lens wat- ching the image on the Auditor Pro screen for cla- rity Problem: Control head does not advance to image af-... -
Page 17: Certificate Of Conformity
EN 61000-6-1:2007 EN ISO 12100:2010 EN ISO 62368-1:2014 CE-Bevollmächtigter / authorized person of CE / personne autorisée de la CE / persona autorizada por CE: intimus International GmbH; Bergheimer Straße 6-12; D-88672 Markdorf / Germany 2017/11 Javier Ortiz de Zárate Geschäftsführer Postfach / p.o.box 1420... - Page 18 Room 260D, C Building info@intimus.com.cn Guojigang No.E-2 Dong San Huan Bei Road, Chaoyang District, Beijing 100027, PRC Austria intimus International Austria Ges. m. b. H. + 43 1 2583621 0 Ernst Melchior Gasse 20, 4. OG Top 6 contact@intimus.com ...
Need help?
Do you have a question about the Auditor Pro and is the answer not in the manual?
Questions and answers