
Related Manuals for Kguard PLM00

Summary of Contents for Kguard PLM00
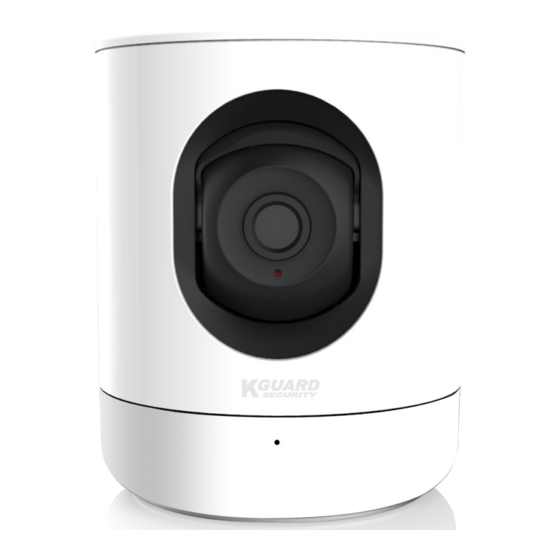
- Page 1 WiFi IP Camera PLM00 Web Client Manual Default user name: admin Default password: 123456...
-
Page 2: Table Of Contents
Record Menu ......................16 Rec Parameters ...................16 Record Schedule ..................17 Record Snapshot ..................17 Network Menu ..................... 18 Network Setting ..................18 WifiSet ......................19 Video Streaming ..................19 Email ......................20 DDNS ......................20 IP Filter .......................21 RTSP ......................21 FTP ......................21 PLM00 User’s Manual... - Page 3 Audio File ....................24 BreathingLight ....................25 System Menu ......................25 Date/Time ....................25 Users ......................26 Info ......................26 Advanced Menu ....................27 Firmware Update ..................27 Load Default ....................27 Maintain .....................27 Local Settings ......................28 Information ......................28 Logoff ........................28 PLM00 User’s Manual...
- Page 4 Safety and Regulatory Info Safety Information FCC Compliance Statement This equipment has been tested and found to comply with the limits for a Class C digital device, pursuant to Part Warning 15 of the FCC Rules. These limits are designed to provide reasonable protection against harmful interference when This is the symbol for indicating any potential hazard, the equipment is operated in a commercial environment.
-
Page 5: Set Up Your Camera Wirelessly Through Your Mobile Devices
Web Client Set Up Your Camera Wirelessly Through Your Mobile Devices To connect the IP camera to the WiFi network, perform the following: IMPORTANT! • Make sure the IP camera is powered on. • Make sure your smartphone/tablet uses WiFi connection, not mobile data network. Scan the QR code on the IP camera with your smartphone/tablet. -
Page 6: Configure The Ip Camera Using The Kviewlink App
KViewLink app. These settings must be set on the Web Client. Prior accessing the IP camera’s Web Client through your notebook, make sure the IP camera is connected to the WiFi network and your notebook is connected to the same WiFi router as your IP camera. Notebook PLM00 IP Camera WiFi Router Internet... -
Page 7: Log In
Download and install the DeviceSearch software to your notebook. NOTE: The DeviceSearch software is available at http://kguardsecurity.server289.com/kguard/ KguardWEBSite/Utility/IPcam/PLM00/. Double-click the icon to open the remote tool. The program lists the IP camera by IP address. Click on the IP camera IP address field to open the IP camera Web Client on your notebook default web browser. -
Page 8: Live Screen
Web Client Live Screen After you login to Web Client, the Live screen opens. On Live screen, you will see the live view from the IP camera, access the Quick menu and functions on the Task bar, select a screen mode, and configure local and remote settings. Screen mode Quick menu Task bar... -
Page 9: Screen Mode
Web Client The snapshot is saved to the default location in your notebook. To view the snapshot, click “PreView”. To change the snapshot saving location, refer to “Local Settings” on page 28. To open the snapshot folder, click “Open”. • Click to mute audio. - Page 10 Web Client • Click to set preset points and use Cruise mode. To add a preset point, perform the following: Click the direction arrows on the pointer pan to move the camera to the desired direction. Click to add the preset point. Click to go to the preset point (for testing).
-
Page 11: Live
Web Client To use Cruise mode, perform the following: Click to start cruise. Click to stop cruise. Live Click Live to access the live video from the IP camera (refer to “Live Screen” on page 8). To modify the IP camera name, or current date and time, refer to “Display Menu”... -
Page 12: Playback
Web Client Playback Click Playback to search and playback the recorded videos. Playback control Time bar Task bar To playback a recorded video, perform the following: Select the recording type. Click Search to find recordings. Select the recording of a day in the calendar. NOTE: Those days that have recordings are marked with blue triangles ( Click... -
Page 13: Task Bar
Web Client Task Bar To access the common functions of the playback, click the respective icon shown on the task bar. • Click to switch playback to full screen mode or click to switch playback to portrait mode. • Click to back up a fraction of the video. -
Page 14: Remote Settings
Web Client Remote Settings Click Remote Settings to configure IP camera settings, such as video recording, network, storage, and etc. Menu option/setting/status Remote Settings menu NOTE: • After altering settings, click Save to save the modifications. • Click Refresh to renew the settings. •... -
Page 15: Image Control
Web Client TIP: You can drag the IP camera name and date/time box to the desired location on the Live view. Camera name Date and time Image Control Configure the image control settings. IR-CUT: Select the desired built-in filter switch-over mode to ensure the IP camera works properly both in the daylight and night. -
Page 16: Privacy Zone
Web Client Privacy Zone Set the privacy zone on the video. Privacy Zone: Click the checkbox to enable selecting a privacy zone. Drag the cursor over the desired area where you want the privacy zone to appear. The marked area is then filled with maroon color, indicating the zone location. -
Page 17: Record Schedule
To delete a recording for the time slot, drag again the cursor over the desired time slot(s). Record Snapshot IMPORTANT! This feature is not supported with PLM00 IP camera. Configure the snapshot capturing settings. Snapshot: Enable or disable capturing snapshots. -
Page 18: Network Menu
IP camera remotely through the router using port forwarding. NOTE: If your router does not support UPnP, make sure the port forwarding is completed manually. Please see the http:// customized free guide on portforward.com/kguard. WiFi IP Camera User’s Manual... -
Page 19: Wifiset
Web Client WifiSet Set the default Wifi network connection settings. Wifi: Enable or disable connecting the IP camera to the Wifi network. SSID: Enter the SSID of the default Wifi network manually or double-click the desired SSID shown in the table. Pass Phrase: Enter a password for security-enabled Wifi network. -
Page 20: Email
DDNS Configure the DDNS settings. DDNS provides a static address to simplify remote connection to your IP camera. To use DDNS, you need to open an account on the DDNS service provider’s web page. For example, KGUARD.ORG: http://www.kguard.org. DDNS: Enable or disable DDNS function. -
Page 21: Ip Filter
Web Client IP Filter Configure IP filter settings. To increase security, you can create a rule to deny or allow devices with certain IP addresses to access the IP camera over the network. Filter Mode: Select the filter mode. • Allow all IP connection: The IP filter is off and any device from Internet can connect to the IP camera. • Allow the setted IP connection: Click Add to start adding IP address(es) you want to allow accessing the IP camera over Internet. -
Page 22: Alarm Menu
Web Client Alarm Menu Select this menu option to configure the alarm settings. Motion Configure the motion parameters. When a motion is detected, the system can be set to automatically initiate the video recording and send the notification messages. Enable: Click the checkbox to enable motion detection. -
Page 23: Wireless Alarm Sensor
NOTE: • The Alarm Kit can be added by scanning the QR code on the KGUARD alarm sensor and paired with the IP camera only by using the mobile app called KViewLink. But when you reset the IP camera, you need to pair the Alarm Kit with the IP camera again using the KViewLink app. -
Page 24: Log
Audio Codec Type: G.711A is the only supported audio codec type. Encode Bitrate: Display the encoding bitrate. Audio File IMPORTANT! This feature is not supported with PLM00 IP camera. Configure the audio file settings. File Use: Select how the audio file is outputted. -
Page 25: Breathinglight
Web Client BreathingLight IMPORTANT! This BreathingLight schedule is not supported with PLM00 IP camera. Configure the breathinglight settings. Enable: Click the checkbox to enable breathinglight flashing. Week: Set the schedule when the breathinglight is flashing. Copy: Select the schedule of a day that you want to copy to another day (or All days). -
Page 26: Users
Web Client Synchronize With Computer Time: Click to synchronize the time of the IP camera with the current time of your notebook. After checking this option, the date and time configurations will be disabled as displayed below. Users Configure the user accounts. Click on the user account that you want to modify. User Name/Password: Enter new login credentials for the user. -
Page 27: Advanced Menu
Web Client Advanced Menu Select this menu option to configure the advanced settings. Firmware Update Upgrade the system firmware. Upgrade file path: Click Scan and browse to the location of the upgrade file. Upgrade: Click to start upgrading the system. IMPORTANT! Make sure not to close the browser or turn off the IP camera while upgrading firmware. -
Page 28: Local Settings
Web Client Local Settings Click Local Settings to specify the local path directory to save downloaded videos, files, and snapshots. Record Path: Click to set a new path for manual recordings in the computer. Download Path: Click to set a new path in the computer for downloads. Snapshot Path: Click to set a new path for saving manually captured snapshots in the computer. - Page 29 Customer Support KGUARD INFORMATION CO., LTD. USA Technical Support Contact Address: 4F, No.113, Jian 2nd Road, TEL: 1-949-450-0052 Jhonghe District, New Taipei City 23585, Taiwan Email: support@kworldcomputer.com TEL: +886-2-8228-6080 FAX: +886-2-8221-6857 Email: support@kguardsecurity.com...
Need help?
Do you have a question about the PLM00 and is the answer not in the manual?
Questions and answers