Table of Contents
Advertisement
Available languages
Available languages
Quick Links
Advertisement
Chapters
Table of Contents

Related Manuals for cahors MINISAT


Summary of Contents for cahors MINISAT
-
Page 2: Table Of Contents
1) Qu’est-ce que la MINISAT ? ...................2 2) Consignes de sécurité :....................2 3) Contenu de la boîte......................3 4) Comment l’installer ?.......................4 4 - 1 Etape 1 : ou l’installer ?....................4 4 - 2 Etape 2 : très important ! 3 angles essentiels ! ............5 4 - 3 Etape 3 : Comment assembler ? ................5... -
Page 3: Qu'est-Ce Que La Minisat
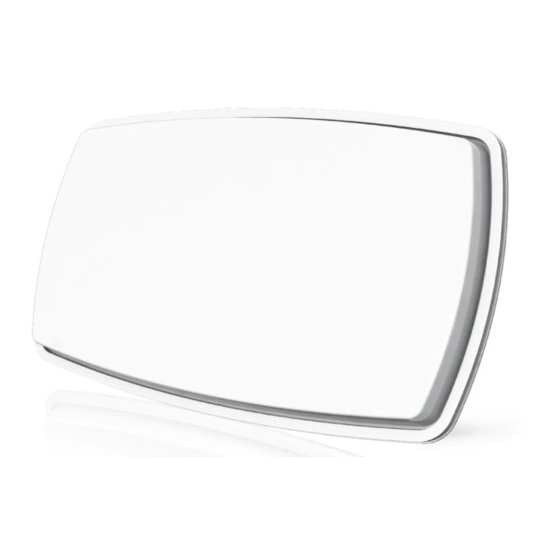
Petite, discrète et facile d’utilisation, elle peut être installé en quelques minutes et également être utilisée comme antenne portable. MINISAT peut être utilisée aussi bien pour la réception de chaînes en clair que cryptées (ces dernières exigeant la souscription d’un abonnement auprès d’un opérateur). -
Page 4: Contenu De La Boîte
3) Contenu de la boîte Symbole Nom de la Piece Image Quantite Corps de l’Antenne Equerre de Support Support Principal Support de Fixation A Support de Fixation B Clé à Boulon Boussole Ancrage Hexagonal M6x18 SEMS2 Ancrage Hexagonal M6x50 SEMS2 Vis a Tête Bombée a Collet Carre M6x50 Vis a Tête Bombée a... -
Page 5: Comment L'installer
4 - 1 Etape 1 : ou l’installer ? Afin de recevoir un signal provenant du Satellite, MINISAT doit être installé dans un espace à ciel ouvert (à l’extérieur de la maison ou de l’appartem ent), en direction du satellite vers le sud. Vous aurez besoin d’une boussole afin de connaître l’orient ation vers le satellite, le réglage final sera... -
Page 6: Etape 2 : Très Important ! 3 Angles Essentiels
Réception du signal de Bonne Qualité éception du signal de Mauvaise Qualité Pas bon! Bon! 4 - 2 Etape 2 : très important ! 3 angles essentiels ! Afin d’installer correctement votre antenne, vous devez trouvez les angles d’inclinaison, azimut et élévation en vous référant au tableau à... - Page 7 2) Fixer l’angle d’élévation (entre l’antenne et le support de fixation) Soulever ou baisser délicatement l’antenne afin d’atteindre l’angle d’élévation voulu selon le schéma ci-dessous, ne pas fixer à ce stade encore avec la vis et l’écrou. Vérifiez 30 3) Installation du Bras de Fixation A Selon l’emplacement de l’antenne et le type d’installation vous devez poser le bras de fixation A (B3 sur la figure) soit en type rambarde de balcon soit en accroche murale.
-
Page 8: Etape 4 : Alignement De L'antenne
4) L’arrière bras et les Bras de fixation A(B3) Monter l’ensemble selon le schéma ci-joint, afin de pouvoir tenir correctement l’antenne, vérifiez le blocage correct des écrous (N1) selon le schéma. 4 - 4 Etape 4 : Alignement de l’antenne : Un alignement correct de l’antenne nécessite du matériel spécialisé... -
Page 9: En Cas De Problèmes
5) En cas de problèmes : Si aucun signal n’est perçu, assurez-vous que les manuels d’utilisation du récepteur et de l’antenne ont été suivis à la lettre. Vérifiez ce qui suit : Assurez-vous qu’il n’y ait pas d’obstacle (arbres, bâtiments, fenêtres, coins ou avancées du toit, votre corps ou vos mains)-le signal ne passe pas à... - Page 10 1) What is MINISAT ? ......................2 2) Safety instructions :......................2 3) Box content ........................3 4) How to Install........................4 4 - 1 STEP 1 : Where to install ?..................4 4 - 2 Step 2 : Very important ! 3 needed angles !.............5 4 - 3 Step 3 : assembly : ....................5...
-
Page 11: What Is Minisat
& orientation instructions. All the instructions should be followed in order to avoid any technical problems. Any electric or magnetic field close to the MINISAT may cause a bad reception or even cut off the signal completely. -
Page 12: Box Content
3) Box content Part name Symbol Image Quantite Antenna Body Angle Bracket Main Support Fix Bracket A Fix Bracket B Spanner Compass Screw M6x18 SEMS2 Screw M6x50 SEMS2 Round Head Square Neck Bolt M6x50 Round Head Square Neck Bolt M6x75 Flanged Nut M6... -
Page 13: How To Install
4 - 1 STEP 1 : Where to install ? In order to receive a signal from the Satellite, MINISAT is to be installed in an open loop space (outside the house or the apartment), in the direction of the satellite towards the equator, for which, you will need a compass to know the satellite orientation. -
Page 14: Step 2 : Very Important ! 3 Needed Angles
Good quality signal reception ad quality signal reception BAD! GOOD! 4 - 2 Step 2 : Very important ! 3 needed angles ! In order to set up correctly your antenna, you must find inclination angle , azimuth angle and elevation angle using the chart at the end of this user’s manual. - Page 15 2) Set up the elevation angle (between angle bracket B1 and antenna body A1) after fixing the main support B2 with angle body B1. For delicate adjustment elevation and azimuth angle, please don’t fix bolt and nut tightly. Check 30 3) Installation of Fix bracket A : You need to install Fix Bracket A (B3) considering installation place (Clamp Type, Wall Mounting Type).
-
Page 16: Step 4 : Alignement
4) Joint Antenna Body with main support and Fix bracket A(B3) Joint assembled Antenna Body with main support and Fix Bracket A. In order to support antenna, nut (N1) should be jointed as tightly as it can. Wall 4 - 4 Step 4 : Alignement : A correct alignment of the antenna requires specialised measurement device owned by your installer. -
Page 17: Troubleshooting Check List
5) Troubleshooting check list: In case no signal is available, please check you have followed the procedure described in the user’s manual and check the following points: Make sure there are no obstructions (trees, buildings, windows, corner or overhang of your roof, your body or hands) –... - Page 18 1) Um was handelt es sich bei der NINISAT? ................2 2) Sicherheitsanweisungen .....................2 3) Lieferumfang ........................3 4 ) So wird sie installiert? ......................4 4 - 1 Schritt 1 : Wo kann man sie installieren?..............4 4 - 2 Schritt 2 : Informationen überprüfen................5 4 - 3 Schritt 3 : Teile zusammenfügen ...................5 4 - 4 Schritt 4 : Verbinden der Antenne mit dem Digitalempfänger........7 5) Störungsbehebungs-Prüfliste für die Erstinstallation ............8...
-
Page 19: Um Was Handelt Es Sich Bei Der Ninisat
1) Um was handelt es sich bei der MINISAT? Die MINISAT ist eine Satellitenantenne vom Typ Hornanordnung mit doppelter Linear- Polarisation, die Signale von großen Satelliten empfangen kann wie eine normale Parabol-Antenne. Da sie klein, unauffällig und bedienungsfreundlich ist, kann sie innerhalb von wenigen Minuten aufgestellt werden und als tragbare Antenne für sämtliche Arten des Satellitenempfangs verwendet werden. -
Page 20: Lieferumfang
3) Lieferumfang Teilename Abbildung Abbildung Symbol Antennen-Hauptteil Winkelhalterung Hauptstütze Fixierungshalterung A Fixierungshalterung B Schraubenschlüssel Kompass Sechskantschraube M6x18 SEMS2 Sechskantschraube M6X50 SEMS2 Halbrund-Vierkant- Halsschraube M6x30 Halbrund-Vierkant- Halsschraube M6x50 Mutter M6... -
Page 21: So Wird Sie Installiert
4) So wird sie installiert ? Indem man die Anweisungen Schritt für Schritt befolgt, ist es einfach, die MINISAT selbst oder mit Hilfe eines professionellen Antenneninstallateurs zu installieren. Vor dem Installieren Ihrer Antenne prüfen Sie bitte, ob alle unter "Lieferumfang" genannten Teile in der Verpackung sind. -
Page 22: Schritt 2 : Informationen Überprüfen
Signal wird gut empfangen Signal wird schlecht empfangen Schlecht! Gut! 4 - 2 Schritt 2 : Informationen überprüfen Um die Antenne zu installieren müssen Sie die richtige Schrägstellung (Sky), Höhe (Elevation) und den Azimuth-Winkel finden, wie in den letzten Seiten der Bedienungsanleitung angegeben. Wenn Sie lhren Standort in der Tabelle nicht finden, nehmen Sie bitte den der Ihnen am nächsten ist. - Page 23 2) Höhe fixieren (Gelenk Antenne und Hauptstütze) Gelenk Winkel Verbindung und Hauptstütze. Für die empfindliche Abstimmung und für den Azimuth-Winkel, fixieren Sie den .Bolzen und die Mutter nicht zu fest. Überprüfung 30 3) Montage der Wand- bzw. Masthalterung Sie müssen die Fixier-Verbindung A(B3) unter Berücksichtigung des Installationsplatzes (Mastmontage, Wandmontage) wie nachstehend abgebildet fixieren.
-
Page 24: Schritt 4 : Verbinden Der Antenne Mit Dem Digitalempfänger
4) Montage der Hauptstütze (B2) Befestigen Sie die Hauptstütze (B2) wie abgebildet mit den 2 Schrauben (S3) und Muttern am Fixierhalter (B3). Ziehen Sie die Muttern (N1) fest an. Wand 4 - 4 Schritt 4 : Verbinden der Antenne mit dem Digitalempfänger Wenn die Feinabstimmung für den Signalempfang abgeschlossen ist, ziehen Sie den Bolzen und die Mutter fest. -
Page 25: Störungsbehebungs-Prüfliste Für Die Erstinstallation
5) Störungsbehebungs-Prüfliste für die Erstinstallation Wenn das Signal nicht gefunden wird, dann stellen Sie sicher, dass die Anweisungen in der Empfänger-Bedienungsanleitung und der Antennen-Bedienungsanleitung genau befolgt worden sind, dazu prüfen Sie bitte Folgendes : Stellen Sie sicher, dass es keine Hindernisse gibt (Bäume, Gebäude, Fenster, Ecken oder Überhänge Ihres Daches, Ihres Körpers, Ihrer Hände) –... - Page 26 1) Que es la MINISAT ? ......................2 2)Instrucciones de seguridade: ....................2 3) Contenido de la caja : ......................3 4) Como Instalarla ? ........................4 4 - 1 Paso 1 : Donde instalarla ? ....................4 4 - 2 Paso 2 : Muy importante ! 3 angulos esenciales para recivir su satelite :....5 4 - 3 Paso 3 : Como armarla ? ....................5...
-
Page 27: Que Es La Minisat
Pequena, discreta, y facil de usar, se puede instalar en poco tiempo y tambien se puede utilizar como antena portatil. MINISAT se puede utilizar tan para la recepcion de los canales en claro que codificados (que requieren una suscripcion con un operador) -
Page 28: Contenido De La Caja
3) Contenido de la caja : Simbolo Nombre de la pieza Imagen Cantitad Cuerpo de la antena Montaje de apoyo Principal apoyo Soporte A Soporte B Clave Brujula Anclaje Hexagonal M6x18 SEMS2 Anclaje Hexagonal M6x50 SEMS2 Tornillo de cabeza cuadrada M6x50 Tornillo de cabeza cuadrada M6x75... -
Page 29: Como Instalarla
Piense en la manera en la cual podria pasar los cables discretamente de la MINISAT hacia el receptor. La antena no debe ser alejada del receptor satélite. Un cable de mas de 30m puede... -
Page 30: Paso 2 : Muy Importante ! 3 Angulos Esenciales Para Recivir Su Satelite
Señal de recepción de buena calidad Señal de recepción de mala calidad Mala! Buena! 4 - 2 Paso 2 : Muy importante ! 3 angulos esenciales para recivir su satelite : Para bien instalar su antena, debe buscar los angulos de inclinacion, azimut y elevacion segun el tablero que encontrara al final de este manual (Appendix). - Page 31 2) Fijar el angulo de elevacion (entre la antena y el soporte de fijacion) Subir o bajar suavemente la antena para llegar al querido angulo de elevacion segun el esuquema mas abajo, no fije todavia con el tornillo y el tuerca Verificar 30 3) Instalacion del brazo de fijacion A : Segun el emplazamiento de la antena y el tipo de instalacion, tiene que poner el brazo de...
-
Page 32: Paso 4 : Alineacion De La Antena
4) brazo posterior y brazos de fijacion A (B3) Montar el conjunto segun el esquema mas bajo, para mantener corectamente la antena, verificar el bloqueo corecto de los tuercas (N1) segun el esquema Pedar 4 - 4 Paso 4 : alineacion de la antena : La alineacion corecta de la antena necesita material espacializado que tiene el instalador. -
Page 33: En Caso De Problemas
5) En caso de problemas : Si no recibe ningunos senales, asegurese que los manuales de uso del receptor y de la antena han sido corectamente respetados. Verificar : que no hay ostaculo (arboles, edificios, ventanas, rincones,tejados, su cuerpo o sus manos), la señal no pasa à... - Page 35 Az = Azimuth El = Elevation Sk = Skew Astra Astra Atlantic Hispa Astra Astra Atlantic Hispa Türk Türk 2A-2D 1F-1H/ 2A-2D 1F-1H/ bird bird bird bird 1KR/1L/ 1KR/1L/ Euro Euro 2A, 3A 6/7A/8 1C,1D 2A, 3A 6/7A/8 1C,1D bird 1 bird 1 42.0E 28.2E...
- Page 36 Az = Azimuth El = Elevation Sk = Skew Astra Astra Atlantic Hispa Astra Astra Atlantic Hispa Türk Türk 2A-2D 1F-1H/ 2A-2D 1F-1H/ bird bird bird bird 1KR/1L/ 1KR/1L/ Euro Euro 2A, 3A 6/7A/8 1C,1D 2A, 3A 6/7A/8 1C,1D bird 1 bird 1 42.0E 28.2E...
- Page 37 Az = Azimuth El = Elevation Sk = Skew Astra Astra Atlantic Hispa Astra Astra Atlantic Hispa Türk Türk 2A-2D 1F-1H/ 2A-2D 1F-1H/ bird bird bird bird 1KR/1L/ 1KR/1L/ Euro Euro 2A, 3A 6/7A/8 1C,1D 2A, 3A 6/7A/8 1C,1D bird 1 bird 1 42.0E 28.2E...
- Page 38 Az = Azimuth El = Elevation Sk = Skew Astra Astra Atlantic Hispa Astra Astra Atlantic Hispa Türk Türk 2A-2D 1F-1H/ 2A-2D 1F-1H/ bird bird bird bird 1KR/1L/ 1KR/1L/ Euro Euro 2A, 3A 6/7A/8 1C,1D 2A, 3A 6/7A/8 1C,1D bird 1 bird 1 42.0E 28.2E...
- Page 39 Az = Azimuth El = Elevation Sk = Skew Astra Astra Atlantic Hispa Astra Astra Atlantic Hispa Türk Türk 2A-2D 1F-1H/ 2A-2D 1F-1H/ bird bird bird bird 1KR/1L/ 1KR/1L/ Euro Euro 2A, 3A 6/7A/8 1C,1D 2A, 3A 6/7A/8 1C,1D bird 1 bird 1 42.0E 28.2E...
- Page 40 Az = Azimuth El = Elevation Sk = Skew Astra Astra Atlantic Hispa Astra Astra Atlantic Hispa Türk Türk 2A-2D 1F-1H/ 2A-2D 1F-1H/ bird bird bird bird 1KR/1L/ 1KR/1L/ Euro Euro 2A, 3A 6/7A/8 1C,1D 2A, 3A 6/7A/8 1C,1D bird 1 bird 1 42.0E 28.2E...
- Page 41 Az = Azimuth El = Elevation Sk = Skew Astra Astra Atlantic Hispa Astra Astra Atlantic Hispa Türk Türk 2A-2D 1F-1H/ 2A-2D 1F-1H/ bird bird bird bird 1KR/1L/ 1KR/1L/ Euro Euro 2A, 3A 6/7A/8 1C,1D 2A, 3A 6/7A/8 1C,1D bird 1 bird 1 42.0E 28.2E...
- Page 42 Az = Azimuth El = Elevation Sk = Skew Astra Astra Atlantic Hispa Astra Astra Atlantic Hispa Türk Türk 2A-2D 1F-1H/ 2A-2D 1F-1H/ bird bird bird bird 1KR/1L/ 1KR/1L/ Euro Euro 2A, 3A 6/7A/8 1C,1D 2A, 3A 6/7A/8 1C,1D bird 1 bird 1 42.0E 28.2E...
- Page 43 Az = Azimuth El = Elevation Sk = Skew Astra Astra Atlantic Hispa Astra Astra Atlantic Hispa Türk Türk 2A-2D 1F-1H/ 2A-2D 1F-1H/ bird bird bird bird 1KR/1L/ 1KR/1L/ Euro Euro 2A, 3A 6/7A/8 1C,1D 2A, 3A 6/7A/8 1C,1D bird 1 bird 1 42.0E 28.2E...
- Page 44 Az = Azimuth El = Elevation Sk = Skew Astra Astra Atlantic Hispa Astra Astra Atlantic Hispa Türk Türk 2A-2D 1F-1H/ 2A-2D 1F-1H/ bird bird bird bird Euro 1KR/1L/ Euro 1KR/1L/ 2A, 3A 6/7A/8 1C,1D 2A, 3A 6/7A/8 1C,1D bird 1 bird 1 42.0E 28.2E...
- Page 45 Az = Azimuth El = Elevation Sk = Skew Astra Astra Thor 2A-2D 1F-1H/ Astra Eutelsat Hotbird Eutelsat Eutelsat Atlantic Hispasat Sirius 4 1KR/1L/ Euro 1E/3A 6/7A/8 bird 3 1C,1D Intelsat bird 1 10-02 28.2E 23.5 E 19.2E 16.0E 13.0W 10.0W 7.0E 5.0E...
- Page 46 Az = Azimuth El = Elevation Sk = Skew Astra Astra Thor 2A-2D 1F-1H/ Astra Eutelsat Hotbird Eutelsat Eutelsat Atlantic Hispasat Sirius 4 1KR/1L/ Euro 1E/3A 6/7A/8 bird 3 1C,1D Intelsat bird 1 10-02 28.2E 23.5 E 19.2E 16.0E 13.0W 10.0W 7.0E 5.0E...
- Page 47 Az = Azimuth El = Elevation Sk = Skew Astra Astra Thor 2A-2D 1F-1H/ Astra Eutelsat Hotbird Eutelsat Eutelsat Atlantic Hispasat Sirius 4 1KR/1L/ Euro 1E/3A 6/7A/8 bird 3 1C,1D Intelsat bird 1 10-02 28.2E 23.5 E 19.2E 16.0E 13.0W 10.0W 7.0E 5.0E...
- Page 48 Az = Azimuth El = Elevation Sk = Skew Astra Astra Thor 2A-2D 1F-1H/ Astra Eutelsat Hotbird Eutelsat Eutelsat Atlantic Hispasat Sirius 4 1KR/1L/ Euro 1E/3A 6/7A/8 bird 3 1C,1D Intelsat bird 1 10-02 28.2E 23.5 E 19.2E 16.0E 13.0W 10.0W 7.0E 5.0E...
- Page 49 Specifications techniques Fréquence d’entrée 10.7 ~12.75GHz Facteur de bruit LNB 0.7 dB Typ 2 sorties, H/V, Bande haute et bande basse Gain antenne @ 12.7 GHz 33.7 dBi 558 X 325 X 58mm Dimensions antenne Largeur à -3dB 2.9° @ 12.7 GHz Commande bande basse / Bande Haute OKHz / 22KHz G/T @ 12.7 GHz...
Need help?
Do you have a question about the MINISAT and is the answer not in the manual?
Questions and answers