Advertisement
Available languages
Available languages
Quick Links
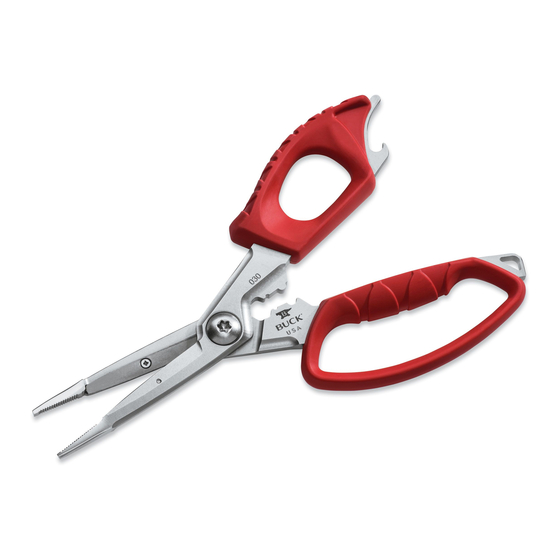
0 3 0 S P L I Z Z O R S
Splizzors conveniently
Replaceable
combine the use of
Blades
scissors and pliers
Scissor
to create a versatile
Edges
tool designed for any
fishing task.
REGULAR MAINTENANCE
For smooth opening and closing of the
Splizzors and optimum cutting performance
regular oiling at the end of the day will keep
them in top working condition.
Oil in the three places indicated with a light
oil, such as fishing reel oil or a gun oil:
1. Along the entire length of the blades.
2. In the groove around the flange nut, which allows oil to work into the washers
under the flange nut.
3. The bearings behind the pivot bolt are accessible when the Splizzors are fully
open. Look for the small notch on the handle near the pivot bolt.
Also, wiping a light coating of oil on all metal surfaces will provide increased
protection against rust. This is especially helpful on the plier teeth.
REPLACING THE BLADES
The spare blades are located in the small pocket on the back of the sheath.
Note: Always replace both blades. One is serrated and the other is smooth.
CAUTION! Even if the blades do not cut line or other materials they can
still pose a danger to you. Wear cut resistant gloves when handling the
blades.
You will need a T30 Torx driver, #1 Phillips screw
driver, and either an adjustable wrench or 5/16"
open end wrench.
1. Fully open the Splizzors and loosen the flange
nut only 1/8 to 1/4 of a turn with the wrench.
Thread locking material is used to hold it in place
so it might be difficult. In extreme circumstances
some penetrating oil might be necessary.
2. Loosen the pivot screw 1/8 to 1/4 of a turn with
the T30 Torx driver. Both of these steps are neces-
sary to relieve the pressure on the blades.
Small
Crimp
Large
Plier Tips
Crimp
2
1
3
www.buckknives.com | 800-326-2825 | 660 S. Lochsa Street | Post Falls, ID 83854
Bottle
Opener
Lanyard
R E M O V I N G T H E B L A D E S
Hole
1. Completely remove the screw and set it aside.
2. Flip Splizzors over and remove the other screw.
3. Grasp blade near the plier tips to rotate slightly toward the other blade and pull
to completely remove it. Flip Splizzors over and remove the other blade.
1
INSTALLING NEW BLADES
The cutting performance of the Splizzors requires one
micro serrated blade and one smooth blade. Always
change both blades. Either blade can go in either arm.
1. Slide a new blade into the arm. Secure in place with
the Phillips screw.
Note: Be sure the screw head is flush or below the
top surface of the blade to prevent it from damaging
the cutting edge.
2. With the Splizzors fully open, insert and secure the
other blade in place with a screw.
3. Next tighten the pivot screw. As soon as you start
closing them you should feel some resistance. If they
are too loose cutting performance will be poor. Overly
tight and they will be difficult to open and close.
4. Hold the pivot screw in place with the Torx driver
and tighten the flange nut.
5. Very important! Before closing the Splizzors
hold open with one hand. Relieve the blade to blade
pressure by pressing the plier tips away from each
other using your thumb and index finger. Keeping
them spread; slowly close them by gently squeezing
the handles together.
6. Test cut and if necessary adjust pivot screw and
flange nut.
7. Lubricate the blades, pivot and bearings with light
machine oil.
2
3
1/2
3
4
5
#93117
Advertisement

Summary of Contents for Buck 030
- Page 1 Bottle 0 3 0 S P L I Z Z O R S Opener Splizzors conveniently Lanyard R E M O V I N G T H E B L A D E S Replaceable Hole combine the use of Blades scissors and pliers 1.
- Page 2 0 3 0 S P L I Z Z O R S Décapsuleur Pratiques, les Splizzors Trou à R E T R A I T D E S L A M E S conjuguent les fonctions lanière Lames de pince et de ciseaux remplaçables 1.