Table of Contents
Advertisement
Quick Links
Provided by:
Rentals • Sales • Calibration • Service
RUSKA 7250, 7250i,
PN 3952213
November 2010, Rev. 1, 11/11
© 2010 – 2011 Fluke Corporation. All rights reserved. Printed in USA. Specifications are subject to change without notice.
All product names are trademarks of their respective companies.
Advanced Test
®
Equipment Corp.
7250xi & 7250LP
www.atecorp.com
(800) 404-ATEC
Pressure Controller/Calibrator
Users Manual
Advertisement
Table of Contents

Related Manuals for Fluke Calibration RUSKA 7250

Summary of Contents for Fluke Calibration RUSKA 7250
- Page 1 ® Provided by: Equipment Corp. (800) 404-ATEC Rentals • Sales • Calibration • Service RUSKA 7250, 7250i, 7250xi & 7250LP Pressure Controller/Calibrator Users Manual PN 3952213 November 2010, Rev. 1, 11/11 © 2010 – 2011 Fluke Corporation. All rights reserved. Printed in USA. Specifications are subject to change without notice.
- Page 2 LIMITED WARRANTY AND LIMITATION OF LIABILITY Each Fluke product is warranted to be free from defects in material and workmanship under normal use and service. The warranty period is one year and begins on the date of shipment. Parts, product repairs, and services are warranted for 90 days.
- Page 3 7250 – Change Language mode Hold key for 5 seconds enter gkn001.eps...
-
Page 5: Table Of Contents
Table of Contents Chapter Title Page General Information ................1-1 Introduction ......................1-1 How to Contact Fluke ..................1-1 Safety Information ..................... 1-2 Resuscitation....................1-2 Symbols Used in this Manual ................1-3 General Information ................... 1-3 Features ......................1-3 Fused-Quartz Bourdon Tube Technology ............. 1-3 Mercury-Free ..................... - Page 6 RUSKA 7250, 7250i, 7250xi & 7250LP Users Manual IEEE–488 Interface ..................2-3 Front Panel..................... 2-3 Pneumatics Module .................... 2-4 Measure Mode Pneumatics ................2-6 Reference Port ................... 2-6 Test Port ....................2-6 Vent Procedure ..................2-7 Control Mode Pneumatics ................2-7 Pressure Supply Port .................
- Page 7 Selecting Language ..................4-5 Selecting Mode of Operation ................. 4-5 Simulated Absolute Instruments ............... 4-6 Absolute with Evacuated Reference—Optional for RUSKA 7250 & 7250i only ..............4-6 Main Menu ......................4-6 Controlling Pressure ..................4-7 Setting the Pressure Set-Point ............... 4-7 Entering/Exiting Control Mode ..............
- Page 8 Maintenance ..................6-1 Introduction ......................6-1 Observing the Software Version Number ............6-1 Preventive Maintenance ..................6-1 Initiating the RUSKA 7250’s Self Test ............6-1 Removing the Calibrator’s Cover ..............6-2 Moisture Filter ....................6-3 Particle Filters ....................6-3 Vacuum Pumps ....................6-3 Processor Battery ...................
- Page 9 List of Tables Table Title Page 1-1. Symbols ........................1-3 1-2. RUSKA 7250 Options List ..................1-5 2-1. Conversion Factors ....................2-3 2-2. Solenoid Valves States ................... 2-5 3-1. General Specifications and Parameters ..............3-2 6-1. Electronics Self Test ....................6-2 6-2.
- Page 10 RUSKA 7250, 7250i, 7250xi & 7250LP Users Manual...
- Page 11 Model 7250 DPC Gauge Pneumatics Diagram, 5 to 2500 psig (34 kPa to 17.2 MPa) Full Scale Ranges ..............2-4 2-3. RUSKA 7250 Absolute Pneumatics Diagram to 50 PSIA (340 kPa) FS ....2-5 2-4. RUSKA 7250 Absolute Pneumatics Diagram 3000 PSIA (20.7 MPa) FS .... 2-5 2-5.
- Page 12 RUSKA 7250, 7250i, 7250xi & 7250LP Users Manual 4-25. Menu | Test | Sweep - Menu ................... 4-25 4-26. Menu | Test | Remote - GPIB Menu & Serial1 Menu ..........4-26 4-27. Menu | Test | Shop1 - Menu ................... 4-26 4-28.
-
Page 13: General Information
Introduction This manual contains operation and routine and preventive maintenance instructions for the RUSKA 7250, 7250i, 7250xi and 7250LP Pressure Controller/Calibrator (Calibrator) manufactured by Fluke. The manual will refer to all model numbers of the instrument listed above generically as the Calibrator. Therefore, the information contained in the manual will be applicable to all of the models of the 7250 unless it denotes that the information is only applicable to a specific model number. -
Page 14: Safety Information
RUSKA 7250, 7250i, 7250xi & 7250LP Users Manual Safety Information In this manual, a Warning identifies conditions and procedures that are dangerous to the user. A Caution identifies conditions and procedures that can cause damage to the Product or the equipment under test. -
Page 15: Symbols Used In This Manual
Go to Fluke’s website for recycling information. General Information The RUSKA 7250 uses force-balanced, fused-quartz Bourdon tube technology to provide the precise measurement of pressure. During normal operation, the Calibrator performs in either Measure mode or Control mode. -
Page 16: Universal Power Supply
RUSKA 7250, 7250i, 7250xi & 7250LP Users Manual Universal Power Supply The Calibrators’s universal power supply accepts AC voltages between 100 - 240 VAC. To “reconfigure” the Calibrator for use in another country, the user simply changes the power cord. -
Page 17: Automatic Head Correction
RUSKA 7010, 7215, 7215i and 7215xi, therefore, it can operate from software written for any of these products. The RUSKA 7250 can also be configured to accept existing software written for the RUSKA Series 6000 Digital Pressure Gauge/Controller or the Druck model 510. - Page 18 RUSKA 7250, 7250i, 7250xi & 7250LP Users Manual...
-
Page 19: Theory Of Operation
Chapter 2 Theory of Operation Introduction The Calibrator’s power supply, electronics, pneumatics, and sensor combine to form a complete, stand-alone, measure and control instrument. This Chapter of the manual describes the Calibrator’s component modules and provides a general discussion of each. Primary Transducer Module Pneumatics Module Reference Port... -
Page 20: Electronics Module
RUSKA 7250, 7250i, 7250xi & 7250LP Users Manual Electronics Module Back-Plane Board The Back-plane Board is used to interconnect all of the plug-in electronic boards and distribute power. The Microprocessor Board, the Digital Control Board, and the IEEE-488 Interface all plug into the Back-plane Board. The Front Panel communicates with the Microprocessor Board via cables. -
Page 21: Digital Control Board
Theory of Operation Electronics Module Table 2-1. Conversion Factors Symbol Description Conversion Factor InHg inches of mercury (0 °C) = kPa x 0.2952998 InHg inches of mercury (60 °F) = kPa x 0.296134 KiloPascals = kPa x 1.0 Bars = kPa x 0.01 pounds per square inch = kPa x 0.1450377 Centimeters of water (4 °C) -
Page 22: Pneumatics Module
The valves, filters, and transducers that make up the pneumatics module of a Gauge mode (or Simulated Absolute) RUSKA 7250 are shown in Figure 2-2. The schematics for the Absolute mode RUSKA 7250s are shown in Figures 2-3 and 2-4. - Page 23 APPLY ISOLATION RELEASE ZERO INNER LOOP CONTROL SENSOR Control Section PRIMARY SENSOR VACUUM SENSOR Option gkn004.eps Figure 2-3. RUSKA 7250 Absolute Pneumatics Diagram to 50 PSIA (340 kPa) FS REFERENCE TEST SUPPLY EXHAUST PORT PORT PRESSURE PORT PORT APPLY RELEASE...
-
Page 24: Measure Mode Pneumatics
This sensor provides the barometric offset that allows the Gauge mode Calibrator to function in a simulated Absolute system. A RUSKA 7250 must have a minimum full scale pressure range of 14.7 psig (101 kPa) in order to be configured to operate in the simulated absolute mode using the barometric reference sensor. -
Page 25: Vent Procedure
Theory of Operation Control Strategy Vent Procedure The vent mode is implemented with a fast multi-step procedure. For gauge instruments, the Calibrator controls pressure at the maximum rate towards zero psig. When the primary sensor reads that the pressure is within 1% FS pressure of zero psig, the controller is turned off and the reference zeroing solenoid is opened, which vents the remaining test port pressure to atmosphere. -
Page 26: Normal Mode
This can cause control problems such as overshoot. This can be realigned using the Auto-Tune feature. See Chapter 6, Maintenance, for details on the Auto-Tune functions of the RUSKA 7250. PID Control The outer loop pressure controller is a form of PID control executed every 100 milliseconds (10 times per second). -
Page 27: Transducer Module
Theory of Operation Transducer Module Time - seconds gkn054.eps Figure 2-5. Pressure Control Transducer Module Quartz Bourdon Tube Sensor (Transducer01) The quartz Bourdon tube sensor is mounted in a machined aluminum housing. The sensor consists of a helical quartz tube with a mirror affixed to one end, as shown in Figure 2-6. A rigid beam is attached transverse to the axis of the helical tube. -
Page 28: Sensor Board
RUSKA 7250, 7250i, 7250xi & 7250LP Users Manual FUSED QUARTZ BOURDON TUBE AXIS OF ROTATION MIRROR TORSION HINGE ELECTROMAGNETIC COIL FLEXURE PERMANENT MAGNET gkn008.eps Figure 2-6. Shaft/Magnet Section PHOTOCELLS LEFTHAND RIGHTHAND SHIFTING SPOT OF LIGHT, SHOWN AT PHOTOCELLS GENERATE VOLTAGE... -
Page 29: Auxiliary Sensors
Menu | Display. With an exception of the 3000 psi (20.7 MPa) version RUSKA 7250, the high accuracy quartz sensor is housed in a temperature controlled oven. There is a 3 hour warm-up time required prior to the Calibrator operating at its optimum precision. -
Page 30: Pressure Reading And Correction
RUSKA 7250, 7250i, 7250xi & 7250LP Users Manual thermally stable by viewing the Menu | Display screen and verifying that the temperature is at 50 C. In addition to the temperature, this screen will show the duty cycle of the oven. -
Page 31: Range Coefficients
Theory of Operation Software Hardware zero correction. (0 to 4095, center is 2048). Zero corrections scaling factor. Ratio of High FSR to Low FSR. Used only when Case Effect Coefficient or Oven Temperature Coefficient are non-zero. s=0 for high range sensor, s=1 for low range sensor. Range Coefficients 0=Range Unused 4=Valid High FSR Range... - Page 32 RUSKA 7250, 7250i, 7250xi & 7250LP Users Manual 2-14...
-
Page 33: Installation
If necessary, report any shipping damage to the freight agency. Remove all shipping and packing materials (including the shipping plugs) from all components. If possible, save the packing materials for future shipping needs. Finally, install the RUSKA 7250 in a location that meets the requirements listed in Table 3-1. Note The DPC should be handled in such a way as to minimize mechanical shocks or vibration during installation or use. -
Page 34: Cautions
RUSKA 7250, 7250i, 7250xi & 7250LP Users Manual Table 3-1. General Specifications and Parameters Parameter Value Model Operating Humidity 5–95%RH, noncondensing Storage Humidity none* Operating Temperature 18 to 36 °C Storage Temperature -20 to 70 °C Electrical Power 100 – 120/220 – 240 VAC... -
Page 35: Observing The Calibrator's Full Scale Rating
Installation Observing the Calibrator’s Full Scale Rating Observing the Calibrator’s Full Scale Rating To observe the Calibrator’s full scale rating, 1. Press Previous until the Main Menu appears. 2. Select Menu | Test | Electrical. The Calibrator’s full scale pressure rating (FS) will appear on the screen (in the currently selected units of measure). -
Page 36: Reference Port
RUSKA 7250, 7250i, 7250xi & 7250LP Users Manual Reference Port The reference port is open to atmosphere for gauge measurements or it can be connected to the Reference Port of the Device Under Test. Instruments with a low full-scale pressure range require special handling to assure the performance of the instrument. -
Page 37: Vacuum Sensor-Option
Figure 3-1. RUSKA 7250 Back Panel Vacuum Sensor—Option The RUSKA 7250 is also available with a vacuum sensor option. On a permanent absolute instrument, this sensor is used to zero the RUSKA quartz sensor at a high vacuum. On a Calibrator that has the Evacuated Reference Option, this vacuum sensor is used to monitor the vacuum level in the reference port when the reference port is pulled to a hard vacuum allowing the Calibrator to operate in the absolute mode. - Page 38 RUSKA 7250, 7250i, 7250xi & 7250LP Users Manual...
-
Page 39: Local Operation
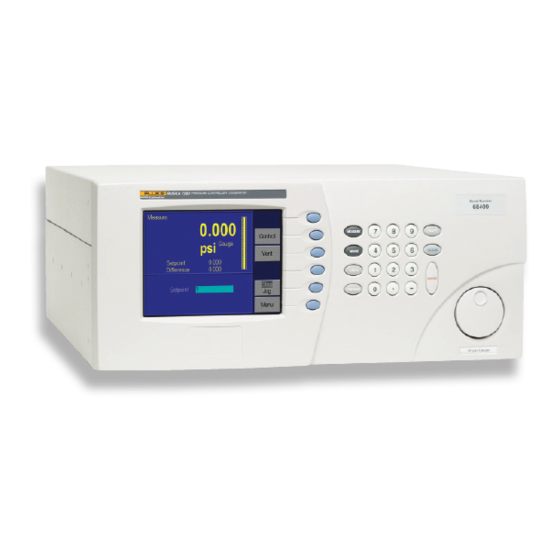
Local Operation Introduction This section of the manual describes operation of the RUSKA 7250 using the front panel. The local interface (front panel) consists of a color TFT display, a rotary knob and a set of keys. The display shows the system status and menu options. The keys are grouped according to function. -
Page 40: Cancel, Previous
RUSKA 7250, 7250i, 7250xi & 7250LP Users Manual Cancel, Previous These keys are used to stop, undo, or exit the current operation. The CANCEL key returns all edited fields on the current entry screen to their original values. It also stops the current program sequence or calibration process. -
Page 41: Tutorial
To go to one of the menus, press the [F6] key. Tutorial To begin the tutorial, first verify that the RUSKA 7250 is powered-up and that the pneumatic connections have been completed. The Calibrator should display a screen similar to the one shown below. - Page 42 The display will return to the MAIN screen with the current units. The second part of this tutorial uses the RUSKA 7250 to generate pressure. The pressure supply must be connected and the test port must be connected to a closed volume, in accordance with Chapter 3, Pneumatic Connections, of this manual.
-
Page 43: Selecting Language
Measure mode. No confirmation is necessary to leave Control mode. Selecting Language The RUSKA 7250 can operate in a variety of different languages. To select a different language, press the MODE key two times MODE, MODE. The current language will be highlighted. -
Page 44: Simulated Absolute Instruments
Tare function. Absolute with Evacuated Reference—Optional for RUSKA 7250 & 7250i only The RUSKA 7250 is a gauge mode instrument when the reference port is open to atmosphere. It can also operate in the absolute mode by evacuating the reference port with an external high capacity vacuum pump. -
Page 45: Controlling Pressure
Local Operation Controlling Pressure gkn019.bmp Figure 4-8. Functions in Main Menu Note For Calibrators with pressure ranges greater than 100 psi (700 kPa), the supply pressure port must be plugged or connected to a properly set pressure supply in order to measure pressure greater than 100 psi (700 kPa). -
Page 46: Vent
This function is not available on permanent absolute versions of the RUSKA 7250. Step/Jog In addition to entering the pressure set-point through the key-pad, the pressure set-point can be changed using either the step or the jog functions. -
Page 47: Menu | Setup
Local Operation Menu gkn020.bmp Figure 4-9. Configurations in Menu Menu | Setup Setup is used to configure the system. It includes setting all of the limits, user parameters, user-defined units of measure, remote interface and system setup. gkn040.bmp Figure 4-10. Menu l Setup - Menu Menu | Setup—Limits The Menu | Setup | Limits menu is used to setup all of the limits in the system. - Page 48 Control Band There are two common pressure control approaches that are available with the RUSKA 7250. One of the most common control styles is an Active controller where the controller remains operative and holds the pressure at a commanded set-point. This allows the system to hold the pressure at a set-point within the control stability specification (See Appendix A).
- Page 49 Slew Rate User defined maximum pressure rate of change. The RUSKA 7250 is designed to control with minimum overshoot into a wide variety of external volumes at its highest slew rate. Therefore, in most applications it is recommended that the slew rate be set at its maximum rate value.
-
Page 50: Menu | Setup-User
Access The test access password allows the user to protect access to the RUSKA 7250’s configuration and programs. If the test access password is set to any number other than zero (factory default), it is required before the user is allowed to change the limits, control parameters or programs. - Page 51 Calibrator automatically corrects for head pressure. 1. The Pressure Reference Line on the RUSKA 7250 is defined as the bottom of the color display where the display and the front panel join. This provides the reference plane against which the device under test (DUT) pressure is measured.
-
Page 52: Menu | Setup-Units
RUSKA 7250, 7250i, 7250xi & 7250LP Users Manual Key Click The RUSKA 7250 can be configured to emit a “clicking” sound each time a key is pressed. 1. The key “click” is set from the Menu | Setup | User. From the Main Menu (press Previous until the Main Menu appears), press Menu [F6] | Setup [F2] | User [F2]. -
Page 53: Menu | Setup-Remote
Local Operation Menu gkn024.bmp Figure 4-14. Menu | Setup | Units | Edit Name - Menu Use the < [F4] or > [F5] key to highlight the desired character in the matrix. a. Use the rotary knob to change the character. b. -
Page 54: Menu | Setup-System
6000 to emulate the RUSKA Series 6000 Pressure Controller, and 510 to emulate the Druck Model 510 Pressure Controller. When using the SCPI interface, the RUSKA 7250 will emulate the RUSKA 7010 and 7215 Series Controllers. Serial Interface Set-Up The operator can set-up the Baud Rate, Data Bits, Parity, and Stop Bits for the Serial Interface. -
Page 55: Menu | Calibrate
The optional vacuum gauge sensor should be installed in a port that is located internally to the RUSKA 7250 very near to the RUSKA quartz sensor. See Chapter 3, Pneumatic Connections, Vacuum Sensor - Option, for proper vacuum gauge installation instructions. -
Page 56: Menu | Program-Storing A Sequence In Memory
The RUSKA 7250 can store up to 1,000 program steps that may be divided among a maximum of 20 named programs. -
Page 57: Entering A New Program
Figure 4-17. Menu | Program - Menu 3. Use the rotary knob to highlight “new”. 4. Press Edit [F4]. Since “new” was highlighted, the RUSKA 7250 will create a new program and give a default name of NAMEnn, where nn is a two digit number. The program editing screen will appear, displaying the first step. -
Page 58: Automatically Generating A Program
4. Press Edit [F4]. Since “new” was highlighted, the RUSKA 7250 will create a new program and give a default name of NAMEnn where nn is a two digit number. The program editing screen will appear, displaying the first step. -
Page 59: Changing The Name Of A Program
Local Operation Menu gkn029.bmp Figure 4-19. Menu | Program | Edit | Auto - Menu 6. Using the numeric keypad, enter the values for Start, Stop, Tolerance, Dwell time, Max time, number of pressure Points up, and number of pressure Points down, pressing ENTER after each value. -
Page 60: Changing An Existing Program
RUSKA 7250, 7250i, 7250xi & 7250LP Users Manual 5. Use the < [F4] and > [F5] keys to highlight a character. 6. Turn the rotary knob to select the character from the character set. 7. To correct a mistake, press Clear [F4] and return to step 5. -
Page 61: Running A Program
Local Operation Menu 3. Press Config [F3]. The configuration screen will appear. 4. Press Recall [F2]. The Calibrator will be set to the configuration stored with the program. gkn032.bmp Figure 4-22. Menu | Program | Config - Menu 5. Press PREVIOUS until the Main Menu appears. 6. -
Page 62: Menu | Test
Figure 4-23. Menu l Program l Run - Menu 4. Press Run [F2]. The configuration of the RUSKA 7250 stored with the program is restored, the pressure set-point is set to the pressure value in the first step, and the Calibrator is placed in Control mode. -
Page 63: Menu | Test-Sweep Test
The sweep function can be used to automatically exercise the elastic sensing element of the device under test prior to performing a calibration. For the RUSKA 7250 to perform the sweep test, input the high and low set-point pressures, the pressure control tolerance, the dwell time at set-point, and the number of cycles to perform. -
Page 64: Menu | Test-Remote Test
RUSKA 7250, 7250i, 7250xi & 7250LP Users Manual Menu | Test—Remote Test The Menu | Test | Remote section of the system is used to perform a number of the diagnostic functions on the remote interface. It can be used to display the transmitted and received messages that are sent across the interface. -
Page 65: Menu | Display
Local Operation Menu gkn038.bmp Figure 4-28. Menu | Test | Controller - Menu Menu | Display The Menu | Display is used to conveniently monitor most of the sensor output parameters. It is primarily used for troubleshooting. gkn039.bmp Figure 4-29. Menu l Display - Menu Menu | Display—Blank Menu | Display—Blank is used as a screen saver in the 7250. - Page 66 RUSKA 7250, 7250i, 7250xi & 7250LP Users Manual 4-28...
-
Page 67: Remote Operation
Chapter 5 Remote Operation Capabilities The RUSKA 7250 can be operated remotely by a computer. Two interfaces are supported: IEEE-488 and RS-232. Both interfaces support SCPI (Standard Commands for Programmable Instruments). The IEEE-488 interface additionally supports emulation of a RUSKA Single Channel Interface Panel (Models 6005-701 and 6005-761). The IEEE-488 interface conforms to the following standards: ANSI/IEEE Std 488.1-1987... -
Page 68: Remote/Local Operation
1 or 2 Handshaking XON/XOFF The RS-232 connection is a DB-9P connector found on the back panel of the RUSKA 7250. It is located on the processor board. The following pins are used; all other pins are reserved. Pin # Direction... -
Page 69: Device Messages
Remote Operation Device Messages To configure the remote interface: 1. The remote interface is configured from the Setup | Remote | Menu. From the Main Menu (press PREVIOUS until the Main Menu appears), press Menu [F6] | Setup [F2] | Remote [F4]. 2. -
Page 70: Ansi/Ieee 488.2-1987 Command Summary
RUSKA 7250, 7250i, 7250xi & 7250LP Users Manual ANSI/IEEE 488.2-1987 Command Summary *CLS Clear Status *ESE? Event Status Enable Query *ESE <number> Event Status Enable *ESR? Event Status Register *IDN? Identification *OPC? Operation Complete Query (Returns 1) *OPC Operation Complete... - Page 71 Remote Operation Device Messages...
-
Page 72: Example Scpi Commands
RUSKA 7250, 7250i, 7250xi & 7250LP Users Manual Example SCPI Commands To request the current pressure reading, all of the following commands are equivalent: :MEASURE:PRESSURE? :measure:pressure? :MeAsUrE:pReSsUrE? :meas:pres? :measure? :meas? MEAS? To set the control pressure set-point to 50, all of the following commands are equivalent: SOURCE:PRESSURE:LEVEL:IMMEDIATE:AMPLITUDE 50 SOUR:PRES:LEV:IMM:AMPL 50.0... -
Page 73: Scpi Status Registers
Remote Operation Device Messages To zero the unit via the remote interface use the following sequence: CAL:ZERO:INIT Enter Zero Mode CAL:ZERO:INIT? Read Status (Mode, Pressure, Temperature, Reference) and Wait Until Stable. CAL:ZERO:RUN Start Zero Adjust Sequence STAT:OPER:COND? Wait Until Complete (Bit 0 = 0) SCPI Status Registers Three types of status registers are available: Condition, Event, and Enable. - Page 74 RUSKA 7250, 7250i, 7250xi & 7250LP Users Manual Standard Event Status Register (ESR), Standard Event Status Enable Register (ESE) Bit 7 Power-on. Set at power-up. Bit 6 Reserved 0. Bit 5 Command error. Error in command syntax. Bit 4 Execution error. Error in command execution.
-
Page 75: 6005 Interface Panel Emulation
6005 Interface Panel Emulation 6005 Interface Panel Emulation The RUSKA 7250 may be configured to emulate the IEEE-488 command set of the RUSKA Single Channel Interface Panel (Models 6005-701 and 6005-761). See the Interface Panel User’s Manual for a description of the protocol. The RUSKA 7250 emulation has the following differences: 1. -
Page 76: Response Formats
RUSKA 7250, 7250i, 7250xi & 7250LP Users Manual Unlock keyboard R1,R2 Lock keyboard S0,S1,S2,S3 Set pre-programmed units Turn off Tare mode Turn on tare mode to value set to B (B must be set first) U1 to U23 Set S4 units (if S4 is selected this will change current units immediately) V<value>... -
Page 77: Units
Remote Operation Sample Programs Units Unit Number Unit Name RUSKA display units mbar kg/cm2 kg/cm kg/m2 kg/cm mmHg mmHg 0 cmHg cmHg 0 cmHg 0 mmH2O cmH2O mH2O torr mmHg 0 lb/ft2 inHg inHg 0 "H2O04 'H2O04 SPEC'L User Defined 1 "H2O20 O 20 'H2O20... - Page 78 RUSKA 7250, 7250i, 7250xi & 7250LP Users Manual / * G P I B A d d r e s s o f 7 0 1 0 * / N O _ S A D , / * N o s e c o n d a r y a d d r e s s i n g * /...
-
Page 79: Sample Program 2 - 7250 Gpib (Ieee-488)
Remote Operation Sample Programs / * - - - - - - - - - - - - - - - - - - - - - - - - - - - - - - - - - * / / * C h e c k f o r G P I B I n t e r f a c e E r r o r s * / / * - - - - - - - - - - - - - - - - - - - - - - - - - - - - - - - - - * / i f ( i b s t a &... - Page 80 RUSKA 7250, 7250i, 7250xi & 7250LP Users Manual d e v i c e = i b d e v ( 0 , / * F i r s t G P I B B o a r d * /...
- Page 81 Remote Operation Sample Programs g o t o x y ( 2 0 , 7 ) ; i f ( r s t a t = = 0 ) c p r i n t f ( " S t a b l e " ) ; e l s e i f ( r s t a t <...
-
Page 82: Sample Program 3 - 7250 Serial (Rs-232)
RUSKA 7250, 7250i, 7250xi & 7250LP Users Manual i b w r t ( d e v i c e , s , s t r l e n ( s ) ) ; / * - - - - - - - - - - - - - - - - - - - - - - - - - - - - - - - - - - - - - - - - - - - - - - - - - - - - - - - - - - - - - - - - - - - - * /... - Page 83 Remote Operation Sample Programs P R E S : T O L 0 . 0 0 1 S e t c o n t r o l t o l e r a n c e t o 0 . 0 0 1 % F S * / O U T P : M O D E C O N T R O L E n t e r c o n t r o l m o d e / * - - - - - - - - - - - - - - - - - - - - - - - - - - - - - - - - - - - - - - - - - - - - - - - - - - - - - - - - - - - * / w r i t e _ 7 0 0 0 _ s e r i a l ( "...
- Page 84 RUSKA 7250, 7250i, 7250xi & 7250LP Users Manual / * - - - - - - - - - - - - - - - - - - - - - - - - - - - - - - - - - - - - - - - - - - - - - - - - - - - - - - - - - - - - - - - - - - - - * /...
-
Page 85: Sample Program 4 - Qbasic
Remote Operation Sample Programs o u t p o r t b ( p o r t b a s e , c h ) ; / * - - - - - - - - - - - - - - - - - - - - - - - - - - - - - - - - - - - - - - - - - - - - - - - - - - - - - - - - - - - - - - - - - - - - * / / * w r i t e _ 7 0 0 0 _ s e r i a l : w r i t e a s t r i n g t o t h e c o r r e c t 7 2 5 0 / * - - - - - - - - - - - - - - - - - - - - - - - - - - - - - - - - - - - - - - - - - - - - - - - - - - - - - - - - - - - - - - - - - - - - * / v o i d w r i t e _ 7 0 0 0 _ s e r i a l ( c h a r * s ) - Page 86 RUSKA 7250, 7250i, 7250xi & 7250LP Users Manual 5-20...
-
Page 87: Maintenance
Chapter 6 Maintenance Introduction Very little maintenance is required for the RUSKA 7250. This section of the manual discusses suggested maintenance procedures. XWWarning To prevent possible electrical shock, fire, or personal injury: • Disconnect the mains power cord before you remove the Product covers. -
Page 88: Removing The Calibrator's Cover
Replace control PCB Removing the Calibrator’s Cover The RUSKA 7250 should be kept clean and completely assembled at all times. Operating the Calibrator without its cover affects the Calibrator’s thermal gradients and therefore may reduce precision. If it becomes necessary to remove the RUSKA 7250’s cover, follow the instructions below. -
Page 89: Moisture Filter
Refer to Appendix A for air supply quality requirements. During normal operation, the RUSKA 7250 transfers gas both into and out of the device under test (DUT). When necessary, the user is expected to use and maintain an in-line disposable particle filter to protect the Calibrator’s pneumatics from any contamination that may exist in the DUT. -
Page 90: Calibration Instructions
Users Manual Calibration Instructions To calibrate the RUSKA 7250, the user connects a calibration standard such as the RUSKA Instrument Model 2465 (or 2470 for high pressure ranges) Gas Piston Gauge to the Calibrator’s test port, then follow the multi-step calibration procedure on the Calibrator’s display. - Page 91 Calibrator. The number of pressure points required to calibrate the RUSKA 7250 will vary based on whether the Calibrator is a RUSKA 7250, 7250i or 7250xi and if it has a vacuum (negative gauge) option. The screen will display a table noting the following information;...
-
Page 92: Storing The Coefficients
RUSKA 7250, 7250i, 7250xi & 7250LP Users Manual Note If the RUSKA 7250 has the Vacuum (Negative Gauge Option) or the Barometric reference, the first two points in the procedure will show the negative pressures that should be generated to calibrate the sensor in the negative gauge direction. -
Page 93: Vacuum (Negative Gauge) Calibrations
Maintenance Calibration Step 5 1. Press PREVIOUS to return to the Main Menu. 2. Once the calibration procedure is complete, the user should verify several pressure readings against the pressure standard. If there are variances beyond the stated precision, then an error was probably made in generating one of the calibration pressures, and the calibration procedure should be repeated. -
Page 94: Barometric Reference Calibration - Simulated Absolute
The first Calibration screen will appear. 7. You will use the calibration standard to apply the various pressures that will be requested by the RUSKA 7250. The screen will display a table noting the following information;... -
Page 95: Editing The Calibration Coefficients
14. Reinstall the cover onto the Calibrator. Editing the Calibration Coefficients If the RUSKA 7250’s memory is erased but the calibration coefficients are known, the user can restore the coefficients to the Calibrator by following the directions below. W Caution Never randomly adjust the calibration coefficients. -
Page 96: Zeroing
CLEAR key. 7. Repeat steps 4 and 5 until all coefficients are correct. Note In addition to saving the calibration coefficients to the RUSKA 7250’s memory, separately record the calibration coefficients and store this “backup” in a safe place. -
Page 97: Permanent Absolute Instruments
Maintenance Calibration gkn043.bmp Figure 6-4. Zeroing Menu 4. Do not disturb the instrument while zeroing is in process. 5. Wait for the zeroing procedure to finish. gkn044.bmp Figure 6-5. Zero Set 6. Press PREVIOUS to return to the Main Menu. Permanent Absolute Instruments This section details how to set up Permanent Absolute Instruments or Absolute with Evacuated Reference option. -
Page 98: Rpt-Simulated Absolute Instruments
100 mTorr) in order to obtain a proper zero. The Calibrator can be zeroed at higher vacuum levels; however, the uncertainty of vacuum sensors tend to increase at higher vacuum levels, therefore, the uncertainty in the RUSKA 7250 would also increase if zeroed at higher vacuum levels. - Page 99 Maintenance Sensor Photocell Zeroing 3. Enter the Zeroing screen by selecting MENU | CALIBRATE. 4. Select the Primary sensor by pressing the Sensor [F6] key until the word Primary is displayed above the calibration coefficients. 5. Select Zero [F1]. Do NOT press the Calibrate button. 6.
-
Page 100: Mechanical Zero Of The Ruska 7250Xi
RUSKA 7250, 7250i, 7250xi & 7250LP Users Manual gkn047.bmp Figure 6-8. Correct Adjustment of Photocell Centering Bar 9. Tighten the Allen screw. 10. Often, when the Allen screw is tightened, the zero will move. Review the width of the yellow line, again loosen the Allen screw, and now offset the yellow bar the same width that you observed it moving from tightening the Allen screw, and now offset it in the opposite direction by this same width. -
Page 101: Optimizing Control
Auto-tune. There are two options available to the operator. Full—this fully characterizes the control function of the RUSKA 7250. It automatically adjusts the control valve biases and aligns the inner loop high control pressure sensor to the high accuracy quartz sensor. This should be performed any time major components are replaced in the controller such as the control valves or the high-speed inner loop control sensor. -
Page 102: Fan Operation
Auto-Tune should be run to characterize the new hardware. Fan Operation The fan in the RUSKA 7250 can be turned on or off. It is recommended to keep the fan ON since this will extend the life of the power supply. -
Page 103: System Software Update Procedure
Maintenance System Software Update Procedure should indicate a sensor temperature of 50 C and a duty cycle between 10 to 90%. If operating the instrument in a very cold environment and the oven duty cycle is at a high percentage (>90%) you will need to turn the fan off. If you are operating in a warm environment or when multiple systems are housed in consoles without adequate ventilation, the system may become too hot and generate the oven control failure error message. -
Page 104: Ruska 7250 Controller Software Upgrade
Users Manual RUSKA 7250 Controller Software Upgrade In addition to the main code, the RUSKA 7250 includes code for the pressure controller. The controller software version can be viewed by pressing the MENU | TEST | REMOTE | SERIAL2 keys. The controller software version is displayed next to “Ctrl”. This code can be upgraded through the RS-232 port on most units. -
Page 105: Cleaning
Maintenance Cleaning Table 6-3. RUSKA 7250 Additional Parts Part Number Description 3878948 7250xi isolation manifold valve body 3915651 7250xi isolation manifold valve coil 3879016 Display Upgrade Kit 3876760 Sensor LED Lamp Assembly 3908093 Sensor Photocell 3878975 Photocell Adjustment Tool 3865784... - Page 106 RUSKA 7250, 7250i, 7250xi & 7250LP Users Manual 6-20...
-
Page 107: Preparation For Storage & Shipping
1. Relieve all pneumatic pressure from the Calibrator. 2. Turn the Calibrator power switch to the Off position. 3. Disconnect the power cable from the Calibrator power receptacle. 4. Disconnect all pneumatic lines and fittings from the RUSKA 7250’s back panel. 5. Plug all ports. Packing Instructions To prevent shipping and handling damage to the instrument, adhere to and strictly follow the instructions below. - Page 108 If the original packaging and shipping materials have been retained, use them for packing the RUSKA 7250. If the Calibrator is being packed for long-term storage (more than 30 days), place a desiccant bag inside the box.
- Page 109 8. Label the carton with the following labels: THIS SIDE UP, HANDLE WITH CARE, DO NOT DROP, and FRAGILE. (If the original Fluke shipping carton is utilized for this shipment, the above markings are preprinted on the carton.) gkn049.bmp Figure 7-1. Packing the RUSKA 7250...
-
Page 110: Shipping Instructions
RUSKA 7250, 7250i, 7250xi & 7250LP Users Manual Shipping Instructions Fluke recommends using air freight for transportation. Surface transportation subjects the shipment to more frequent handling and much more intense shock. In most cases, if surface transportation is the mode of transport employed, handling damage is likely. -
Page 111: A Summary Of Specifications
Appendix A Summary of Specifications Uncertainty Analysis To perform an Uncertainty Analysis on a measurement device, you must be able to identify all of the parameters that influence the measurement. You must be able to quantify the magnitude of the potential error source and combine these into an overall uncertainty statement. - Page 112 RUSKA 7250, 7250i, 7250xi & 7250LP Users Manual Long Term Stability Long term stability defines how the instrument drifts with time. This specification can be utilized to define the calibration interval for the standard. Some manufacturers will provide more than one stability specification for their instrument based on different calibration time intervals.
- Page 113 In this approach, it is important to define the level of confidence that all of the uncertainty components are defined. For instance, all of the uncertainty specifications that Fluke Calibration publishes are at the 2 sigma level which would be at a 95% confidence level. Some manufacturers may state their uncertainty at different confidence level and therefore, you would need to be able to convert from one to the other in order to compare the two devices.
- Page 114 RUSKA 7250, 7250i, 7250xi & 7250LP Users Manual The following two tables are uncertainty analysis examples for a RUSKA 7250xi based on a three month and a yearly calibration. Table A-1. Uncertainty Analysis for RUSKA 7250xi—Three Month Analysis Uncertainty Analysis – 3 Month Calibration Interval...
- Page 115 Uncertainty Analysis The following two tables are uncertainty analysis examples for a single range RUSKA 7250 based on a three month and a yearly calibration. Table A-3. Uncertainty Analysis for RUSKA 7250—Three Month Analysis Uncertainty Analysis – 3 Month Calibration Interval...
- Page 116 Dimensions: 7" H x 16.5" W x 19" D (17.8 cm x 41.9 cm x 48.3 cm) Weight: RUSKA 7250 & 7250i: 17 lb (7.7 kg) RUSKA 7250xi: 20 lb (9 kg) Standard Pressure Units: inHg at 0 °C and 60 °F, kPa, bar, psi, inH...
- Page 117 Summary of Specifications Specifications Performance Table A-5. Performance Specifications: RUSKA 7250 Pressure Range 5–1000 psi 1000–2500 psi 15–50 psi 3000 psi (0.34–68.9 bar) (68.9–172 bar) (1–3.45 bar) (210 bar) Mode Gauge Gauge Absolute Gauge Precision 0.003% FS 0.003% FS 0.003% FS 0.01% FS...
- Page 118 RUSKA 7250, 7250i, 7250xi & 7250LP Users Manual MODEL RUSKA 7250i RUSKA 7250xi MODE GAUGE GAUGE Precision From 25% to 100% FS: 0.005% RDG From 5% to 100%FS: 0.005% RDG Below 25%FS: 0.005% of 25%FS Below 5%FS: 0.005% of 5%FS Neg.
-
Page 119: B Summary Of Error Messages
Appendix B Summary of Error Messages Summary of Error Messages Negative error numbers are from the Standard Commands for Programmable Instruments (Version 1991.0). Table B-1. Summary of Error Messages Value Description and Corrective Action No Error. -103 Invalid Separator. Check punctuation in the SCPI command. -104 Data Type. - Page 120 RUSKA 7250, 7250i, 7250xi & 7250LP Users Manual Summary of Error Messages, cont. -315 Configuration Data Lost. The configuration data has been lost. Check all parameters to be sure they are correct. -330 Self-Test Failed. Check the display for the test that failed.
Need help?
Do you have a question about the RUSKA 7250 and is the answer not in the manual?
Questions and answers