Table of Contents
Advertisement
Quick Links
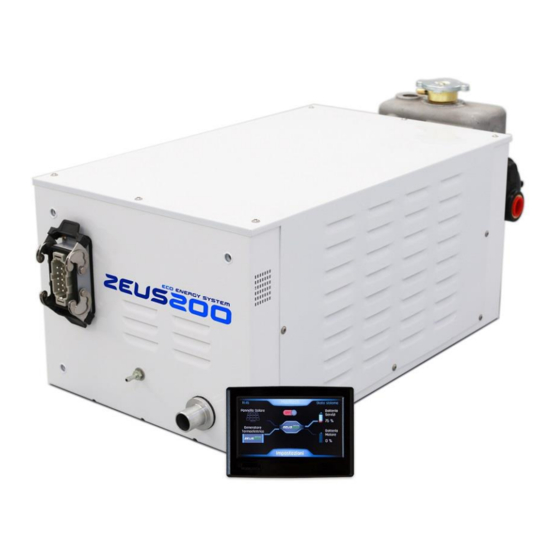
Thermoelectric Generator
INSTALLATION MANUAL
ZEUS200 BD
Power Supply: Diesel
IMPORTANT
As reported in the warranty conditions available on our
website, the warranty becomes void if the instructions in the
installation manual are disregarded.
More information can be found on chapter 6 of this manual.
Advertisement
Table of Contents

Summary of Contents for Mobiltech ZEUS200
- Page 1 Thermoelectric Generator INSTALLATION MANUAL ZEUS200 BD Power Supply: Diesel IMPORTANT As reported in the warranty conditions available on our website, the warranty becomes void if the instructions in the installation manual are disregarded. More information can be found on chapter 6 of this manual.
-
Page 2: Table Of Contents
Zeus200 Installation manual SUMMARY Introduction ......................... 3 Security information ....................3 1.1.1 Destination of use (intended purpose) ..............3 1.1.2 Safety and correct mounting ................3 1.1.3 General rules ..................... 4 1.1.3.1 Positioning of the display / control panel ............4 1.1.3.2... -
Page 3: Introduction
Security information 1.1.1 Destination of use (intended purpose) The Zeus200 generator has been designed for electricity production; it is able to recharge the batteries of campers and caravans during the static use of the vehicle. Any other type of use causes the immediate loss of legal and / or commercial warranty. -
Page 4: General Rules
1.1.3.3 Fuel supply • Zeus200 generator is designed to use the fuel present in the vehicle's tank. Check the compatibility of the generator model purchased with the fuel in the vehicle tank. • When using a separate fuel tank separate, the filler neck must not be placed in the passenger compartment and must be fitted with a perfect closing cap to prevent leakage. -
Page 5: Exhaust Gas
1.1.3.9 Safety rules for assembly and operation • The Zeus200 generator can be assembled, verified and repaired only by the Mobil Tech authorized personnel, in compliance with these assembly instructions or, if necessary, with particular assembly instructions. •... -
Page 6: Certifications And Approvals
Faulty fuses must be replaced with fuses of the prescribed value. • It is not alllowed to use the Zeus200 generator in the presence of highly flammable materials in the area of the drain pipe or where flammable vapors or dusts may occur, for... -
Page 7: Package Contents
Zeus200 Installation manual 1.3 Package contents The package contains the following elements: 1. 1 generator 2. 1 power unit 3. 1 display unit 4. 1 external water pump 5. 1 water filter 6. 2 fittings from ¾ Inch to rod holder 7. -
Page 8: Mounting
Zeus200 Installation manual Mounting 2.1 Generator 2.1.1 Components list Code Description Z200BD12 Zeus200 generator 1 pc Envelope #1: Code Description Z200-10-001 Inox generator bracket 50x150mm thickness 4mm 4 pcs Z-01-011 Screw Hexagonal head M8x20mm A4 4 pcs Z-01-025 Washer 9x24x2mm A4 4 pcs V 1.0.7 - 12/10/2020... -
Page 9: Mounting Instruction
5- Make sure that there are no objects inside the installation compartment that can move and hit the Zeus200 generator. 6- To install the Zeus200 generator, use the 4 brackets (2), fixing them with screws (3) and washers (4) or create a supporting structure suitable to support the weight. -
Page 10: Filter And External Pump
Zeus200 Installation manual 2.2 Filter and external pump 2.2.1 Components list Code Description Z200-07-013 Water filter 1 pc Z200-07-010 External cooling pump 1 pc Z200-03-014 Hose connection from ¾ to 20mm 2 pcs 2.2.2 Mounting instruction 1. Starting from the seacock group with safety tap, which must be positioned below the waterline, fit the supplied water filter (1). - Page 11 Zeus200 Installation manual 3. Connect the external water pump to the exchanger of the Zeus200 generator using anti- crushing spiral pipes not supplied and the fitting (3). Use the second fitting supplied (3) at the outlet of the exchanger to connect a second pipe in order to allow the cooling water to flow out of the hull through a sea discharge.
-
Page 12: Exhaust Gas Line
3. Connect the supplied steel tube (2) of 28mm L2mt. between the Zeus200 generator outlet (C) and the exhaust silencer (1), as shown in the following diagram. The tube can be stretched up V 1.0.7 - 12/10/2020... -
Page 13: Fuel Supply Line
Zeus200 Installation manual to a maximum of 3m. In order to optimize the noiselessness of the drain, it is advisable not to use pipes less than 1m long. 4. Fix the exhaust silencer in a stable way using the bracket (3) with screw (6), washer (7) and nut (8), taking care that no part can interfere or be damaged due to the heat produced by the drain. - Page 14 Be very careful if existing draft lines are used as an inadequate passage of fuel leads to malfunctions or a low performance of the Zeus200 generator. 5. The maximum length of the tube B between the pump and the Zeus200 generator must be 6 meters 6.
-
Page 15: Electrical System
Zeus200 Installation manual 2.5 Electrical system 2.5.1 Components list Code Description Z200-08-002 Power unit 1 pc Z200-11-031 Cable for external pump 4x0.5mm 1 pc Z1/2-08-003 Touch screen display 4,3” 1 pc Z1/1-11-022 Display cable 7 mt 1 pc Z1/2-11-023 Battery cable 2x6mm, l=1.5mt... -
Page 16: Element Identification
Zeus200 Installation manual 2.5.2 Element identification The charging unit must be positioned as close as possible to the primary battery, in a dry place and not subject to high temperatures. The wiring must be oriented downwards, in such a way that no water can be in contact with electronic parts. -
Page 17: Electrical Diagram
Zeus200 Installation manual 2.5.3 Electrical diagram The following figure shows the wiring diagram, with the numbering of the terminals inside the control unit and the number of cable entries to be used for the needed connections. Terminal or Element - Wire... -
Page 18: Generator Connections
The following figure shows the connections to be made inside the power unit Only for Zeus200 24V (Model Z200BD24) The red and black 6mm wires coming from the generator must not be connected to terminals 1 and 2 but to the cable connector. -
Page 19: Display Unit Connections
/ off flow switch dedicated to reading the presence of water. In the event of connection in the event of a water shortage from the seacock, the Zeus200 generator will stop before switching on and the display will indicate the error. -
Page 20: Secondary Battery Connections 12V/24V (Optional)
Installation manual 2.5.9 Secondary battery connections 12V/24V (optional) The Zeus200 generator charges either secondary batteries or both 12V and 24V motors. The cable to the secondary battery (motor) must pass through the cable gland 5. For 12V batteries the section to... -
Page 21: First Start-Up
3. Reconnect the blue rilsan tube previously extracted. Note: for the correct and fast ignition of the Zeus200 generator it is advisable to exit completely the air from the fuel pipes. The ideal condition is confirmed by quietness of the dosing pump and of the uniform drop coming from the rilsan tube close to the generator connection. -
Page 22: Battery Type Selection
Zeus200 Installation manual 2.6.3 Battery type selection The battery type can be selected using the dip-switches in the power unit, as shown in the following figure Battery type selection dip-switches The primary battery type (services) is set using the third and fourth switches, as shown in the following table. - Page 23 Zeus200 Installation manual The setting of the secondary battery type (engine), if connected to the system, takes place using the first two switches, as described in the following table. Position Description @ 12V @ 24V Lead EE_VEoCBatt2=1 14,2V @25°C 28,4V @25°C...
-
Page 24: Installer Menu
To access the Generator Installer menu, activate the Maintenance menu, click the central icon of the Zeus200 generator and enter the password 3105, confirming with OK. In this menu it is possible to display the operating parameters of the heating and cooling system, activate the water pump to verify the cooling system during the first start-up and to activate the fuel pump to purge the supply circuit. -
Page 25: Alarm Pop-Up Reset
Zeus200 Installation manual 3.2 Alarm pop-up reset In the event of hardware errors, it is possible to reset the signal by entering the generator maintenance menu. The error icon will be displayed in red. Reset it by pressing the icon for 3-5 seconds and wait for another 5-10 seconds for the update and the checks performed by the system. -
Page 26: Fault Or Malfunctions
Zeus200 Installation manual Fault or malfunctions The following table shows the most common causes of errors, together with the possible cause and possible solutions. Error Possible cause Possible solution System does not - No power supply - Check the fuse on the charging unit... - Page 27 Display shows - Generator temperature too - Wait for the system to cool down. The “Wait for cooling” high to be able to perform a new Zeus200 generator restarts when the ignition combustion chambers temperatures drop below 100°C. Battery charges too...
-
Page 28: Technical Data
EN60068-2-1 :2007 Standard acoustic tests EN ISO 3744:2010 Note: data subject to change without notice and without changing functionality Warranty The Zeus200 generator is covered by a two-years warranty. Warranty conditions are available on the website www.mobiltech.it References MOBIL TECH SRL...
Need help?
Do you have a question about the ZEUS200 and is the answer not in the manual?
Questions and answers