
Related Manuals for Audiovox PCX-1110XL


Summary of Contents for Audiovox PCX-1110XL
- Page 1 mmp1020(5/14)-6/21 2001.6.21 6:23 PM Page 1 DO NOT PRINT THIS PAGE...
-
Page 2: Table Of Contents
mmp1020(5/14)-6/21 2001.6.21 6:23 PM Page 2 TABLE OF CONTENTS CHAPTER 1 BEFORE USING YOUR PHONE ..1 Package Includes ........2 Handset Description . - Page 3 mmp1020(5/14)-6/21 2001.6.21 6:23 PM Page 4 TABLE OF CONTENTS (CONT’D.) How to Make a Call Using A Stored Phone Number ..26 One-Touch/Two-Touch Dialing ..... . .26 How to Find Your Call Logs .
- Page 4 mmp1020(5/14)-6/21 2001.6.21 6:23 PM Page 6 TABLE OF CONTENTS (CONT’D.) CHAPTER 8 MAKING AN EMERGENCY CALL ..81 Making an Emergency Call ......82 E911 in Lock Mode .
-
Page 5: Package Includes
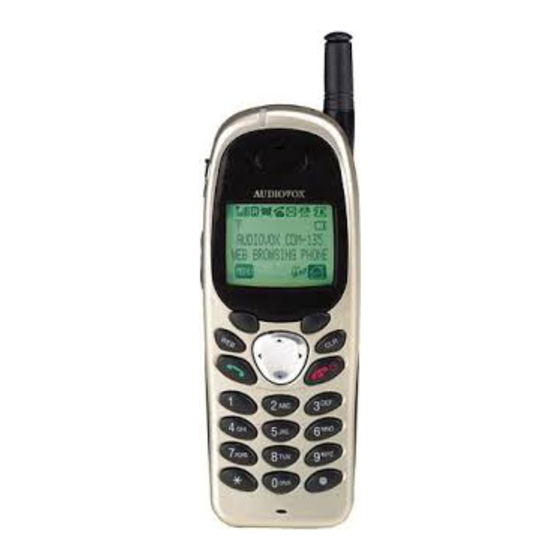
mmp1020(5/14)-6/21 2001.6.21 6:23 PM Page 8 PACKAGE INCLUDES Thank you for purchasing this product. Please check the product contents by comparing them with the following pictures. Handset Desktop Charger Standard Battery User Manual Handstrap Extended Battery(optional) In case there are any product defects, please report them to the place of purchase immediately. -
Page 6: Basic Functions
mmp1020(5/14)-6/21 2001.6.21 6:23 PM Page 10 BASIC FUNCTIONS THE FUNCTION KEYS This key is used to make or receive a call. This key is used to terminate a call or exit the current menu. This key is used to turn the hand- set on or off. -
Page 7: Using The Battery
mmp1020(5/14)-6/21 2001.6.21 6:23 PM Page 12 USING THE BATTERY INSTALLING THE BATTERY Insert the bottom of battery into the groove at the bottom of the handset. Then press in the top of the battery until it snaps. REMOVING THE BATTERY Push the tab with one hand and lift the top of the battery... -
Page 8: Charging The Battery With The Handset
mmp1020(5/14)-6/21 2001.6.21 6:23 PM Page 14 CHARGING THE BATTERY CHARGING THE BATTERY WITH THE HANDSET To charge the battery with the handset, insert the handset into the charger. Charging the battery with the handset on is less efficient than charging it with the handset off. CHARGING COMPLETION Charging is completed when the green-colored LED stays on. -
Page 9: Important Battery Information
mmp1020(5/14)-6/21 2001.6.21 6:23 PM Page 16 IMPORTANT BATTERY INFORMATION Use only batteries and chargers approved by the phone manufacturer. When a charger is not in use, disconnect it from the power source. Do not leave the battery connected to a charger for longer than a week; overcharging may shorten its life. -
Page 10: Turning The Phone On And Off
mmp1020(5/14)-6/21 2001.6.21 6:23 PM Page 18 TURNING THE PHONE ON AND OFF TURNING THE PHONE ON Press [ The phone is locked if “LOCK” is displayed on the screen. When “LOCK” is displayed, enter the 4-digit lock code to unlock the phone. -
Page 11: Menu Summary
mmp1020(5/14)-6/21 2001.6.21 6:23 PM Page 20 MENU SUMMARY CHECK BILLING 2 : PHONE BOOK 1 : CALL LOGS 1 : MISSED CALL 2 : ANSWERED CALL 3 : DIALED CALL 2 : BY LOCATION 3 : BY NAME 3 : SCHEDULE 1 : LIST ALL 2 : INPUT SCHEDULE 3 : PAUSE ALL... -
Page 12: Basic Functions
mmp1020(5/14)-6/21 2001.6.21 6:23 PM Page 22 BASIC FUNCTIONS MAKING A CALL Enter the phone number. To modify the phone number you have XXX-XXX-XXXX entered: To erase the last number entered: Press [ XXX-XXX-XXXX To erase all numbers entered and MENU start again: Press [ ] and hold for more than half of a second. -
Page 13: How To Answer Calls
mmp1020(5/14)-6/21 2001.6.21 6:23 PM Page 24 BASIC FUNCTIONS HOW TO ANSWER CALLS When the phone rings or the LED blinks, press any key except Volume up, Volume down or [ To end the call, press [ AUTO ANSWER This function allows an incoming call to automatically be answered after a set number of rings. -
Page 14: Functions During A Call
mmp1020(5/14)-6/21 2001.6.21 6:23 PM Page 26 FUNCTIONS DURING A CALL SENDING YOUR NUMBER TO A PAGER This function enables the phone number of the handset to be transmitted automatically to a pager, depending on pager ser- vice. After calling a pager, when you are asked to enter your number, press and hold [ ] then [1] “SEND PHONE #”. -
Page 15: Chapter 3 Memory Function
mmp1020(5/14)-6/21 2001.6.21 6:23 PM Page 28 [22] CHAPTER 3 MEMORY FUNCTION How to Store a Phone Number How to Make a Call Using a Stored Phone Number How to Find Your Call Logs How to Find Your Phone Book [23]... -
Page 16: How To Store A Phone Number
mmp1020(5/14)-6/21 2001.6.21 6:23 PM Page 30 HOW TO STORE A PHONE NUMBER You can store up to 100 frequently used phone numbers in memory. Enter the phone number(more 3 digits) you want to store and press [ ], then[1] XXX-XXXX-XXXX “Store”. -
Page 17: How To Make A Call Using Astored Phone Number
mmp1020(5/14)-6/21 2001.6.21 6:23 PM Page 32 HOW TO MAKE A CALL USING A STORED PHONE NUMBER ONE-TOUCH / TWO-TOUCH DIALING This feature allows the phone book entries to be dialed via the key- pad. ONE-TOUCH DIALING: 0-9 : Press corresponding memory number and hold for more than 1 second. -
Page 18: Answered Calls
mmp1020(5/14)-6/21 2001.6.21 6:23 PM Page 34 HOW TO FIND YOUR CALL LOGS ANSWERED CALLS (Refer to previous page.) Press [ ], then [2], then [1], then [2]. Press [ ] to dial desired answered call number. The last answered call, its phone number, time and date are displayed. -
Page 19: Recalling By Name
mmp1020(5/14)-6/21 2001.6.21 6:23 PM Page 36 HOW TO FIND YOUR PHONE BOOK RECALLING BY NAME Press [ ], then [2], then [3]. Enter the alpha (or part of the alpha). SEARCH RECALL NAME? Then press [ To locate the phone number using the scroll key: ] / [ ] search phone number. -
Page 20: Check Billing Feature
mmp1020(5/14)-6/21 2001.6.21 6:23 PM Page 38 CHECK BILLING FEATURE This feature allows you to automatically dial your service provider’s customer care center to check your phone bill balance. Press [ ], then [1] ”CHECK BILLING”. The phone number will be displayed on the screen and the phone will automaticallly dial customer service. -
Page 21: Input Schedule List
mmp1020(5/14)-6/21 2001.6.21 6:23 PM Page 40 SCHEDULE INPUT SCHEDULE Press [ ], then [3], then [2]. Select the date in calendar and press the [ ]-month input. ], numeric key -day input. Press [1], and select the parameter 1:ALARM TYPE (one time or daily). -
Page 22: Settings
mmp1020(5/14)-6/21 2001.6.21 6:23 PM Page 42 SETTINGS AUTO RETRY When a call is not connected, this function retries the call automatically at a set interval or amount or retries. INTERVAL Press [ ], then [4], then [1], then [1]. Select the parameter(OFF, 5 , 10 , 20 , 30 SECS) by using the scroll, then press [ REPEAT Press [... -
Page 23: One-Touch Dialing
mmp1020(5/14)-6/21 2001.6.21 6:23 PM Page 44 SETTINGS ONE-TOUCH DIALING This function allows the phone book entries to be dialed via the keypad. Press [ ], then [4], then [3]. Select the parameter (NO, YES) by using the scroll keys. Press [ VOICE PRIVACY Press [ ], then [4], then [4]. -
Page 24: Logo Display
mmp1020(5/14)-6/21 2001.6.21 6:23 PM Page 46 SETTINGS LOGO DISPLAY LOGO DISPLAY Press [ ], then [4], then [7]. DATE Select the parameter Banner(Date,World MAP) by using the scroll keys. Press [ WEB IDLE TIME This function disconnects from the network when there is no key input while browsing through the web. -
Page 25: Key Pad
mmp1020(5/14)-6/21 2001.6.21 6:23 PM Page 48 VOLUME KEY PAD Press [ ], then [5], then [3]. If the warning alarm sounds because of low battery, the sound will not be heard even if the user press- es the button. Select the volume level by using the scroll keys. ] / [ ] scroll up to increase volume. -
Page 26: Alerts
mmp1020(5/14)-6/21 2001.6.21 6:23 PM Page 50 ALERTS MIN ALERT This function sounds an alert every minute, letting you know the call lapse time. Press [ ] then [8] then [1]. MIN ALERT Select the parameter (ON, OFF) by using the scroll keys. -
Page 27: Connect Alert
mmp1020(5/14)-6/21 2001.6.21 6:23 PM Page 52 ALERTS CONNECT ALERT This function sounds an alert when the call is made. CONNECT TONE Press [ ], then [8], then [5]. Select the parameter (ON, OFF) by using the scroll keys. Press [ [46] CHAPTER 5 SECURITY FEATURES... -
Page 28: How To Lock Your Phone
mmp1020(5/14)-6/21 2001.6.21 6:23 PM Page 54 HOW TO LOCK YOUR PHONE AUTO LOCK This function prevents any other person from using the handset with- out permission. When it is locked, the handset can not be used to dial or use any other function. Press [ ], then [0], then AUTO LOCK? -
Page 29: How To Change Your Banner
mmp1020(5/14)-6/21 2001.6.21 6:23 PM Page 56 HOW TO CHANGE YOUR BANNER BANNER CHANGE This function changes the banner displayed on the LCD. You can enter a banner up to 16 characters long. Press [ ], then [0], then enter [PASSWORD], then [3]. BANNER XXXXXXX Enter a banner using instructions for alpha keys... -
Page 30: Restricting Outgoing Calls
mmp1020(5/14)-6/21 2001.6.21 6:23 PM Page 58 HOW TO RESTRICT YOUR PHONE RESTRICTING OUTGOING CALLS When this function is enabled, incoming calls can be answered, but outgoing calls cannot be made. It is still possible to make emergency calls. OUTGOING Press [2] “OUTGOING”. ALLOW Select the parameter by using the scroll keys. -
Page 31: How To Reset Your Phone
mmp1020(5/14)-6/21 2001.6.21 6:23 PM Page 60 HOW TO RESET YOUR PHONE RESET This function resets each value set in the memory to its default value. Press [ ], then [0], then RESET SETTING? enter [PASSWORD], then [5]. Select the parameter by using the scroll keys. -
Page 32: Memory Clearing Function
mmp1020(5/14)-6/21 2001.6.21 6:23 PM Page 62 MEMORY CLEARING FUNCTION CLEARING DIALED NUMBERS IN CALL LOGS This function clears dialed number in call logs. Press [ ], then [0], then enter CLR CALL LOGS? [PASSWORD], then [6], then [3]. The default password is the last 4 digits of your phone number. -
Page 33: Chapter 6 Supplementary Functions
mmp1020(5/14)-6/21 2001.6.21 6:23 PM Page 64 [58] CHAPTER 6 SUPPLEMENTARY FUNCTIONS Stopwatch Calculator Bio-Rhythm [59]... -
Page 34: Stopwatch
mmp1020(5/14)-6/21 2001.6.21 6:24 PM Page 66 STOPWATCH STOPWATCH Press [ ], then [7], then [1]. Press [ ] to control the stopwatch. ] controls Start/Stop ] controls Split/Split Release/Reset. The time unit displayed on the LCD in 1/100 of a second. Press [ ] to exit and return to the initial display. -
Page 35: Bio-Rhythm
mmp1020(5/14)-6/21 2001.6.21 6:24 PM Page 68 BIO-RHYTHM This function identifies the bio-rhythms of today or a specific day using solar calendar. Press [ ], then [7], then [3]. Press [3] “BIRTHDAY”. 1:TODAY 2:SOMEDAY Enter your solar calendar birthday 3:BIRTHDAY in year/month/date, and then press [OK]. -
Page 36: Receiving A Message
mmp1020(5/14)-6/21 2001.6.21 6:24 PM Page 70 RECEIVING A MESSAGE When a message is received, XX NEW TEXT XX VOICE the following message is displayed. XXX-XXXX-XXXX READ Press [READ] to display the received : Test1 message. : Test2 VOICE MAIL CHECKING RECEIVED VOICE MAIL MESSAGE Press [ ], then press [1] 1 Voice Mail... -
Page 37: Inbox
mmp1020(5/14)-6/21 2001.6.21 6:24 PM Page 72 SEND NEW 4.3 To change the text message, then press [3] “Edit Message”. MESSAGE? T9 Abc Test Input text message, NEXT then press [NEXT]. 4.4 To send an urgent message, press [4] “Priority”. Priority? Normal Then select the parameter (normal/ urgent) by using the... -
Page 38: Outbox
mmp1020(5/14)-6/21 2001.6.21 6:24 PM Page 74 INBOX 3.3 To forward the text message, press [3], then input the phone number and text message. Send To MESSAGE? T9 Abc Test1 NEXT phone book MODE NEXT 3.4 To save the text message, press [4]. Message saved : Test1 in ‘filed’... -
Page 39: Settings
mmp1020(5/14)-6/21 2001.6.21 6:24 PM Page 76 OUTBOX 3.2 To erase the text message, press [2], then press [SEL]. ERASE : O U T B O X T e s t 1 THIS MESSAGE? : O U T B O X T e s t 2 : O U T B O X T e s t 3 3.3 To send the text message,press [3], then input phone number and text message. -
Page 40: Delivery Ack
mmp1020(5/14)-6/21 2001.6.21 6:24 PM Page 78 DELIVERY ACK Press [ ], then press [5] “SETTINGS”. Then press [4] “Delivery Ack” Delivery Ack Select the parameter (YES/NO) by using the scroll keys. Press [SEL]. AUTO ERASE Press [ ], then press [5] “SETTINGS”. Then press [5] “Auto erase”... -
Page 41: Erase Messages
mmp1020(5/14)-6/21 2001.6.21 6:24 PM Page 80 ERASE MESSAGES ERASE MESSAGES Press [ ], then press [7] “Erase Msgs”. 1:Inbox 2:Outbox 3:Filed To erase inbox messages, press [1]. Erase inbox? PREV To erase outbox messages, press [2]. Erase outbox? PREV To erase filed messages, press [3]. -
Page 42: Using T9 Mode Text Input
mmp1020(5/14)-6/21 2001.6.21 6:24 PM Page 82 REFERENCE(WRITING MESSAGE) USING T9 MODE TEXT INPUT FUNCTION Press to change mode. [T9Abc][Abc][123][Special characters Mode mode] Press to view the next matching word if the underlined word is not the word you Next intended. Press once to accept a word and add a Space space. -
Page 43: Write With T9 Mode Text Input
mmp1020(5/14)-6/21 2001.6.21 6:24 PM Page 84 REFERENCE(WRITING MESSAGE) WRITE WITH T9 MODE TEXT INPUT Select the T9 Abc mode, by using the [ ] keys. Press each key once for each letter. MESSAGE? T9Abc John -For example, to write “John” press. NEXT [5] [6] [4] [6] Press to view the next matching word if... -
Page 44: Chapter 8 Making An Emergency Call
mmp1020(5/14)-6/21 2001.6.21 6:24 PM Page 86 REFERENCE(WRITING MESSAGE) Write compound words Write the first part of the word and press [ key to accept it. Write the last part of the compound word and press [#] key to enter the word in memory. - For example, to write “Whitehouse”... -
Page 45: Making An Emergency Call
6:24 PM Page 88 MAKING AN EMERGENCY CALL This is the enhanced 911 feature. E911 IN LOCK MODE Enter 911 and press [ Audiovox Mon Jan 08 19:31 LOCK When a call ends, the phone returns to the emergency mode. MENU... -
Page 46: Chapter 9 Data Service
mmp1020(5/14)-6/21 2001.6.21 6:24 PM Page 90 [84] CHAPTER 9 DATA SERVICE Receive Mode Flow Control Ability of Wireless Data Communication [85]... -
Page 47: Flow Control
mmp1020(5/14)-6/21 2001.6.21 6:24 PM Page 92 RECEIVE MODE RECEIVE MODE Press [ ] then [9] then [1]. 1:RECEIVE MODE 2:FLOW CONTROL Select the parameter (INACTIVE, DATA, RECEIVE MODE INACTIVE FAX) by using the scroll keys. Press [ INACTIVE : When you use telephone DATE : When you use data FAX : When you use fax [86]... -
Page 48: Ability Of Wireless Data Communication
mmp1020(5/14)-6/21 2001.6.21 6:24 PM Page 94 A B I L I T Y OF WIRELESS DATAC O M M U N I C AT I O N ABILITY OF WIRELESS DATA COMMUNICATION If you use the data communication, install program provided by serv- ice office or phone connected network program of window 95/98 and then, you can use PC communication and internet connected by wireless communication networks. -
Page 49: Start Internet Browser
mmp1020(5/14)-6/21 2001.6.21 6:24 PM Page 96 START INTERNET BROWSER ACCESS WIRELESS INTERNET To access wireless internet network, press [ ] key. Then internet browser start. Connecting ..1:EMAIL 2:CONTACTS 3:CALENDAR [90] BROWSER MENU The browser menu is a list of actions necessary for full operation of the browser. -
Page 50: Bookmarks
1:RELOAD Press [ ], then press [3]. 2:HOME 3:BOOKMARKS BOOKMARKS 1:AUDIOVOX 2:HYUNDDAI MARK SITE When the mark site item is selected from the browser menu, the browser add the current deck to the user’s bookmark list. 2:HOME Press [ ], then press [4]. -
Page 51: Show Url
mmp1020(5/14)-6/21 2001.6.21 6:24 PM Page 100 BROWSER MENU SHOW URL Selecting the show URL action displays the URLof the current deck. ADVANCED Press [ ], then press [6], then press [1]. 1:SHOW URL 2:HOMEPAGE HTTP://www. Hyundai.com/index HOMEPAGE Selecting the homepage item from the browser menu, enables the user to change the homepage. -
Page 52: Outbox
mmp1020(5/14)-6/21 2001.6.21 6:24 PM Page 102 BROWSER MENU OUTBOX When the outbox item is selected from the browser menu, a status screen is displayed that shows the user how many items are pending delivery and the age of the oldest item. Press [ ], then press [6], then press [5]. -
Page 53: Chapter 11 Safety
mmp1020(5/14)-6/21 2001.6.21 6:24 PM Page 104 [98] CHAPTER 11 SAFETY INFORMATION FOR WIRE- LESS HANDHELD PHONES Driving Safety Electronic Devices Other safety Guidelines Precautions Warning Safety Information for FCC RF Exposure [99]... -
Page 54: Driving Safety
mmp1020(5/14)-6/21 2001.6.21 6:24 PM Page 106 SAFETY INFORMATION FOR WIRELESS HANDHELD PHONES Read This Information Before Using Your Handheld Portable Cellular Telephone EXPOSURE TO RADIO FREQUENCY SIGNALS Your wireless handheld portable telephone is a low power radio trans- mitter and receiver. When it is ON, it receives and also sends out radio frequency (RF) signals. -
Page 55: Electronic Devices
mmp1020(5/14)-6/21 2001.6.21 6:24 PM Page 108 SAFETY INFORMATION FOR WIRELESS HANDHELD PHONES ELECTRONIC DEVICES Most modern electronic equipment is shielded from RF energy. However, certain electronic equipment may not be shielded against the RF signals from your wireless phone. Pacemakers The Health Industry Manufacturers Association recommends that a minimum separation of six (6”) inches be maintained between a hand- held wireless phone and a pacemaker to avoid potential interference... -
Page 56: Other Safety Guidelines
DO NOT use unauthorized accessories. DO NOT disassemble the phone or its accessories. If service or repair is required, return unit to an authorized Audiovox cellular service center. If unit is disassembled, the risk of electric shock or fire may result. -
Page 57: Warning
mmp1020(5/14)-6/21 2001.6.21 6:24 PM Page 112 SAFETY INFORMATION FOR WIRELESS HANDHELD PHONES WARNING The following offenses are punishable by fine, imprisonment, or both: Using obscene, indecent, or profane language. Using the unit to give off false distress calls. Wiretapping or otherwise intercepting a telephone call, unless that person has first obtained the consent of the parties participating in the call. -
Page 58: Chapter 12 Warranty
mmp1020(5/14)-6/21 2001.6.21 6:24 PM Page 114 [108] CHAPTER 12 WARRANTY Protect Your Warranty 12 Month Limited Warranty [109]... -
Page 59: Protect Your Warranty
Many companies are making look alike accessories and in some cases, promoting that their product is equal to or bet- ter than the Audiovox product Be careful. Some of these products may not be compatible to use with your Audiovox product and may damage the unit or cause it to malfunction. - Page 60 IN U.S.A.: Audiovox Communications Corp. 555 Wireless Blvd. Hauppauge, NY 11788 (800)229-1235 MER- IN CANADA: Audiovox Canada Ltd. 5515 Spectrum Way, Unit #5 Mississauga, Ontario L4W 5A1 (800)-465-9672 [113]...
Need help?
Do you have a question about the PCX-1110XL and is the answer not in the manual?
Questions and answers