
Summary of Contents for Connectland X-Rev Storage Center
- Page 1 ” ”...
-
Page 2: Table Of Contents
INDEX Trademarks ----------------------------------------------------------------------- Introductions --------------------------------------------------------------------- System requirements ------------------------------------------------------------ Package contents ----------------------------------------------------------------- Your X-Rev Storage Center Outline ----------------------------------------- Getting Started ------------------------------------------------------------------- ----------------------------------------------- Install 3.5 inch SATA hard drive --- -------------------------------------------- Plugging in the X-Rev Storage Center Button Manager Utility Installation -----------------------------------------... -
Page 3: Trademarks
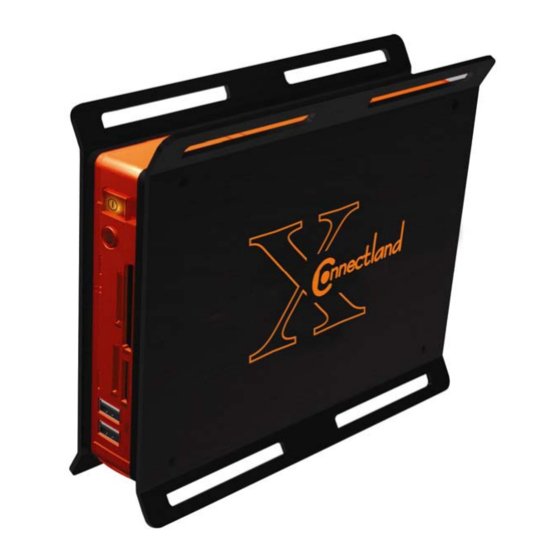
The 3.5” X-Rev Storage Center enclosure allows you to install a high-speed SATA hard drive and connect to a computer via USB2.0 or the new eSATA interfaces. The X-Rev Storage Center offers not only for a standalone backup storage disk, but is also integrated with a USB 2.0 hub and a multimedia card reader. -
Page 4: Your X-Rev Storage Center Outline
Outline Getting Started Before using the X-Rev Storage Center Enclosure… Electrostatic discharge can damage electronic components. Be sure you are properly grounded before the beginning of any procedure.You can touch the metal parts of a computer’s chassis or power supply unit to discharge any static charge that may have accumulated inside your body. - Page 5 Remove the four screws that fix the drive carrier in place and then take the drive carrier out. Attach a SATA hard drive to the drive carrier with the four screws supplied in the package. Place the carrier with the hard drive into the housing (Step 1) and connect the hard drive via the SATA connector with the fitting of the carrier to the housing (Step 2).
- Page 6 Install that previously removed screws to secure the drive carrier. Reinstall the X-Rev aluminum cover and tighten by previously removed screws. Stand the X-Rev Storage Center in an upright position. Upon cable connection it is ready for use.
-
Page 7: Plugging In The X-Rev Storage Center
External power adapter pin out specification: Plug in the USB cable: The X-Rev Storage Center includes an USB hub to enable the use for a hard drive, a media card reader and two external USB ports. The USB hub and card reader will only operate through the USB connection and will be disabled if only the eSATA connection is present. -
Page 8: Button Manager Utility Installation
Button Manager Utility Installation The X-Rev Storage Center provides a special backup button for the file copy function. A Button Manager Utility will need to be first installed and users need to preset a copy path location. Users can then regularly synchronize the data from the hard disk in the X-Rev to a specified location in the hard drive in the PC by pressing the one touch button. - Page 9 3. Choose the “Button Manager Application” and click “Next” to continue 4. Click “Install” button to begin the installation.
- Page 10 5. Click “ Finish” button to exit the software installation. 6. Choose “Yes, I want to restart my computer now” and click “OK” button to restart your computer.
- Page 11 7. After restarting your computer, the user will find an icon on the status bar of the windows on the bottom right. 8. Click on the icon and choose “Automatic Backup".
-
Page 12: Button Manager Utility Description
9. After clicking on the “Automatic Backup”, a backup task window will pop out for user to configure the preset path for file copy. Button Manager Utility Description a. User Interface Description:... -
Page 13: Adding A New Task
TASK LIST: The task window shows all arranged tasks, each task comprises source directory, destination directory and attribute. OPEN: Open a previous preset backup task file. SAVE: Save current task list to a backup task file (as *.iniBackup file). Disk Properties: Display: Display your host system current disk drives information. - Page 14 2. Define the daily backup tasks in the “Source Directory” and “Destination Directory” columns by clicking the browse button and check the necessary “Attributes” and “Task Direction”. Source Directory: assign Source Directory location. Destination Directory: assign backup Destination Directory location. 3.
- Page 15 3. The task window will show a new task, you can add more task in the time or click ”Save” button to save as a *.iniBackup backup file, then press “Exit” to finish task setting. 4. If you quit the Button Manager utility from the windows, and would like to modify or add a new task, you can bring the utility back via Start button\Startup\Button manager.
-
Page 16: Use Button Backup Function
------------------------------------------------------------------------------------------------------------------------------- USB and eSATA port Priority The X-Rev Storage Center provides dual interface of USB and eSATA for host connectivity, but the high-speed eSATA port will have priority over the USB port when both are connected at the same time. -
Page 17: Product Specification
Product Specification: Bridge: Initio_INIC1610 Chipset Hub: Genesys-GL850G Reader: ALCOR AU-6375 USB 2.0 B-type (USB1.1 compatible) Host Interface High-speed eSATA port Two high-speed USB 2.0 downstream ports. USB 2.0 Hub Support 500ma high-powered device. Four media slots: CF/SD/xD/MS Media slot: CF TypeI, CF TypeII, CF UlrraII, Microdrive, Magicstor, xD, M-series xD, Memory Card Supported SD, SD Ultra II, mini SD, MMC-I, MMC-II, MMC 4.0,MMC Dual Voltage, RS-MMC, RS-MMC Dual Voltage, RS-MMC 4.0, TransFlash, Micro SD,...
Need help?
Do you have a question about the X-Rev Storage Center and is the answer not in the manual?
Questions and answers