Advertisement
Quick Links
Advertisement

Summary of Contents for France Sauna ZEN Steam Sauna
- Page 1 Installation handbook ZEN Steam Sauna...
- Page 3 CONTENTS Recommendations Safety instructions Description – Package contents and product presentation Installation – Choice of location Assembling the cabin Rectangular design Corner design Maintenance – Troubleshooting guide Servicing – Warranty Read this manual carefully before using your sauna for the first time. We recommend you keep it in a safe place for future reference.
- Page 4 RECOMMENDATIONS • Install the sauna on a perfectly flat floor. • The sauna must remain in a dry area. • Do not use it near a source of water (bath, damp floor, swimming pool). • Do not use liquid cleaning products. • Disconnect the sauna before cleaning and use a wet rag. (see Maintenance section) • Protect the sauna’s electrical cable to avoid it being crushed or pinched. • Prior to replacing certain components, ensure that they are specified by the manufacturer or that they have the same features as the original parts. Incorrect replacement can cause a fire, a short circuit or damage to the sauna. We strongly recommend using a qualified technician. • To avoid the risk of burns or electric shocks, do not use any metal tools. • Do not put animals in the sauna. • Do not leave the sauna switched on without supervision. • Do not leave the sauna switched on for more than 3 hours at a time to avoid premature deterio- ration of the equipment. After 3 hours continuous usage, switch off the sauna for at least one hour.
- Page 5 SAFETY IMPORTANT : Please read the safety instructions carefully before installing and using your sauna cabin. They are essential for your safety, so please adhere strictly to them. Beware of hyperthermia, heat stroke or heat exhaustion which can be caused or aggravated by non- compliance with the safety instructions. Symptoms are fever, a rapid pulse, dizziness, fainting, lethargy and numbness in all or part of the body. The effects are: reduced awareness of the heat, ignorance of imminent risks, loss of consciousness.
- Page 6 DESCRIPTION General features • Cabin made from Canadian spruce • Interior light fittings • Thermometer/Hygrometer • Hourglass • Wooden pail and ladle • Safety glass • Ventilation grille • 2 year warranty Certifications Complies with current Wood is sourced from sustainably Manufacturing process uses European standards. managed forests. no heavy metals. Package contents General : 1 installation & user handbook 1 door handle (interior and exterior component) 1 electric stove protective cage 1 steam sauna accessories pack (including thermometer, hygrometer, hourglass, pail, ladle and light fitting)
- Page 7 INSTAllATION Read the assembly instructions carefully before starting. Choice of location Sauna-Center saunas are designed solely for interior installation. Select a space: • Inside, in a dry area, on a flat stable floor that can support the weight of your sauna. • The height must be sufficient for you to reach the ceiling and carry out electrical connec- tions and maintenance. • Away from any source of water, flames or flammable materials. Practical advice: • Note that sauna assembly requires two or three adults. • Clearly identify each panel before you begin. • During assembly, position your sauna’s mains cable so that it is easily accessible. • Note that there are variations between the models.
- Page 8 RECTANGUlAR DESIGN Step 1 Start by positioning the flooring on the ground at the location where you wish to install the sauna. Step 2 Install the rear panel in the groove in the flooring. Assembly bracket Step 3 Position the left side panel in the groove in the floo- ring, ensuring that it slots perfectly into the rear panel. Use the metal bracket to complete Assembly bracket the assembly of the 2 panels.
- Page 9 ASSEMBlY Step 4 Assemble the bench and its backrest. Then attach the bench to the rear panel. Step 5 Position the front panel in the groove in the flooring, ensuring that it slots perfectly into the left side panel. Important: Keep the door closed while handling this component. Use the metal bracket to complete Assembly bracket the assembly of the 2 panels. Step 6 Finally, position the right side panel in the groove in the flooring, ensuring that it slots perfectly into the front and rear panels.
- Page 10 RECTANGUlAR DESIGN Step 7 Stabilise the structure by fixing the front and rear pa- nels with the screws provided. Then cover each screw with a screw cover cap. Step 8 Carefully position the ceiling. Complete the assembly by fixing the wooden slats around the cei- ling Step 9 On the outside of the door, position the handle in line with the holes provided. Insert the screws through the inside of the door and fix the handle.
- Page 11 ASSEMBlY Step 10 Install the light fittings in the corners of the cabin then connect them to the electric stove power supply. Step 11 The stove’s protective cage must be assembled then installed inside the cabin. Step 12 Install the stove in its cage. All instructions for the stove’s installation and electri- cal connection are enclosed in its shipping carton.
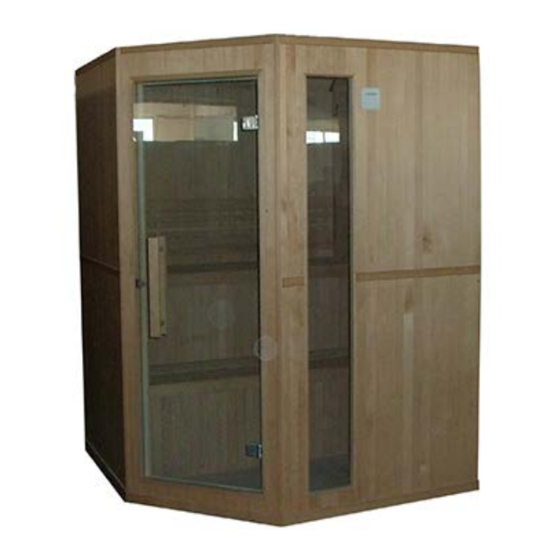
- Page 12 CORNER DESIGN Step 1 Start by positioning the flooring on the ground at the location where you wish to install the sauna. The front part of the panel can be recognised by the absence of an electrical connector. Step 2 Install the left rear panel in the groove in the flooring. Step 3 Position the right rear panel in the groove in the floo- ring, ensuring that it slots perfectly into the left rear panel. Use the metal bracket to complete Assembly bracket the assembly of the 2 panels.
- Page 13 ASSEMBlY Step 4 Position the left side panel in the groove in the floo- ring, ensuring that it slots perfectly into the left rear panel. Use the metal bracket to complete Assembly bracket the assembly of the 2 panels. Step 5 Position the upper bench backrest, ensuring that it slots perfectly into the side panels. Position the upper bench seating, ensuring that it slots perfectly into the side panels.
- Page 14 CORNER DESIGN Step 7 Carefully position the right side panel, ensuring that it slots perfectly into the right rear panel. Use the metal bracket to com- Assembly bracket plete the assembly of the 2 pa- nels. Step 8 Carefully position the front panel, ensuring that it fits perfectly with the side panels. Important: Keep the door closed while handling this component.
- Page 15 ASSEMBlY Step 10 Carefully position the ceiling over the cabin. Step 11 Complete the assembly by fixing the wooden slats around the ceiling Step 12 On the outside of the door, position the handle in line with the holes provided. Insert the screws through the inside of the door and fix the handle. The metal part must be on the outside of the cabin.
- Page 16 CORNER DESIGN Step 13 Install the lights in the corners of the cabin then connect them to the electric stove power supply. Step 14 The stove’s protective cage must be assembled then installed inside the cabin. Step 15 Install the stove in its cage. All instructions for the stove’s installation and electri- cal connection are enclosed in its shipping carton.
- Page 17 MAINTENANCE Disconnect the cabin’s power supply cable before undertaking any work. Problems identified Possible reasons Solutions Power supply cable disconnected Check power supply cable connection Electric stove does not heat Check that the switchboard and wall plug are The general power supply is cut up.
- Page 18 SERVICING & WARRANTY Servicing 1. Disconnect your sauna. 2. Use a vacuum cleaner to remove dust from crevices in the woodwork. 3. Clean the cabin with a damp cotton cloth and use a small amount of soap if necessary. Rinse with a damp cloth. 4. Wipe with a dry cloth. IMPORTANT Do not use benzene, alcohol, chemical agents or strong detergents on the sauna since chemical products can damage the wood and its protective coating. Do not spray water on your sauna. Practical advice: To extend the life of your sauna, we recommend that you apply linseed oil to the benches, back rests and flooring of your cabin with a lint-free cloth.
- Page 20 www.france-sauna.com T ECHNICAL AS SI ST A NC E +33 (0)4 91 51 01 99 Distribution POOLSTAR FRANCE | www.poolstar.fr | ZA les Pielettes - 13740 LE ROVE - FRANCE...
Need help?
Do you have a question about the ZEN Steam Sauna and is the answer not in the manual?
Questions and answers