Advertisement
Quick Links
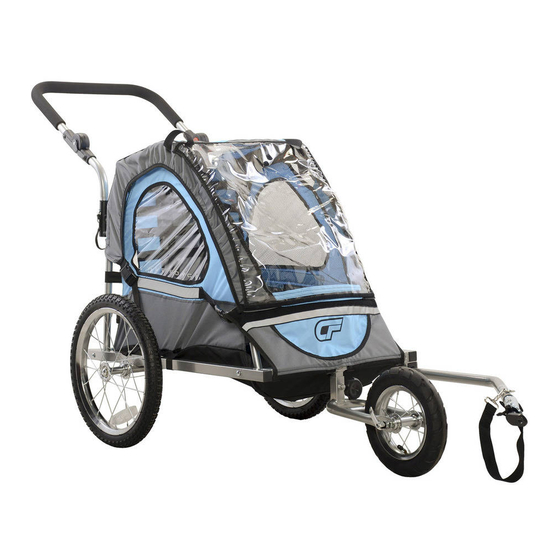
BICYCLE BABY
TRAILER & JOGGER
Please read these instructions before attempting
to construct your newly purchased trailer.
DO NOT RETURN
THIS TRAILER TO THE PLACE OF PURCHASE
If you should experience a problem with your purchase,
in most cases, a BikeAid representative can resolve
your problem over the phone. Your feedback is vital to
our success and our quality improvement program.
CALL 877-BIKEAID (245-3243) or visit
www.bikeaidonline.com
Advertisement

Related Manuals for Cycle Force Group BICYCLE BABY TRAILER & JOGGER

Summary of Contents for Cycle Force Group BICYCLE BABY TRAILER & JOGGER
- Page 1 BICYCLE BABY TRAILER & JOGGER Please read these instructions before attempting to construct your newly purchased trailer. DO NOT RETURN THIS TRAILER TO THE PLACE OF PURCHASE If you should experience a problem with your purchase, in most cases, a BikeAid representative can resolve your problem over the phone.
- Page 2 BICYCLE BABY TRAILER AND JOGGER 2 IN 1 INSTRUCTION MANUAL...
- Page 3 Safety Precautions: 1. The gross weight rating of the trailer must not exceed 40 kgs. 2. Children must not be transported in the trailer until they can sit safely on their own. 3. The child must have at least 100 mm head clearance (spacing between the top edge of the safety helmet and the upper edge of the frame structure) to reduce the risk of injuries to the child if the trailer should roll over.
- Page 4 Practice in particular going round bends, uphill and downhill gradients, braking in an emergency and starting off with the trailer on the back of the bicycle, on different road surfaces. 29. Fit the supplied pennant to make the bicycle and trailer more noticeable. 30.
- Page 5 Step 2: Assembly the trailer body as per following pictures and steps: Make sure each step mounted safety. (1).Mount the frame (2).Mount the support bar by screws (3).Mount the handlebar bracket...
- Page 6 (4).Mount the top cover...
- Page 7 (5).Mount the handlebar (The foldable handlebar is adjustable) (6).Mount the wheel, insert the wheel axle into the frame wheel mounting hole and make sure it locked safety. If you want to remove the wheels, lift back of trailer up and simply push on the push buttons located on the axle and remove the wheel (See below picture).
- Page 8 Step 3: Installing the Tow Bar Lift the trailer up. Remove safety pin from back hole in two bar mount. Swivel the tow bar 180o. Lock the tow bar into place by re-inserting the safety pin.(see below picture) WARNING! The two bar safety pin must be locked into place before using the trailer. A tow bar that has not secured properly could loose during travel, resulting in serious injury or death.
- Page 9 clamp the quick release with the correct pressure. In order to ensure that the hub is clamped sufficiently in the hollow axle, the quick release lever must begin gripping as it moves from the open to the middle position, and approaching the closed position you should clearly feel resistance as you tighten. If it is too easy or too difficult to move the quick release lever, tighten or loosen the quick release nut on the other side of the hub.
- Page 10 Install the jogger kit Insert the jogger kit into the frame bracket and lock the knob screw tightly to make sure safety. Install the safety flag Insert the safety flag into the side pocket.
Need help?
Do you have a question about the BICYCLE BABY TRAILER & JOGGER and is the answer not in the manual?
Questions and answers