Table of Contents
Advertisement
Quick Links
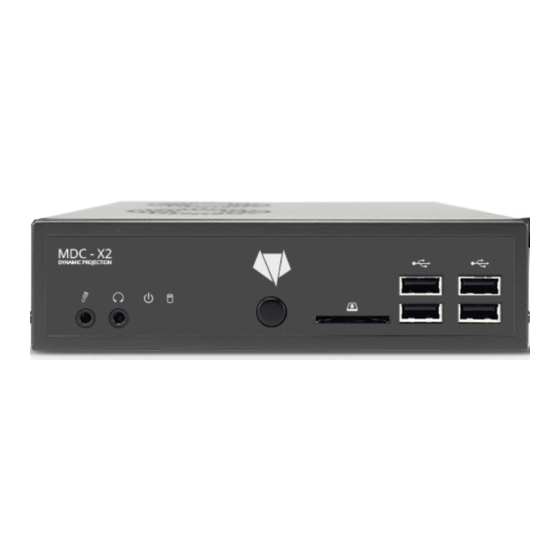
MDC-X
Media Server
Quick Setup Guide and
Manual for
MDC-X1 and MDC-X2
The illustrations may differ in some details from the original. Subject to change without prior notice.
Copyright © 2016,2017 by Dynamic Projection Institute GmbH. All Rights Reserved. http://www.dynamicprojection.com - MDC_QSG - Version 1.0.8- Page 1
Advertisement
Table of Contents

Summary of Contents for Dynamic Projection MDC-X
- Page 1 Manual for MDC-X1 and MDC-X2 The illustrations may differ in some details from the original. Subject to change without prior notice. Copyright © 2016,2017 by Dynamic Projection Institute GmbH. All Rights Reserved. http://www.dynamicprojection.com - MDC_QSG - Version 1.0.8- Page 1...
-
Page 2: Table Of Contents
DO NOT USE ANY OTHER POWER SUPPLY THAN THE ONE THAT WAS SHIPPED WITH THE • UNIT. The illustrations may differ in some details from the original. Subject to change without prior notice. Copyright © 2016,2017 by Dynamic Projection Institute GmbH. All Rights Reserved. http://www.dynamicprojection.com - MDC_QSG - Version 1.0.8- Page 2... -
Page 3: Connecting The Output Devices
1.2 Projector(s) After you connected the projector for the first time please power it on before you turn on the MDC-X. Please note that some projectors do have a very long LAMP ON/OFF timeout depending on the last state of the lamp and the shutdown integrity - it may happen that the LAMP ON/OFF command (sent by TOUCH) is ignored if it was called to early. - Page 4 1.4 Mirror Head The MDC-X system is preconfigured for the use with Mirror Head units. Its template generator asumes Mirror head #1on Art-Net Adress 2.0.0.3 and DMX Start Address of 001. The 2nd Mirror Head on 2.0.0.4 and DMX 015. Please make sure that your Mirror Head is configured correctly! For more information please read the Mirror Head Quick Installation Guide on how to change the Art-Net and DMX settings.
- Page 5 You will find more information and tutorials on our YouTube Training channel: http://www.dynamicprojection.com/training/ The illustrations may differ in some details from the original. Subject to change without prior notice. Copyright © 2016,2017 by Dynamic Projection Institute GmbH. All Rights Reserved. http://www.dynamicprojection.com - MDC_QSG - Version 1.0.8- Page 5...
-
Page 6: Starting The Mdc For The First Time
Mirror Head unit finished calibrating itself and the mirror is in the home position turn on the MDC-X by pressing the Power button at the front; the desktop of the MDC-X will show up after a few seconds. During the start the display will flicker, this is normal because of the detection of the output screens. - Page 7 This will instantly terminate all Automatisation and MDC Jobs without asking for saving! 3.0 START DEMONSTRATION • The illustrations may differ in some details from the original. Subject to change without prior notice. Copyright © 2016,2017 by Dynamic Projection Institute GmbH. All Rights Reserved. http://www.dynamicprojection.com - MDC_QSG - Version 1.0.8- Page 7...
- Page 8 3.3 Re-Encode Media • If you want to re-encode your media to optimal settings to use with the MDC-X platform you can choose between various encoding presets. Note: Selecting an image it will be converted to a video clip. 3.4 System Time Scheduler: •...
- Page 9 3.5 Generate MDC Template: • This generates a template for the current physical output configuration of the MDC-X system. You can select if you want to template for one or two Mirror Head units. The template will be safed in /home/mdcuser/Templates/.
- Page 10 MDC. MDC-Touch offers lots of functions for controlling and starting MDC projects. Futhermore the main setup for the MDC-X system is directly available over MDC-Touch. This makes it very easy to control and setup the MDC-X server without the need of a main monitor or remote desktop. For further details please see the MDC-Touch Manual.
-
Page 11: Starting The Demonstration Project
3. Starting the Demonstration Project The MDC-X is shipped with a small demonstration project to show the basic functions of the MDC and the Mirror Head. It gives you the possibility to check that all parts are functional and working. The demonstration project can be started using the MDC-Launcher on the desktop and clicking the button “3.0 START DEMONSTRATION”. - Page 12 Project is up and running. The illustrations may differ in some details from the original. Subject to change without prior notice. Copyright © 2016,2017 by Dynamic Projection Institute GmbH. All Rights Reserved. http://www.dynamicprojection.com - MDC_QSG - Version 1.0.8- Page 12...
- Page 13 Now the project remote control is loaded and you can use some of the predefined presets and load different kind • of media. The illustrations may differ in some details from the original. Subject to change without prior notice. Copyright © 2016,2017 by Dynamic Projection Institute GmbH. All Rights Reserved. http://www.dynamicprojection.com - MDC_QSG - Version 1.0.8- Page 13...
- Page 14 Project like Media, Movement or Presets. The illustrations may differ in some details from the original. Subject to change without prior notice. Copyright © 2016,2017 by Dynamic Projection Institute GmbH. All Rights Reserved. http://www.dynamicprojection.com - MDC_QSG - Version 1.0.8- Page 14...
-
Page 15: Connecting Remotely To The Mdc
4.5 USB Stick / Harddisk / SD-Card To transfer data to the MDC-X a USB harddisk or stick is the fasted and prefered way. You can connect any USB The illustrations may differ in some details from the original. Subject to change without prior notice. - Page 16 Launcher or MDC-Touch otherwise some important backend functions like OSC will not be available or work incorrectly! The illustrations may differ in some details from the original. Subject to change without prior notice. Copyright © 2016,2017 by Dynamic Projection Institute GmbH. All Rights Reserved. http://www.dynamicprojection.com - MDC_QSG - Version 1.0.8- Page 16...
-
Page 17: Network Settings And Wifi Connections
CHANGING THE NETWORK CONFIGURATION MAYBE REQUIRES A REBOOT DEPENDING ON YOUR CHANGES. The illustrations may differ in some details from the original. Subject to change without prior notice. Copyright © 2016,2017 by Dynamic Projection Institute GmbH. All Rights Reserved. http://www.dynamicprojection.com - MDC_QSG - Version 1.0.8- Page 17... -
Page 18: Changing The Keyboard Layout
GIVES DIRECT ACCESS TO THE KEYBOARD SETTINGS The illustrations may differ in some details from the original. Subject to change without prior notice. Copyright © 2016,2017 by Dynamic Projection Institute GmbH. All Rights Reserved. http://www.dynamicprojection.com - MDC_QSG - Version 1.0.8- Page 18... - Page 19 7. Scheduler and MDC-System-daemon The MDC-X system comes with a scheduler which offers the possibility to start and stop differnt kind of projects during at a given time. Per default the scheduler que is empty and there are no scheduled tasks.
- Page 20 /opt/mdcos/bin/mdc-sender KILL_AUTO 0 Kill all automatic jobs The illustrations may differ in some details from the original. Subject to change without prior notice. Copyright © 2016,2017 by Dynamic Projection Institute GmbH. All Rights Reserved. http://www.dynamicprojection.com - MDC_QSG - Version 1.0.8- Page 20...
-
Page 21: Remote Control Of The Mdc-X System
8.3 DMX/ArtNet Control The DMX/ArtNet control of the MDC-X server is basically the same as the OSC control. To enable ArtNet on the MDC-X you have to set the required Bcast-IP as well (for the default IP 192.168.0.200 the Bcast-IP for ArtNet is 192.168.0.255) as the DMX start address for the listening service ->... - Page 22 : SIMPLEKILL ( = TURN OFF) : DLOAD : DAULOAD The illustrations may differ in some details from the original. Subject to change without prior notice. Copyright © 2016,2017 by Dynamic Projection Institute GmbH. All Rights Reserved. http://www.dynamicprojection.com - MDC_QSG - Version 1.0.8- Page 22...
-
Page 23: Automatisation Programming
Wait 4 seconds Return to the beginning The illustrations may differ in some details from the original. Subject to change without prior notice. Copyright © 2016,2017 by Dynamic Projection Institute GmbH. All Rights Reserved. http://www.dynamicprojection.com - MDC_QSG - Version 1.0.8- Page 23... - Page 24 MDC project with “1.0 Select a MDC Project” and wait until it is loaded. Now select “2.2 Debug Automatisation The illustrations may differ in some details from the original. Subject to change without prior notice. Copyright © 2016,2017 by Dynamic Projection Institute GmbH. All Rights Reserved. http://www.dynamicprojection.com - MDC_QSG - Version 1.0.8- Page 24...
- Page 25 Automatisation scripts can be set to be loaded by default in the SETUP page of MDC-Touch. The illustrations may differ in some details from the original. Subject to change without prior notice. Copyright © 2016,2017 by Dynamic Projection Institute GmbH. All Rights Reserved. http://www.dynamicprojection.com - MDC_QSG - Version 1.0.8- Page 25...
-
Page 26: Updating Mdc-X And Further Information
10.1 Update MDC-X We recommend updating the MDC-X system only in cases when you need a new feature or told so by our support - do not update systems that are running fine or during a show setup. Please test your systems, system integrations and projectes after an update. - Page 27 The illustrations may differ in some details from the original. Subject to change without prior notice. Copyright © 2016,2017 by Dynamic Projection Institute GmbH. All Rights Reserved. http://www.dynamicprojection.com - MDC_QSG - Version 1.0.8- Page 27...
Need help?
Do you have a question about the MDC-X and is the answer not in the manual?
Questions and answers