Advertisement
Quick Links
Advertisement

Summary of Contents for MonkMakes Charger Kit
- Page 1 Rev 1.
-
Page 2: Table Of Contents
WARNING........................2 Introduction .......................3 Assembly........................4 Using the Charger for micro:bit................11 MonkMakes......................12 WARNING This product contains a Lithium Polymer (LiPo) battery. If these batteries are punctured or otherwise damaged, they can catch fire. So please handle the battery with care when assembling this kit. -
Page 3: Introduction
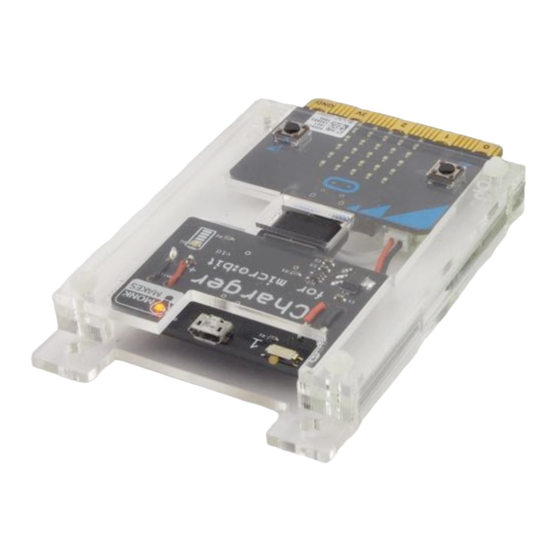
NTRODUCTION A LiPo battery and charger board that charges automatically while you use your micro:bit! This neat solution to your micro:bit’s power needs comes with an acrylic layer enclosure to protect your micro:bit and the Charger for micro:bit. • Program your micro:bit and charge at the same time •... -
Page 4: Assembly
SSEMBLY Step 1. Check the Contents Take the parts out of the box (contained in three bags) and check that you have everything. • Acrylic pieces labelled 1 to 6 • Charger for micro:bit board with USB adapter fitted • 4 x plastic nuts and bolts Page 4... - Page 5 Step 2. Put the Bolts Through the Base Push the bolts through the back of the piece labelled 1. Its difficult to do this without bolts falling out as fast as you put them in. If you do it near the edge of your table, you can slide one corner of piece 1 over the edge of the desk at a time and push its bolt through.
- Page 6 Step 3. Assemble the Layers Place the acrylic pieces over the bolts as shown in the sequence below. You can tell that it is the right way around from the photo, and also by checking that the numbers engraved on the plastic are the correct way up. Page 6...
- Page 7 Step 4. Connect the USB Adapter Connect your BBC micro:bit to the Charger for micro:bit’s USB plug. If the USB plug won’t fit into the micro:bit’s USB socket make sure that the black USB adaptor hasn’t been put onto the Charger for micro:bit the wrong way around. Page 7...
- Page 8 Step 5. Connect the JST Battery Connector Plug the JST plug coming from the lead on the Charger for micro:bit into the JST ‘battery’ socket on the micro:bit. This will only connect one way around. Page 8...
- Page 9 Step 6. Fit the micro:bit and Charger into Position Place the connected micro:bit and Charger for micro:bit onto the acrylic assembly as shown below. Step 7. Put on the Top Layer of Acrylic Put the acrylic layer labelled 6 into place, with the square cut-outs over buttons A and B.
- Page 10 Step 8. Fit the Nuts Place the nuts over the top of the screws and tighten them (finger tight). You can if you like use a small screwdriver to hold the screws still while you tighten the nuts with your fingers. Page 10...
-
Page 11: Using The Charger For Micro:bit
SING THE HARGER FOR MICRO The Charger for micro:bit contains a rechargeable battery, that will automatically charge whenever the device is plugged into a USB power source such as your computer. You can also flash programs onto your micro:bit through this connection. There is no need to take anything apart. -
Page 12: Monkmakes
For more information on this kit, the product's home page is here: https://monkmakes.com/mb_charger As well as this kit, MonkMakes makes all sorts of kits and gadgets to help with your micro:bit and Raspberry Pi projects. Find out more, as well as where to buy here: https://monkmakes.com...
Need help?
Do you have a question about the Charger Kit and is the answer not in the manual?
Questions and answers