RADEMACHER RolloTron Standard Translation Of The Original Operating And Assembly Manual
Electronic roller shutter belt winder
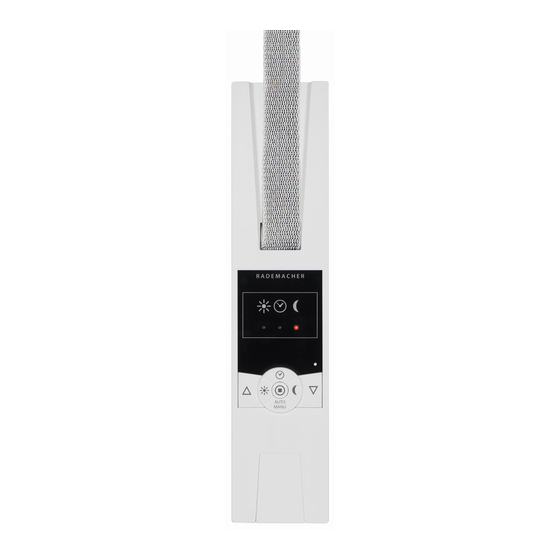
Source: rademacher.de

Subscribe to Our Youtube Channel
Related Manuals for RADEMACHER RolloTron Standard


Summary of Contents for RADEMACHER RolloTron Standard
- Page 1 Electronic Roller Shutter Belt Winder RolloTron Standard Translation of the Original Operating and Assembly Manual Item No.: 1423 45 19 1423 60 19 (Standard Plus) 1415 45 19 (Small belt) VBD 589-2-1 (06.19)
-
Page 2: Dear Customer
Dear Customer, With your purchase of a RolloTron Standard, you have These instructions... chosen a quality product manufactured by RADEMACHER. Thank you for the trust you have placed in us..describe how to install the equipment, connect the elec- trical system and operate your roller shutter belt winder. -
Page 3: Table Of Contents
........... 41 Drawing in and fastening the belt ......18 24. Technical Specifications.......... 42 10. Mounting the RolloTron Standard ......20 25. Tractive force diagrams .......... 43 11. End point adjustment ..........22 26. Simplified EU Declaration of Conformity .... 44 12. -
Page 4: Hazard Symbols
1. Hazard symbols Danger of fatal electric shock Danger area / dangerous situation 1.1 Levels of danger and signal words DANGER! CAUTION! This hazard will result in serious injury or death if not This hazard may result in minor or moderate injury if not avoided. -
Page 5: Safety Instructions
Exceeding the maximum permissible running time increased risk of injury. (KB) can overload and damage the RolloTron Standard. ◆ Train all personnel to use the RolloTron Standard ◆ The maximum permissible running time for a cycle safely. may not be exceeded when the equipment is in op- ◆... -
Page 6: Proper Use
◆ As the manufacturer, we provide no guarantee for the must be flat. use of third-party components and accept no liability for consequential damage resulting from such. ◆ All repairs to the RolloTron Standard must be under- taken by authorised customer service personnel. -
Page 7: Improper Use
◆ Never install or operate the RolloTron Standard outside. 2.3 Required expert knowledge of the installer The electrical connection, installation and commissioning of the RolloTron Standard must only be carried out by a qualified electrician in accordance with the instructions in this manual. -
Page 8: Scope Of Delivery (Item No. 1423 45 19)
3. Scope of delivery (item no. 1423 45 19) * * also applies to item numbers 1423 60 19 / 1415 45 19 Legend 1. Belt Winder RolloTron Standard or Standard Plus 2. 2 x assembly screws (4 x 55 mm) 3. Disengaging bracket (in housing) 4. -
Page 9: General View (Item No. 1423 45 19)
4. General view (item no. 1423 45 19) * * also applies to item numbers 1423 60 19 / 1415 45 19 Front cover Fastening holes Reel compartment Deflection roller cover Belt inlet Type plate Sun LED Clock LED Reset button Twilight LED SET button Reel... -
Page 10: Permissible Roller Shutter Belts
ATTENTION! The specifications are intended for guidance only and apply to an ideal installation situation. The actual values The RolloTron Standard may be damaged if excessively may vary due to local conditions. long belts are used. Only use belts of the permissible lengths. -
Page 11: Functional Description
6. Functional description Features and control options: The RolloTron Standard is a roller shutter drive designed for use inside. It is fitted as a flush-mounted device and ◆ Manual operation (MANU) the power supply is provided via the enclosed connect- ◆... -
Page 12: Description Of Safety Functions
There is a risk of injury if the obstacle detection is not working. The RolloTron Standard is equipped with a Soft-start / ◆ The belt must be wound on as evenly as possible to Soft-stop function. Gentle starting and stopping serves ensure safe and correct functioning of the obstacle to protect the belt winder mechanics and the belt. -
Page 13: General Assembly Instructions
7. General assembly instructions Poor routing of the belt can cause the belt to fail and Incorrect installation can lead to leads to unnecessary loads on the RolloTron Standard. property damage. ◆ Install the belt winder so that the belt runs as straight ◆... -
Page 14: Preparation For Installation
Check that the belt box has suf- ficient space to house the RolloTron Standard. All dimensions in mm All dimensions in mm RolloTron Standard RolloTron Standard Plus Item no.: Item no.: 1415 45 19 (Small belt) 1423 60 19 (Standard belt) 1423 45 19 (Standard belt) - Page 15 7.2 Preparation for installation Remove the old belt winder, if you are carrying out a conversion to an existing roller shutter system. Let the roller shutter move fully down, until the slats are completely closed. Remove the old belt winder and unreel the belt. CAUTION! There is a risk of injury from the pre-tensioned springs on the old belt winder.
-
Page 16: Safety Instructions For Electrical Connection
8. Safety instructions for electrical connection DANGER! The electrical connection for the RolloTron Standard can be made either with the supplied connecting Danger due to electric shock when working on all cable or via a fixed laid cable. electrical systems. -
Page 17: Electrical Connection
RolloTron Standard RolloTron Standard Plus screwing on the belt winder as this could lead to damage. Lay the connecting cable to the RolloTron Standard in a cable duct. Finally, screw on the traction relief mechanism with the screws provided. Cable duct... -
Page 18: Drawing In And Fastening The Belt
As no end points have been set yet, the drive will stop as soon as you release the button. Always remove the mains plug from the socket. Next, draw-in the belt into the RolloTron Standard from the top. - Page 19 Pull the belt tight when winding, so that the deflection roller turns at the same time. End of belt Finally remove the mains plug from the socket again. Fastening Finally, place the provided reel compartment cover onto hooks the reel compartment. Belt path in RolloTron Standard...
-
Page 20: Mounting The Rollotron Standard
Mount the RolloTron Standard as straight as possible, so that the belt can wind correctly. Ensure that the RolloTron Standard sits freely in the belt box and that it is not in contact with the masonry, otherwise noise will be generated during operation. - Page 21 Mount the light sensor (not included, see page 44, Accessories. Insert the light sensor plug into the designated connec- tion socket at the bottom of the RolloTron Standard. Subsequently secure the light sensor to the window pane using the sucker.
-
Page 22: End Point Adjustment
11. End point adjustment Additional information about configuring the end If the RolloTron Standard is operated without an end points point setting, the drive will continue to run for as long as one of the two control buttons is actuated. - Page 23 11. End point adjustment Set the lower end point Simultaneously press and hold the Please ensure that the belt is not excessively slack when buttons. reaching the lower end point. The roller shutters travel down. Release the buttons..as soon as the roller shutter achieves the desired position for the lower end point.
-
Page 24: Manual Operation
12. Manual operation Manual operation is always possible and has priority over the programmed automatic functions. Open the roller shutters. Briefly pressing the button causes the roller shutters to move to the upper end point. Causes the roller shutters to stop in the interim. -
Page 25: Automatic Mode; Brief Description
13. Automatic mode; brief description The RolloTron Standard features three automatic func- All of the automatic functions can be combined as well tions: as independently activated and deactivated on the Rol- loTron Standard. ◆ Automated solar function The status of each automatic function is indicated by the ◆... -
Page 26: Automatic Timer; Brief Description
14. Automatic timer; brief description The same switching times every day of the week. In order to set the switching times, you must carry out You can set an opening and closing time for your belt this step once at the time that the roller shutters are to winder which will apply to all days of the week. -
Page 27: Switching The Automatic Timer On/Off
14.2 Switching the automatic timer on/off You can toggle between automatic and manual modes Press the timer button for approx. 1 at any time if required. second. Manual operation of the roller shutters is possible at Pay attention to the timer LED. any time, regardless of the automatic settings. -
Page 28: Automated Solar Function; Brief Description
To do this, the light sensor is secured to the window pane with a sucker and then plugged into the RolloTron Standard. Automated solar function Automatic moving up and down of the roller shutter once a set limit is exceeded. - Page 29 15. Automated solar function; brief description Automatic lowering If the sensor detects uninterrupted sunlight for 10 min- 10 mins. utes, the shutter will descend until its shadow covers the light sensor. Automatic clearing After approx. 20 minutes, the roller shutter is automati- cally raised a small amount to uncover the sensor.
-
Page 30: Automated Solar Function; Configuring Sensitivity
Automated solar function ON pane and protect it from the sunlight or remove the con- nector from the RolloTron Standard device. Slowly flashing... ◆ if the set limit is exceeded. -
Page 31: Automatic Twilight Function; Brief Description
◆ If the automatic twilight function is activated. ◆ If twilight is detected for a minimum of 15 seconds. ◆ If the light sensor has been mounted and plugged into the RolloTron Standard. Automatic lowering At twilight, the roller shutters will lower to the lower end point after approx. -
Page 32: Automatic Twilight Function; Configuration Of Sensitivity
If you intend not to use the automatic twilight function, it is necessary to unplug the light sensor from the Automatic twilight function ON RolloTron Standard device or deactivate the automatic twilight function. Slowly flashing... ◆ if the set limit is exceeded. -
Page 33: Setting The Motor Speed For Automatic Functions
17. Setting the motor speed for automatic functions Pay attention to the LEDs The speed of the motor can be configured for recurring automatic functions if necessary (e.g. to reduce noise). = low speed Recurring automatic commands are executed at the con- = average speed figured motor speed. -
Page 34: Erase All Settings, Software Reset
Never press the reset button when the motor is running, as otherwise the end points will be modified. A hardware reset causes the internal power supply to the RolloTron Standard to be briefly interrupted. The opening and closing times must be reconfigured accordingly. All other settings are retained. -
Page 35: Removing The Rollotron Standard (E.g. In The Event Of A Move)
20. Removing the RolloTron Standard (e.g. in the event of a move) Erase all settings. Simultaneously press and hold the buttons for 4 seconds. Fully close the roller shutters. Keep the button held down. In doing so, pull out the belt as far as possible from the top of the RolloTron Standard. - Page 36 20. Removing the RolloTron Standard (e.g. in the event of a move) Remove the belt compartment cover. Check the position of the fastening hook and move the hook into an easily accessible position if necessary. CAUTION! There is a risk of injury from the reel.
-
Page 37: Removing The Belt In The Event Of Unit Failure
21. Removing the belt in the event of unit failure In the event that the RolloTron Standard unit fails and the Release the belt from the fastening hook and pull it out motor no longer runs, you can use the disengaging bracket completely from the RolloTron Standard. -
Page 38: What To Do If
Possible cause / solution ... the RolloTron Standard indicates no functions? Check the power supply including connecting cable and plug..the RolloTron Standard no longer reacts at a) There may have been a power failure. Reconfigure the switching the configured switching time? times, see page 26 b) The end may points are not configured. - Page 39 22. What to do if... ? Fault Possible cause / solution ... the roller shutters stop during downward travel? a) The roller shutters may have hit an obstacle. Move the roller shutters back up and remove the obstacle. b) Slats have shifted out of alignment. If possible, move the roller shutters back up and realign the slats.
- Page 40 Carry out a hardware reset in accordance with page 34. b) If the RolloTron Standard still fails to react after the hardware reset, carry out a software reset in accordance with the instructions on page 34. Subsequently test the RolloTron...
-
Page 41: Information About Maintenance And Care Of Your Equipment
Inadequate maintenance may lead to personal injury through damage to your RolloTron Standard and to the roller shutter system. ◆ Please check the RolloTron Standard and all of your roller shutter components regularly for damage. Regularly check the RolloTron Standard for its cor- ■... -
Page 42: Technical Specifications
230 V / 50 Hz; 230 V / 60 Hz Nominal power: 70 W Standby power: < 0.35 W Nominal torque: - RolloTron Standard 10 Nm - RolloTron Standard Plus 14 Nm Maximum speed: - RolloTron Standard 30 RPM. - RolloTron Standard Plus 24 RPM. Maximum tractive force:... -
Page 43: Tractive Force Diagrams
Belt length [ m ] 1 Lifting weight [Kg] 2 Belt thickness 1.0 mm 3 Belt thickness 1.3 mm 4 Belt thickness 1.5 mm 5 Belt length [m] 6 Belt lengths for RolloTron Standard 7 Belt lengths for RolloTron Standard Plus... -
Page 44: Simplified Eu Declaration Of Conformity
26. Simplified EU Declaration of Conformity RADEMACHER Geräte-Elektronik GmbH hereby declares The full text of the EU declaration of conformity is that the RolloTron Standard complies with the Directives included with the product and is kept on file by the 2006/42/EC (Machinery directive) and 2014/30/EU manufacturer.s. -
Page 45: Warranty Conditions
RADEMACHER shall remedy any defects, which occur within Your statutory warranty claims shall remain unaffected by the warranty period free of charge either by repair or by this warranty. - Page 48 RADEMACHER Geräte-Elektronik GmbH Buschkamp 7 46414 Rhede (Germany) info@rademacher.de www.rademacher.de Service: Hotline 01807 933-171* Fax +49 2872 933-253 * 30 seconds free of charge, subsequently 14 cents / minute from German fixed line networks and service@rademacher.de max. 42 cents / minute from German cellular networks.
Need help?
Do you have a question about the RolloTron Standard and is the answer not in the manual?
Questions and answers