Table of Contents
Advertisement
Quick Links
USE AND CARE GUIDE
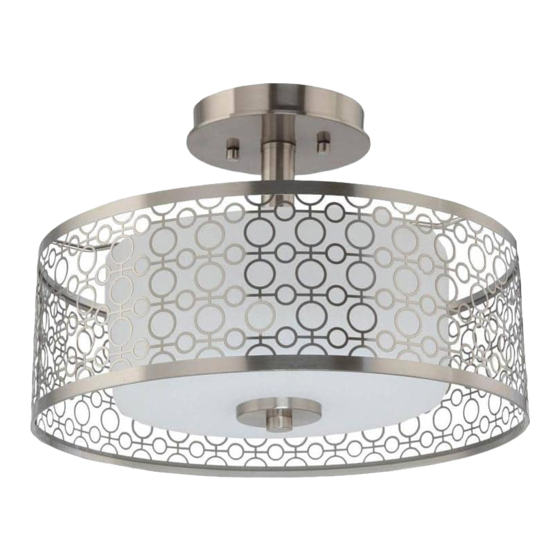
1-LIGHT LED SEMI-FLUSHMOUNT
Questions, problems, missing parts? Before returning to the store,
8 a.m. - 7 p.m., EST, Monday - Friday; 9 a.m. - 6 p.m., EST, Saturday
We appreciate the trust and confidence you have placed in Home Decorators Collection through the purchase of this
1-light LED semi-flushmount fixture. We strive to continually create quality products designed to enhance your home.
Visit us online to see our full line of products available for your home improvement needs.
call Home Decorators Collection Customer Service
1-800-986-3460
HOMEDEPOT.COM/HOMEDECORATORS
THANK YOU
Thank you for choosing Home Decorators Collection!
Item #1001571764
Model #79140930K9HDCDI
Advertisement
Table of Contents

Subscribe to Our Youtube Channel
Summary of Contents for Home Decorators Collection 79140930K9HDCDI
- Page 1 HOMEDEPOT.COM/HOMEDECORATORS THANK YOU We appreciate the trust and confidence you have placed in Home Decorators Collection through the purchase of this 1-light LED semi-flushmount fixture. We strive to continually create quality products designed to enhance your home. Visit us online to see our full line of products available for your home improvement needs.
-
Page 2: Table Of Contents
Table of Contents Table of Contents ............2 Tools Required ............3 Safety Information .............2 Hardware Included ..........3 Warranty..............2 Package Contents ..........4 What is covered .............2 Installation ..............5 Pre-Installation ............3 Care & Cleaning ............10 Planning Installation ..........3 Troubleshooting ............10 Service Parts ............11 Safety Information PLEASE READ AND UNDERSTAND THIS WARNING: IF ANY SPECIAL CONTROL... -
Page 3: Pre-Installation
Pre-Installation PLANNING INSTALLATION Before beginning installation, make sure all parts are included using the Hardware Included and Package Contents sections. If any part is missing or damaged, do not attempt to assemble, install or operate the product. To avoid damaging this product, place it on a soft, non-abrasive surface, such as carpet or cardboard. NOTE: Estimated assembly time: 30 minutes TOOLS REQUIRED (NOT INCLUDED) Phillips... -
Page 4: Package Contents
Pre-Installation (continued) PACKAGE CONTENTS Pieza Descripción Cantidad Fixture Cylinder Nut Metal Shade Glass Shade Finial Knurled Nut... -
Page 5: Installation
Installation Attaching the mounting strap Preparing for installation assembly to the junction box □ □ Install screws (BB) onto the mounting strap (AA). Attach the mounting strap (AA) onto the junction box using the mounting screws supplied with the junction box (not included). □... - Page 6 Installation (continued) Installing the fixture to the junction box □ Attach the fixture (A) to the mounting strap (AA) by aligning the screws (BB) with the holes in the fixture’s (A) canopy. □ Secure the fixture (A) to the mounting strap (AA) by using the ball nuts (B). Tighten securely. NOTE: The screws (BB) should extend long enough to protrude through the fixture’s (A) canopy when it is mounted (Adjust as needed).
- Page 7 Installation (continued) Installing the stem to fixture □ Screw the stem (EE) into the nipple until the hex nut (FF) is flush with the nipple. The nipple is already pre-assembled on the fixture (A). □ Screw another hex nut (FF) on the stem (EE). Leave enough stem (EE) to install the glass shade (E), cup (C) and finial (F).
- Page 8 Installation (continued) Installing the glass shade □ Insert a flat washer (GG) and a rubber washer (HH) onto the stem (EE). □ Install the glass shade (E) by inserting the nipple through the hole in the glass shade (E). □ Insert another rubber washer (HH) and a flat washer (GG) onto the stem (EE).
- Page 9 Installation (continued) Top View Installing the metal shade □ Attach the metal shade (D) over the glass shade (E). Fixture Metal Shade Glass Shade HOMEDEPOT.COM/HOMEDECORATORS Please contact 1-800-986-3460 for further assistance.
-
Page 10: Care & Cleaning
Care and Cleaning □ Shut off the main power supply before cleaning the product. □ To clean, wipe with a damp cloth. □ Do not use abrasive cleaners or cleaners that contain alcohol. Troubleshooting Problem Possible Causes Solution The lights will not turn on The power is off. -
Page 11: Service Parts
Service Parts Model# 79140930K9HDCDI Part Description Part Description Cylinder Nut Mounting Strap #8-32 x 1-1/2 in. Screw Metal Shade #8-32 x 1-1/2 in. Green Ground Screw Glass Shade Wire Nut Finial Stem 1/8P x 3-1/2 in. Hex Nut Flat Washer... - Page 12 Questions, problems, missing parts? Before returning to the store, call Home Decorators Collection Customer Service 8 a.m. - 7 p.m., EST, Monday - Friday; 9 a.m. - 6 p.m., EST, Saturday 1-800-986-3460 HOMEDEPOT.COM/HOMEDECORATORS Retain this manual for future use.


Need help?
Do you have a question about the 79140930K9HDCDI and is the answer not in the manual?
Questions and answers