Advertisement
Quick Links
EKZ F$
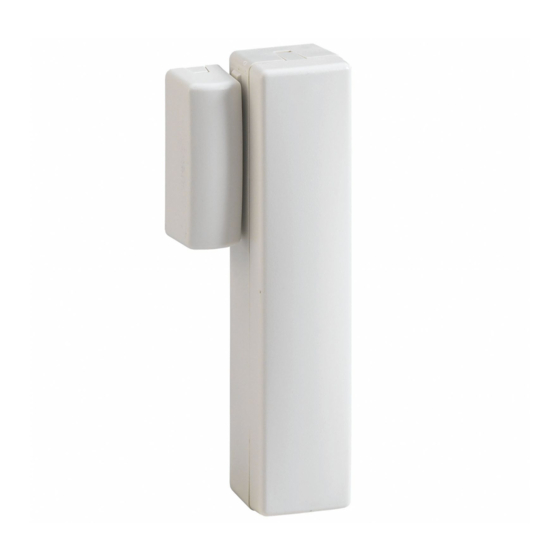
Détecteur d'ouverture magnétique
Door/window magnet contact
I
I
-
-
P
P
R
R
E
E
S
S
E
E
N
N
T
T
A
A
T
T
I
I
O
O
N
N
Ce détecteur d'ouverture magnétique, fait partie de la gamme de
périphériques radio « Média » associables à la centrale DOMONIAL 800
de type CMI/CMT.
Une LED rouge s'allume lorsque le contact s'ouvre ou se ferme.
Conformité EN50131 : Ce produit peut être utilisé dans des systèmes
conformes à PD6662 :2004 sécurité Grade-2 et classe d'environnement II.
I
I
-
M
O
N
T
A
G
E
I
I
-
M
O
N
T
A
G
E
L'émetteur se fixe sur le dormant de l'ouverture à protéger, l'aimant se
fixe toujours sur le battant.
L'écartement entre le boîtier et son aimant fourni ne doit pas excéder en
règle générale 10 mm.
Etapes de montage :
1
– Ouvrir le détecteur avec un tournevis (1 vis sur le côté) : image 1
2
– Ouvrir le boîtier en le faisant pivoter : image 2
3
– Fixer le socle à plat sur l'encadrement de la porte ou de la fenêtre
par 2 vis
Attention la vis du centre est obligatoire pour un bon
fonctionnement de l'autoprotection.
4
– Mettre la pile en respectant les polarités : Image 3
La LED peut être désactivée en maintenant l'autoprotection fermée
lors de l'insertion de la pile.
5
– Replacer le DO800M sur son socle fixé et refermer en le bloquant
avec la vis.
6
– Fixer l'aimant sur la partie mobile de la porte ou de la fenêtre en face
du repère du DO800M : image 4
I
I
I
–
P
R
O
C
E
D
U
R
E
D
E
I
I
I
–
P
R
O
C
E
D
U
R
E
D
E
Une LED permet de vérifier l'envoi de la trame radio à l'ouverture et à la
fermeture du contact.
I
V
–
A
L
I
M
E
N
T
A
T
I
O
N
I
V
–
A
L
I
M
E
N
T
A
T
I
O
N
Le détecteur signale un défaut pile à la centrale, lorsque sa tension
d'alimentation chute entre 2,7V & 2,5V. Il dispose d'une semaine
d'autonomie après avoir signalé son défaut pile.
ATTENTION : Il y a danger d'explosion s'il y a remplacement
incorrect de la pile. Remplacer uniquement avec une pile du même
type ou d'un type équivalent recommandé par le constructeur.
Mettre au rebut les piles usagées conformément aux instructions du
fabricant.
V
-
E
N
R
E
G
I
S
T
R
E
M
E
N
V
-
E
N
R
E
G
I
S
T
R
E
M
E
N
L'enregistrement est la procédure qui associe le détecteur à la centrale.
Cette opération nécessite un outil de programmation fonctionnant sur PDA.
La procédure complète est décrite dans la notice de l'outil de
programmation.
1
- Connecter l'outil de programmation et entrez en programmation.
2
- Choisir la rubrique « ENREGISTREMENT»
3
– Déclencher l'autoprotection du périphérique. Un message de confirmation
apparaît indiquant la prise en compte du détecteur par la centrale avec le
niveau radio et le numéro de série après quelques secondes.
4
– Choisir ensuite le mode de fonctionnement, le libellé...
5
– Vous pouvez sortir du mode programmation.
NB : Vous disposez d'une heure après introduction de la pile pour procéder à
l'enregistrement. Une fois ce délai dépassé, ôtez la pile, appuyez plusieurs fois
sur l'autoprotection et recommencez la procédure d'enregistrement.
IMPORTANT : le détecteur doit toujours être enregistré à son
emplacement définitif avec un minimum de réception de 2/10
EKZ012000F 11-2005 - Page 1 – Honeywell - Sécurité Communications -
Sécurité Communications se réserve le droit de modifier, à tout moment, dans l'intérêt du produit et/ou de l'utilisateur, ces caractéristiques techniques - Sécurité Communications reserve the right to change these technical specifications in the interest of product or user, without prior notice
D
D
4
T
E
S
T
T
E
S
T
(
p
i
l
e
f
o
u
r
n
i
e
)
(
p
i
l
e
f
o
u
r
n
i
e
)
T
T
Village d'entreprises - Bât D - Route des Dolines - BP41 - 06901 SOPHIA ANTIPOLIS CEDEX – France - Tél. : (33)492 942 950 - Fax : (33)492 942 960 -
O
8
0
0
M
O
8
0
0
M
I
I
–
–
P
P
R
R
E
E
S
S
E
E
This magnet contact must be associated to the Domonial 800 "media" range
control panel (CMI/CMT).
A red LED turns on when opening or closing the equipped door or window.
EN50131 compliance: This product is suitable for use in systems designed to
comply with PD6662:2004 at security grade-2 and environmental class II.
I
I
–
M
O
U
N
I
I
–
M
O
U
The transmitter part shall be secured to the frame and the magnet to the leaf of the
protected door or window
The gap between the transmitter and the magnet shall generally not be more than
10 mm
Mounting steps :
1
– Open the detector with a screwdriver (1 screw on magnet side) : picture 1
2
– Pivot the case up to open it : picture 2
3
– Fix the base using 2 screws on the fixed part of the door or window
The screw in the center must be secure for tamper good working.
1
4
– Insert the battery the right way round : picture 3
The LED can be disabled by inserting the battery while the
tamper is closed.
5
– Put the DO800M device on its base and secure it by the screw.
6
– Fix the magnet on the moved part and on the opposite of the mark of the
DO800M : picture 4.
I
I
I
-
T
E
S
T
I
I
I
-
T
E
S
T
2
Opening and closing operations can be checked with the LED. A radio frame is
sent at each lightning.
I
I
V
V
-
-
P
P
O
O
W
W
3
The detector indicates a battery fault to the alarm central unit when the power
supply voltage drops to a range of 2.7V to 2.5V. The detector offers one week's
autonomy after indicating a battery fault.
WARNING : There is a risk of explosion in case of wrong replacement of the
battery. Replace only with a battery of the same type or an equivalent type,
which has been recommended by the manufacturer. Throw away used
+
batteries according to the manufacturer's instructions.
V
V
–
–
R
R
E
E
C
C
O
O
Contact
The recording is the procedure associating the detector to the alarm central
unit. This operation requires a programming tool working on/compatible with a
PDA. The complete procedure is described in the programming tool notice.
1
– Connect the programming tool and start programming.
2
– Go to the « RECORD » menu
3
– Generate a radio pulse using the tamper switch. The radio level and serial
number appears after a few seconds.
4
– Choose the operating mode, the label...
5
– Exit the programming mode
NB: There is a one hour delay after battery introduction to proceed to the
recording. Once this time is over, remove the battery, press several times the
tamper switch and restart a new recording cycle.
Aimant
IMPORTANT : The detector must always be programmed in its
Magnet
final location with a minimum radio level of 2 units on a scale of 10
EKZ F$
Media Range
N
N
T
T
A
A
T
T
I
I
O
O
N
N
T
I
N
G
N
T
I
N
G
P
R
O
C
E
D
U
R
E
P
R
O
C
E
D
U
R
E
E
E
R
R
S
S
U
U
P
P
P
P
L
L
Y
Y
(
(
b
b
a
a
t
t
t
t
e
e
r
r
y
y
R
R
D
D
I
I
N
N
G
G
CR123A
x 1
Fournie / supplied
s
s
u
u
p
p
p
p
l
l
i
i
e
e
d
d
)
)
http://www.secom.tm.fr
Advertisement

Related Manuals for Honeywell DO800M


Summary of Contents for Honeywell DO800M
- Page 1 La LED peut être désactivée en maintenant l’autoprotection fermée tamper is closed. lors de l’insertion de la pile. – Put the DO800M device on its base and secure it by the screw. – Replacer le DO800M sur son socle fixé et refermer en le bloquant avec la vis.
- Page 2 Description du défaut / Fault description EKZ012000F 11-2005 - Page 2 – Honeywell - Sécurité Communications - Village d’entreprises - Bât D - Route des Dolines - BP41 - 06901 SOPHIA ANTIPOLIS CEDEX – France - Tél. : (33)492 942 950 - Fax : (33)492 942 960 - http://www.secom.tm.fr...