Table of Contents
Advertisement
Quick Links
Advertisement
Table of Contents

Subscribe to Our Youtube Channel
Related Manuals for Galaxy Innovations Gi FLY T2


Summary of Contents for Galaxy Innovations Gi FLY T2
-
Page 2: Table Of Contents
Contents Safety Rules ......................2 1. Summarization ....................3 1.1 Preface: ......................... 3 1.2 Main Features ........................ 3 2. Hardware ......................4 2.1 Front panel ........................4 2.2 Side panel ........................4 2.3 Rear panel ........................5 2.4 Remote Control ......................6 3. -
Page 3: Safety Rules
Safety Rules 1. Please do read user manual before you operate this machine. 2. Please don’t open the case of the machine by yourself in case of electric shock and damage to the machine, unless you are professional. 3. Please keep the machine power off when not working, don’t use damaged power line. -
Page 4: Summarization
1. Summarization 1.1 Preface: Thanks for choosing our Android TV box. This Android TV BOX is based on Android 4.0 version, with CPU A9-1GHz and GPU Mail-400 that can fluently run all Android 2D/3D application. Fully support HD H.264 decoding and HDMI high definition digital video output, giving you the cinema–class audio and visual enjoyment. -
Page 5: Hardware
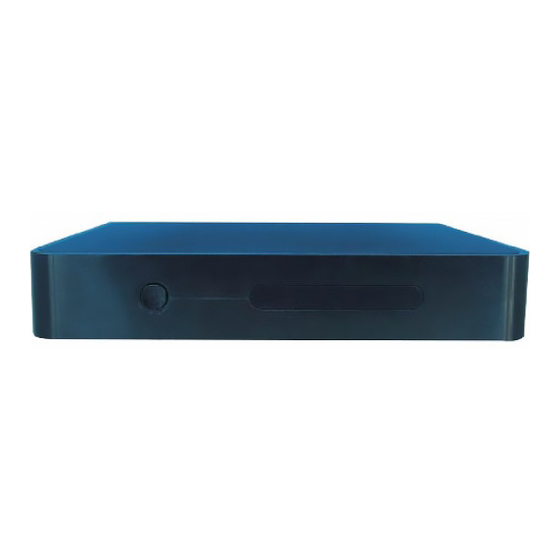
2. Hardware 2.1 Front panel STANDBY:Standby Button INDICATOR :Run:Green; Standby:Red 2.2 Side panel SD CARD:SD Card Slot USB:USB Slot... -
Page 6: Rear Panel
2.3 Rear panel LNB IN:Signal Input ETHERNET:Ethernet Slot USB:USB Slot HDMI:HDMI Output AV:AV Output RS 232:Serial Port DC 12V:DC 12V Input... -
Page 7: Remote Control
2.4 Remote Control Power/Standby key Mute key Their functions depend on certain application Pause key Stop key Fast backward /Fast forward Record key V.RATIO: video aspect ratio settings PVR:Access to recorded content in USB storage device 10. Recall key: Back to the last program 11. -
Page 8: System Connection
3. System Connection Please connect with your power, TV set, and other related devices according to the picture shows below, if you need to connect with more devices, please contact with your local operator. -
Page 9: Quick Installation Guide
4. Quick Installation Guide Step 1:Check system connection Please make sure antenna, TV, STB connected correctly, you can take a reference on system connection picture. Step 2 :Switch TV into Video Status Make sure all the port in rear panel connect properly, turn on the TV, and switch the TV into Video Status. -
Page 10: Functions
5. Functions 5.2 TV Interface After setting up boot guidance interface, it This Android TV box is based on Android 4.0 will enter into the full-screen broadcasting TV operating system of smart phone, aiming at program interface, as shown in figure 5-2-1: providing full variety of Internet applications, keeping your family in heart full of enjoyment on widescreen beyond which smart phone can bring... -
Page 11: Switch Channel
Figure 5-2-3 Figure 5-2-5 3. Input key words or letters into input field, matched programs will appear below. Choose 5.2.2 Switch Channel your demanded program in the search results, press【OK】to enter in. As shown in figure 5-2-6: 1. Press【OK】or【FAV】, program list pops up. Press 【... -
Page 12: Parent Lock
5.2.6 Parent Lock This function is to encrypt programs. (For encryption steps, please refer to the program editing and parent lock settings section). Only by inputing correct password can play the encrypted programs. Figure 5-2-10 4. When setting up language, press 【 / 】 to select and 【OK】to confirm. -
Page 13: Program Info
There are three parts: 5.2.9 Program Info ① Time: show the current time and date. ② Televising contractible window: press 【EXIT】 1. Press 【INFO】, program info pops up. to back to the full-screen televising state. 2. When switching channel, program info pops ③... - Page 14 to change the parameters; press【EXIT】to turn Program Search back. Click into program search, then the auto search interface pops up as shown in figure 5-3-4 below. The satellite list lies left and antenna settings lies right. Figure 5-3-7 5) According to the caption below, at the selected frequency point, pressing【BLUE】key means searching the programs at the point, while Figure 5-3-4...
- Page 15 Program Edit Program edit function includes lock, favourite, sequencing, move and delete. Program lock and FAV 1) Move the cursor to "Program Edit" option, press 【OK】 to confirm into. It reminds you to input Figure 5-3-12 password. When first entering, the user can set up an initial password.
- Page 16 By pressing 【 / 、 / 】 and 【OK】 to play or delete Small televising window:There is a movable window to broadcast the selected program the recorded program. on EPG menu. Select program: Press 【 / 】 to select program ...
- Page 17 Daylight Saving Time(DST): TV Setup Press 【 / 】 and 【OK】 to enter in DST option. Press 【EXIT】to quit without saving. Press【 / 、 / 】and【OK】to enter in "DTV Programs sort: Settings". As shown in the following picture. Use up ,down button to sort programs, press 【OK】button to confirm.
- Page 18 3) Video & Audio Press【 / 】and【 】to enter in Video & Audio settings. Figure 5-3-27 Recorded file save path: Figure 5-3-24 Set the position of recorded files. Video aspect ratio: Divide record by EPG event: Press【 / 】and【OK】or【V.RATIO】to enter in Open or close Divide record by EPG event video aspect ratio setting.
-
Page 19: Internet
5.3.2 Internet In the main menu, Internet option has four son options of "Browser", "Email", "YouTube" and "Facebook" as shown in figure 5-3-32. Press 【 / 、 / 】to move the cursor to the son option; press【OK】to enter in. Figure 5-3-29 6) Import satellite Figure 5-3-32 ... -
Page 20: More Applications
5.3.4 More Applications More Applications are mainly divided into "Application" and " Applied installation" . Use 【 / 、 / 】or fly mouse to move cursor to sub menu, press【OK】button to enter in. As picture 5-3-34 shows: Figure 5-4-1 IE Browser, connecting Google by default. -
Page 21: Wireless & Internet
all these settings are invalid. 5.5.1 Wireless & Internet Use IR remote control to choose static state IP, press【OK】button to enter in. Press【 / 、 / 】and【OK】to enter in “ Settings”, seeing picture 5-5-2: 5.5.2 Ethernet Settings Ethernet :Click this option , press【OK】 button to turn on or off Ethernet. -
Page 22: Display Setup
Volume: Set the system volume; 5.5.6 Applications Sound Output Mode: Choose PCM or RAW model. Choose "Apps" and press【OK】to enter in, like Picture 5-5-8 shows: 5.5.4 Display Setup Press【OK】to enter in "Display". Figure 5-5-8 Downloaded: Display users' personal downloaded and installed applications Figure 5-5-6... -
Page 23: System Update
5.5.8 System Update 1. Insert the SD card or U-disk that store upgrading files. 2. Choose Setting ->system setting->system upgrading into system upgrading interface, see as picture 5-5-10. Figure 5-5-12 5. The machine starts to clear FLASH and showing completely loading the upgrade files, see as picture 5-5-13. -
Page 24: Technical Parameter
6. Technical Parameter Features: Standard Android 4.0 System Support local multimedia playing Support HMTL5 or RTSP video and audio playing Support hardware accelerating OpenGL2.0 Support Android 2D/3D games Support video formats:mpeg、avi、mov、mp4、rm、rmvb、mp3 Support picture formats: jpeg、bmp、png、gif Resolution 720P, 1080P Support Multilanguage English, Chinese, Spanish, Polish, Portuguese, Persian Support USB 2.0 interface×3 Support updating by USB device or SD card. -
Page 25: Abnormal Phenomenon And Ruled Out
7. Abnormal phenomenon and ruled out Fault Phenomenon Possible reason Solution After start, without The power cord didn't connect Connected power plug, ensure normal or socket without electricity voltage electrical outlet any display No Voice and Please press the POWER button of the RCU Play box in standby mode Images switch to the operation condition... -
Page 26: Glossary
8. Glossary HDMI High Definition Multimedia Interface Electronic Program Guide Frequency unit Radio Frequency(It is also called HF in some countries) Standby STB no longer plays program or outputs any video and audio signals, also don't accept command of any key except on/off button. Allow parents to lock programs unfavourable to children Parent Lock A kind of equipment that can decode and tune digital signal, and turn these signals into formats...
Need help?
Do you have a question about the Gi FLY T2 and is the answer not in the manual?
Questions and answers