Table of Contents
Advertisement
Advertisement
Table of Contents

Related Manuals for Haden HCTT60

Summary of Contents for Haden HCTT60
- Page 2 How Can We Help? The Haden team is always interested in what you have to say, so why not get in touch? Call us 01909 544 570 Email us info@hadenappliances.com Write to us Team Haden, Sabichi Homewares Ltd, Priorswell Rd, Worksop, S80 2BY Visit us www.hadenappliances.com...
- Page 3 CONTENTS Safety Information Installation Getting to know your Hob Before use Usage Hints and Tips Care and use Troubleshooting Electrical Safety Technical Specification www.hadenappliances.com...
-
Page 4: Safety Information
SAFETY INFORMATION KEEP THIS MANUAL IN A CONVENIENT PLACE SO YOU CAN REFER TO IT FOR THE SAFE AND PROPER USE OF THE APPLIANCE THIS APPLIANCE MUST BE EARTHED. THIS PRODUCT MUST BE INSTALLED BY A QUALIFIED ELECTRICIAN. • This appliance can be used by children aged from 8 years and above and persons with reduced physical, sensory or mental capabilities or lack of experience and knowledge if they have been given supervision or instruction concerning use of the appliance in a safe way and... - Page 5 • Ensure that the appliance is not standing on the electricity supply cable. • Never use an extension cord or a multiple socket for connection to the power supply. The power connection should be easily accessible after the machine has been installed. •...
- Page 6 • WARNING: Unattended cooking on a hob with fat or oil can be dangerous and may result in fire. NEVER try to extinguish a fire with water. First switch off the appliance and then cover flame e.g. with a lid or a fire blanket. •...
- Page 7 L(mm) W(mm) H(mm) D(mm) A(mm) B(mm) X(mm) F(mm) 561min- 491min- 50min 3min 564max 494max • Under any circumstances, make sure the Induction cooker hob is well ventilated and the air inlet and outlet are not blocked. Ensure the induction cooker hob is in good work state. As shown below A(mm) B(mm)
-
Page 8: Ensuring Adequate Ventilation
Note: The distance between the hob and the cupboard above the hob should be at least 760mm ENSURING ADEQUATE VENTILATION Make sure the induction cooker hob is well ventilated and that air inlet and outlet are not blocked. In order to avoid accidental touch with the overheating bottom of the hob, or getting unexpectable electric shock during working, it is necessary to put a wooden insert, fixed by screws, at a minimum distance of 50mm from the bottom of the hob. -
Page 9: Before Locating The Fixing Brackets
• A suitable isolating switch providing full disconnection from the mains power supply is incorporated in the permanent wiring, mounted and positioned to comply with the local wiring rules and regulations. • The isolating switch must be of an approved type and provide a 3 mm air gap contact separation in all poles. -
Page 10: Adjusting The Bracket Position
ADJUSTING THE BRACKET POSITION The hob should be placed on a stable, smooth surface (use the packaging). Do not apply force onto the controls protruding from the hob. Fix the hob on the work surface by screw four brackets on the bottom of hob (see picture) after installation. -
Page 11: Connecting The Hob To The Mains Power Supply
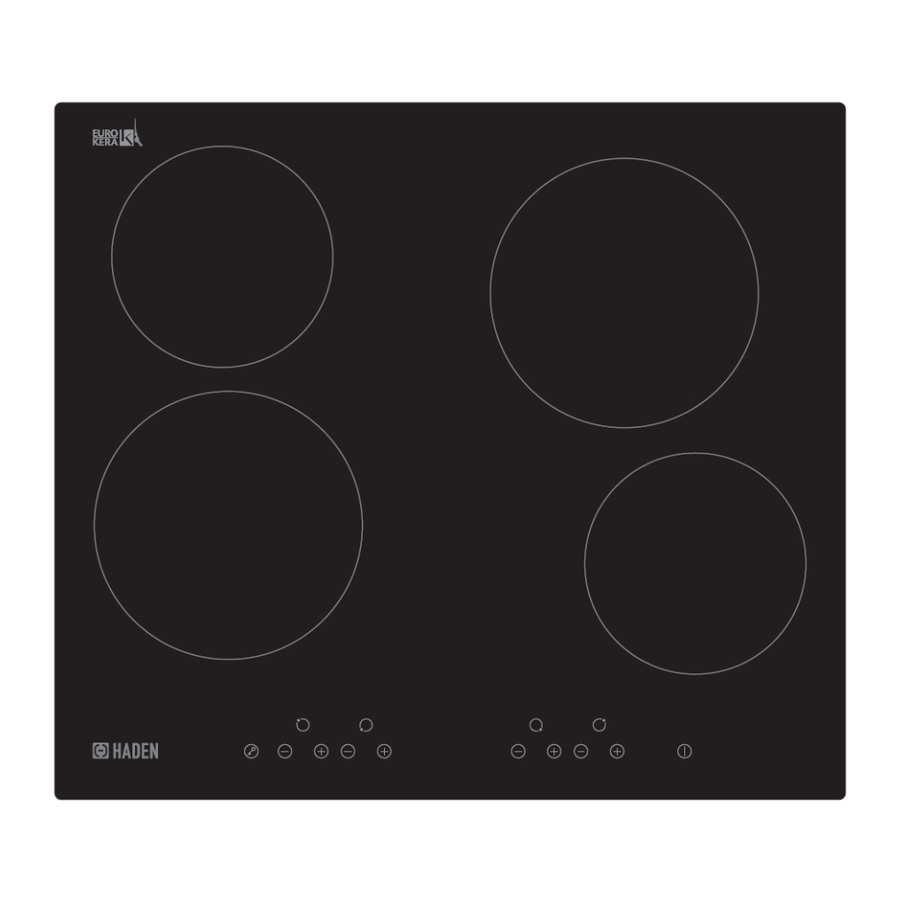
CONNECTING THE HOB TO THE MAINS POWER SUPPLY BEFORE PROCEEDING WITH THE ELECTRICAL CONNECTION, VERIFY THAT • The current carrying capacity of the household electrical circuit and the socket is adequate for the maximum power rating of the hob. • The voltage indicated on the rating label is the same as the supply voltage. - Page 12 GETTING TO KNOW YOUR CERAMIC HOB 1. Max. 1200 W zone 2. Max. 1800 W zone 3. Max. 1200 W zone 4. Max. 1800 W zone 5. Glass plate 6. ON / OFF 7. Control panel www.hadenappliances.com...
-
Page 13: Control Panel
CONTROL PANEL 1. ON /OFF 2. Power setting keys 3. Keylock www.hadenappliances.com... -
Page 14: Before Use
BEFORE USE CHOOSING SUITABLE COOKWARE • Do not use cookware with jagged edges or a curved base. • Make sure that the base of your pan is smooth, sits flat against the glass, and is the same size as the cooking zone. Use pans whose diameter is as large as the graphic of the zone selected. -
Page 15: Using Your Ceramic Hob
USING YOUR CERAMIC HOB TOUCH CONTROLS • The controls respond to touch, so you don’t need to apply any pressure. • Use the ball of your finger, not its tip. • You will hear a beep each time a touch is registered. •... - Page 16 3. Select a heat setting by touching the “-” or “+” control. • You can modify the heat setting at any time during cooking. NOTE: If you don’t choose a heat setting within 1 minute, the Ceramic hob will automatically switch off. You will need to start again at step 1. 4.
- Page 17 CONTROL LOCK/UNLOCK You can lock the controls to prevent unintended use (for example children accidentally turning the cooking zones on). When the controls are locked, all the controls except the ON/OFF control are disabled. Lock Touch the lock control the timer indicator will show “Lo”, the controls are now locked Unlock To Unlock the control, press and hold the lock control...
- Page 18 OVER TEMPERATURE PROTECTION A temperature sensor equipped can monitor the temperature inside the ceramic hob. When an excessive temperature is monitored, the ceramic hob will stop operation automatically. RESIDUAL HEAT WARNING When the hob has been operating for some time, there will be some residual heat.
- Page 19 Heat Setting Suitability • delicate warming for small amounts of food • melting chocolate, butter, and foods that burn quickly • gentle simmering • slow warming • reheating • rapid simmering • cooking rice • pancakes • sautéing • cooking pasta •...
-
Page 20: Care And Cleaning
CARE & CLEANING Cleaning the hob after use Everyday soiling on glass 1. Turn the hob off and • Heavy-duty scourers, (fingerprints, marks, allow to cool down. some nylon scourers and stains left by food or 2. Apply a hob cleaner harsh/abrasive cleaning non-sugary spill on the while the glass is still... -
Page 21: Troubleshooting
To request a service call TROUBLESHOOTING Contact the Haden Helpline 01759 487830 Cleaning the hob after use Problem Possible Causes What to do The ceramic hob cannot No power. Make sure the ceramic be turned on. hob is connected to the power supply and that it is switched on. -
Page 22: Electrical Safety
ELECTRICAL SAFETY IMPORTANT – This is a Class I Electrical Product. It requires an Earth connection. MAINS WIRING The power supply cable connected to this product should have wires with insulation colours: brown, blue and green/yellow. They must be connected to the mains supply according to the diagram below. WARNING! ELECTRIC SHOCK HAZARD. -
Page 23: Waste Electrical Recycling
WASTE ELECTRICAL RECYCLING This symbol indicates the product is classed as Electrical or Electronic Equipment and should not be disposed of with other household waste. The Waste Electrical and Electronic (WEEE) Directive has been introduced across the EU: • to recycle waste electrical products using the best available recovery and recycling techniques in order to minimise the •... -
Page 24: Technical Specification
TECHNICAL SPECIFICATION • Cooking Hob HCTT60 220-240V~ 50/60Hz • Rated voltage 5500-6600W • Rated power input 4 Zones • Cooking Zones Class 1 • Protection Sabichi Homewares Ltd 5 Wadsworth Road, Perivale, Middlesex UB6 7JD Information for domestic electric hobs... - Page 28 www.hadenappliances.com...
Need help?
Do you have a question about the HCTT60 and is the answer not in the manual?
Questions and answers