Table of Contents
Advertisement
Quick Links
G Series CMOS Cameras
A N E M P L O Y E E - O W N E D C O M P A N Y
Copyright © 2021 Orion Telescopes & Binoculars. All Rights Reserved. No part of this product instruction or any of its contents
may be reproduced, copied, modified or adapted, without the prior written consent of Orion Telescopes & Binoculars.
INSTRUCTION MANUAL
Orion
StarShoot
®
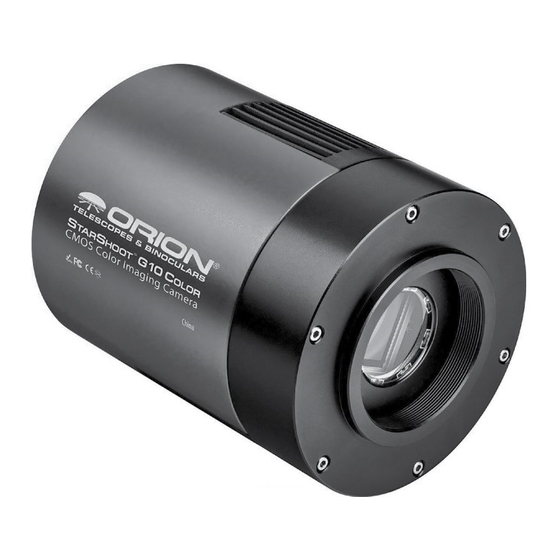
#51452 G10 Color
#51454 G10 EU/UK
#51457 G16 Mono
#51458 G26 APS-C Color
#54290 G21 Color
#51883 Mini 6.3 Color
#51884 Mini 6.3 Mono
#51860 G24 Full Format
#51862 G10 Mono
#51863 G26 APS-C Mono
#51452
#51883
Corporate Offices: 89 Hangar Way, Watsonville CA 95076 - USA
Toll Free USA & Canada: (800) 447-1001
International: +1(831) 763-7000
Customer Support: support@telescope.com
™
IN 628 Rev. E 01/21
Advertisement
Table of Contents

Summary of Contents for Orion StarShoot G Series
- Page 1 A N E M P L O Y E E - O W N E D C O M P A N Y Copyright © 2021 Orion Telescopes & Binoculars. All Rights Reserved. No part of this product instruction or any of its contents may be reproduced, copied, modified or adapted, without the prior written consent of Orion Telescopes &...
- Page 2 Welcome to the exciting world of astro-imaging. Your new StarShoot™ CMOS Imaging Camera is capable of capturing profes- sional quality astro-images of your favorite celestial objects. You can showcase spectacular images on your computer, share them on the internet, or print them. The camera’s large pixel array provides very high resolution images which are great for publishing in large prints.
-
Page 3: Getting Started
AC power requirements, do not apply. The Mini cameras are powered fully by the USB 3.0 port on your computer. 2. Getting Started Parts List • StarShoot G Series camera • 1.25” nosepiece (Mini), 2” nosepiece (G10 and above) • USB 3.0 cable • SBIG guide cable (Mini only) Figure 3b. - Page 4 Software and Driver Installation The software and driver must first be downloaded from the Orion Focusing the camera for the first time can be tricky, since the website before plugging in the camera. Please go to: www.tele- camera may focus at a completely different place from where scope.com/Gseries to download all the relevant software for...
- Page 5 Image Capture Plug the camera into the USB 3 port, and into AC power. When you open Orion Starshoot Image Capture, you’ll be presented with the main preview win- Figure 4a. Camera model – click this text to connect to the dow on the right, and the camera and start the preview.
- Page 6 If you wish to fine tune the focus further, a Bahtinov mask is an ideal method of focusing with Orion StarShoot Capture, as it is quite an accurate method using medium brightness stars.
- Page 7 Pick an object like the Ring Nebula (M57), exposure and check the results. Dumbbell (M27), or Orion Nebula (M42) since they are all very bright and easy to see in short exposures to make Once you’ve dialed in the right histogram, it’s time to start sure the framing is correct.
- Page 8 Also consider a dark frames can benefit from averaging many together. A mas- motorized filter wheel such as the Orion StarShoot 2” Motorized ter dark or flat made of many individual frames has significantly USB Filter Wheel to automate the process of switching filters less noise than only one.
-
Page 9: Conversion Gain
if you are boosting the gain up high to keep exposures times lower, try switching to HCG and readjusting gain, which can reduce read noise in the chip without losing as much dynamic range in the image. But when in doubt, stay in LCG mode, and your images will turn out fine. -
Page 10: Image Processing
Please note that the standard 2” nozzle that is included with the a color image, but if you set the saved file type to RAW, you will G24 is threaded for Orion filters (M48 x 0.6mm), and does not save an unconverted black and white image in the .fit format. -
Page 11: Specifications
Specifications G10 Color G16 Mono Sensor: Sony IMX 294 color CMOS, 4/3 format Panasonic MN34230 CMOS, 4/3 format Resolution: Up to 4128x2808 Up to 4640x3506 Pixel Size: 4.63 microns 3.8 microns Diagonal size of chip: 23.1mm 22.1mm Bayer Matrix pattern: RGGB arrangement BGGR/GRGB (depending on software) Exposure range:... - Page 12 Sensor: Sony IMX 410 color CMOS, full format Resolution: Up to 6064 x 4040 Pixel Size: 5.94 microns Diagonal Size of chip: 43.3mm Bayer Matrix patter: RGGB Exposure Range: 0.1ms - 3600s Partial frame download: Region of interest and Sub-frame download supported Binning: 1x1, 2x2, 3x3, hardware and...
- Page 13 G10 Mono Sensor: Sony IMX 492 mono CMOS, 4/3 format Resolution: 4128x2808 (best mode for deep-sky at 14-bit) 8184x5616 (unbinned 12-bit mode) Pixel Size: 4.63 microns (default best mode for deep-sky) 2.3 micron (unbinned for lunar/planetary) Diagonal Size of chip: 23.1mm Exposure Range: .01ms –...
-
Page 14: One-Year Limited Warranty
A N E M P L O Y E E - O W N E D C O M P A N Y Copyright © 2021 Orion Telescopes & Binoculars. All Rights Reserved. No part of this product instruction or any of its contents...


Need help?
Do you have a question about the StarShoot G Series and is the answer not in the manual?
Questions and answers