
Subscribe to Our Youtube Channel
Related Manuals for V2 NIUBA-24V

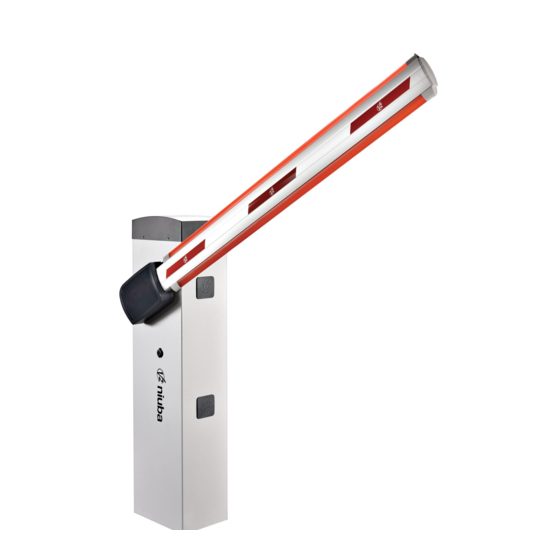
Summary of Contents for V2 NIUBA-24V
- Page 1 IL 417-1 EDIZ. 18/02/2020 NIUBA-24V BARRIERA STRADALE AUTOMATIC BARRIER BARRIÈRE LEVANTE BARRERA AUTOMÁTICA...
- Page 2 287 mm 218 mm 320 mm 319 mm 239 mm 374 mm...
-
Page 3: Table Of Contents
INDICE 1 - AVVERTENZE GENERALI PER LA SICUREZZA ....................... 1.1 - VERIFICHE PRELIMINARI E IDENTIFICAZIONE DELLA TIPOLOGIA DI UTILIZZO ............ 1.2 - SERVIZIO DI ASSISTENZA TECNICA ........................1.3 - DICHIARAZIONE UE DI CONFORMITÀ E DICHIARAZIONE DI INCORPORAZIONE DI QUASI MACCHINA ..... 2 - CARATTERISTICHE TECNICHE .......................... -
Page 4: Avvertenze Generali Per La Sicurezza
E’ necessario leggere tutte le istruzioni prima di • V2 si riserva il diritto di apportare eventuali modifiche al procedere all’installazione in quanto forniscono importanti prodotto senza preavviso. indicazioni riguardanti la sicurezza, l’installazione, l’uso e la manutenzione. -
Page 5: Verifiche Preliminari E Identificazione Della Tipologia Di Utilizzo
1.1 - VERIFICHE PRELIMINARI E IDENTIFICAZIONE DELLA TIPOLOGIA DI UTILIZZO L’automatismo non deve essere utilizzato prima di aver effettuato la messa in servizio come specificato nel paragrafo “Collaudo e messa in servizio”. Si ricorda che l’automatismo non sopperisce a difetti causati da una sbagliata installazione, o da una cattiva manutenzione, quindi, prima di procedere all’installazione verificare che la struttura sia idonea e conforme alle norme vigenti e, se del caso, apportare tutte le modifiche strutturali volte alla realizzazione dei franchi di sicurezza ed alla protezione o segregazione di tutte le zone di schiacciamento, cesoiamento, convogliamento e verificare che:... -
Page 6: Servizio Di Assistenza Tecnica
2014/30/UE (EMC); 2006/42/CE (MD) ALLEGATO II, PARTE B Tempo di apertura 3 ÷ 4 s 5 ÷ 6 s Il fabbricante V2 S.p.A., con sede in Corso Principi di Piemonte 65, 12035, Racconigi (CN), Italia 80 % 80 % Ciclo di lavoro (200 cicli ora max.) - Page 7 NIUBA4 NIUBA6 - 5 -...
-
Page 8: Schema D'installazione
3 - SCHEMA D’INSTALLAZIONE COMPONENTI ACCESSORI AGGIUNTIVI Motore Selettore chiave Barra Lampeggiante Trasmettitore Fotocellule Modulo ricevitore Fotocellule a colonna Appoggio Kit luci barra kit luci barriera Selettore digitale via radio LUNGHEZZA DEL CAVO < 10 metri da 10 a 20 metri da 20 a 30 metri Alimentazione 230V / 120V 3G x 1,5 mm... -
Page 9: Preparazione Della Base Per L'automazione
4 - PREPARAZIONE DELLA BASE PER FIG. 3 L’AUTOMAZIONE 1. Prevedere uno scavo di fondazione e predisporre uno o più tubi per il passaggio dei cavi elettrici (FIG. 1). 2. Assemblare le 4 zanche sulla piastra di ancoraggio e fissarle tramite i 8 bulloni in dotazione (FIG. -
Page 10: Posizione Della Molla
5 - POSIZIONE DELLA MOLLA FIG. 1 La barriera viene fornita con la molla montata per l’installazione DESTRA (DX). Se l’installazione deve essere a SINISTRA (SX) seguire le istruzioni riportate sotto per modificare la posizione della molla. Il foro di aggancio sul bilanciere può variare in base alla lunghezza della barra. - Page 11 FIG. 3 FIG. 4 - 9 -...
-
Page 12: Installazione Della Barra
6 - INSTALLAZIONE DELLA BARRA 6.1 - BARRA QUADRA 1. Tagliare la barra A alla lunghezza desiderata. NOTA: se l’installazione prevede l’utilizzo del kit luci (cod. 163615) è necessario eseguire l’installazione dei moduli prima di montare il profilo in gomma 2. - Page 13 - 11 -...
-
Page 14: Bilanciamento Della Barra
7 - BILANCIAMENTO DELLA BARRA Dopo aver agganciato la molla come descritto nel capitolo 5 è necessario procedere con il bilanciamento della barra. 45° 1. Sbloccare l’automazione 2. Ruotare manualmente la molla per aumentare o diminuire la trazione. La barra deve stabilizzarsi a 45°. 45°... -
Page 15: Centrale Di Comando
9 - CENTRALE DI COMANDO 9.2 - ALIMENTAZIONE DA BATTERIA PD16 è dotata di un display il quale permette, oltre che una In caso di black-out elettrico il dispositivo può essere alimentato facile programmazione, il costante monitoraggio dello stato dal pacco batteria (accessorio codice 161212). degli ingressi;... -
Page 16: Ingressi Di Attivazione
9.4 - INGRESSI DI ATTIVAZIONE 9.6 - FOTOCELLULE La centrale PD16 dispone di due ingressi di attivazione, la cui Le fotocellule possono essere attive in due modi: funzione dipende dalla modalità di funzionamento programmata 1. Solo durante la chiusura: in questo caso il passaggio davanti Strt (voce del menu di programmazione):... -
Page 17: Coste Sensibili
9.7 - COSTE SENSIBILI 9.9 - USCITA LUCI IN BASSA TENSIONE Si possono installare al posto del profilo anturto in gomma La centrale PD16 dispone di un uscita a 24Vdc che permette il normalmente fornito con la barra. collegamento di un carico massimo di 3W. In caso di intervento durante la chiusura si ha la ri-apertura e la Questa uscita può... -
Page 18: Collegamenti Elettrici
10 - COLLEGAMENTI ELETTRICI OVERLOAD RECEIVER FUSE MAINS M9 M10 M11 M12 B1 B2 A1 A2 BATTERY Collegare a terra il motore per mezzo del morsetto contrassegnato dal simbolo Utilizzare il terminale ad occhiello in dotazione - 16 -... -
Page 19: Ricevitore Ad Innesto
V2. dei trasmettitori delle fotocellule tra i morsetti M10 e M9 Fare riferimento al catalogo V2 per vedere quali moduli opzionali con interfaccia ADI sono disponibili per questa centrale. M11 - M12 Uscita luci in bassa tensione (Lampada spia o lampeggiante 24V) ATTENZIONE: Per l’installazione dei moduli opzionali,... -
Page 20: Pannello Di Controllo
11 - PANNELLO DI CONTROLLO 11.2 - USO DEI TASTI PER LA PROGRAMMAZIONE 11.1 - DISPLAY La programmazione delle funzioni e dei tempi della centrale viene eseguita tramite un apposito menù di configurazione, accessibile Quando viene attivata l’alimentazione, la centrale verifica il ed esplorabile tramite i 3 tasti e OK posti di fianco al display corretto funzionamento del display accendendo tutti i segmenti... -
Page 21: Accesso Alle Impostazioni Della Centrale
12 - ACCESSO ALLE IMPOSTAZIONI 13 - CARICAMENTO DEI DELLA CENTRALE PARAMETRI DI DEFAULT In caso di necessità, è possibile riportare tutti i parametri al loro 1. Tenere premuto il tasto OK fino a quando il display visualizza il valore standard o di default (vedere la tabella riassuntiva finale). menù... -
Page 22: Configurazione Veloce
14 - CONFIGURAZIONE VELOCE 15 - AUTOAPPRENDIMENTO DEI FINECORSA In questo paragrafo viene illustrata una procedura veloce per configurare la centrale e metterla immediatamente in opera. Questo menù permette di apprendere in modo automatico le posizioni di finecorsa della barriera in apertura ed in chiusura. Si consiglia di seguire inizialmente queste istruzioni per verificare velocemente il corretto funzionamento della ATTENZIONE: prima di procedere assicurarsi di aver... -
Page 23: Lettura Del Contatore Di Cicli
16 - LETTURA DEL CONTATORE DI CICLI L’area 3 rappresenta l’impostazione di quest’ultimo contatore: alla prima pressione del tasto il valore attuale del contatore viene arrotondato alle migliaia, ogni pressione successiva fa La centrale PD16 tiene il conto dei cicli di apertura della barriera aumentare o diminuire l’impostazione di 1000 unità. -
Page 24: Programmazione Della Centrale
17 - PROGRAMMAZIONE DELLA CENTRALE DI COMANDO -PrG Il menu di programmazione consiste in una lista di voci configurabili; la sigla che compare sul display indica la voce attualmente selezionata. Premendo il tasto si passa alla voce FinE successiva; premendo il tasto si ritorna alla voce precedente. - Page 25 PARAMETRO VALORE DESCRIZIONE DEFAULT MEMO t.rSE 0.0” Tempo di ritardo elettromagnete di tenuta 0.0” - 5.0” Questo menù permette di regolare il ritardo con cui l’elettromagnete di tenuta si blocca dopo che la barra ha terminato la chiusura. ATTENZIONE: se l’elettromagnete di tenuta non è presente impostare questo parametro a zero.
- Page 26 PARAMETRO VALORE DESCRIZIONE DEFAULT MEMO SEnS Abilitazione del Sensore di Ostacoli 1.0A - 10.0A Questo menù permette la regolazione della sensibilità del sensore di ostacoli. Quando la corrente assorbita dal motore supera il valore impostato, la centrale rileva un allarme. Durante l’apertura, un ostacolo causa l’arresto della barra.
- Page 27 PARAMETRO VALORE DESCRIZIONE DEFAULT MEMO Ch.tr Chiusura dopo il transito Nel funzionamento automatico, ogni volta che interviene una fotocellula durante la pausa, il conteggio del tempo di pausa ricomincia dal valore impostato in questo menù. Analogamente, se la fotocellula interviene durante l’apertura, viene immediatamente caricato questo tempo come tempo di pausa.
- Page 28 PARAMETRO VALORE DESCRIZIONE DEFAULT MEMO Strt StAn Funzione degli ingressi di attivazione START1 e START2 Questo menù permette di scegliere la modalità di funzionamento degli ingressi START1 e START2 (capitolo 9.4) StAn Modalità standard Gli ingressi di Start da morsettiera sono disabilitati. StAn Gli ingressi radio funzionano secondo la modalità...
- Page 29 PARAMETRO VALORE DESCRIZIONE DEFAULT MEMO Ingresso costa sensibile Questo menù permette di abilitare l’ingresso per le coste sensibili Ingresso disabilitato (la centrale lo ignora) Ingresso abilitato durante la chiusura. L’intervento della costa causa la riapertura della barriera e la disattivazione dell’eventuale chiusura automatica Co.tE Test delle coste di sicurezza...
-
Page 30: Anomalie Di Funzionamento
Questo malfunzionamento non è rimediabile dall’installatore. Significa che la programmazione è stata bloccata con la chiave di La centrale deve essere inviata alla V2 S.p.A. per la riparazione. blocco programmazione CL1+ (codice 161213). Per procedere con la modifica delle impostazioni è necessario... - Page 31 - 29 -...
-
Page 32: Collaudo E Messa In Servizio
V2 raccomanda l’utilizzo delle seguenti norme tecniche: L’intervallo raccomandato tra ogni manutenzione è di sei mesi, le verifiche previste dovrebbero riguardare almeno: •... - Page 33 Concordate con il vostro installatore un piano di manutenzione con frequenza periodica; V2 SPA raccomanda un piano di manutenzione da eseguire ogni 6 mesi per un normale utilizzo domestico, ma questo periodo può...
- Page 34 - 32 -...
- Page 35 INDEX 1 - GENERAL SAFETY INFORMATION ........................1.1 - PRELIMINARY CHECKS AND IDENTIFICATION OF THE TYPE TO BE USED ............1.2 - TECHNICAL ASSISTANCE SERVICE ........................1.3 - EU DECLARATION OF CONFORMITY ....................... 2 - TECHNICAL CHARACTERISTICS ..........................3 - INSTALLATION LAYOUT ............................4 - PREPARATION OF THE BASE FOR AUTOMATION ....................
- Page 36 V2 customer assistance service. 1 - GENERAL SAFETY INFORMATION • V2 declines all responsibility for failure to comply with good construction practice standards in addition to structural deformation of the barrier that might occur during use.
- Page 37 1.1 - PRELIMINARY CHECKS AND IDENTIFICATION OF THE TYPE TO BE USED The automation device should not be used until installation, as specified in “Testing and start-up”, has been performed. It should be remembered that the device does not compensate for defects caused by improper installation, or poor maintenance, thus, prior to proceeding with installation, ensure that the structure is suitable and meets current standards and, if necessary, perform any structural modifications aimed at the implementation of safety gaps and the protection or segregation of all crushing, shearing and transit zones, and verify that:...
- Page 38 Declaration in accordance with Directives: 2014/35/UE (LVD); 2014/30/UE (EMC); 2006/42/CE (MD) ANNEX II, PART B Power in stand-by 3,5W 3,5W The manufacturer V2 S.p.A., headquarters in Corso Principi di Opening time 3 ÷ 4 s 5 ÷ 6 s Piemonte 65, 12035, Racconigi (CN), Italy...
- Page 39 NIUBA4 NIUBA6 - 37 -...
- Page 40 3 - INSTALLATION LAYOUT COMPONENTS ADDITIONAL ACCESSORIES Motor Key switch Boom Flashing light Transmitter Photocells Receiving module Pillar photocells End support post Lights kit (boom) Lights kit (barrier) Pillar-mounted digital radio switch LENGTH OF THE CABLE < 10 metres from 10 to 20 metres from 20 to 30 metres Power supply (230V / 120V) 3G x 1,5 mm...
- Page 41 4 - PREPARATION OF THE BASE FOR FIG. 3 AUTOMATION 1. Provide a foundation pit and arrange one or more conduits for the passage of the electrical cabling (FIG. 1). 2. Assemble the 4 anchoring brackets on the mounting plate and fasten with the 8 bolts provided (FIG.
- Page 42 5 - SPRING POSITION FIG. 1 The barrier is provided with the spring fitted for RIGHT installation (DX). If the installation should be on the LEFT (SX), follow the instructions below to change the position of the spring. The coupling hole on the rocker arm may vary according to the bar length.
- Page 43 FIG. 3 FIG. 4 - 41 -...
- Page 44 6 - BOOM INSTALLATION 6.1 - SQUARE BOOM 1. Cut boom A to the desired length NOTE: if the lights kit is required (code 163615), the modules have to be installed before mounting the rubber edge 2. Present the rubber anti-shock profile B on the bar before inserting it and cut it to the desired length NOTE: the rubber profile must be 20 cm shorter than the bar length.
- Page 45 - 43 -...
- Page 46 7 - BALANCING OF THE BOOM After having hooked the balance spring as described in the chapter 5, it is necessary to proceed to balance the boom. 45° 1. Unblock the automation 2. Rotate the balance spring manually in order to increase or to diminish the traction.
- Page 47 9 - CONTROL UNIT 9.2 - BATTERY POWER SUPPLY PD16 is provided with a display that, not only makes In the case of an electricity black-out, the device may be powered programming simple, but also allows a continuous monitoring of using a battery pack (accessory code 161212).
- Page 48 9.4 - ACTIVATION INPUTS 9.6 - PHOTOCELLS The control unit PD16 has two activation inputs available, whose Photocells can be activated in two ways: functions depend on the programmed mode of operation (See 1. Only during closing: in which case the passage in front of Strt voice on the programming menu):...
- Page 49 9.7 - SAFETY RIBBONS 9.9 - LOW VOLTAGE LIGHT OUTPUT They can be installed located on the anti-shock rubber bumper The control unit has a 24 VDC output that allows connection of a strip, which normally comes provided with the boom kit. maximum load of 3 W.
- Page 50 10 - ELECTRICAL CONNECTIONS OVERLOAD RECEIVER FUSE MAINS M9 M10 M11 M12 B1 B2 A1 A2 BATTERY onnect the motor to ground through the clamp marked by the symbol Use the eyelet provided. - 48 -...
- Page 51 Accessory power common (-) PD16 allows the connection to V2 optional modules. Power supply - photocell/optical edge TX for Refer to V2 catalogue or to the technical sheets to see which functional Test. optional modules with ADI interface are available for this control Connect power supply cables of photocells unit.
- Page 52 11 - CONTROL PANEL 11.2 - USE OF THE KEYS FOR PROGRAMMING 11.1 - DISPLAY The control unit functions and times are programmed by means of a special configuration menu, which can be accessed and When power is on, the control unit checks that display correctly explored by using the 3 keys, and OK, located on the side of 8.8.8.8...
- Page 53 12 - ACCESSING THE CONTROL UNIT 13 - LOADING THE DEFAULT SETTINGS PARAMETERS If necessary, it is possible to restore all parameters to their 1. Press and hold the OK key until the display shows the menu standard or default values (see the final summary table). desired 2.
- Page 54 14 - QUICK CONFIGURATION 15 - AUTO-LEARNING END-STOP This paragraph concerns a quick procedure to set the control unit This menu allows automatically learning the end-stop positions of and set it at work immediately. the barrier in opening and closing. We recommend following these instructions, in order to ATTENTION: before proceeding, make sure to position check quickly the correct operation of control unit, motor...
- Page 55 16 - READING OF CYCLE COUNTER Area 3 is the setup of this latter counter; if you press once key, the current counter value will be rounded up or down to thousands, any following pressure will have the setup be PD16 control unit counts the completed opening cycles of the increased or decreased of 1000 units.
- Page 56 17 - PROGRAMMING THE CONTROL UNIT -PrG The configuration menu consists in a list of configurable items; the display shows the selected item. By pressing , you will pass to the next item; by pressing , you FinE will return to the previous item. By pressing OK, you can view the current value of selected item and possibly change it.
- Page 57 PARAMETER VALUE DESCRIPTION DEFAULT MEMO t.rSE 0.0” Holding magnet delay time 0.0” - 5.0” This menu allows regulating the delay with which the holding magnet jams after the barrier has finished closing. ATTENTION: if the holding magnet is not present to set up this parameter to zero.
- Page 58 PARAMETER VALUE DESCRIPTION DEFAULT MEMO SEnS Enable the obstacle sensor 1.0A - 10.0A This menu allows you to regulate the sensitivity of the obstacle sensor. When the current absorbed by the motor exceeds the set value, the controller detects an alarm. During the opening, an obstacle would cause the arrest of the boom.
- Page 59 PARAMETER VALUE DESCRIPTION DEFAULT MEMO Ch.tr Closing after transit During the automatic operation, the pause count down starts from the set up value each time a photocell operates during the pause. If the photocell operates during the opening time, this time will be immediately stored as pause time.
- Page 60 PARAMETER VALUE DESCRIPTION DEFAULT MEMO Strt StAn Function of input START1 and START2 This menu allows choosing the mode of operation of the input START1 and START2 StAn Standard mode The Start input commands on the terminal strip are disabled. StAn The radio command function depending of the mode AP.Ch...
- Page 61 PARAMETER VALUE DESCRIPTION DEFAULT MEMO Safety ribbon input This menu allows enabling the input for safety ribbon Input disabled (ignored by the control unit) Input enabled during closure and disabled during opening. The intervention of the safety ribbon cause the reopening of the barrier and the disactivation of any automatic closing Co.tE Test of the safety ribbons...
- Page 62 It means that MOSFET test failed. Before sending the control unit to V2 S.p.A. for repair, be sure Error 10 that motors have been properly connected. When a start command is given, the barrier does not open and...
- Page 63 - 61 -...
- Page 64 V2 recommends the application of the following technical The recommended interval between each maintenance standards: operation is six months, the checks involved should at least relate to: •...
- Page 65 Are you satisfied? Should you wish to add another automation device to your home, contact the same installer and ask for a V2 SpA product: we guarantee you the most advanced products on the market and maximum compatibility with existing automation devices.
- Page 66 - 64 -...
- Page 67 INDEX 1 - CONSIGNES GÉNÉRALES DE SÉCURITÉ ........................ 1.1 - VÉRIFICATIONS PRÉLIMINAIRES ET IDENTIFICATION DE LA TYPOLOGIE D’UTILISATION ........1.2 - SERVICE D’ASSISTANCE TECHNIQUE ....................... 1.3 - DECLARATION UE DE CONFORMITE ET DECLARATION D’INCORPORATION DE QUASI-MACHINE ....2 - CARACTÉRISTIQUES TECHNIQUES ........................3 - SCHÉMA D’INSTALLATION ............................
- Page 68 L’AUTOMATION DOIT ÊTRE RÉALISÉE CONFORMÉMENT AUX • V2 se réserve le droit d’apporter d’éventuelles modifications au DISPOSITIFS NORMATIFS EUROPÉENS EN VIGUEUR: produit sans préavis. EN 60204-1, EN 12453, EN 13241-1, EN 12635 •...
- Page 69 1.1 - VÉRIFICATIONS PRÉLIMINAIRES ET IDENTIFICATION DE LA TYPOLOGIE D’UTILISATION L’automatisme ne doit pas être utilisé avant d’avoir effectué la mise en service comme spécifié dans le paragraphe “Essai et mise en service.” Nous rappelons que l’automatisme ne pallie pas les défauts causés par une installation erronée, ou relatifs à un mauvais entretien, par conséquent, avant de procéder à...
- Page 70 2014/30/UE (EMC); 2006/42/CE (MD) ANNEXE II, PARTIE B Temps d’ouverture 3 ÷ 4 s 5 ÷ 6 s Le fabricant V2 S.p.A., ayant son siège social a: Intermittence de 80 % 80 % Corso Principi di Piemonte 65, 12035, Racconigi (CN), Italie travail (200 cicli ora max.)
- Page 71 NIUBA4 NIUBA6 - 69 -...
- Page 72 3 - SCHÉMA D’INSTALLATION COMPOSANTS AUTRES ACCESSOIRES Barrière Sélecteur à clé Lisse Émetteur Photocellules Module récepteur Potelets avec photocellules Lyre de repos Kit lumières (lisse) Kit lumières (barrière) Sélecteur digitale par radio LONGUEUR DU CÂBLE < 10 mètres de 10 à 20 mètres de 20 à...
- Page 73 4 - PRÉPARATION DE LA BASE POUR FIG. 3 L’AUTOMATION 1. Prédisposer un trou de fondation et un ou plusieurs tubes pour le passage câbles électriques (FIG. 1). 2. Assembler les 4 agrafes sur la plaque d’ancrage et les fixer au moyen des 8 boulons en dotation (FIG.
- Page 74 5 - POSITION DU RESSORT FIG. 1 La barrière est fournie avec le ressort monté pour l’installation DROITE (DX). Si l’installation doit se faire à GAUCHE (SX), suivre les instructions fournies ci-dessous pour modifier la position du ressort. Le trou d’accrochage sur le balancier peut varier sur la base de la longueur de la barre.
- Page 75 FIG. 3 FIG. 4 - 73 -...
- Page 76 6 - MISE EN PLACE DE LA LISSE 6.1 - LISSE PLATE 1. Couper la lisse A à la longueur désirée. REMARQUE: si l’installation prévoit l’utilisation du kit lumières (cod. 163615) il est alors nécessaire d’exécuter l’installation des modules avant de monter le profil en caoutchouc 2.
- Page 77 - 75 -...
- Page 78 7 - ÉQUILIBRAGE DE LA LISSE Après avoir accroché le ressort comme décrit dans le chapitre 5, il est nécessaire de procéder à l’équilibrage de la lisse. 45° 1. Débloquer l’automation 2. Tourner le ressort manuellement pour augmenter ou diminuer la traction. 45°...
- Page 79 9 - ARMOIRE DE COMMANDE 9.2 - ALIMENTATION DE LA BATTERIE La PD16 est dotée d’un affichage qui permet, en plus d’une En cas de coupure d’électricité, le dispositif peut être alimenté par programmation aisée, le monitoring constant de l’état des un kit batterie (code accessoire 161212).
- Page 80 9.4 - ENTREES DE ACTIVATION 9.6 - PHOTOCELLULES L’armoire PD16 est équipée de deux entrée d’activation, dont Les photocellules peuvent être activées en deux modes: la fonction dépend de la modalité de fonctionnement 1. Uniquement pendant la fermeture: dans ce cas le passage programmée (Voir la rubrique Strt du menu programmation): devant le faisceau cause la réouverture immédiate.
- Page 81 9.7 - BARRES PALPEUSES 9.9 - SORTIE LUMIÈRES EN BASSE Il est possible de les installer à la place du profil anti-choc TENSION en caoutchouc normalement fourni avec la lisse. En cas L’armoire de commande PD16 dispose d’une sortie à 24Vdc qui d’intervention pendant la fermeture on obtient la réouverture et la permet le branchement d’une charge jusqu’à...
- Page 82 10 - BRANCHEMENTS ÉLECTRIQUES OVERLOAD RECEIVER FUSE MAINS M9 M10 M11 M12 B1 B2 A1 A2 BATTERY Relier à la terre le moteur au moyen de la borne marquée par le symbole Utiliser la cosse fournie. - 80 -...
- Page 83 Alimentation TX photocellules pour test de ligne V2. fonctionnement. Brancher les câbles d’alimentation des cellules émettrice entre les Référez-vous au catalogue V2 pour voir quels modules optionnels bornes M10 et M9 avec interface ADI sont disponibles pour cette armoire de commande.
- Page 84 11 - PANNEAU DE CONTROLE 11.2 - UTILISATION DES TOUCHES DE PROGRAMMATION 11.1 - DISPLAY La programmation des fonctions et des temporisations de l’armoire de commande est exécutée depuis un menu de Quand on active l’alimentation, l’armoire vérifie le correct configuration prévu à...
- Page 85 12 - ACCÈS AUX PARAMÈTRES DE 13 - CHARGEMENT DES PARAMÈTRES L’ARMOIRE DE COMMANDE PAR DÉFAUT Si besoin, il est possible de rétablir tous les paramètres à leur 1. Maintenir enfoncée la touche OK jusqu’à quand l’écran valeur standard ou par défaut (voir le tableau récapitulatif final). affiche le menu désiré...
- Page 86 14 - CONFIGURATION RAPIDE 15 - AUTO-APPRENTISSAGE DES FINS DE COURSE Ce paragraphe illustre une procédure rapide pour configurer l’armoire de commande et la mettre immédiatement en oeuvre. Ce menu permet d’apprendre en mode automatique les positions de fin de course de la barrière en ouverture et en fermeture. On conseille de suivre du début ces notices, pour vérifier rapidement le correct fonctionnement de l’armoire, du ATTENTION: avant de procéder s’assurer d’avoir...
- Page 87 16 - LECTURE DU COMPTEURS DE L’aire 3 représente l’établissement de ce dernier compteurs: à la premiers pression du touche le valeur actuel du compteur CYCLES viens arrondi au millier, chaque pression après augmente ou diminue le postage de 1000 unité. Le comptage précédemment L’armoire PD16 tiens le compte des cycles d’ouverture de la visualisé...
- Page 88 17 - PROGRAMMATION DE L’ARMOIRE DE COMMANDE -PrG Le menu de programmation consiste en une liste de paramètres configurables; le sigle qui s’affiche à l’écran indique le paramètre actuellement sélectionnée. En appuyant la touche FinE au paramètre suivant ; en appuyant la touche on retourne au paramètre précédent.
- Page 89 PARAMÈTRE VALEUR DESCRIPTION DEFAULT MEMO t.rSE 0.0” Temps de retard électroventouse 0.0” - 5.0” Ce menu permet de régler le retard avec lequel l’électroventouse de bloque avant que la lisse ait terminé en ouverture. ATTENTION: si l’électroventouse n’est pas présente configurer ce paramètre à...
- Page 90 PARAMÈTRE VALEUR DESCRIPTION DEFAULT MEMO SEnS Activation du Détecteur d’Obstacles 1.0A - 10.0A Ce menu permet le réglage de la sensibilité du capteur d’obstacles. Quand le courant absorbé par le moteur dépasse la valeur introduite, l’armoire relève une alarme. Pendant l’ouverture, un obstacle cause l’arrêt de la lisse. Pendant la fermeture, un obstacle cause la réouverture complète, pour libérer l’obstacle.
- Page 91 PARAMÈTRE VALEUR DESCRIPTION DEFAULT MEMO Ch.tr Fermeture après le passage Dans le fonctionnement automatique, chaque fois qu’interviens une photocellule pendant la pause, le compte du temps de pause recommence a partir du valeur établit en ce menu. De façon analogue , si la cellule interviens pendant l’ouverture, viens immédiatement chargé...
- Page 92 PARAMÈTRE VALEUR DESCRIPTION DEFAULT MEMO Strt StAn Fonctionnement des entrées de commande START1 et START2 Ce menu permet de choisir le mode de fonctionnement des entrées START1 et START2. (voir chapitre 9.4) StAn Mode standard Les entrées Start sur bornes sont des-habilitées. StAn Les entrées fonctionnent selon le mode AP.Ch...
- Page 93 PARAMÈTRE VALEUR DESCRIPTION DEFAULT MEMO Entrée Barre palpeuse Ce menu permet d’habiliter l’entrée pour les barres palpeuses Entrée désactivée (l’armoire l’ignore) Entrée activée pendant la fermeture et désactivée pendant l’ouverture. L’intervention de la barre palpeuse cause la réouverture de la barrière et la désactivation de l’éventuelle fermeture automatique Co.tE Test des barres palpeuses de sécurité...
- Page 94 Cela signifie qu’il n’a pas été possible de sauver les données modifiées. Ce disfonctionnement n’est pas réparable par l’installateur. Erreur 9 L’armoire doit être retournée à V2 S.p.A. pour la réparation. Quand on essaye de modifier les réglages de l’armoire et que sur Err9 l’écran apparaît Erreur 2 Cela signifie que la programmation a été...
- Page 95 - 93 -...
- Page 96 V2 recommande l’utilisation des normes techniques suivantes: L’intervalle recommandé entre chaque entretien est de six mois, les vérifications prévues devraient concerner au moins: •...
- Page 97 Êtes-vous satisfait? Au cas où vous souhaiteriez ajouter à votre maison un nouveau système d’automation, en faisant appel au même installateur V2: vous aurez la garantie des produits les plus évolués du marché et la meilleure compatibilité avec les automations déjà...
- Page 98 - 96 -...
- Page 99 ÌNDICE 1 - ADVERTENCIAS GENERALES PARA LA SEGURIDAD .................... 1.1 - VERIFICACIONES PRELIMINARES E IDENTIFICACIÓN DEL TIPO DE USO ............. 1.2 - SERVICIO DE ASISTENCIA TÉCNICA ......................... 1.3 - DECLARACIÓN UE DE CONFORMIDAD Y DECLARACIÓN DE INCORPORACIÓN DE CUASI MÁQUINAS .... 2 - CARACTERÍSTICAS TÉCNICAS ..........................
-
Page 100: Advertencias Generales Para La Seguridad
• V2 se reserva el derecho a realizar eventuales modificaciones en el producto sin aviso previo. LA AUTOMATIZACION DEBE SER REALIZADA EN CONFORMIDAD • Los encargados de los trabajos de instalación \ mantenimiento A LAS VIGENTES NORMATIVAS EUROPEAS: deben llevar puestos dispositivos de protección individual (DPI),... -
Page 101: Verificaciones Preliminares E Identificación Del Tipo De Uso
1.1 - VERIFICACIONES PRELIMINARES E IDENTIFICACIÓN DEL TIPO DE USO El automatismo no debe ser utilizado antes de haber efectuado su puesta en servicio, como se especifica en el apartado “Prueba y puesta en servicio”. Se recuerda que el automatismo no subviene a defectos causados por una errónea instalación, o por un mal mantenimiento, por tanto, antes de proceder a la instalación verifique que la estructura sea idónea y conforme con las normas vigentes y, si es el caso, aporte todas las modificaciones estructurales dirigidas a la realización de los flancos de seguridad y a la protección o aislamiento de todas las zonas de aplastamiento, cizallado, arrastre y verifique que:... -
Page 102: Servicio De Asistencia Técnica
80 % 80 % trabajo (200 cicli ora max.) (150 cicli ora max.) El fabricante V2 S.p.A., con sede en Corso Principi di Piemonte 65, 12035, Racconigi (CN), Italia Carga máx accesorios Declara bajo su propia responsabilidad que: (accesorios + lámpara de señalización... - Page 103 NIUBA4 NIUBA6 - 101 -...
-
Page 104: Esquema De Instalación
3 - ESQUEMA DE INSTALACIÓN COMPONENTES ACCESORIOS ADICIONALES Actuador Selector con llave Asta Lámpara de señalización Emisor Fotocélulas Módulo receptor Fotocélulas con columnas Apoyo Kit luces (asta) Kit luces (barrera) Selector digital vía radio de columna LONGITUD DEL CABLE < 10 metros de 10 a 20 metros de 20 a 30 metros Alimentación 230V / 120V... -
Page 105: Preparación De La Base Para La Automatización
4 - PREPARACIÓN DE LA BASE PARA LA FIG. 3 AUTOMATIZACIÓN 1. Disponga de una excavación de cimentación y predisponga de uno o más tubos para el paso de los cables eléctricos (FIG. 1). 2. Monte los cuatro soportes sobre la placa de anclaje y fíjela mediante los 8 pernos suministrados (FIG. -
Page 106: Posición Del Resorte
5 - POSICIÓN DEL RESORTE FIG. 1 La barrera se suministra con el resorte montado para la instalación DERECHA (DX). Si la instalación debe ser a la IZQUIERDA (SX) seguir las instrucciones indicadas debajo para modificar la posición del muelle. El orificio de enganche del balancín puede variar dependiendo de la longitud de la barra. - Page 107 FIG. 3 FIG. 4 - 105 -...
-
Page 108: Instalación De La Barra
6 - INSTALACIÓN DE LA BARRA 6.1 - BARRA PLANA 1. Corte la barra A a la longitud deseada. NOTA: si la instalación prevé el uso del kit de luces (cod. 163615) es necesario llevar a cabo la instalación de los módulos antes de montar el perfil de goma 2. - Page 109 - 107 -...
-
Page 110: Balanceo De La Barra
7 - BALANCEO DE LA BARRA Después de enganchar el muelle como se describió en el capítulo 5 es necesario proceder con el balanceo de la barra. 45° 1. Desbloquear la automatización 2. Gire manualmente el muelle para aumentar o disminuir la tracción. La barra debe estabilizarse a 45°. -
Page 111: Cuadro De Maniobras
9 - CUADRO DE MANIOBRAS 9.2 - ALIMENTACIÓN DE LA BATERÍA El PD16 está dotado de un display el cual permite, además de En caso de black-out eléctrico el dispositivo puede ser alimentado una fácil programación, la constante visualización del estado por el paquete batería (accesorio código 161212). -
Page 112: Entradas De Activación
9.4 - ENTRADAS DE ACTIVACIÓN 9.6 - FOTOCELDAS Las fotoceldas pueden activarse en dos modos: (START1 /START2) La centralita PD16 dispone de dos entradas de activación, cuya 1. Únicamente durante el cierre: en este caso el paso por función depende de la modalidad de funcionamiento programada Strt delante del haz causa la reapertura inmediata. -
Page 113: Costillas Sensibles
9.7 - COSTILLAS SENSIBLES 9.9 - SALIDA DE LUCES EN BAJA Se pueden instalar en la posición del perfil parachoques de goma TENSIÓN normalmente suministrado con la barra. En caso de intervención La central PD16 cuenta con una salida de 24Vdc que permite la durante el cierre se produce la reapertura y la inhabilitación del conexión de una carga máxima de 3W. -
Page 114: Conexiones Eléctricas
10 - CONEXIONES ELÉCTRICAS OVERLOAD RECEIVER FUSE MAINS M9 M10 M11 M12 B1 B2 A1 A2 BATTERY Conectar a tierra el motor por medio de los bornes señalados con el sìmbolo Utilizar el terminal suministrado. - 112 -... -
Page 115: Receptor Enchufable
M10 opcionales de la línea V2. y M9 Hacer referencia al catálogo V2 o a la documentación técnica para M11 - M12 Salida de luces en baja tensión ver que modulos opcionales con interfaz ADI estan disponibles (indicador intermitente ou lámpara piloto 24V) -
Page 116: Panel De Control
11 - PANEL DE CONTROL 11.2 - USO DE LAS TECLAS PARA LA PROGRAMACIÓN 11.1 - DISPLAY La programación de las funciones y de los tiempos de la central se efectúa mediante menú de configuración adecuado, accesible Cuando se activa la alimentación, el cuadro verifica el correcto y OK situadas al lado del y explorable mediante las 3 teclas funcionamiento del display encendiendo todos los segmentos... -
Page 117: Acceso A Las Configuraciones De La Central
12 - ACCESO A LAS 13 - CARGA DE LOS PARÁMETROS CONFIGURACIONES DE LA CENTRAL POR DEFECTO En caso de necesidad, es posible volver a poner todos los 1. Mantenga pulsada la tecla OK hasta que en el display se parámetros en su valor estándar o por defecto (véase el cuadro visualice el menú... -
Page 118: Configuracion Rapida
14 - CONFIGURACION RAPIDA 15 - AUTOAPRENDIZAJE DEL FIN DEL RECORRIDO En este pàrrafo se ilustra un procedimento ràpido para configurar el cuadro y ponerlo en marcha inmediatamente Este menú permite aprender en modo automático las posiciones de fin del recorrido de la barrera en apertura y en cierre. Se aconseja seguir inicialmente estas instrucciones, para verificar ràpidamente el correcto funcionamiento del cuadro,el motor y de ATENCIÓN: Antes de proceder, asegúrese de haber... -
Page 119: Lectura Del Contador De Ciclos
16 - LECTURA DEL CONTADOR DE El área 3 representa la programación de este último contador: a la primera pulsación de la tecla el valor actual del contador CICLOS se redondea a los millares, cada pulsación siguiente aumenta o disminuye la programación de 1000 unidades. El cuadro PD16 cuenta los ciclos de apertura de la barrera El contador anterior visualizado viene así... -
Page 120: Programación De La Central
17 - PROGRAMACIÓN DE LA CENTRAL -PrG El menù de configuración consiste en un listado de voces configurables; la sigla que aparece en el display indica la voz seleccionada en ese momento. Pulsando la tecla se pasa a la siguiente voz; pulsando la tecla se vuelve a la voz anterior. - Page 121 PARÁMETRO VALOR DESCRIPCIÓN DEFAULT MEMO t.rSE 0.0” Tiempo de retardo de la electroventosa 0.0” - 5.0” Este menú permite regular el retardo con la que la electroventosa se bloquea después de que la barra ha concluido el cierre. ATENCIÓN: Si la electroventosa no está presente, programe este parámetro en cero.
- Page 122 PARÁMETRO VALOR DESCRIPCIÓN DEFAULT MEMO SEnS Habilitación del sensor de obstáculos 1.0A - 10.0A Este menú permite la regulación de la sensibilidad del sensor de obstáculos. Cuando la corriente absorbida por el motor supera el valor programado, la centralita observa una alarma. Durante la apertura, un obstáculo causa la parada de la barra.
- Page 123 PARÁMETRO VALOR DESCRIPCIÓN DEFAULT MEMO Ch.tr Cierre después del transito En el funcionamiento automático, cada vez que interviene una fotocélula durante la pausa, el tiempo de pausa vuelve a empezar por el valor programado en este menú. De la misma forma, si la fotocélula interviene durante la apertura, inmediatamente se carga este tiempo como tiempo de pausa.
- Page 124 PARÁMETRO VALOR DESCRIPCIÓN DEFAULT MEMO Strt StAn Función de las entradas de Start Este menú permite seleccionar la modalidad de funcionamiento de las entradas START1 y START2 (capítulo 9.4) StAn Modalidad standard (normal) Las entradas de Start en la bornera están inhabilitadas. StAn Las entradas de radio funcionando según la modalidad AP.Ch...
- Page 125 PARÁMETRO VALOR DESCRIPCIÓN DEFAULT MEMO Entrada Banda de Seguridad Este menú permite habilitare la entrada para las banda de seguridad Entrada deshabilitada (el cuadro de maniobras lo ignora) Entrada habilitada durante el cierre y deshabilitada durante la apertura. La intervención del borde causa la reapertura de la barrera y la desactivación del eventual cierre automático.
-
Page 126: Anomalias De Funcionamiento
Este mal funcionamiento no puede ser solucionado por el Cuando se intenta modificar las programaciones del cuadro y en Err9 instalador. El cuadro tiene que ser enviado a V2 S.p.A. para su el display aparece la sigla reparación. Significa che la programación está bloqueada con la llave de bloqueo de programación CL1+ (cód. - Page 127 - 125 -...
-
Page 128: Prueba Y Puesta En Servicio
V2 recomienda el uso de las siguientes normas técnicas: normativas vigentes. El intervalo recomendado entre cada mantenimiento es de seis meses, las verificaciones previstas deberían concernir... - Page 129 Establezca con su instalador un plan de mantenimiento con frecuencia periódica; V2 SPA recomienda un plan de mantenimiento a efectuar cada 6 meses para un uso normal doméstico, pero este período puede variar en función de la intensidad de uso.
- Page 130 - 128 -...
- Page 132 V2 S.p.A. Corso Principi di Piemonte 65/67 12035 RACCONIGI CN (ITALY) Tel. +39 0172 812411 - Fax +39 0172 84050 info@v2home.com www.v2home.com...
Need help?
Do you have a question about the NIUBA-24V and is the answer not in the manual?
Questions and answers