Table of Contents
Advertisement
Quick Links
Advertisement
Table of Contents

Summary of Contents for Camlab CAMLAB CUB
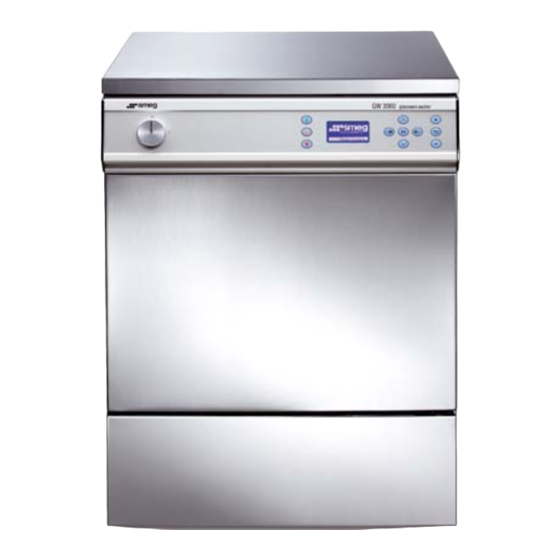
- Page 1 CAMLAB CUB GW3060 CAMLAB CUB EXTRA GW4090 GLASSWARE WASHER USER MANUAL...
- Page 2 This manual is for informational purposes only. The contents of this manual and the appliance described herein may be liable to modification without prior notice. In no case may CAMLAB be held liable for any direct or accidental damages deriving from or concerning the use of this manual.
- Page 3 Please contact us from 8:30 to 17:30 hrs on the following numbers and addresses: 01954 233100 01954 233101 www.camlab.co.uk Email service@camlab.co.uk Our Sales Department staff will provide information about prices and offers. You can view our entire product range at www.camlab.co.uk...
-
Page 4: Table Of Contents
TABLE OF CONTENTS 1. KEY TO THE SYMBOLS USED IN THE MANUAL AND ON THE MACHINE INTRODUCTION GENERAL RECOMMENDATIONS GENERAL OPERATING INSTRUCTIONS Switching on Controls BRIEF DESCRIPTION OF THE OPERATING CYCLE HOW TO CARRY OUT A WASHING CYCLE HOW TO CARRY OUT A SEPARATE DRYING CYCLE PRINTING THE LAST CYCLE EXECUTED HOW TO SELECT A WASHING CYCLE DEFERRED CYCLE START... - Page 5 WASHING PROGRAMS - DESCRIPTION WASHING PROGRAMS EFFICIENCY OF THE WASHING ACTION AND DETERGENTS 7.2.1 Arrangement of the glassware in the washing trays and jet racks 7.2.2 Quality and quantity of water 7.2.3 Water pressure 7.2.4 Washing temperature 7.2.5 Detergents used 7.2.6 First-aid measures for use of detergents 7.2.7...
-
Page 6: Key To The Symbols Used In The Manual And On The Machine
Any other use is considered improper. The manufacturer declines all liability for uses differing from those indicated. CAMLAB declines all liability for damage caused by washing glassware for which the relative manufacturers have not explicitly authorized automatic cleaning and decontamination. -
Page 7: General Recommendations
If the appliance develops a recurring fault, isolate it from the electricity supply and shut off the water supply taps. After doing this contact the Camlab Service Department. The machine must only be used by specifically trained persons. Camlab declines any liability for malfunction or accidents due to the appliance having been used by untrained persons. -
Page 8: General Operating Instructions
GENERAL OPERATING INSTRUCTIONS Switching on CAMLAB CUB GW3060. Switch on by turning the knob on the front panel to the right. - Page 9 CAMLAB CUB EXTRA GW4090 Switch S1 that turns on the GW4090 is situated in the cabinet at the side and can only be accessed after the door of the side compartment has been opened. The door to the side compartment is opened by pressing on the top left-hand side.
-
Page 10: Controls
CONTROLS The keyboard is divided into two separate sections: . The left-hand part of the display with keys for starting and stopping a program, and for the reset process; . The right-hand part of the display, contains the keys used for selecting/editing programs, selecting the machine parameters and the various functions/adjustments. - Page 11 ARROW UP: selection key ARROW DOWN: selection key ARROW LEFT – DRYER ON: key used to start the separate drying cycle;(GW4090); it is also used for moving to the left in each menu ARROW RIGHT – DRYER OFF: selection key for deactivating the drying cycle for the program chosen;...
- Page 12 ENTER: confirms the selection made/program selection; door opening INC: increases the value in question/selects yes ESC: quits the current screen and goes back to the previous step DEC: decreases the value in question/selects no The keys that are available to use appear on the bottom line of the display.
-
Page 13: Brief Description Of The Operating Cycle
BRIEF DESCRIPTION OF THE OPERATING CYCLE HOW TO CARRY OUT A WASHING CYCLE Once the appliance has been installed correctly, connect the Camclean and Camacid containers, load the trays or racks, then proceed in the following way to conduct a washing cycle: . - Page 14 to go back to the program selector menu. This menu displays the following information: Pr4 LIGHT DI WASH +Dy . the name and number of the program activated; with or without drying Phase 0 – Pre Loading . the phase in which the machine is operating (phase 0 and the machine is being filled with water in the example.
-
Page 15: How To Carry Out A Separate Drying Cycle
HOW TO CARRY OUT A SEPARATE DRYING CYCLE (GW4090) The drying phase is a default setting in each program. To select a separate drying cycle, press the DRYING Confirm? confirm the selection with . The drying cycle will begin and the following message will appear: PR: DRYING The drying cycle will commence with the blower on slow speed... -
Page 16: Printing The Last Cycle Executed
PRINTING THE LAST CYCLE EXECUTED A printout can be made of the last cycle executed when the machine is in standby mode (If a printer is attached) Proceed as follows. Pr.4 LIGHT DI WASH Press the STOP button. The following screen will appear: LAST CYCLE PRINTOUT <Y>... -
Page 17: How To Select A Washing Cycle
HOW TO SELECT A WASHING CYCLE Access the initial menu: Pr.4 LIGHT DI WASH (000016) Duration: 0:45:00 <Dryer ON> 05/02/10 9:30:17 press to move to the list of programs. scroll down with key <1 Prewash> <2 Light Wash No DI > <3 Std Wash No DI>... -
Page 18: How To Open The Washing Chamber Door And Side Cabinet Door
Pr.4 postponed Use “PLUS” key to enter the delay time. Use “Right Arrow” key to move the cursor from ‘hour’ to ‘min’, then press “ENTER” to confirm. <4 LIGHT DI WASH> The display will show a countdown timer. Type in the length Starting can be postponed for up to 24 hours. -
Page 19: Security Policy, User Password, Technical And Super User
It can be potentially dangerous to open the door when the temperature inside the washing chamber exceeds 70°C due to the escape of steam! Camlab declines all liability for damage to persons or property caused by forcing the door open during a wash cycle. - Page 20 . WATER CONNECTION . WATER TRAP WASH . REGENERATION . DRAINING . tech level: For Camlab engineers. All the menus in the lower levels as well as other “WASHING PARAMETERS” submenus can be accessed from this level, i.e.: . EXTRA FILLING TIME .
-
Page 21: Built-In Softener
Before the GW3060/4090 is used for the first time, pour some granular salt into the softener reservoir along with enough water to fill it. (This is usually done at Camlab before delivery) Make sure that the cap is firmly closed each time the reservoir is filled. Do not fill to the brim! Leave a 2cm space for the float device on the underside of the cap. -
Page 22: Use Of The Appliance With Softened Mains Water
Do not use compressed salt tablets or fine salt as these are not as effective as granular salt and can also clog the regeneration valve. Close the reservoir by turning the cap ¼ turn clockwise. Make sure that the cap is not obstructed by salt granules. -
Page 23: Forced Resin Regeneration
5.8.3 Forced resin regeneration Press ESCAPE. When prompted enter superuser password. PROGRAMME screen is shown. Scroll to UTILITIES, press ENTER. Scroll to REGENERATION, press ENTER. Scroll down to LT WATER and enter 5 in the menu below using the PLUS key and confirm with ENTER key. -
Page 24: How To Regulate The Washing Pressure In The Spraying Arms
A loaded rack can weigh as much as 20 kg: take care when handling it. Persons with back problems should not load or unload the trays/racks. Camlab declines all liability for problems concerning the health of persons caused by lengthy use of the machine. -
Page 25: Detergent Dispensing System
5.11 DETERGENT/ACID DISPENSING SYSTEM The machine is equipped with two peristaltic pumps to dispense additives. Each tube is marked by a tag that indicates the type of additive required. Take care not to put the tubes into the wrong containers! Detergent or acid spills should be cleaned up immediately The amount of detergent and acid to dispense during a wash cycle is programmed by means of the general programming menu. -
Page 26: Preparation For Washing
6. PREPARATION FOR WASHING. Effective washing starts with preparation of the glassware. Ensure that any solid residue is removed, if necessary by rinsing or pre-soaking (in a non-foaming solution) before carefully placing the glassware on the appropriate basket tray or jet rack. Avoid overloading basket trays and jet racks. -
Page 27: Washing Programs - Description
WASHING PROGRAMS - DESCRIPTION The Camlab programs are installed in program positions 1 to 7. (Program 7 is a test program for service engineers) These programs cover a very wide range of applications providing effective washing results. The programs are specifically recommended for washing laboratory glassware, and have been put into a “custom group”... -
Page 28: Efficiency Of The Washing Action And Detergents
every rinse dilutes the initial concentration of the pollutant by about 99% Rinsing in demineralised water dilutes the inorganic salts and any organic fractions in the previous rinse water Drying phase Final phase to dry the glassware 7.2 EFFICIENCY OF THE WASHING ACTION AND DETERGENTS To ensure that the glassware processed by the washer are completely washed, the washing phases must be as effective as possible. -
Page 29: Washing Temperature
However, washing temperatures must usually exceed 50°C. 7.2.5 Detergents and Acids used The additives used represent an important factor for obtaining an optimum washing result. Here are the products which Camlab reccomends for goodwashing results: alkaline detergents: Camlab’s CAMCLEAN acid neutralizers: Camlab’s CAMACID... -
Page 30: First-Aid Measures For Use Of Detergents
7.2.6 First-aid measures for use of detergents Camlab’s CAMCLEAN General advice: Remove any contaminated garments and take them to a safe place Contact with the skin: Immediately wash the affected area with plenty of water if the product splashes on to the skin. Apply a sterile gauze if possible. -
Page 31: Table Of Programs
GW3060/4090 – User Manual 7.2.7 DESCRIPTION OF PROGRAMS CYCLE PROGRAM PROG PHASE 0 PHASE 1 PHASE 2 PHASE 3 PHASE 4 PHASE 5 TIME NAME (MIN) COLD RINSE PREWASH 5 mins WASH AT 60C HOT RINSE AT PRE-WASH ACID RINSE RINSE LIGHT WASH +5 MINS... - Page 32 GW3060/4090 – User Manual CYCLE PROGRAM PROG PHASE 0 PHASE 1 PHASE 2 PHASE 3 PHASE 4 PHASE 5 TIME NAME (MIN) WASH AT ACID RINSE DI RINSE ENGINEER +4 MINS 2 mins 1 mins TEST +DETERGENT NOTE ** WASHING TIMES: The times given in the table are indicative and refer to the following operating conditions: 415V –...
-
Page 33: The Thermal Disinfection Process Explained
GW3060/4090 – User Manual 7.3 THE THERMAL DISINFECTION PROCESS Over the last few years, many efforts have been made to improve the decontamination of instruments and glassware: specific standards for both the process and techniques used have been issued and have defined the state-of-the-art. All this has provided the end-user with quality and safety advantages. - Page 34 Sometimes, however, the alarm may be caused by a temporary situation. Before calling Camlab service you are therefore advised to make a Reset and repeat the cycle a second time. Call Camlab if the alarm persists.
-
Page 35: Alarm Messages
ALARM MESSAGES Alarm ID Message Action WATER HEATING FAILED Check the condition of the safety thermostat. Call the Camlab Technical Assistance Service if the fault persists. TEMP. PROBE TL1-TC Repeat the cycle: It could be a temporary alarm. OVERTEMPERATURE TL1 Repeat the cycle: It could be a temporary alarm. - Page 36 GW3060/4090 – User Manual open/closed, water pressure, connection pipe, etc.) NO WATER IN CHAMBER Check the water supply (cock open/closed, water pressure, connection pipe, etc.) Is the drain pipe too low? NO PRESS IN HYD SYS: FOAM Is wash pump running? Check for foam in chamber.
- Page 37 GW3060/4090 – User Manual not squashed. Repeat the cycle. Call the Technical Assistance Service if the fault persists. PUMP 4 INFLOW FAILED Make sure that the suction tubes of can P4 are in a good condition and (flowmeter nr.4 optional) not squashed.
- Page 38 GW3060/4090 – User Manual BOILER SAFETY SWITCH ON If it is present, try to reactivate the thermostat and repeat the cycle. If the problem persists, call the Technical Assistance Service. TEMPERATURE > 45°C Appears (if option selected) if the temperature of the water entering in the first phase exceeds 45°C.
-
Page 39: Cleaning And Servicing
Wipe the exterior with proprietary stainless steel cleanser. Every year Have the machine serviced by Camlab Service Technician HOW TO CLEAN THE SPRAYING ARMS The spray arms can be easily removed in order to clean the nozzles and prevent clogging. -
Page 40: How To Clean The Inlet Filters
The inlet filters installed at the water taps must be periodically cleaned. This is done by simply unscrewing the supply pipes (after turning the water off!). INSPECTION If the appliance fails to function, before calling Camlab Service make sure that:- the machine is receiving power the machine has been turned on and the display is lit... -
Page 41: Drying Air Filter
WHEN TO SERVICE THE APPLIANCE The user should call Camlab Service Dept every 12 months for preventive maintenance purposes and for the visual inspection required for safety reasons. Make sure that there is a clear area of at least 1m in front of the machine before proceeding with any maintenance/repair work. -
Page 42: Notes
GW3060/4090 – User Manual 11 NOTES...
Need help?
Do you have a question about the CAMLAB CUB and is the answer not in the manual?
Questions and answers