Table of Contents
Advertisement
Quick Links
Consultation with SebaKMT
User Manual
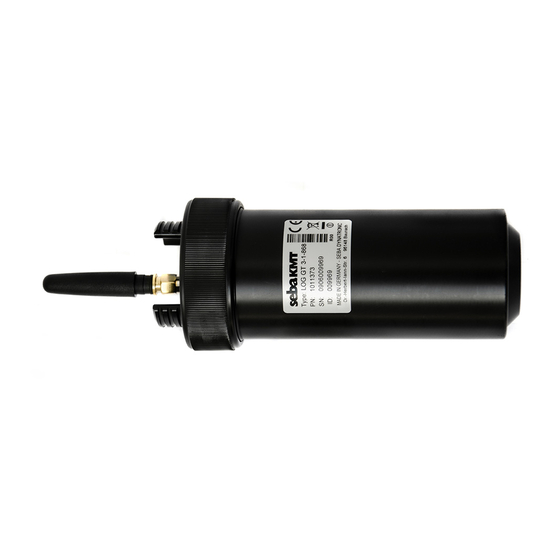
GSM transmitter
Sebalog GT-3-1
Mess- und Ortungstechnik
Measuring and Locating Technologies
Elektrizitätsnetze
Power Networks
Kommunikationsnetze
Communication Networks
Rohrleitungsnetze
Water Networks
Abwassernetze
Sewer Systems
Leitungsortung
Line Locating
1
Issue:
02 (02/2019) - EN
Article number:
86454
Advertisement
Table of Contents

Summary of Contents for SEBA KMT Sebalog GT-3-1
- Page 1 Consultation with SebaKMT User Manual GSM transmitter Sebalog GT-3-1 Mess- und Ortungstechnik Measuring and Locating Technologies Elektrizitätsnetze Power Networks Kommunikationsnetze Communication Networks Rohrleitungsnetze Water Networks Abwassernetze Sewer Systems Leitungsortung Line Locating Issue: 02 (02/2019) - EN Article number: 86454...
- Page 2 Consultation with SebaKMT...
-
Page 3: Consultation With Sebakmt
Furthermore, check all terminals and connections of the instruments involved. Should any question remain unanswered or should you need the help of an authorized service station, please contact: Seba Dynatronic Hagenuk KMT Mess- und Ortungstechnik GmbH Kabelmesstechnik GmbH Dr.-Herbert-Iann-Str. -
Page 4: Terms Of Warranty
Terms of Warranty Terms of Warranty SebaKMT accept responsibility for a claim under warranty brought forward by a customer for a product sold by SebaKMT under the terms stated below. SebaKMT warrant that at the time of delivery SebaKMT products are free from manufacturing or material defects which might considerably reduce their value or usability. -
Page 5: Table Of Contents
Terms of Warranty Contents Consultation with SebaKMT ................... 3 Terms of Warranty ......................4 Safety Instructions ................... 7 General Safety Instructions and Warnings ............7 General Notes ....................7 Technical data and delivery ................9 Technical data ....................9 Scope of delivery ....................9 Technical description .................. - Page 6 Terms of Warranty Preparing the loggers ..................30 Connecting the wireless interface to the PC / laptop ........30 Saving access data for FTP server and e-mail account in the SebaDataView-3 software ......................31 Registering devices in the SebaDataView-3 software ........32 8.7.1 Introduction .......................
-
Page 7: Safety Instructions
Safety Instructions Safety Instructions General Safety Instructions and Warnings NOTICE Do not drop the device / the system’s components or subject it / them to • strong impacts or mechanical shocks. The limits described under Technical Data may not be exceeded. •... - Page 8 Safety Instructions Repair and Repair and maintenance work has to be carried out by SebaKMT or authorised service maintenance partners using original spare parts only. SebaKMT recommends having the system tested and maintained at a SebaKMT service centre once a year. SebaKMT also offers its customers on-site service.
-
Page 9: Technical Data And Delivery
Technical data and delivery Technical data and delivery Technical data The GT-3-1 is distinguished by the following technical parameters: Parameter Value Display Status LED Communication Short-range radio 868 / 913 / 916 MHz (depending on country) Mobile network (version -868 / -916-IL): FDD-LTE B1/B3/B7/B8/B20 Dual-Band UMTS/HSDPA/HSPA+ B1/B8 GSM/GPRS/EDGE900/1800 MHz... - Page 10 Technical data and delivery Optional accessory Additional accessory parts are available: Part Description Serial no. LSH-14 Spare battery 90028201 GPS ANT GPS receiver for laptop 820013945 connecting cable no. 861 Extension cable for GSM aerial 90028430 SMA Angle Adaptor m-f Angle adaptor for GSM aerial 90008232 J01154A0021...
-
Page 11: Technical Description
Technical description Technical description Device design External features The GT-3-1 has the following external features: Element Description Cover Screw cap Housing with nameplate On the plate you will find the identification number (ID) of the device. Threaded hole for attaching the wrist strap or other holding accessory GSM socket for aerial connection Status LED and On/Off contact field 1x red, 3x green... -
Page 12: Function
Technical description Internal hardware Inside the GT-3-1 housing is the electronics module of the device. Element Description O-ring The GT-3-1 cover has a rubber sealing that provides a tight fit in the housing and protects the inside from moisture. Electronics module On a carrier plate are all electronic modules, also the battery of the device and the slot for the SIM card. -
Page 13: Communication
Technical description Communication 3.3.1 Introduction The GT-3-1 features an integrated GSM/GPRS modem for mobile network. The mobile network is used for: Transfer of the data measured by the logger from the GT-3-1 to the FTP server • Sending messages by e-mail/SMS •... -
Page 14: Power Supply
Technical description Power supply The GT-3-1 is supplied with energy by an internal lithium battery. The battery can be inserted and replaced by the user. The battery used must meet the following criteria: Battery criteria Parameter Value Type Lithium battery Size C cell Quantity... -
Page 15: Data Security
Data security Data security Introduction Many SebaKMT devices support the following security features: Encryption of the radio communication • Encryption of data transfers from / to the FTP server • Possibility of assigning a user password for access restriction • The following table shows which devices have the security features Radio Encryption and Password Protection and which firmware version is at least necessary. -
Page 16: Encryption Of Data Uploads And Data Downloads
Data security 4.2.2 Encryption of data uploads and data downloads The devices listed above are able to use an encryption protocol for GSM data transfers between the device and an FTP server or between the device and the SebaKMT Cloud. Whether the data should be transmitted encrypted and which protocol should be used, the user can specify when programming the device. -
Page 17: Setting Up A Login For The Sebadataview-3 Software
Data security 4.3.1 Setting up a login for the SebaDataView-3 software To set up the password protection for the SebaDataView-3 software for the first time, proceed as follows. First open the password management dialog in the system settings: Password management dialog Step Description Start the SebaDataView-3 software and click on the water drop symbol... -
Page 18: Extending Password Protection To Devices
Data security Login From now on, a login area appears in the start screen above the language selection. To log in, proceed as follows: Step Description Click on the drop-down menu and select a user level. Enter the corresponding password in the input field. Click on OK. -
Page 19: Disabling Password Protection
Data security Requirements User level 1 login for the SebaDataView-3 software is required. User levels 2 and 3 are not authorized to manage the passwords. To change the login passwords for the SebaDataView-3, proceed as follows: Procedure Srep Description Start the software and log in to User level 1. Click on the water drop symbol in the top left. - Page 20 Data security...
-
Page 21: First Use
First use First use When the GT-3-1 is shipped, there is an insulator strip between the positive pole of the battery and the battery carrier. It prevents the battery from being discharged and the device from being accidentally switched on. Before using it for the first time, open the GT-3-1 and remove the insulator strip. - Page 22 First use...
-
Page 23: Inserting The Sim Card / Changing The Battery
Inserting the SIM card / changing the battery Inserting the SIM card / changing the battery Introduction and warnings The following sections describe what to do to insert a SIM card into the device and to change the battery. In both cases, the housing of the GT-3-1 must be opened to gain access to the electronics module of the device. -
Page 24: Inserting The Sim Card
Inserting the SIM card / changing the battery Inserting the SIM card We recommend to remove the battery from its holder for the duration of the SIM card change. The slot for the SIM card is located at the bottom of the electronics module. Push the SIM card into the slot until you can feel it lock into place. -
Page 25: Changing The Battery And Resetting The Battery Counter
Inserting the SIM card / changing the battery Changing the battery and resetting the battery counter Changing the battery To change the battery, simply remove the old battery from its holder and insert the new battery. It is important that the characteristics of the new battery meet the requirements of the device. - Page 26 Inserting the SIM card / changing the battery...
-
Page 27: Switching The Gt-3-1 On/Off
Switching the GT-3-1 on/off Switching the GT-3-1 on/off The GT-3-1 features an internal magnet switch for switching it on and off. Switching on Move the supplied magnet over the On/Off contact field in the status LED area laterally below the status LED as shown in the picture. The status LED lights up in red first;... - Page 28 Switching the GT-3-1 on/off...
-
Page 29: Preparatory Work In The Office
Preparatory work in the office Preparatory work in the office Mobile network, FTP server, e-mail account, etc. GSM / GPRS / UMTS For data transfer using the mobile network, a contract with a mobile service provider must be concluded. You will require a SIM card that is enabled for data traffic using GPRS / UMTS. -
Page 30: Preparing The Loggers
Preparatory work in the office Preparing the loggers Have all loggers you wish to use for measurements ready. The loggers must be switched off. Connecting the wireless interface to the PC / laptop To communicate with the GT-3-1, a wireless interface must be connected to the computer (e.g. -
Page 31: Saving Access Data For Ftp Server And E-Mail Account In The Sebadataview-3 Software
Preparatory work in the office Saving access data for FTP server and e-mail account in the SebaDataView-3 software You must now save the access data for the FTP server used, along with the access data for the e-mail account you are using, in the SebaDataView-3 software configuration. -
Page 32: Registering Devices In The Sebadataview-3 Software
Preparatory work in the office Registering devices in the SebaDataView-3 software 8.7.1 Introduction All GT-3-1 and all loggers that are to be used for the upcoming measurement must have been registered in the SebaDataView-3 software. You can register the devices in the office, or do this directly on site. Important information Observe the following points: All devices in the network (i.e. -
Page 33: Creating A Group And Adding A Gt-3-1
Preparatory work in the office 8.7.3 Creating a group and adding a GT-3-1 Creating a new group Create a new group in the directory tree. Proceed as follows: Step Description Mark the zone under which the new group should be created. Click New in the Group segment. -
Page 34: Programming The Gt-3-1
Preparatory work in the office Programming the GT-3-1 8.8.1 Basic procedure The GT-3-1 must be programmed before measurements are taken. This involves allocating all GSM configuration data to the device. Requirements The following prerequisites must be met: A wireless interface must be connected to the computer (e.g. LOG RI). •... -
Page 35: Explanations For The Gsm Input Window
Preparatory work in the office 8.8.2 Explanations for the GSM input window The figure shows the input mask for GSM configuration data. All parameters necessary for the mobile connection from / to the GT-3-1 to function must be entered in it. (The data required can be found in your mobile phone contract, or ask your mobile operator for them.) GSM parameters... - Page 36 If you wish to use the SebaKMT demo server, mark the Seba Demo Mode checkbox. The access data are then entered automatically. (Please note that this server may be used temporarily and for...
- Page 37 Preparatory work in the office Segment Parameter When this checkbox is deactivated, then audio requests will not be processed on the same day. The audio files on the logger will only be available following the next regular data upload. Note: When this checkbox is activated, this results in much more energy being consumed by both the GT-3-1 and the loggers connected.
-
Page 38: Performing A Gsm Test
Preparatory work in the office Performing a GSM test To avoid complications on site, you should perform an initial GSM test with every GT-3-1 to be used for measurements while still in the office. This involves checking whether the device can connect to the mobile network properly. Requirements The following prerequisites must be met: A wireless interface must be connected to the computer (e.g. -
Page 39: Password Protection For Gt-3-1
Password protection for GT-3-1 Password protection for GT-3-1 Setting the password protection Introduction It is possible to restrict access to the GT-3-1 by means of a login so that only authorized persons can work with the device. For this purpose, the password protection of the SebaDataView-3 software is extended to the GT-3-1, which means that no new password is created, instead the login passwords of the software also apply to the device. -
Page 40: Canceled Password Protection After Device Reset
Password protection for GT-3-1 Canceled password protection after device reset Introduction It may happen that the passwords for the password-protected device are no longer valid or no longer known. In this case, there is no way to contact the device via radio. In order to gain access again, you can reset the device to GT-3-1 settings. -
Page 41: Gt-3-1 Activities Performed At The Installation Site
GT-3-1 activities performed at the installation site GT-3-1 activities performed at the installation site 10.1 Introduction After performing the set-up tasks in the office, all other steps must be performed directly at the usage site. Requirements The following prerequisites must be met: Laptop with SebaDataView-3 software. -
Page 42: Installing All Devices In The Shaft
GT-3-1 activities performed at the installation site Step Description Switch on the first logger to be registered. The logger will be detected automatically, and its identification number (ID) is shown. Use the Insert button to copy the ID shown into the directory tree. (Alternatively: if you deactivate the “Automatic detection”... -
Page 43: Programming Noise Loggers (Log N-3)
GT-3-1 activities performed at the installation site 10.5 Programming noise loggers (Log N-3) This section is not relevant for Log P-3 / Log P-3 mini pressure loggers. When programming the GT-3-1 in the office, you entered a number of measurement Introduction settings which apply for all loggers in the group in equal measure. -
Page 44: Programming Pressure Loggers (Log P-3 / P-3 Mini)
GT-3-1 activities performed at the installation site 10.6 Programming pressure loggers (Log P-3 / P-3 mini) This section is not relevant for Log N-3 noise loggers. When programming the GT-3-1 in the office, you entered a number of measurement Introduction settings which apply for all loggers in the group in equal measure. -
Page 45: Programming The Gt-3-1
GT-3-1 activities performed at the installation site 10.7 Programming the GT-3-1 Introduction This step involves sending the GT-3-1 configuration data from the computer to the GT-3-1. You may have already performed this step during preparations in the office. This was necessary to be able to test whether the mobile connection functions there. -
Page 46: Linking" The Gt-3-1 To The Loggers
GT-3-1 activities performed at the installation site 10.8 “Linking” the GT-3-1 to the loggers This step involves “linking” the GT-3-1 to the loggers in the group, meaning the GT-3-1 passes the configuration data to the loggers. In addition, the clocks of the loggers are synchronized with the time of the GT-3-1. - Page 47 Tento symbol indikuje, že výrobek nesoucí takovéto označení nelze likvidovat společně s běžným domovním odpadem. Jelikož se jedná o produkt obchodovaný mezi podnikatelskými subjekty (B2B), nelze jej likvidovat ani ve veřejných sběrných dvorech. Pokud se potřebujete tohoto výrobku zbavit, obraťte se na organizaci specializující se na likvidaci starých elektrických spotřebičů...
Need help?
Do you have a question about the KMT Sebalog GT-3-1 and is the answer not in the manual?
Questions and answers