Table of Contents
Advertisement
Advertisement
Table of Contents

Summary of Contents for Stark KH 1600 T
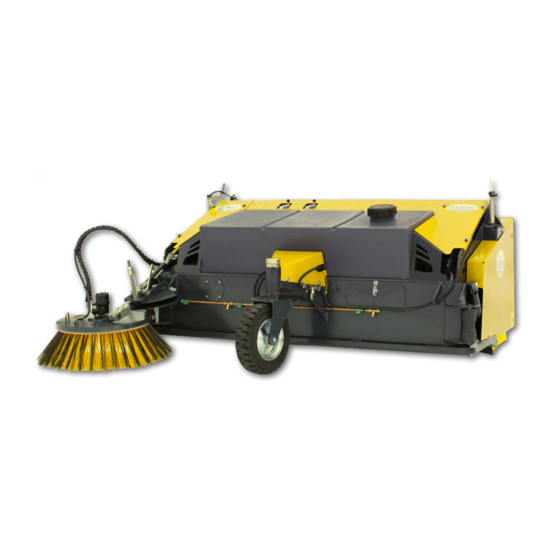
- Page 1 Original Operating and maintenance manual Collecting sweeper...
-
Page 2: General
For us, the long lifecycle and efficiency of your new equipment is a priority. To keep the sweeper in top working condition, read this manual carefully before using the equipment. STARK products are engineered and manufactured in Finland, and each of them is equipped according to the needs of the customer. -
Page 3: Table Of Contents
Table of contents General ..............................2 Read before use ........................... 2 1. DECLARATION OF CONFORMITY ...................... 4 2. PURPOSE OF USE ..........................5 3. SAFETY PRECAUTIONS ........................5 4. IDENTIFICATION INFORMATION AND SPAREPARTS ................ 7 4.1. Identification plate ..........................7 4.2. -
Page 4: Declaration Of Conformity
1. DECLARATION OF CONFORMITY The original manufacturer’s EC declaration of conformity: Generic product name: Collecting sweeper Models: KH 1600 T, KH 2000 T, KH 1600 S, KH 2000 S, KH 2500 S Manufacturer: Lametal Ltd Kaskenviertäjäntie 2 73100 LAPINLAHTI, Finland tel. -
Page 5: Purpose Of Use
2. PURPOSE OF USE Collecting sweepers are used for cleaning streets and yards of different size. 3. SAFETY PRECAUTIONS Make sure you know your equipment before you start using it. Equipment may be operated only by an individual who is thoroughly familiar with its use. - Page 6 After every 50 hours of operation: lubricate points specified in section 8.6. check all bolts and nuts for tightness Check all bolts, nuts and hydraulic fittings for tightness after the first day of operation! If the equipment is not likely to be used for a longer period of time, clean it thoroughly after use and lubricate as instructed.
-
Page 7: Identification Information And Spareparts
(marked in the identification plate) when you order spare parts. For more information on maintenance and spare parts, please contact the STARK maintenance and spare part services or your dealer. -
Page 8: Main Parts Of The Collecting Sweeper
5. MAIN PARTS OF THE COLLECTING SWEEPER 1) Frame of the collecting sweeper 2) Bottom plate 3) Broom roller 4) Floating beam 5) Protective case 6) Hydraulic cylinder 7) Front support wheel 8) Back support wheel 9) Brush lamellas Picture 2. Main parts of the sweeper Sivu 8 / 23... - Page 9 Picture 3. Main parts of the sweeper Sivu 9 / 23...
-
Page 10: Attaching The Collecting Sweeper
6.1. Attaching the collecting sweeper to a base machine The collecting sweeper is attached to the base machine by bolt-on STARK FIT quick hitches which in turn are attached to the floating frame. The machine is connected to a 2- or 4-hose hydraulic system (hydraulic circuit diagrams are shown in section 9 in this manual). -
Page 11: Operating The Collecting Sweeper
7. OPERATING THE COLLECTING SWEEPER Before using the collecting sweeper, make sure: the sweeper is installed correctly all locking pins are in place hydraulic hoses are installed correctly hoses are intact there are no oil leaks all functions are working properly that you have learnt to operate the collecting sweeper in a closed area before actually starting to use it 7.1. -
Page 12: Adjusting The Height Of The Broom Roller
Adjustment pole Picture 4. Optimal height of the broom roller from the ground 7.2. Adjusting the height of the broom roller The broom roller height is set by adjustment poles located at both ends of the sweeper (picture 4). When you adjust the height, do it on both sides in equal measure. -
Page 13: Adjusting The Side Brushes
7.3. Adjusting the side brushes Side brushes are available as an accessory for both sides of the collecting sweeper. For the best possible operating efficiency, adjust the side brush so that it will tilt to the front and to the outer side. (Picture 5) Adjusting the side brush: 1. -
Page 14: Replacing The Brush Rings
7.4. Replacing the brush rings Clean the device inside the casing carefully.. 1) Open protective cases from both sides. 2) Detach the hydraulic hoses located inside the protective case (mark the hoses to make it easier to reattach them). Protect the exposed hydraulic connectors with plugs. 3) Loosen the adjustment bolts in the bearing unit. - Page 15 Picture 8. Bolts of the engine’s support plate Sivu 15 / 23...
-
Page 16: Replacing The Side Brushes
7.5. Replacing the side brushes Remove the nuts at the bottom of the side brush (picture 9) and detach the brush. Attach a new brush. Picture 9. Nuts of the side brush 7.6. Transferring the collecting sweeper Lift the collecting sweeper high enough and reduce driving speed if needed, especially on bumpy roads. The collecting sweeper or the base machine can be damaged due to excessive speed. -
Page 17: Irrigation System
7.8. Irrigation system Collecting sweeper can be upgraded with an irrigation system. The container size in the irrigation system can be either 155 l or 255 l. The irrigation system suppresses dusting, improves the cleaning result, greases the brushes and reduces wearing. -
Page 18: Maintenance Of The Collecting Sweeper
8. MAINTENANCE OF THE COLLECTING SWEEPER 8.1. General safety precautions for the use and maintenance Comply with the existing laws and regulations and the instructions given in this manual. Never go under an unsecured device. Always apply the parking brake of the base machine before performing any actions on the device. Only use tools that are in proper working order. -
Page 19: Maintenance At 50-Working Hour Intervals Or On A Weekly Basis
8.5. Maintenance at 50-working hour intervals or on a weekly basis Lubricate, preferably with a NLGI-2 grease or equivalent, as instructed in section 8.6 Check the mechanical condition of the device for bends, distortions or breaches Check fastening bolts for tightness (table 1) 8.6. -
Page 20: Hydraulics
9. HYDRAULICS The collecting sweeper can be connected to a 2-hose or a 4-hose hydraulic system. The device is equipped with a complex closed hydraulic system, which has been tested and adjusted by the manufacturer. Any repairs to the system are to be performed by replacing one component at a time by a professional in hydraulics. - Page 21 Figure 2. 2-hose hydraulics with two side brushes Sivu 21 / 23...
-
Page 22: 4-Hose Hydraulics
9.2. 4-hose hydraulics Figure 3. 4-hose hydraulics with one side brush Figure 4. 4-hose hydraulics with two side brushes Sivu 22 / 23... -
Page 23: Warranty Policy
3. Warranty period STARK warranty covers a period of one (1) year. If need be, the client and the manufacturer make separate agreements on warranty concerning repairs and spare parts used in repairs. 4. Repairs during the warranty period Repairs during the warranty period are carried out free of charge within the normal working hours by the manufacturer repair and maintenance services or by a repair service provider accredited by the manufacturer.
Need help?
Do you have a question about the KH 1600 T and is the answer not in the manual?
Questions and answers