Table of Contents
Advertisement
Quick Links
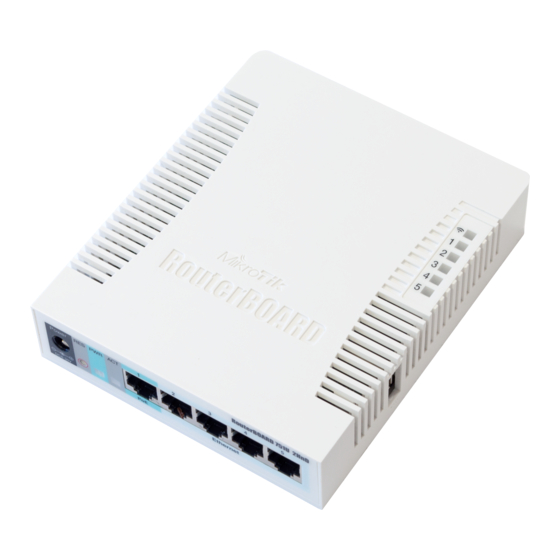
RouterBOARD 751U-2HnD
Quick Setup Guide and Warranty Information
Connecting
1. Connect your WAN cable to port 1, and LAN PCs to ports 2-5
2. Set LAN computer IP configuration to automatic (DHCP)
3. Default IP address from LAN/WLAN is 192.168.88.1, connect with
SSH, Telnet or Winbox tool for configuration. The username is
admin and there is no password
4. Wireless AP mode is enabled by default, you can connect to the
SSID "MikroTik". Log into your router and configure a WPA
password to secure your network
Powering
The device accepts powering from the power jack or from the first Ethernet port (Passive PoE):
DC power jack (5.5mm outside and 2mm inside diameter, female, pin positive plug) accepts 8-30V DC
The first Ethernet port accepts passive Power over Ethernet accepts 8-30V DC
Under maximum load, the power consumption of this device is 7W
Booting process
RouterOS is the operating system of all RouterBOARD routers. Please see detailed configuration guide here
http://wiki.mikrotik.com/wiki/Category:Manual
This device doesn't come fitted with a Serial Port connector, so initial connection has to be done via the Ethernet cable, using
the MikroTik Winbox utility. Winbox should be used to connect to the default IP address of 192.168.88.1 with the username
admin and no password.
In case you wish to boot the device from network, for example to use MikroTik Netinstall, hold the RESET button of the
device when starting it until the LED light turns off, and Groove will start to look for Netinstall servers.
In case IP connection is not available, Winbox can also be used to connect to the MAC address of the device. More
information here:
http://wiki.mikrotik.com/wiki/First_time_startup
Extension Slots and Ports
Five individual 10/100 Ethernet ports, supporting automatic cross/straight cable connection (Auto MDI/X), so you
can use either straight or cross-over cables for connecting to other network devices. The First Ethernet port accepts
8-30V DC powering from a passive PoE injector.
One Integrated Wireless 2.4GHz 802.11b/g/n 2x2 MIMO, Onboard PIF antennas, max gain 2.5dBi
One USB 2.0 port
See www.routerboard.com for more information. Contact support@mikrotik.com for support questions.
18-Aug-2011
Advertisement
Table of Contents

Subscribe to Our Youtube Channel
Related Manuals for MikroTik RouterBOARD 751U-2HnD


Summary of Contents for MikroTik RouterBOARD 751U-2HnD
- Page 1 In case you wish to boot the device from network, for example to use MikroTik Netinstall, hold the RESET button of the device when starting it until the LED light turns off, and Groove will start to look for Netinstall servers.
- Page 2 Copyright MikroTikls SIA. This manual contains information protected by copyright law. No part of it may be reproduced or transmitted in any form without prior written permission from the copyright holder. RouterBOARD, RouterOS, RouterBOOT and MikroTik are trademarks of MikroTikls SIA. All trademarks and registered trademarks appearing in this manual are the property of their respective holders.
- Page 3 Professional installation is required of equipment with connectors to ensure compliance with health and safety issues. See www.routerboard.com for more information. Contact support@mikrotik.com for support questions. 18-Aug-2011...
Need help?
Do you have a question about the RouterBOARD 751U-2HnD and is the answer not in the manual?
Questions and answers